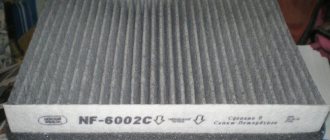
Nissan Tiida is the next incarnation of the already well-known B platform, which became the basis for many cars of the Renault-Nissan concern (especially if you remember one of its varieties - the famous B0). Inexpensive and fairly easy to maintain, the car achieved good sales in car dealerships, and the time-tested platform simplified maintenance operations: having replaced the cabin filter yourself with a Nissan Tiida, you can notice that the design of the filter compartment is very similar to the well-known Logan, although in size incompatible.
Signs of the need to replace the SF
In accordance with the regulations, replacement of the interior part must be carried out after the car has covered every 15,000 kilometers . Unscheduled replacement is carried out when:
- poor operation of the heating and air conditioning system;
- frequent appearance of dust on the front panel;
- fogging of windows.
If the car constantly moves along country roads, then it is recommended to change the device after covering 7-8 thousand kilometers. Experts recommend carrying out the procedure before the summer.
During intensive use, the car filter is changed 2 times a year.
Algorithm of actions
The instructions to follow during the replacement process are as follows:
- The glove box (glove box) is removed. The procedure involves the need to unscrew 7 screws, which is why you will need a Phillips screwdriver.
- The first 4 screws can be seen by opening the glove compartment; they are located on top.
- The remaining screws are located below the glove compartment.
- When removing the box from its seat, you must be careful and careful not to damage the thin power wires that ensure the operation of the backlight module.
- The wires are carefully pulled out of the connector, after which the box is removed completely.
- The filter cover can be seen at the bottom of the dashboard, it will be to the left or right of the steering wheel, depending on the modification of the Nissan Tiida.
- To remove the cover, you will have to unscrew a couple of screws securing the bar.
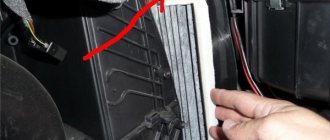
- When the cover is removed, the filter itself can be pulled out without any problems. If you can’t pull it out manually, you can carefully hook the bottom bar with pliers.
- Before installing the filter, it is worth blowing out the mounting hole, removing dust and other contaminants.
- In order for the new filter to fit into place without problems, it is allowed to compress it at the edges; the elastic material will return to its shape.
Assembly is carried out in reverse order. As a rule, the result of replacing the filter is felt immediately: the air in the vehicle interior becomes cleaner and fresher, the windows stop fogging up, and the draft of the ventilation system returns to its previous level.
A cabin filter is an element that prevents dust and pollen from flowering plants from entering the vehicle interior, reducing the intensity of unpleasant odors, thereby increasing the overall level of travel comfort.
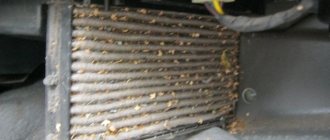
During operation, the filter becomes clogged with mechanical particles, which is why it not only begins to cope with its tasks worse, but becomes a source of danger.
How to choose the right new filter element?
The manufacturer installs a standard filter on Nissan Tiida cars, which has specific geometric measurements. This is an expensive part that can be replaced with cheaper analogues:
- Belongs to the category of fine-filter cabin filters. When used, the air is cleaned of pollen, dust and other harmful microparticles. Thanks to the universal production system, the elimination of unpleasant odors in the car interior is ensured.
- The car part has dimensions that fully correspond to the Nissan Tiida air duct. For its manufacture, special fibers are used that do not allow the smallest microparticles of dust to enter the cabin.
- The filter system is manufactured from high quality materials, which ensures high-quality performance of functions throughout its entire service life. When using this device, unpleasant odors and air pollution are eliminated.
- A high-quality analogue of the factory cabin filter. Thanks to the multi-layer structure of the device, high-quality air purification in the cabin is ensured. The filter frame is made of elastic plastic, which simplifies the installation process and eliminates the possibility of breakage.
Due to the special dimensions of the cabin filter, the choice of analogues is small.
Features of choice
The most reliable solution is to purchase an original cabin filter recommended by the Nissan factory. The only negative is the rather high price, even if you order the part under the factory designation J1340121, you will have to pay a considerable amount.
If you urgently need to save money, you can also buy an analog filter; product descriptions always indicate whether they can be installed on a Nissan Tiida.
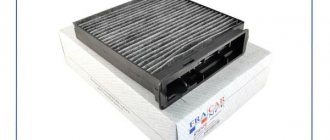
Cabin filter (analogue) for Tiida (1.6) Part code: A6546-EDOOM-RV
It should be noted that saving on replacement by cleaning the old filter from contaminants is unacceptable. Some motorists wash the old filter with water or even soak it in a soapy solution, trying to remove chemical contaminants, but this approach is ineffective and even dangerous.
It will not be possible to remove particularly small fractions by washing, so the filter will continue to fill the interior with harmful compounds, and the cleaning itself will turn out to be ineffective; after a few days of driving, everything will return to its old state.
How to replace the cabin filter with your own hands?
Before changing the filtration system, it is recommended to empty the glove compartment of personal items. Further all actions are performed according to the instructions:
- The glove compartment lid opens. There are 4 screws on top that need to be unscrewed.
- The glove compartment is carefully pulled out until an obstacle appears, which is the stretched backlight wiring.
- In order to completely dismantle the glove compartment, it is recommended to disconnect the lamp connector.
- The glove compartment is removed and set aside.
- Behind the glove compartment there is a filter system cover, at the bottom of which there is a latch. To remove the cover, it is recommended to press the latch.
- The next step is to pull out the old filter device.
- When removing the cabin filter, dirt and dust may enter the air duct, which is recommended to be removed first with a cabin vacuum cleaner.
- At the next stage, a new spare part is installed on the car. Snags and distortions will be avoided if the device is slightly compressed before installation. You should not overdo it, as strong compression may cause the cabin filter housing to burst.
- After installing the filter system, it is recommended to close the lid and replace the glove compartment.
IMPORTANT! If you are replacing the cabin filter in a 2011 car, you need to make some effort when pulling it out. This is because the filter is slightly larger than the frame.
In Nissan Tiida cars, it is recommended to regularly change interior parts. This is a simple procedure that you can do yourself. To ensure high-quality operation of the filtration system, it is recommended to replace it in accordance with the instructions.
Step-by-step technology for replacing the cabin filter on a Nissan Tiida
After you unscrew the screws, remove the glove compartment. In principle, access to the cabin filter on this model can be obtained without removing the glove compartment, but with removal it will be much more convenient to carry out the operation.
Under the removed glove compartment you will find a cover covering the cabin air filter.
To make removal easier, you can lift the lid with pliers. Open it, remove the old filter, thoroughly wipe the original place and insert the new filter.
This is how you can easily replace the cabin filter on a Nissan Tiida yourself. There will now be fresh air inside your car.
Video - replacing the Nissan Tiida cabin filter
The operating instructions for the Nissan Tiida indicate that the average replacement interval for the cabin filter is 10 thousand kilometers, or 6 months of use, depending on which figure is reached first.
Sometimes the element is clogged even before the specified values are reached, which is determined by the following criteria:
- the air in the cabin becomes unpleasant, which is expressed in foreign odors, increased dryness or humidity;
- the windows sweat a lot;
- the efficiency of the ventilation system has decreased significantly;
- Dust accumulates intensively on the dashboard, which has not been observed before.
It is best to replace the cabin filter yourself. The procedure is quite simple, so independent work allows you not only to save time and money, but also to gain moral satisfaction from the new acquired skills.
Video
You might be interested in:
Replacing the Nissan Tiida generator drive belt The trunk of the Nissan Tiida does not open Repairing the Nissan Tiida muffler: installing a repair clamp What kind of oil to pour into the Nissan Tiida engine Changing the oil in the Nissan Tiida engine Replacing the front and rear pads of the Nissan Tiida
Nissan Tiida is the next incarnation of the already well-known B platform, which became the basis for many cars of the Renault-Nissan concern (especially if you remember one of its varieties - the famous B0). Inexpensive and fairly easy to maintain, the car achieved good sales in car dealerships, and the time-tested platform simplified maintenance operations: having replaced the cabin filter yourself with a Nissan Tiida, you can notice that the design of the filter compartment is very similar to the well-known Logan, although in size incompatible.
Procedure steps
It is not necessary to remove the glove compartment, but this action can significantly simplify access to the cleaning element itself.
- So, to remove the glove box, you need to unscrew 7 screws. To do this we use a Phillips screwdriver.
- The first four screws are located inside the glove compartment. Open the door and unscrew them.
Upper glove box screws - Three more screws are located under the glove compartment.
Bottom glove box screws - When removing the box from the panel, be careful; the power wires for the glove compartment lighting are connected to it.
- Remove the wires from the connector, and then remove the box completely.
- The filter cover is located at the bottom of the instrument panel (Left or right, depending on the location of the steering wheel. There are two options in the video).
Cleaning element cover - In order to remove it, you need to unscrew the two screws securing the strip above the cleaning element cover.
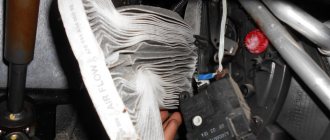
Element fastening strip - Then you need to remove the filter itself from the hole. Pull the handle so that the top of the filter comes out of the connector. Then use pliers to pry the lid from the bottom. Now take out the element.
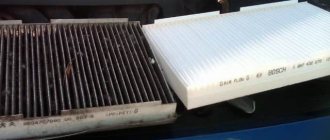
Old and dirty cabin filter - Before installing a new air purifier in the Nissan Tiida, it is recommended to blow out and clean the hole in which it was located.
- Next, insert a new element. When installed, it can be compressed into an accordion for more comfortable immersion.
- When completing the procedure, do the steps in reverse order: install the bar, connect the wire to the glove compartment, put the box in place and tighten the screws.
The cabin filter replacement is now complete. You will immediately feel how the air in the car has become cleaner, and the ventilation and air conditioning work better.
