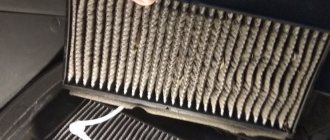
The Fluence model of the famous French automaker Renault is among the popular cars that came to Russia and the CIS countries from France.
The car has decent technical characteristics, good interior ergonomics and relatively inexpensive maintenance and repairs. At the same time, Fluence owners often prefer to resolve minor issues related to replacing consumables on their own.
If we talk about the cabin filter, the task seems not to be simple, based on the official instructions. But folk craftsmen managed to find an excellent workaround. As a result, there are 2 main methods for changing consumables. But before performing this procedure, it is important to determine the replacement interval and select the appropriate cabin filter.
Location of the cabin filter Renault Fluence
Many car owners ask where the cabin filter is located on the Renault Fluence in order to understand the degree of contamination and understand the need to replace it. It is located in the car interior behind the glove compartment. To change the part, it is necessary to dismantle the glove compartment. But you can also approach the element from below.
Replacement frequency
Having set this goal, changing the cabin filter on a Renault Fluence with your own hands will not be at all difficult. This is not to say that the procedure is performed quickly and in conditions of maximum comfort. You will have to take certain poses in order to adapt to the filter housing located and change the consumables.
Information from the official operating manual tells us that the factory advises changing its already worn-out filter element for cleaning cabin air on the Fluence model at every scheduled maintenance, that is, at an interval of 15 thousand kilometers. If you use the car little, then replacement is carried out based on the duration of the consumables being in the car. The figure given here is 1 year.
French engineers decided to install a fairly compact cabin filter on the Renault Fluence, which in real operating conditions does not withstand such a period. When driving on dusty roads, the pores quickly become clogged. Plus, there is a fairly tightly compressed curtain, which is characterized by increased sensitivity to leaves penetrating the ventilation system.
Based on the real capabilities of the cabin filter on the Renault Fluence, we can give the following recommendations regarding the frequency of replacing this consumable:
- If you live in a region where there are quite dusty roads, which is typical for populated areas in flat areas and with no green spaces in large quantities, then the maximum service life of the Fluence filter should not exceed 10 thousand kilometers. It is better to do the replacement itself 2 times a year in autumn and summer.
- Renault Fluence car owners living in heavy traffic and city traffic jams, as well as near industrial areas and smog, should switch to carbon filters. But their resource is limited to 7-8 thousand kilometers. Paper consumables will not be able to block the penetration of foreign odors of exhaust and smog into the cabin, but their service life reaches 10 thousand kilometers.
Here everyone should focus on their specific situation and operating conditions of the Renault Fluence.
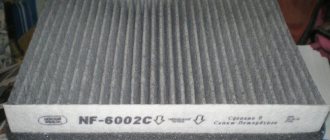
New Renault Fluence cabin filter
Signs of need and frequency of SF replacement
Replacing the Renault Fluence cabin filter in a car according to the technical operating manual should be done every 30-50 thousand kilometers. In Russian realities, this can already be done after 10-15 thousand kilometers. This interval is optimal for a change, but the part should be inspected at 7 thousand kilometers. Often signs of the need to replace the SF appear earlier:
- Feeling of air pollution in the car interior;
- Connecting the interior ventilation to maximum power and avoiding strong airflow;
- Formation of a large accumulation of dust in the cabin;
- An unpleasant musty smell appears in the car;
- The appearance of high humidity in the cabin and rapid fogging of windows.
Note! It is necessary to change the SF not only for your health. Otherwise, the evaporator radiator may break.
Some car owners recommend not buying a new cabin filter, advising you to blow through the contaminated element and remove visible dirt from its surface. Many people advise turning it the other way around. Both actions are prohibited. Even when the SF is externally cleansed, it will no longer perform its function.
As a result, the driver and passengers will continue to breathe dust, dirt and machine exhaust, and the entire ventilation system will begin to wear out. But you can still save money if you install the SF yourself according to the step-by-step instructions below.
Possible breakdowns and their causes
There are two serious problems that can occur with the cabin filter, and both of them are associated with its untimely replacement. You can determine that a part is clogged by sweating glass and weak pressure from the air conditioner or stove. Another sign is an unpleasant odor that is constantly present in the cabin. If you notice one of these signs, you should replace the cleaner as soon as possible. Otherwise, you will have to deal with a colony of fungus or a rupture in its surface.
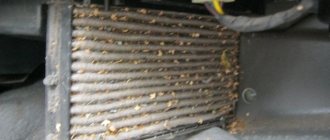
The surface and fibers of a clogged filter are an excellent breeding ground for bacteria, mildew and mold. This is due to the fact that the cleaner is located in the warmest and most humid place of the car. In addition, the filter is protected from direct light rays, which aggravates the situation. Air passing through a contaminated purifier poses a direct threat to your health and the health of your passengers.
The second serious problem is the wear of the filter surface, in which holes or tears may subsequently form. Naturally, the air will try to pass through the hole and dust and carbon monoxide will begin to enter the cabin. However, the greatest danger in this case is large debris, such as fluff or leaves, that gets into the ventilation system. Leaves and other debris begin to rot, becoming an excellent colony for spores and bacteria. In addition, a clogged radiator of an air conditioner or stove begins to overheat and may subsequently burst. This will lead to very sad consequences for your car and will cost you a pretty penny.
Rules for choosing consumables
High-quality SF is a multi-layer air consumable that has an upper paper layer to retain large particles of debris and dust and a lower electrostatic layer to retain small particles. It is also equipped with an activated carbon layer that prevents harmful exhaust from the street from entering the cabin, and an insurance layer that traps other harmful microparticles.
You need to choose a consumable based on the criteria of material, average dust transmission coefficient, surface area of the filter curtain, aerodynamic resistance, manufacturer and price.
As for the material, it happens:
- regular barrier;
- carbonic;
- carbon hypoallergenic;
- electret;
- mixed (carbon and electret).
It is necessary to choose a mixed option. In this case, coal particles should be as small as possible to effectively capture harmful substances.
Based on price and manufacturer criteria, preference should be given to original, non-analog models in the mid-price category.
For dust transmission on the filter, the indicator should be no more than 10%, for the surface area of the filter curtain - 0.166-0.203, and for aerodynamic resistance - no more than 50 millimeters.
Replacing the air filter on Renault Megane 3
- Files
- Engine
Required parts:
Air filter
Engine F4R (2.0 16V) - original code: 7701071327, analogs: Knecht LX2916
Engine K4M (1.6 16V) - original code: 8200820859, analogs: MECAFILTER ELP9284
Engine K9K (1.5 DCI) - original code: 8200820859, analogs: Patron PF1511
You can find out the cost of Renault spare parts for maintenance from our partners who provide discounts using the Renault-Drive card
The Renault manufacturer recommends changing the air filter every 30,000 km, but when operating in harsh conditions (dusty roads)
How to change the air filter
The air filter for Renault Megane 3 is here
We unscrew the two screws and take out the housing, change the filter and reassemble in the reverse order.
Photo of the old Megane 3 filter
If you have anything to add to the article, or would like to share your experience on this topic, please leave a comment
If you are the author of a report on repairs, modifications of a Renault car, or recommend material for the Renault-Drive Knowledge Base, please let us know
How to replace the filter element with your own hands
To replace the filter element yourself, you need to take gloves, a rag, a flashlight, a screwdriver and a new consumable. There are several ways to carry out this procedure. The first method requires:
- Open the glove compartment compartment;
- Remove the plastic cover on the right;
- Unscrew several screws at the top;
- Remove the plug from the torpedo block;
- Unscrew the screws with the mounting panel;
- Pull out the glove compartment and gain access to the SF;
- Remove the backlight wiring, unscrew the screws from the SF cover;
- Remove the old consumable and install a new one;
- Do everything in reverse.
According to a simplified method, which is practiced by many car owners, you need to:
- Find a plastic plate next to the glove compartment (bottom left) that is secured only with clips;
- Remove the plate and move the hose to the side, which is secured with one bolt;
- Remove the chamber cover of the filter element and remove the old consumable;
- Clean the space with a rag and insert a new SF;
- Return all mechanisms to their places.
Important! After completing all the steps, make sure that all elements are well secured. Otherwise, there is a risk of equipment failure.
In general, the SF on Renault Fluence is located in the glove compartment. It needs to be changed every 15 thousand kilometers, on average. You can do this yourself using the instructions above. In this case, it is better to choose original models with basic characteristics for replacement.
Replacing the cabin filter Renault Fluence
Many people think that it is difficult to replace the Fluence cabin filter with their own hands. To cope with such a task requires a lot of time and effort. You will have to disassemble almost half of the interior before getting to the filter and replacing it. But is this really so?
Step-by-step instructions on how to remove the filter
Not everything is as hopeless and scary as they write and talk about it. There are a large number of different videos on the Internet that describe this task step by step.
To remove and replace the filter, there is no need to disassemble the interior.
In various videos on this topic, you can see that replacing the Renault Fluence cabin filter does not take much time; you don’t need to disassemble anything.
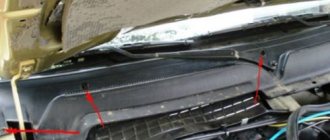
To do this, just remove the cover at the bottom, which is held on by several clips. After removing it, set the part aside. It should not interfere with the main process.
Now we can say that getting to the detail of interest is not so difficult. To do this, you need to remove the plastic tube. Everything is very simple. The tube is attached to one bolt, you need to unscrew it, after which you remove the tube and, like the cover, put it aside.
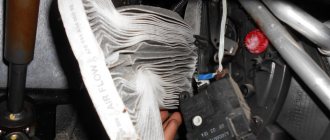
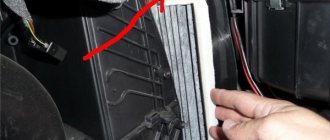
And now the most important thing. You need to find the filter itself with your hand to pull it out. You don't need a special tool to find it. It is located at the back, its presence is indicated by a special handle that needs to be slightly pulled towards you.
A click will be heard when opening. It is this that indicates that you have found the lid.
It must be removed and, like the previously removed tab, set aside. Only after this, you can feel the filter, hook your fingers on its edge and easily pull it out. The main thing here is to take your time and not pull anything, so as not to cause damage. Otherwise, you won’t be able to put the part back in its place; you’ll have to purchase a new one.
Pull out, inspect, diagnose the degree of filter contamination
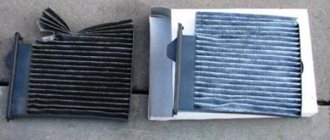
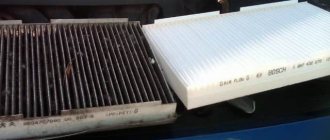
The removed spare part must be carefully inspected from all sides and determined whether it is suitable for further use or whether it will have to be thrown away and replaced with a new one.
If quite a lot of dirt and deposits have accumulated on it, then it will have to be replaced with a new one. If not, then you can still use the old one. Only for this, it needs to be returned to its original place in the same order that it was removed, as can be seen in various videos on the Internet on this topic.
Step-by-step instructions on how to install a Fluence cabin filter
As already mentioned, installing the filter is carried out according to the same principle as removing it, only in reverse order. Coping with this task is just as easy as in the previous case.
Since the part is made of elastic material, it is easy to install. No special tools are needed for this. There is also no need to search for or select special keys. You can simply install the part in its original place by hand.
You need to take the filter, squeeze it exactly in the middle with two fingers and, towards the installation site, first insert its edge on one side, then insert the second edge, then straighten it, install the lid. A click will indicate that the lid is tightly fitted, the same as when the lid was opened. Only in this case is the lid on the filter completely closed.
Next, the tube also returns to its place and is screwed with one bolt. The panel is secured with clamps and clips. This completes the work.
As you can see, not everything is as complicated as it seems at first glance. Just about 15 minutes and that's it. Therefore, some “rumors” that you need to dismantle the cabin floor in order to change the Fluence cabin filter are not true.
Therefore, replacing the filter in the Renault Fluence cabin is easy and quick. This is very convenient when there is no auto repair shop nearby. For a more complete picture, you can watch various videos on the topic on the Internet.
Source: https://portalmashin.ru/fluence/renflu-repair/zamena-filtra-salona-reno-flyuens.html
