Characteristics of the VAZ starter of the ninth model
Every driver knows that if the car does not start, the reason may be a faulty starter. In order to diagnose and repair a mechanism, you need to know its structure.
Location and purpose
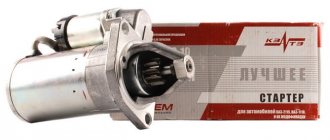
The main purpose of the starter is to spin the crankshaft, thanks to which the engine starts. Naturally, it is located close to the engine. It is usually located in the engine compartment on the driver's side under the power unit. Depending on the location, when dismantling the unit, you will need to remove either the engine protection or the air filter. Finding a starter is not difficult. It has the shape of a cylinder, and wires are connected to it, which are secured with a nut.
Design and principle of operation of the unit
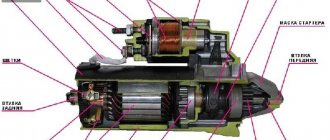
This unit is a small electric motor. Its design consists of a bendix with brushes, two windings and a movable rotor. Magnetic fields of opposite values are created on two windings - starter and rotor. The mechanism is supplied with voltage, which is transmitted to the rotor using graphite brushes. Thanks to Bendix, rotational movements are transmitted to the flywheel.
The device includes:
- a sleeve that connects to the solenoid relay;
- overrunning clutch, which ensures movement in only one direction;
- gears.
Over time, the parts of the Bendix wear out and it begins to slip. In this case, it needs to be replaced. The cause of the malfunction is contamination of the mechanism, but cleaning does not help restore functionality. Mechanism parts wear unevenly; after washing, they cannot fully perform their functions.
The principle of operation of the starter mechanism is to convert the electrical energy it receives from the battery into rotational movement of the drive gear. An electric current is applied to the poles of the electric motor using a brush assembly. At the same time, the clutch extends and the flywheel crown is connected to the gear. The starter rotates the crankshaft and thus helps start the engine. When the engine is started, the clutch takes its original position (video author - Mikhail Nesterov).
How to close the starter directly on a VAZ 2109
Car enthusiasts often wonder: how to close the starter with a screwdriver to start the engine? And it occurs when the motor refuses to start due to the fact that the starter contacts are covered with an oxide film (strong dielectric), which prevents the normal flow of current. It becomes difficult to start the car without assistance.
Every car owner should know how to close the starter with a screwdriver in order to avoid trouble starting the engine. But before you learn this, you need to understand that this method is not effective in all cases. First you need to identify the causes of the malfunction.
In order to close the starter, you will need a screwdriver, wrench or other metal tool. In our case, consider the option with a screwdriver and a faulty retractor relay.
Problems with the retractor relay are indicated by a peculiar click under the hood when you turn the key in the ignition. The clicking sound is a signal that the solenoid relay is turned on, but the overrunning clutch cannot turn the crankshaft. There is only one way out - close the starter so that voltage goes to the winding.
First you need to choose a suitable screwdriver so that its length matches the distance between the terminals that will be closed.
Next, the gearbox is placed in neutral, the handbrake is pulled all the way, the key is inserted into the ignition switch and turned in the desired direction.
After which the starter terminals are short-circuited. The key and the screwdriver work instead of the faulty relay, and the Bendix turns the crankshaft. As a result, the long-awaited engine start occurs.
In general, the method is simple. But owners of cars from the 80s and 90s need to know that in contactless ignition systems, the switch controls the voltage supply to the coil, but in older ones there is no such control, and when the starter closes, the coil may break.
If you have to close the starter in the contact system, it is better to do it together. One will need to turn the key in the ignition, and the second will need to close the starter contacts.
More experienced car enthusiasts know that the car may not start for a number of reasons that have nothing to do with the starter. But still, most often the “dog is buried” in it.
Geared vs conventional: which starter should you prefer?
A conventional starter does not have a gearbox; the rotational motion is transmitted directly to the crankshaft. Therefore, its design is simple and allows you to carry out repairs at home. Due to the fact that the electric current supplied to the device instantly engages the flywheel crown and gear, the engine starts, which is called “half-turn”. Classic units, due to their simple design, are reliable devices that can withstand electrical influences, but can fail when exposed to low temperatures.
The principle of operation of the gear unit is the same as that of the classic unit - the conversion of electrical energy into mechanical energy.
The difference is in the design - a gearbox is included, which is located between the armature and the bendix. In addition, the windings are equipped with permanent magnets, which increased the reliability of the mechanism. Geared devices are increasingly conquering the car market. In order to figure out which starter is better, you should find out the advantages and disadvantages of each of them.
Advantages of the classic version:
- simplicity of design;
- high maintainability;
- availability of spare parts;
- low cost.
The disadvantages include the following:
- the need for high starting current;
- rapid wear of parts;
- unstable operation at low temperatures;
- large weight and dimensions.
In general, an ordinary unit can be assessed as a reliable device when used correctly.
The gear unit has the following advantages:
- light weight and small size;
- can operate in a wide temperature range;
- long service life;
- economical energy consumption (40% less than usual).
Thanks to the presence of a gearbox, starting reliability at low temperatures has increased. Since a small current is required to start the power unit, the likelihood of a successful start increases in winter.
Basic starter malfunctions
A starter is a device that allows the power unit to start. You should know that the service life of the starter is only 5-6 years - this is about 2 times less than the service life of the engine. Therefore, starter diagnostics are relevant not only for cars that have been in operation for several years, but also for newly purchased vehicles.
If the starter begins to function intermittently, it is necessary to find out the reason for this behavior. Since the starter device operates in the same circuit with other vehicle systems, its breakdowns can be either mechanical or electrical.
If the starter stops turning or turns very slowly, you should pay attention to the battery and electrical circuit:
- The battery is not charged.
- Poor contacts.
- Damage to the wire between the starter and battery.
- The oil in the crankcase does not meet the required viscosity.
- Broken contact group of the ignition switch.
- Broken wire and poor contact of the solenoid relay.
- If the starter does not work or simply does not turn on, the reason may be: a broken relay or a short circuit in the starter winding.
- If the starter armature rotates, but the starter does not turn the crankshaft, it may be a slipping freewheel.
Video “Replacing a classic mechanism with a device with a gearbox”
This video talks about replacing a conventional starter with a gear starter (the author of the video is Auto overhaul).
Technical progress does not stand still and is constantly evolving. Every year new technologies emerge, allowing engineers to improve or create completely new parts. This also applies to mechanical engineering. Hundreds of thousands of modern cars are sold in Russia every year. Each of them contains the latest technologies. We will talk about such a small unit as a starter, and we will figure out which starter is better: a gearbox or a regular one.
Starter repair for VAZ 2108-VAZ 21099
Note! On cars of the Samara family, different starters were used depending on the time and year of their existence. The first one is marked “426.3708” (we’ll look at it in this article), the second one “5712.3708”, and the third one “29.3708”. The first and third starters are similar to each other and they are disassembled almost similarly, only their commutators and drive levers are different. The second starter is different: it is more compact, consists of almost the same parts, but repairs by analogy with the 1st and 2nd ones may not be possible without understanding the operating principle of this mechanism.
Disassembly
1) At the beginning of the operation, remove it directly from the car, and the instructions we prepared from the article will help you cope with the task without any problems: “Replacing the starter on a VAZ” - the process is described in detail.
Note! The starters are removed identically regardless of the markings!
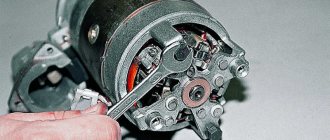
2) Take a wrench or a socket with a wrench and unscrew the nut of the stator winding output terminal (it is located closer to the housing and is indicated by a red arrow in the first photo below, and the blue arrow shows the former location). Then remove the stator winding output terminal, then on the reverse side, turning the starter, unscrew the two screws securing the solenoid relay and pull. Carefully remove from the hole (photo 3) and unhook the end part (called the anchor and indicated by the red arrow) from the lever into which the anchor fits. The anchor may also not come out, because if it does not come out of engagement with the lever, and you pull the relay, the relay will disconnect itself, and the anchor will remain inside. In such a situation, grab it with your hand and remove it, disengaging it. If the armature still comes out along with the relay, then pull it with your hand and disconnect it. Remove the spring and o-ring (photo 4). If there are deformations and torn parts, this ring is replaced with a new one.
3) Find a piece of pipe of a suitable diameter to knock the restrictive ring off the retaining ring. Place the pipe against the restrictive ring (photo 1) and knock it down with hammer blows (the arrow in photo 2 indicates the knocked down one, and under it there is a locking ring, indicated by a red arrow). Remove the retaining and restrictive rings by sliding along the shaft (photo 3). Next, remove the protective shaft cover by unscrewing the two fastening screws with a screwdriver (photo 4).
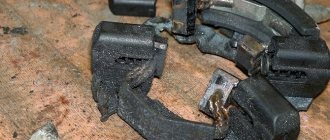
4) Remove the retaining ring by prying it with a screwdriver or using sharp pliers, as shown in photo 1. Now you will find the necessary shims, so put them aside immediately and do not lose them. Unscrew the two nuts securing the cover (the cover is with a blue arrow in photo 2, and the nuts are red) and remove it. Then, taking a screwdriver in your hands, use it to squeeze out the springs of both insulated brushes (one of the springs is indicated by an arrow and its visual squeezing is shown in Photo 3) and remove the insulated brushes from the brush holder. Remove the brush holder from the starter (photo 4).
General information
The first starter used on a car had a number of significant shortcomings. Over time, the design was gradually improved and significantly transformed. The starter is a 4-band electric motor, which is necessary to rotate the crankshaft when starting the engine. It takes energy from the battery and increases the starting current several times. Due to this, any internal combustion engine starts. The principle of operation of the starter has not changed over the years.
Nevertheless, its design has been constantly improved. The weight of the part was reduced, the service life was increased due to the use of higher quality and new materials, etc. All this led to the fact that the starter was transformed quite significantly and even a new type appeared - gearbox. This is exactly what we will talk about now.
Reasons for starter failure on a VAZ 2108 and ways to solve problems
If for some reason the starter does not turn, the problem may lie not only in the part itself, but in other electrical wiring components. If the car does not start, the special retractor relay does not even click - the reason may be the following:
- there is no voltage on the retractor contacts;
- The relay itself has failed.
First of all, if the car engine does not start, you should establish the presence or absence of voltage at the control contacts of the relay. You can check this with a multimeter by turning on the ignition. If power is supplied to the relay, the starter comes on, but the engine still does not start - the problem may lie in the relay. To check it, it is not necessary to remove the engine itself. It is enough to simply close the control contacts. If the relay clicks, it means it is in working condition.
After checking the presence of voltage and contacts, you should move on to the starter itself. But to do this you will need to remove it first. This can be done relatively simply. The most common causes of starter failure:
- wear of bearings or bendix splines;
- failure of the stator winding;
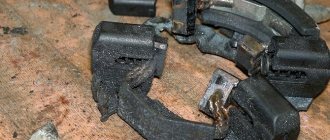
- carbon brushes are worn out.
The main working mechanism of the stator, which experiences the greatest load, is the bendix. It is a small shaft at the end of which there is a gear. The splines of which tend to wear out during long-term use. The shorter such splines are, the less engagement with the engine flywheel. It is due to this that the engagement is carried out leading to the start of the motor.
Replacing a bendix is a relatively simple process. But its cost is sometimes not much different from the price of a new starter. Moreover, you will also have to pay extra for installation. After removal, immediately after inspecting the splines, you need to make sure that the starter shaft rotates without any effort. If it rotates with difficulty or does not rotate at all, the bearings are failing. They will need to be replaced.
Moreover, it is usually extremely difficult to cope with the installation of new bearings on your own. It requires not only skill, but also special key pullers. It is important to choose the right new bearing. A part with a sufficiently long resource is required. Otherwise, various difficulties and problems may arise - associated with the subsequent failure of the already installed new part.
There may also be problems with the mechanical part of the stator. For example, a special plug - which is controlled by a retractor relay. The most serious problem is the failure of the stator winding. If there is a short circuit, rewinding is required. The price of such repairs can be 4-6 thousand rubles. Therefore, in some cases it makes sense to simply purchase a new one.
Classic starter: operating principle and design
The key feature of such a device is that there is no such intermediate unit as a gearbox. This allows rotation to be transmitted directly from the starter to the crankshaft. Consequently, the device is simpler to manufacture and much easier to repair. Another feature of such a starter is that the electric current supplied to the switch allows you to instantly engage the gear and flywheel. This helps the car to start, as drivers say, in a snap.
Currently, they are trying to replace such starters with reduction ones. However, most cars used to have a classic starter. The operating principle and design made this unit extremely durable. Such units almost never fail due to electrical influence, but much more often they need to be repaired due to low temperatures.
Construction and something else
During operation, the internal combustion engine produces a fairly large amount of energy. It is enough for lighting devices, music, wipers, etc. In general, while driving, the main load goes to the generator. In a static position, the motor does not produce anything, so it needs to be started somehow. For this purpose, various types of starters are used along with batteries.
Most often, it is the starter solenoid relay that fails. Its price is fortunately affordable and starts from 500 rubles and ends in several thousand. In addition, the design includes a bendix with a drive gear and brushes.
Starter operation stages
This node works as follows:
- connection of the gear to the flywheel;
- starting the starter;
- disconnecting the gear and flywheel.
Naturally, the starter only works when the engine starts, and then turns off. If this does not happen, then one of the mechanisms is faulty.
After the driver inserts the key into the ignition and turns it to the operating position, current is supplied from the battery to the traction relay. Thanks to this, the bendix of the gear starter engages the gears, at the same time, due to the supply of voltage to the electric motor, the circuit is closed and the car starts. Once the engine speed exceeds the speed of our starter, it turns off. It turns on only the next time the engine is started. Well, now let's look at how a gear starter differs from a regular one. There are some interesting details here.
Starter activation relay VAZ 2108, 2109, 21099
On a VAZ 2108, 2109, 21099 and similar cars, the starter is turned on not directly, but through a relay.
Purpose of the starter switch relay VAZ 2108, 2109, 21099
The starter switch relay is designed to reduce the load on the ignition switch contacts when starting the engine with the starter. Since the starter is the most powerful consumer of electrical energy in the electrical equipment of a car, if it was turned on directly, the ignition switch would burn out very quickly.
— Where is the starter activation relay installed for VAZ 2108, 2109, 21099
The starter switch relay for VAZ 2108, 2109, 21099 is installed on the engine compartment panel.
Where is the starter relay installed?
— Starter activation relay device
The starter activation relay consists of a coil (copper wire winding) with a magnetic core located inside.
— How does the starter relay work?
After turning the key in the ignition switch to the “Starter” (II) position, its contacts “30” and “50” close. Voltage is supplied to the starter activation relay (relay contact “85”). It is triggered (the contacts inside the relay are closed) and supplies voltage to terminal “50” of the starter traction (retractor) relay. The retractor is activated and the starter turns.
— Connection diagram for starter relay
— Faulty starter relay
The most common malfunction of the switching relay is when the starter stops turning on.
Oxidation of relay contacts or ground
Relay burnout due to short circuit
A “break” in the electrical circuit may also occur, which should be taken into account when diagnosing a malfunction.
“Culprits” of the malfunction of the VAZ 21083 starter relay
A faulty relay must be replaced with a new one; if the contacts are oxidized, we clean them and check its operation.
— Applicability of the starter activation relay on VAZ 2108, 2109, 21099 vehicles
In the electrical circuit for switching on the starter of a VAZ 2108, 2109, 21099 car and their modifications, a starter switch relay 111.3747-10, 97.3747-10 and their analogs are used.
— Characteristics of the starter activation relay 111.3747-10
Rated voltage - 12 V
Operation voltage: no more than 8 V
Release voltage - 1.5 - 5.5 V
Winding resistance - 85±5 Ohm
Notes and additions
The starter is the most powerful consumer of electrical energy in a car's electrical equipment (1.3 kW). When starting the engine, the current consumed by it can reach 400 A, which is a lot. Therefore, all connections in its electrical circuit must have reliable contact. Otherwise, the starter may “shoe” because its collector is dirty.
Source
Gear starter
The general principle of operation is no different. Electrical energy is also converted into mechanical energy. The only difference is the presence of a gearbox. In addition, this starter also has permanent magnets in the winding, which makes it possible to slightly increase the reliability of the electric motor as a whole. Of course, there are some peculiarities here. In particular, many are interested in how much a starter of this type costs. In most cases, a little more expensive than classic ones, but not much. On average by 10-15%. But its service life is an order of magnitude longer, and this is definitely worth taking into account.
Original parts and their analogues: which is better?
If, in the event of a breakdown, it was decided to purchase a new starter, then there is always a choice between two types: original or analogue? In the first case, the cost will be much higher. As a result, purchase and installation costs will be higher. But the original parts are distinguished by their quality. By installing a starter from AvtoVAZ, you can forget about problems with it for 40-50 thousand km. Cost of the original starter:
| Manufacturer's name | vendor code | Parameter | Cost, rubles |
| AvtoVAZ | 21214-3708010-81 | 12 V; 1.5 kWt | From 4 thousand rubles |
But the price of such a part can be 2-3 times more than an analogue.
Therefore, some owners of the vehicle in question opt for an analogue. At the same time, some starter manufacturers produce products according to their service life and quality no worse than the original. But this type of product is often counterfeited. Before you go and purchase an analogue in a store or market, you should carefully study the original packaging. For example, counterfeits are often sold in boxes with low quality printing. There are no special holograms or other important parts and components. Therefore, you should carefully read the details before paying.
The following manufacturers have proven themselves to be good:
| Manufacturer's name | vendor code | Parameter | Cost, rubles |
| Bosch | 1362059 | 12 V; 1.5 kWt | 2 thousand rubles |
| Valeo | 1367008 | 12 V; 1.5 kWt | 1.7 thousand rubles |
| Delco | 986016200 | 12 V; 1.5 kWt | 2.9 thousand rubles |
It is important to carefully examine the starter housing. Perhaps even arm yourself with a tape measure. Some universal models installed on various VAZ vehicles require different body designs. As a result, the overall dimensions differ. Therefore, a non-original part may simply not fit in size.
Advantages and disadvantages of the classic version
So we are actually gradually approaching the answer to the question of which starter is better: gear or conventional. To do this, let's look at the strengths of the classic version. They are as follows:
- low cost;
- high maintainability;
- You can find spare parts almost everywhere.
But there are also some disadvantages, which are expressed in the following:
- high base current required;
- rapid wear of parts;
- does not work well at low temperatures;
- large weight and size.
In general, this is a fairly reliable design with proper maintenance. But development does not stand still, and this has led to more advanced gear starters. Let's look at their strengths and weaknesses.
A starter with a gearbox: what is good and what are its disadvantages
We have already figured out how this device works and what its fundamental differences are. It is no longer difficult to guess which starter is better, gearbox or conventional. The fact is that the first option has the following strengths:
- small size and weight;
- long service life regardless of ambient temperature;
- low energy consumption (40% less than the classic version).
As for the disadvantages, they are there too and are as follows:
- complexity of repair work;
- lack of spare parts in stores;
- high cost of the product;
- low quality gearbox.
Often the main reason for the breakdown of a starter with a gearbox is that low-quality components are installed. This leads to breakdowns and various types of malfunctions. In general, such a unit has more prospects in the future than a conventional starter. And this is not due to the fact that one is good and the other is bad, but due to scientific and technological progress.
Let's sum it up
If you decide to replace this unit, then you first need to decide where the starter is located. This is usually the driver's side under or to the side of the engine. To remove it, you need to make room. Depending on the location, it may be necessary to remove the engine protection or the air filter with the box. Next, disconnect the wires and unscrew the bolts. Determining where the starter is located is not difficult. It has a cylindrical shape, and several wires come from it, secured with a nut. Everything is done quite simply and quickly.
So we answered the question about which starter is better: gear or conventional. Classic starters are good in their own way, but are gradually being phased out. But they also have their strengths, just as gearboxes have their weaknesses. For example, in the outback it will be difficult to find spare parts for a starter with a gearbox, but for a regular one - no problem. The same can be said about repairs - not everyone has encountered gearboxes on the starter and not everyone will undertake it. How much does a starter with gearbox cost? It all depends on the brand of the car; a normal one will cost 5-7 thousand rubles.
The gear starter design is distinguished by a gear transmission between the armature and the overrunning clutch. The safety margin is ensured by increasing the torque in the gearbox supplied to the flywheel of the internal combustion engine.
By analogy with a conventional starter, the gear version uses permanent magnets instead of windings, simplifying the design, reducing its weight and size. Maintainability is practically not reduced; the main causes of breakdowns and repair methods are discussed below.
Starter replacement and installation procedure
It is worth familiarizing yourself with the process of removing the device in advance. This will avoid difficulties during repairs. It is also advisable to find out in advance where the starter is located.
Otherwise, various difficult situations may arise. The removal process includes the main steps:
- the terminals from the car battery are disconnected and the contact wires from the starter itself are disconnected;
- Next you need to unscrew the special nut that holds the block with the wires;
- it is necessary to dismantle the crankcase protection - if there is one at all (without this it is simply impossible to remove the starter);
- the lower part of the starter is equipped with two nuts that need to be unscrewed;
- then the starter is simply moved towards the wheel and removed from its seat.
After dismantling, it will be possible to carefully inspect the Bendix splines and carry out troubleshooting. Installation is carried out in reverse order. It is only important to lubricate all threaded connections with graphite lubricant. It will not allow the carving to sour over time.
Purpose of a gear starter
The main problems at the time of starting an internal combustion engine - thick oil at subzero temperatures, a dead battery, extreme loads on the on-board electrical system - are completely solved by a gear starter with a planetary type transmission.
A regular starter starts a car in several stages:
- With the ignition key, the car owner closes the circuit on the traction relay;
- at the same time, the overrunning clutch (Bendix) engages with the flywheel;
- the next circuit closes, voltage is supplied to the electric motor;
- the motor starts until its shaft reaches a rotation speed greater than that of the starter;
- in this case, the overrunning clutch will automatically break the engagement of the electric motor shaft and the drive gear.
In a gear-type starter, the bendix and armature shafts are displaced relative to each other in space, but remain parallel to each other. Gears with different numbers of teeth reduce the rotation speed of the bendix, but the torque on the flywheel increases sharply, ensuring guaranteed all-season starting of the internal combustion engine.
Pros and cons of a gear starter
Since the gear starter has an improved design, the main advantages of this starting unit are:
- the voltage does not drop when the flywheel spins, it is enough for the ECU;
- the speed decreases, but the torque increases;
- increasing the service life of brushes due to lower starting current on the armature windings;
- with the exception of Bendix, all parts last at least twice as long;
- The launch unit is smaller in size and easier to maintain and repair.
Gear starter repair
Since the engine starting unit has friction parts and is equipped with an electrical part, breakdowns still occur. The complex design of the gear starter in some cases makes repairs unprofitable; this unit is completely replaced. However, in some cases, the car owner can identify and fix the problem on the spot.
Solenoid relay failure
In this case, repairing a gear starter requires complete disassembly of this engine starting unit. Experts recommend taking a photograph of the solenoid relay before disassembling it, so as not to confuse the polarity of the contacts. If the relay is dismountable, visually inspect the “nickels”; if they burn, they can be cleaned with sandpaper; if there is significant wear, it is better to replace them entirely.
Start problems
If, when you turn on the ignition with the key, you hear the characteristic sound of the retractor relay operating, but the flywheel does not spin, most likely the bendix has worn out. In this case, the starter drive should be replaced entirely, preferably in a specialized service center.
In any case, it is necessary to check the battery charge level; perhaps the starting current is not enough, even for a gear starter that sharply increases torque.
No response to the ignition key
This malfunction of the gear starter is most often caused by an interruption in the circuit. To restore the functionality of the starting unit, you must:
- tighten the terminal fastening nuts;
- clean oxidized terminals if necessary to restore contact;
- checking battery charging, charging as necessary;
- revision of the bendex and its replacement if necessary; this part is not subject to restoration.
This breakdown, in principle, does not require a visit to a service station; it can be easily repaired on your own.
Magnets falling out/sticking
When disassembling a failed starter, it is very difficult to maintain the original order of the permanent magnets. In principle, inserts piled up in a heap are not a problem for the car owner if there is a compass. Using the random method, you can put them in the required sequence with a 30–50% probability, so you should approach the repair yourself systematically:
- for normal operation of the starter, 3 magnets are used with the magnetization vector directed outward, and the same number with the opposite direction of the magnetization vector, but inward;
- they must be alternated with each other when installing in a cage;
- the magnetization vector is determined by the compass, for this purpose the insert is installed on the edge near the device, for three magnets the arrow will turn towards them with the north side, for the remaining ones - with the south side;
- They stick to the cage body independently; their relative position in the starter is achieved through spacer polymer rings on both edges of the inserts.
In order for the armature to operate (rotate) in the desired direction, it is necessary to place the starter vertically, put the lower remote ring on it, and then the housing, placing the “+” wire retractor slot on the relay side.
Then the housing is removed together with the lower remote ring, the magnets are installed alternately north/south, and are fixed with the upper remote ring, taking into account the holes for the tie rods.
The brush assembly in the form of a repair kit is mounted after installing the cardboard insulation in the groove of the positive wire.
Attention: Before installing the starter in place, it is necessary to check its characteristics. To do this, you should rotate it when connecting it to the battery and make sure that the retractor is working.
Thus, some faults of the gear starter can be eliminated on your own. However, to ensure guarantees, it is better to visit a service station, where professionals do not make mistakes and advise the user on choosing a starter or repair kit from a specific manufacturer for their car.
Scheme for checking the mechanism and replacing its relay
Repairing the starting device and replacing it is never carried out by experienced motorists without first testing it. The scheme for carrying out this operation is very simple, we place the starter with the windings up (that is, at the end), and then perform the following actions: connect one end of the wire to the bolts of the mechanism being tested, the other to the positive terminal; we start the device.
If after starting the mechanism does not turn well or does not turn at all, you can safely begin to repair it. In those cases when the device works normally, there is no need to disassemble it; most likely, the reason for the poor start lies in another element of the car. It would also be useful to check the mechanism relay directly. The verification scheme in this situation is elementary:
- “minus” is applied to the relay body;
- 12-volt voltage is supplied to the output;
- An ohmmeter is connected to the contact bolts.
The appearance of sparks on the contact bolts and the movement of the coupling into the hole tell us about the serviceability of the relay. But the absence of these phenomena, as well as voltage surges on the device, indicates that the relay requires replacement, since the starter does not turn because of it. To install a new relay element, you need to disassemble the starting mechanism - remove the shield from it, remove the hose from the air collector, and then very carefully remove the starter itself.
We carry out all these procedures in neutral, and lift the vehicle itself on a jack or place it in a pit.
Then you should unscrew the bolts that connect the starter to the relay, and install a new mechanism. In this case, it is important to ensure that the drive lever engages with the tip of the device being installed. We install the starter in its place and connect the previously removed wires.
