Articles
Shelf for acoustics for VAZ 2112
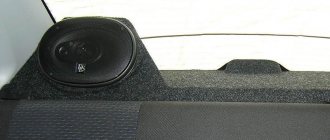
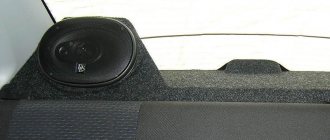
On the VAZ 2112, the acoustic shelf can be easily made independently. The acoustic shelf for the VAZ 2112 is made of plywood or other material. It provides many advantages, significantly improving the sound quality of any speaker system, even the most budget one.
Lada 2112 NOT BAD › Logbook › Acoustic shelf with sides
Good day to all!
In general, I was fed up with knocks, creaks, and rattling sounds from the trunk. Without hesitation, I decided to buy an acoustic shelf. I thought about making it myself, of course, but I figured that it would be more expensive in terms of money and time, so I decided to order a ready-made one (in the process I realized that I could do it myself).
Well, in general, I called, ordered, took it home yesterday, and let’s install it. Well, I thought, I took it off and installed it, especially since the seller said, everything is even, the sizes match, N I F I G I’ll tell you!
I disassembled and removed the old sidewalls, unscrewed 300 screws and the same number of bolts, and with the help of some mother pulled them out
I decided to try on one side panel
It seems normal, well, of course, all the holes had to be drilled on site. I had to run to a construction store and buy a bunch of different screws and corners. In general, in order for the shelf to stay more securely on the sides, they need to be well secured, having fixed the corner, I realized that somehow everything was sitting snotty, I decided to swap the seat belt fasteners (which are not there)
Unscrewed it and swapped it from right to left. I screwed the sidewall to them, everything seems to fit well, it doesn’t shake or make up, in general everything is fine.
Next, 1 strip was cut and screwed onto the sidewalls in order to secure the skin to them
It seems that everything is done, I installed the sidewalls, well, I think I’ll throw in the middle and get hurt, but damn, it won’t stand up, it’s long! Well, my first phrase is NATURAL!
In short, I measured the widths in the cabin from glass to glass and measured the entire new shelf, in short, everything was made to size but 3 cm longer, in general with a margin!
I removed the carpet from the middle, measured everything according to size, cut off the excess and added a bar so that the trunk was not visible from the interior, since the shelf became higher by about 2-3 cm. I secured everything and voila, everything is clear.
I also added a strip of carpet to the inside of the shelf, as the plywood was playing against the plywood and there was cricket.
I also drilled into the old trunk light button.
Source
Photo gallery
On all cars of the tenth family, including VAZ, installing the front speakers in standard places is possible without any difficulties. This is especially easy to do if you already have wiring for powering the speakers. In this case, there should be no problems with the installation at all. One important point is worth noting. So, first of all, we remove the casing, after which we find the power wires for the speakers and connect them. After that, in all 4 corners we install square brackets-clamps under the self-tapping screws, which will then be used to secure the speakers. Next, everything is assembled in the reverse order, that is, we install the casing and the procedure can be considered complete. All rights reserved.
What are the benefits of an acoustic shelf?
VAZ 2112 acoustic shelf
As you know, achieving good sound in a car interior, where there is very little free space, is quite difficult. But this can be done if you use some devices, one of which is a homemade or store-bought acoustic shelf. There are a lot of components inside a car that interfere with normal sound. It's not just the noise of the engine or the hum of a moving car. The weak stereo effect is mostly due to the rear speakers and the direction of their sound. In other words, a large number of barriers arise between the speaker and the listener, in which the sound disappears. Of course, the problem can be solved and this can be done in several ways:
Acoustic shelf VAZ 2112 with sides
Note. In this case, the speakers are installed on the ceiling using a podium. But this method has disadvantages. In particular, there is no way to firmly fix the speaker, which will lead to rattling and other errors. In addition, this method of installing the speaker risks a complete lack of bass.
Note. The reflected sound method implies the presence of an acoustic shelf. Only the store shelf is made in such a way that the speakers face the ceiling, where some of the sound is dampened by soft and fleecy material. In addition, if the VAZ 2112 car has headrests on the seats, then these are additional obstacles. Therefore, it is recommended to make a shelf yourself, especially since it is not so difficult.
Materials you will need for work
Not everyone will undertake to make do-it-yourself acoustic shelves for VAZ 2112, 2106, or for any other model. You can doubt for a long time whether it is worth trying or conducting an experiment. There is, of course, a risk that you will not achieve good results. What could be the reason for failure? An error when applying markings, the use of the wrong fasteners, some unaccounted for nuance.
Making shelves for speakers
Even if nothing comes of this venture, after analyzing the situation, you can take the risk again, for the second time, try to make an acoustic shelf for a VAZ 2112. Due to the dismantling of the standard acoustic shelf and insulation, the interior will not become unusable. If necessary, specialists can easily eliminate any accidental damage.
You should prepare:
- New speakers.
- A sheet of paper so that you can draw a drawing of a new part.
- Sheet of plywood or chipboard.
- Jigsaw.
- Drill.
- Self-tapping screws.
- Bulgarian.
- Carpet.
In addition, you will need a ruler, a centimeter, a pencil and scissors. Having found all the materials, you can start working. Soon an optimal acoustic shelf for VAZ 2115, 2115, or another brand will be created. Her project can be complicated by changing the tilt of the speakers. It is important to turn them towards the rear window. The effect of reflection of sound waves is necessary for their correct, harmonious distribution.
How to make it
Homemade acoustic shelf for VAZ 2112
Before moving on to actual production, you need to prepare the necessary consumables and tools.
Tools
Acoustic shelf VAZ 2112 with sides
Consumables
Acoustic shelf with sidewalls VAZ 2112
Shelf templates
For those who like to do everything with their own hands, we can advise you to make the template yourself. Those who don’t want to mess around can download various template options from the Internet.
Acoustic shelf template
Note. It is advisable to customize the template according to the car. In this case it is a VAZ 2112.
Main stage of work
Acoustic rear shelf for VAZ 2112
Electric wood planer
Note. We do not throw away the remains of the carpet. They will go to the part of the shelf that opens.
Note. It is recommended to wrap the edges of the shelf with coarse burlap, preferably not too thick, but durable. This is done so that the carpet in these places does not wear out in a short time.
VAZ 2112 installation of acoustics
Acoustic shelf with opening part
Installation of acoustics VAZ 2112
At this point, the manufacture of the shelf for the VAZ 2112 can be considered complete. In the process of working with your own hands, it is recommended to study a lot of photo and video materials. Additional instructions, preferably step-by-step, like this one, would also be useful. The price of a ready-made acoustic shelf in stores is not low and there is no point in buying it if you learn how to do everything yourself.
Photo instructions for making side shelves in the trunk of a VAZ
The resulting design can now be installed in a car. When installing, the standard self-tapping screws for attaching the sidewalls to the body must be replaced with M5 bolts. In order for the acoustic shelf to sit firmly on the sides, it is best to use Velcro (see photo below).
Now, significant weight can be placed on the resulting hard modification of the sides of the trunk without fear for its integrity, plus with this design we have completely eliminated any rattling and squeaking.
There are many other ways to combat noise in the trunk of a VAZ 2111 and VAZ 2112, but it is best to use them in combination - this increases the effectiveness of using each of them separately.
We're sorry, but the requests coming from your IP address appear to be automated. For this reason, we are forced to temporarily block access to the site.
To continue, please enter the characters from the image in the input field and click "Submit".
Cookies are disabled in your browser
. We will not be able to remember you and correctly identify you in the future. To enable cookies, follow the tips on this page.
Product delivery options
Note! Below are the shipping methods available specifically for this product. Payment options may vary depending on the shipping method. Detailed information can be found on the “Delivery and Payment” page.
Parcel by Russian Post
Available payment methods:
- Cash on delivery (payment upon receipt)
- Using cards Sberbank, VTB, Post Bank, Tinkoff
- Yandex money
- QIWI
- ROBOKASSA
Shipping throughout Russia. Delivery time is from 5 to 12 days.
Parcel by Russian Post 1st class
Available payment methods:
- Cash on delivery (payment upon receipt)
- Using cards Sberbank, VTB, Post Bank, Tinkoff
- Yandex money
- QIWI
- ROBOKASSA
Why did it happen so?
Perhaps the automatic requests do not belong to you, but to another user accessing the network from the same IP address as you. You need to enter the characters into the form once, after which we will remember you and be able to distinguish you from other users exiting from this IP. In this case, the page with the captcha will not bother you for quite a long time.
You may have add-ons installed in your browser that can make automatic search requests. In this case, we recommend that you disable them.
It is also possible that your computer is infected with a virus program that is using it to collect information. Maybe you should check your system for viruses.
If you have any problems or would like our support team, please use the feedback form.
Source
What are the benefits of an acoustic shelf?
VAZ 2112 acoustic shelf
As you know, achieving good sound in a car interior, where there is very little free space, is quite difficult. But this can be done if you use some devices, one of which is a homemade or store-bought acoustic shelf. There are a lot of components inside a car that interfere with normal sound. It's not just the noise of the engine or the hum of a moving car. The weak stereo effect is mostly due to the rear speakers and the direction of their sound. In other words, a large number of barriers arise between the speaker and the listener, in which the sound disappears. Of course, the problem can be solved and this can be done in several ways:
Acoustic shelf VAZ 2112 with sides
Note. In this case, the speakers are installed on the ceiling using a podium. But this method has disadvantages. In particular, there is no way to firmly fix the speaker, which will lead to rattling and other errors. In addition, this method of installing the speaker risks a complete lack of bass.
Note. The reflected sound method implies the presence of an acoustic shelf. Only the store shelf is made in such a way that the speakers face the ceiling, where some of the sound is dampened by soft and fleecy material. In addition, if the VAZ 2112 car has headrests on the seats, then these are additional obstacles. Therefore, it is recommended to make a shelf yourself, especially since it is not so difficult.
How to make it
Homemade acoustic shelf for VAZ 2112
Before moving on to actual production, you need to prepare the necessary consumables and tools.
Tools
Acoustic shelf VAZ 2112 with sides
Consumables
Acoustic shelf with sidewalls VAZ 2112
Shelf templates
For those who like to do everything with their own hands, we can advise you to make the template yourself. Those who don’t want to mess around can download various template options from the Internet.
Acoustic shelf template
Note. It is advisable to customize the template according to the car. In this case it is a VAZ 2112.
Main stage of work
Acoustic rear shelf for VAZ 2112
Electric wood planer
Note. We do not throw away the remains of the carpet. They will go to the part of the shelf that opens.
Note. It is recommended to wrap the edges of the shelf with coarse burlap, preferably not too thick, but durable. This is done so that the carpet in these places does not wear out in a short time.
VAZ 2112 installation of acoustics
Acoustic shelf with opening part
Installation of acoustics VAZ 2112
At this point, the manufacture of the shelf for the VAZ 2112 can be considered complete. In the process of working with your own hands, it is recommended to study a lot of photo and video materials. Additional instructions, preferably step-by-step, like this one, would also be useful. The price of a ready-made acoustic shelf in stores is not low and there is no point in buying it if you learn how to do everything yourself.
What to do?
There are three ways to solve this problem. The choice in favor of one option or another directly depends on your requirements, wishes and sometimes financial capabilities.
Solution option
Explanation
Completely dismantle the sides and shelf
Nothing will make noise in this situation, but you will deprive yourself of space to install an audio system. You can forget about high-quality sound inside the car
Purchase a ready-made podium for durable material with holes for speakers
A good option that requires certain financial costs. All you have to do is install it in place. Disadvantage - it is not always possible to find a shelf that is ideal for all parameters
Make a podium with your own hands
This option provides minimal financial costs and the opportunity to create a shelf that will meet your smallest requirements. The downside is that you have to do the work yourself, which not everyone can handle.
Having a stronger and thicker shelf not only eliminates noise, but also improves the sound quality of the audio system. The thick shelf acts as a highly efficient enclosure.
Today we will look at how you can create an acoustic podium with your own hands, which will be placed on factory sidewalls. You can also try to make an option with your own sidewalls, but it is much more complicated and extremely difficult for a beginner to cope with. Let's not make things difficult for you. The option with standard sidewalls is very good.
Lada 2112 1.6. 16th grade Pearl. › Logbook › Wooden acoustic shelf on VAZ 2112
Immediately after buying the 12, I didn’t like the sound... The car was all glued, the acoustics were good... But the standard shelf was infuriating. I immediately decided to make a wooden shelf.
I used an old unnecessary wardrobe as a basis! The chipboard made from it is of very good quality. This is not what they do now. I also took the hinges from him. I had to buy Carpet. For covering on both sides, 1m 10 cm is enough.
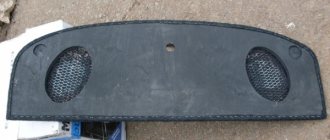
In general, I took the dimensions of a standard shelf... I cut everything out as it should be with a jigsaw! Covered it with carpet.
Let's see what happened.
The amplifier is mounted on the shelf below. I’ll say in advance that there were no problems with the connection, I made a connector. Male/female - block for 8 connectors.
1 + right channel 2 - right channel 3 + left channel 4 - left channel 5 + power control from the player 6 - power supply (body) 7 +12V amplifier power supply 8 +12V amplifier power supply
The result: No rattles, no creaks, very comfortable and beautiful. And most importantly - great sound! If anyone needs it, I can make it to order! Any complexity! For any cars.
PS Later I’ll tell you about strengthening the sides on which the shelf rests.
Lada 2112 2003, 89 l. With. — car audio
Cars for sale
Lada 2112, 2002
Lada 2112, 2006
Lada 2112, 2003
Lada 2112, 2005
Comments 9
On the Lyada, the wiper mechanism protrudes right into the shelf, hence the cutout.
Please explain why the shelf on the left is shortened? Same thing at the factory
Who advised to install the amplifier this way?
What about chipboard? Isn't the shelf too heavy? Many people say that chipboard spoils the sound, chipboard is too heavy, chipboard is afraid of moisture and vibration, and therefore is short-lived. Please tell me how this shelf is in use?! I decided to make a shelf for my Izha too, now I’m thinking of either buying a huge sheet of plywood, which is problematic. Or use the old wardrobe too))
The shelf is excellent. It works great, it’s already been in the winter and has withstood the heat, no problems. This is the second year I’ve been driving without a subwoofer, there’s an amplifier and three-way oval speakers hanging on the shelf. Due to the shelf, you don’t need a subwoofer))) The only difference is that with a subwoofer it’s loud even on the street, but without a subwoofer it’s loud in the cabin, little sound comes out into the street... but this is due to the fact that my whole car is very noisy. The sound is great. But there is one BUT! Modern chipboard is a bad material... you know, they skimp on everything... bad press, bad glue, too porous... so it spoils the sound. If you take dense Soviet varnished or laminated chipboard, then there will be no problems! 100%. My sub is made from the same chipboard. Plays great! At the moment, the house is used as home acoustics. So if you find a wardrobe, then go for it... if you want to buy new chipboard, then plywood is better.
Thank you. Perhaps we’ll save money and pick up old furniture)
What about the sides?)
I'll take a photo tomorrow. I'll write everything. It's already getting dark.
Source
What are the benefits of an acoustic shelf?
VAZ 2112 acoustic shelf
As you know, achieving good sound in a car interior, where there is very little free space, is quite difficult. But this can be done if you use some devices, one of which is a homemade or store-bought acoustic shelf. There are a lot of components inside a car that interfere with normal sound. It's not just the noise of the engine or the hum of a moving car. The weak stereo effect is mostly due to the rear speakers and the direction of their sound. In other words, a large number of barriers arise between the speaker and the listener, in which the sound disappears. Of course, the problem can be solved and this can be done in several ways:
Acoustic shelf VAZ 2112 with sides
Note. In this case, the speakers are installed on the ceiling using a podium. But this method has disadvantages. In particular, there is no way to firmly fix the speaker, which will lead to rattling and other errors. In addition, this method of installing the speaker risks a complete lack of bass.
Note. The reflected sound method implies the presence of an acoustic shelf. Only the store shelf is made in such a way that the speakers face the ceiling, where some of the sound is dampened by soft and fleecy material. In addition, if the VAZ 2112 car has headrests on the seats, then these are additional obstacles. Therefore, it is recommended to make a shelf yourself, especially since it is not so difficult.
Rear trunk shelf of VAZ 2112 made of carbon fiber
This article will help you save money and make your own carbon fiber parts for the internal body elements of the VAZ 2112. The total cost of all materials used is approximately $150. This price includes three rolls of carbon fiber, 2 liters of resin, wax, a set of brushes and sandpaper. These are all the necessary materials to make a shelf for speakers. So, we have prepared the materials, now it’s time to get down to business.
The rear shelf of the VAZ 2112 is a rather voluminous element, and besides, there are simple curved lines, so we can make this part without any problems. First of all, we roughly sand the surface so that it can adhere to the surface of the shelf as best as possible. Next, we measure the required amount of carbon material. When cutting the carbon fiber, we add three centimeters of margin on each side, and also keep in mind that we will have to fold the material at the edges so that the seam is not noticeable. When bending the fiber, you should secure all parts of the part with tape or insulating tape, so it will not slip. We try on the carbon fiber and make sure that it fits the surface and does not bulge anywhere. In several places we grab it with pieces of double-sided tape to the surface. During the application of resin, the fiber may separate from the shelf, creating a risk of bubble formation; the tape prevents this from happening.
We mix all the resin, each type has its own instructions and hardening time, before starting work it would not hurt to familiarize yourself with this information. The resin will begin to set in about 15 minutes, do not mix more than you can use in that amount of time. We strongly recommend using a respirator while working, otherwise you will get headaches. Now we begin to apply the resin to the carbon using the “peck” method on the first layer. Make sure that the carbon fiber does not slip, you need to work carefully because this happens very easily. We continue to treat the carbon with resin until it completely saturates the fabric and the air is completely released from the fabric. We wait until the first layer dries, this lasts about 2 hours. Next, take scissors and cut off the excess material. The next step is to apply another layer of resin. At least 3-4 layers of resin must be applied to the surface. Subsequent layers can be applied using normal brush movements and a thicker layer of resin. There is no need to sand between coats; this will do more harm than good. At the last stage, do not forget to add wax to the resin. Its quantity should be twice as much as the hardener. After the last layer has been applied, you need to let the part dry thoroughly, this will take about a day. The part will have a slightly cloudy appearance after drying, but do not be alarmed by this. The last crucial stage remains; it determines what the element will look like. We begin polishing the trunk shelf of a VAZ 2112, starting with sandpaper with the coarsest grit and ending with a final size of 1500.
Website about joints
I was tired of the constant rattling of the rear shelf and so I decided to get confused and made a new shelf with my own hands
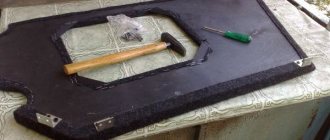
and so we take two pieces of plywood like this...
and cut out something like this. In order to cut it out, we take the old shelf and lay it on top of the plywood that is above in the photo, outline it with a marker and use a jigsaw. I made two such templates, the second one is about 1 cm narrower, along a curved arc that is located on the glass side. I did this because there will be fewer adjustments in the future
this is how it turns out, two cut pieces of plywood
try it on. We make the smooth edge of the plywood flush with the reinforcing strut of the body. if it sticks out, we cut off the edge of the glass, but don’t get carried away so as not to overdo it
After making adjustments on site, we take the first measurement from below, insulation on it, and the second cut plywood on top. We mark, use a thin drill to make holes so that the self-tapping screw fits better, and tighten them tightly in a circle. This is done so that it is stiffer and does not rattle
marking the places for the speakers...
but here it’s up to everyone... I decided to paint on both sides. This is the outside side, that is, from the trunk. and one more thing, if you decide to paint, then before painting you still need to go through the screws; in the next photo you can see exactly where. We pass the edges with sandpaper and sand until there are no sharp edges
Read also: Electric chair massager
Here you can see where to go with the screws. inner side, from the salon
After the paint has dried, we attach the shelves so that they do not rattle like the factory ones and sit rigidly. unfortunately I forgot to take a photo. I made them this way: when we remove the seats, from the trunk side we see three lugs on the body amplifier, put the shelf in its place and make marks so that the bolt that will be the mount goes into this lug, this is the front mount. As for the rear, we open the trunk and climb into it)))) what do we do next, and then we see under the rear window there are two protrusions on the left and right, so, we make marks along the edge of these protrusions and go together with the shelf to make fastenings, I bent I put it on the screws from the tin, after which we put the shelf back and climb into the trunk, there are holes in the protrusions, we make marks on the tin, we make marks, the fastenings are ready. All that remains is to screw it on. I almost forgot, it is advisable to take the front bolts with a screwdriver head, insert them into place and tighten them, since then you will not secure the shelf firmly. According to the fastenings, everything seems to be all right. The writing seems scary, but in reality there is nothing complicated.
after the fastenings are ready, we take the insulation and lay it in three layers...
Do-it-yourself acoustic shelf for VAZ 2111-12
The next step will be choosing a manufacturing method. Either assemble the shelf yourself from scratch, or improve an existing factory rear shelf.
Let's consider the advantages and disadvantages of each chosen method.
When converting a factory one into an acoustic one, you need to try to create a flat surface necessary for installing the equipment. The disadvantage of such a shelf is that it will be very difficult to adjust its functionality to your taste.
Now let's move on directly to the manufacture of an acoustic shelf for the VAZ 2111-12.
Now we begin processing and finalizing our acoustic shelf. It is advisable to apply a waterproof coating to the shelf. If you wish, you can reupholster the shelf with some material. For this purpose, leather or leatherette is used, as well as a special material that is somewhat reminiscent of drape or cloth. A furniture stapler works very well, but you can also use special glue. Please note that the material on the finished shelf should not be very stretched. You can add foam rubber during reupholstery to soften the shelf.
When the size of the speakers does not meet the standard, you can use podiums. (Don't forget to vote) Loading...
Why did it happen so?
Perhaps the automatic requests do not belong to you, but to another user accessing the network from the same IP address as you. You need to enter the characters into the form once, after which we will remember you and be able to distinguish you from other users exiting from this IP. In this case, the page with the captcha will not bother you for quite a long time.
You may have add-ons installed in your browser that can make automatic search requests. In this case, we recommend that you disable them.
It is also possible that your computer is infected with a virus program that is using it to collect information. Maybe you should check your system for viruses.
If you have any problems or would like our support team, please use the feedback form.
We recommend watching:
How to make an acoustic shelf for a VAZ 2114 Music in a car with your own hands
Delivery by transport company (cash on delivery, no prepayment)
Advantages:
- the cost of delivery of heavy and large-sized orders is much cheaper than that of Russian Post;
- There are practically no restrictions on the weight and dimensions of cargo;
- There is a wooden crate service - this is an additional guarantee of the integrity of the order.
Disadvantages: unfortunately, there are branches only in cities.
The estimated cost of delivery for an order up to 30 kg is 450 rubles.
List of transport companies with which we cooperate:
- TC "PEK" (cash on delivery service available);
- TC "Business Lines";
- TC "Energia";
- TC "KASHALOT" (KIT) (cash on delivery service available);
- TC "SDEK" (cash on delivery service available);
- TC "DPD";
- TC "ZhelDorExpedition";
- TC "VOZOVOZ";
- TC "Baikal-Service".
To send your order by transport company:
- Place an order in our online store by phone or on the website (registration is not necessary);
- After we receive it, our manager will contact you by phone to clarify the cost, delivery time and your wishes. Next, we will pack your order carefully and then send it to you;
- You will receive a shipment tracking number from us via SMS or email (if available). You can monitor the status of the order coming to you using our tracking service, as well as independently, on the transport company’s website using the track number. After the order reaches your locality and the manager of the transport company contacts you, you need to receive the order at their office or order home delivery;
- Upon receipt from the transport company, you pay the cost of delivery and order.
The cost of delivery is calculated based on the volume, weight of the selected product and the distance from the city of Tolyatti.
To send an order you must:
- indicate full name recipient;
- Your locality and region;
- series, number of passport or driver's license;
- Your phone number (contact).
TC "Business Lines" - Urgent delivery of goods from 1 kg throughout Russia. The exact cost can be found on the official website of the delivery service - https://www.dellin.ru TC "PEK" - Guaranteed safety of cargo for the entire duration of cargo transportation, clear information support, delivery of goods throughout almost the entire territory of Russia, Belarus and Kazakhstan in optimal time and accurately calculated cost of services. The exact cost can be found on the official website of the delivery service https://pecom.ru/ru/calc TC "SDEK" - Low tariffs compared to foreign courier companies, while the quality of the services provided meets modern international logistics requirements. Developed network of own representative offices. The exact cost can be found on the official website of the delivery service https://www.cdek.ru/calculator.html TC “ZhelDorExpedition” - Serves only large cities and towns. The exact cost can be found on the official website of the delivery service - https://www.jde.ru/branch TC "Energia" - Cargo transportation in Russia, the CIS and China. The exact cost can be found on the official website of the delivery service https://nrg-tk.ru TC "KASHALOT" (KIT) - Delivery of cargo from 1 kg to 20 tons throughout Russia and Kazakhstan. The exact cost can be found on the official website of the delivery service https://tk-kit.ru/calculate TC "Baikal-Service" - Transportation and delivery of groupage cargo by road in Russia. The exact cost can be found on the official website of the delivery service https://www.baikalsr.ru TC “DPD” - Transportation and delivery of groupage cargo by road in Russia. The exact cost can be found on the official website of the delivery service https://www.dpd.ru
Installing rear audio speakers
We show the installation of speakers using the example of a VAZ-2111 car. We install the rear speakers in the places provided by the factory in the right and left supports of the trunk shelf. The seat diameter of the rear speakers is the same as the front ones - 130 mm. We route the wires for the rear speakers from the instrument panel under the floor covering on the left side, next to the threshold. The factory wiring harness runs in this same location.
To route the wires, simply remove the sill trims and unscrew the edge of the floor trim. You will also need to remove the left side of the cushion and the back of the rear seat.
The length of the wires included in the speaker installation kit is usually not enough. Therefore, before installation it is necessary to purchase wires of the required length. Special two-core wires for speaker systems are available for sale. To connect each speaker you will need about five meters of such wire.
Algorithm for making a podium for a car ceiling
The podium on the ceiling of the car is characterized by large dimensions, since the largest speakers are usually located in this place.
Despite this, any car owner can make a podium on the ceiling - you just need to very carefully install the structure:
- It will be necessary to dismantle the headliner so as not to damage it during operation.
- The shape and appearance of the podium are selected based on the size of the speaker.
- Usually plywood and polyurethane foam are also used.
Obviously, the procedure for manufacturing ceiling podiums is similar to the similar process in the production of door podiums.
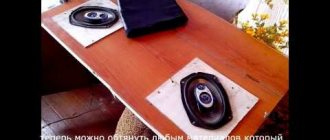
It is noteworthy that these schemes for the manufacture and further design of podiums are suitable for any type of speakers - both round and oval. Regardless of the available speaker dimensions (13, 16, 20 and 25, as well as oval 6*9), the podium will fulfill its main purpose - to improve the sound quality of the acoustics in the cabin and securely fix the speaker in the desired position.
Photo: step-by-step production of a plywood shelf
