Repair
As already said, it is prohibited to drive a car in the evening or at night if the side lights are not on, so we will look for the cause and then eliminate it.
If you are sure that the paths through which electricity passes are in good condition, the first thing to do is check to see if the lamps have burned out. And if they need a replacement, do it.
For the head lamp, the replacement procedure is as follows:
- Open the hood;
- We disconnect the battery, or even better, remove it. After all, we are talking about electricity, which is unsafe;
- From the engine compartment, holding the lamp with your hand, disconnect the wires directly going to the light bulb from the block;
- Remove the rubber cover;
- We move the latch to the side, disengaging the spring from the hook;
- We take out the size bulb;
- We replace it with a new one and put everything back together.
When the replacement is made, we check whether the head lamps are on.
Light bulbs in the rear dimensions on a VAZ 2110 are installed as follows:
- We de-energize the car;
- From the trunk (open) side, remove the contact part of the rear light with lamps. To do this, you need to release the latches;
- Remove the headlight bulb and replace it with a new one.
Do not forget that you cannot touch the halogen lamp with your bare hands. Replacement must be done with gloves. The fact is that dark spots will appear where you touch the light bulb. In addition, it has been proven that such a light bulb burns out much faster.
Replacing the turn signal lamp:
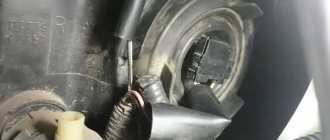
1) In this case, everything is very simple, first of all, you will need to understand where this lamp is located, so that it is more clear to you, see the photo below:
Note! As you already understood, in the photo the arrow indicates only the chamber or, as it is also called, the lamp base, but the lamp itself is not visible, so in order for you to be able to see it and easily remove and change it, grab this base part with your hand and then turn it it clockwise by a small degree, and thereby remove it from there!
2) When the base together with the lamp itself is removed, grab the light bulb with your hand (Indicated by the arrow) and then slightly press on it and turn it counterclockwise and remove this lamp.
Note! When you install a new lamp, make sure that it fits into the grooves, one of them is indicated by an arrow in the photo, and when it fits in there all the way, turn it so that it locks, and after fixing, check that it doesn’t fly out of there!
Important! When you buy a new lamp for either low beam or high beam, be sure to look at the markings that are placed on the base of the bulb, because cars may have bulbs for low beam, for example H1, and for high beam, for example H4, and therefore if If you also install an H1 lamp on the high beam, then both headlight units will shine differently! (Different lamps can only be installed by the previous owner of your car, because from the factory, as mentioned a little earlier, the same H1 bulbs were installed on both the high and low beams)
By the way, before changing the lamp, check the fuse that goes to it; perhaps it has simply blown and because of this the lamp does not work!
Additional video: For more information on how to replace all lamps, see the interesting and instructive video below:
Other malfunctions affecting the illumination of the rear lights
The reversing lights may not light due to a faulty switch. To troubleshoot, you need to do the following:
- disconnect the connector;
- unscrew the switch with a 21 key;
- remove the switch and replace it with a new one.
Note. The operation should be carried out quickly so that there is no large leakage of engine oil from the gearbox.
A malfunction of the car's lights may be caused by problems with the hydraulic corrector. With its help, you can change the angle at which the headlights are tilted (this is due to the different load levels of the car). The hydraulic corrector consists of a master cylinder, which is mounted on the dashboard, actuator cylinders of the headlights and connection tubes. It cannot be disassembled and cannot be repaired. The assembly part should be replaced. Removal and installation of the main cylinder of the headlight hydraulic corrector occurs in stages:
- remove the handle and cylinder lining by prying it off with a screwdriver;
- unscrew the nut with a 22" head;
- remove the hydraulic corrector.
The trunk light may also need replacing. In this case you need:
- Disconnect the cable and terminal of the negative battery;
- disconnect the rear light from the block with wires by opening the trunk lid;
- press the fastener parts and remove the holder with lamps from the flashlight body;
- unfasten the lamp by unscrewing two nuts;
- loosen the three nuts that secure the decorative trim of the luggage lid and unscrew the nut closest to the lamp;
- lift the cover and remove the lamp;
- The new lamp is installed in the opposite order to that described above.
Note. When installing the flashlight, first place the flange of its body under the decorative trim, and then tighten the nuts securing the trim.
Many cars of the VAZ family, including the VAZ 2110, have a problem that affects safety and also causes a lot of trouble for drivers. The rear light board is a thin strip with conductive tracks. You have to change this tape quite often, and with it the burnt out light bulbs. You can use the option of inserting iron cartridges from the VAZ 2101. So, to do this, you need to:
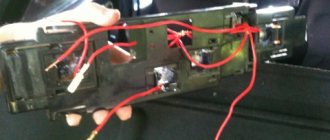
- remove and disassemble the rear lights, removing the board and the tape from them;
- buy single cartridges for stops and dimensions;
- purchase copper wire with a cross-section of 2.5 mm, connectors, M3 bolts;
- mark the places for the cartridges and drill them, finishing the holes with a file;
- to modify the cartridges for clearance and brake lights, turn the tip terminals 180 degrees;
- completely cut out the cartridges from the turn signals;
- secure the cartridges to the plastic with bolts and nuts;
- connect all the cartridges, laying the pluses on the turn signal, stops and dimensions;
- extend the connector block and install everything on the car.
Note. Before installation, you should check everything to ensure there is no short circuit.
Tips for motorists
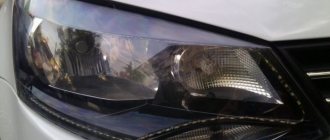
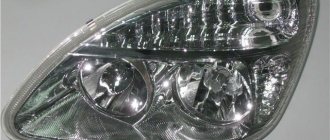
To figure out why the low and high beam headlights on a VAZ-2110 car do not work, you need to know what you need to pay attention to when trying to fix this problem. These cars are equipped with a headlight unit where the direction indicators are located, as well as two options for high and low beam headlights
These options differ in that in one case there are two single-filament lamps in the headlight unit (separately for the low beam headlights and separately for the high beam), and in the other case there is one, two-filament lamp. Therefore, there are two plugs in the electrical wiring for connecting the corresponding set of headlights.
Also involved in the operation of the electrical circuit of external lighting are: the external lighting switch, which is located in the cabin on the front panel; The headlight switch is located on the steering column; The low beam relay, the high beam relay and 4 fuses are located in the mounting block, and the high beam warning lamp is located on the instrument panel. When the high beams are turned on, all 4 filaments in the exterior lighting lamps should light up.
If one or more threads of the headlight lamps do not light, then, without getting out of the car, check the integrity of the fuses located in the mounting block under numbers F2, F3, F12, F13. Fuse F2 protects the low beam filament in the left headlight, F3 protects the high beam filament in the left headlight, F12 protects the low beam filament in the right headlight, F13 protects the high beam filament in the right headlight and the high beam indicator lamp.
Replacing fuses
If after replacing the bulbs the lighting still does not work, you should check the fuses. The mounting block is located on the left side of the steering wheel.
Fuse layout
Fuse F2 is responsible for low beam lighting in the left headlight unit, and F12 in the right one. It must be said that a fuse malfunction cannot always be detected visually. Therefore, it is better to install new fuses.
If the fuses are intact, but the lighting still does not turn on, you need to find the cause of the malfunction. To do this, you will need a test lamp, or even better, a multimeter.
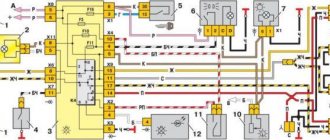
Head lighting diagram for VAZ 2110
It must be said that repairing the low beam on a VAZ 2110 is not difficult - you just need to ring the circuit and find a break in order to fix it.
Below is the optimal procedure:
- Since the low beam relay on the VAZ 2110 is often the cause of a low beam malfunction, you can start checking with it. Using the device, you need to determine whether voltage is supplied to it and whether it is at the output. If there is no voltage at the output, then the relay needs to be replaced.
- If there is no voltage supplied to the relay and there is no voltage at the fuse terminals, then you should check the VAZ wiring from the switch to the fuses, as well as the switch itself.
- If there is voltage at the output of the relay, you need to check whether it is supplied to the lamp connector. Often the cause of the malfunction is burnt or oxidized contacts. If the low and high beams disappear at once, then the ground wire in the headlight may have come loose.
Note! The cause of relay malfunction is often oxidized contacts, which simply need to be cleaned. Thus, by checking all the main components along the circuit, you will definitely find the cause of the malfunction
The low beam diagram for the VAZ 2110, which is shown above, will help to simplify this work.
Thus, by checking all the main components along the circuit, you will definitely find the cause of the malfunction. The low beam diagram for the VAZ 2110, which is shown above, will help to simplify this work.
Low beam adjustment diagram
Both headlights do not work
In the case when two headlights fail at once (and both the high and low beams do not work), the switch responsible for the external lighting is first inspected. It is easy to test the circuit using a test light or a regular tester. One wire is applied to ground, and the other to the 30th terminal. If this is not the problem, then there will be 12 volts on it (even with the ignition off). After turning the key, voltage will also flow to terminal 10. Such diagnostic results allow us to say with complete confidence that the light does not come on precisely because of the switch.
If there is no voltage at the terminals mentioned above, then most likely the wires have broken or the contact has been lost.
Why VAZ-2112 headlights do not work and repairs
On VAZ-2112 model vehicles, left and right headlights are mounted on the front. This design combines both low and high beam. Manufacturers can be Bosch or Avtosvet, respectively, and the products have minor differences. However, the mounts are always located in the same places, which allows you to easily install headlights made in different factories. The light bulbs used are also absolutely identical. Their characteristic feature is the presence of only one filament coil. What to do if for some reason the headlights installed on the VAZ-2112 do not work? We'll talk about this further.
Detailed diagrams of important components of the VAZ 2110 car
If you need an exact diagram of any component of your car, then I recommend that you familiarize yourself with these diagrams.
Generator system connection diagram
| 1 – battery | 2 – generator | 3 – mounting block |
| 4 – ignition switch | 5 – battery charge indicator lamp, located in the instrument cluster |
| 1 – battery | 2 – generator | 3 – starter |
| 4 – ignition switch |
Diagram of the ignition system on the VAZ 2110
| 1 – battery | 2 – ignition switch | 3 – ignition relay |
| 4 – spark plugs | 5 – ignition module | 6 – controller |
| 7 – crankshaft position sensor | 8 – master disk | A – matching devices |
Contactless ignition system diagram
| 1 – ignition coil | 2 – ignition distributor sensor | 3 – spark plugs |
| 4 – switch | 5 – ignition switch |
Turning on the rear window wiper and washer
| 1 – washer motor | 2 – mounting block | 3 – ignition switch |
| 4 – rear window wiper and washer switch | 5 – rear window wiper gear motor | K6 – additional relay |
| A – to power supplies | B – the order of conditional numbering of plugs in the gear motor block |
Diagram of the automatic heater control system
| 1 – fan motor | 2 – additional resistor | 3 – controller |
| 4 – mounting block | 5 – ignition switch | 6 – cabin air temperature sensor |
| 7 – recirculation switch | 8 – recirculation valve | 9 – micromotor gearbox for heater damper drive |
| A – to the instrument lighting switch | B – to power supplies |
The rear lights on the VAZ 2110 do not light up, what could be the problem? In this article we will look at the main types of faults in the electrical equipment of this car, and at the same time we will learn how to replace the rear marker lamps of a VAZ 2110.
The device of the instrument panel on the VAZ 2110
The term “instrument panel” on cars refers to a block of warning lamps and indicators located in front of the driver.
The correct name of the part is the shield, which is installed in a plastic panel called the dashboard. The instrument panel on the VAZ 2110 includes:
- a device for determining the speed of movement - a speedometer;
- speed meter - tachometer;
- indicators of coolant temperature and fuel level in the tank;
- control indicator lamps equipped with yellow, orange, green, blue and red filters;
- lighting system (6 separate lamps);
- installation location of the warning lamp.
On VAZ 2110 cars it is possible to see several options for instrument combinations:
- The first releases used an electromechanical version of the panel with serial number 2110-3801010. Externally, the device is easily identified by a mechanical odometer mounted on the speedometer scale. Its drive is made from an electric motor, the rest of the indicators operate on a magnetic principle. On the back of the shield there are two connection blocks located at right angles.
- Later, an electronic version of the dashboard appeared, equipped with a liquid crystal display on the bottom of the speedometer. There are “gauges” with a “suction” indicator (which was not installed on the VAZ 2110 with such a panel from the factory) or with an airbag lamp in the same place. There may be cars with a double display window - under the tachometer and speedometer.
- A very rare variant of the instrument cluster is designed for the VAZ 21106, equipped with a 2.0-liter Opel engine. The part number is 21106-3801010 and features an extended speed measurement range (up to 240 km/h) and an additional liquid crystal display on the bottom of the tachometer.
- On the latest versions of the VAZ 2110, a shield began to be used, unified with the 2118 Kalina car (model 1118-3801010), differing in the layout of the scales. Such a part is called a “new sample” panel among its owners. The device is installed in a modified type dashboard.
“New” electronic panel
Old style electronic panel
Electromechanical panel
Shield for Opel engine
Depending on the manufacturer and date of assembly, there are different designs for the VAZ-2110 instrument clusters. It is possible to digitize the tachometer in hundreds or thousands of revolutions, write technical information on the scale, etc.
Replacing the rear light and its elements
Tail light bulbs for VAZ 2110
Replacement of the rear light occurs according to the following scheme:
- disconnect the wire from the negative terminal of the battery;
- Having opened the trunk lid, unscrew the screws that secure the rear trunk trim (2 pcs);
- having pressed the rear upholstery, bend the side upholstery, which will allow access to the rear light connection parts;
- disconnect the flashlight and the block with wires;
- loosen the nuts that hold the rear light and remove the washers;
- remove the lamp from the car;
- release the flashlight body from the holder and lamps by squeezing the claws of the clamp;
- install a new lamp, performing the steps in reverse order;
- tuck the side trim under the seal.
Replacing parking lamps and tail lights
Rear fog lamps in VAZ 2110
When changing a vehicle's headlight bulb, you must perform the following steps:
- remove the lamp together with the socket from the optical element;
- remove the lamp from the socket.
Replacement of light bulbs in the rear lights is carried out according to the following algorithm:
- lamps need to be changed from the luggage compartment side;
- remove the contact part along with the lamps (it is held in the lamp body using latches).
Side turn signals
If the side turn signal lighting malfunctions, do the following:
- move the side turn signal forward, pulling its rear part;
- remove the above part;
- disconnect the lamp socket;
- replace the lamp by sliding the cover;
- If you need to replace the cartridge, you must disconnect the wires.
Car license plate light
License plate light bulb VAZ 2110
If the lights that illuminate the car number do not light, the actions should be as follows:
- Unscrew the two self-tapping screws with a Phillips screwdriver and remove the lampshade;
- replace the lamp, first removing the transparent cover from above.
Stop light and reverse
You can remove and install the brake light and reverse light according to the following scheme:
- remove the flashlight board by squeezing the protrusions;
- remove the lamp by pressing down and turning counterclockwise;
- disconnect the wiring connector;
- unscrew the nuts (two outermost and two middle) of the decorative trim using a tool of the appropriate size;
- remove the cover;
- Unscrew the two nuts that secure the lamp and remove it.
Fog lamp
To properly replace the light source in the fog lamp, you do not need to remove it.
So:
- disconnect the negative wire (its terminal) from the battery terminal;
- remove the rubber protective cap from the rim on the back side of the reflector;
- remove the tip of the “negative” wire from the reflector output;
- remove the lamp mounting bracket in the form of a spring, squeezing it with your fingers;
- remove the lamp from the hole located in the reflector;
- disconnect the tip of the “positive” wire from the lamp wire.
You can assemble the lamp by following the reverse procedure.
Replacing the entire fog light
If you need to replace the entire fog light, the steps are as follows:
- disconnect the block of its wires from the harness;
- unscrew the two self-tapping screws securing the cladding using a Phillips screwdriver;
- remove the lining;
- remove the headlight;
- Install the new headlight in reverse order.
Design of the rear light of the VAZ 2110
Bulbs in the taillights of the VAZ 2110
The rear light of the car consists of the following sections:
- anti-fog light (red light diffuser);
- reversing lights (white light diffuser);
- turn indicator (orange light diffuser);
- side light and brake signal (red light diffuser);
- reflector (reflector).
Installation process
Ready-made kits usually contain an installation diagram for the VAZ 2110. However, you should understand that adjustments may need to be made during the process.
Before starting installation work, you need to make sure there is space for them. If it is not provided for in your model, then you should think about it and decide on it yourself. It is recommended to do this through the front bumper.
The installation procedure is as follows:
- At the very beginning we lay out the wiring for the fog lights. It is laid in the same way as the main wiring - along the wing, through the left side (under the hood).
- After this, you need to supply power to the button, which will need to be placed on the dashboard. According to the standard, power is supplied from the fuse on the right dimensions. However, you can go the other way by connecting power to the light switch. You can take power from the output to the dimensions, but this method should be used last, since the battery may discharge prematurely if you forget to turn off the PTF.
- We connect the plug together with the headlights. If the lights do not light up, then there was some error in the circuit. Each component of the network should be carefully checked. Often the problem is in the relay. To identify it, you need to make sure there is a click; if there is none, the relay should be completely changed.
It is quite simple to check that the headlights are set correctly and are working correctly: drive out onto the road and turn on the headlights.
If the light is directed slightly downward, but illuminates both the road surface and the side of the road equally well, everything is installed correctly.
Causes
The side lights can be turned on either with the ignition off or on. In the event that at least one side light bulb does not light, relay K1, located in the mounting block, will turn on a warning light on the instrument panel to warn the driver about this malfunction.
In this case, the driver, with the side lights on, needs to get out of the car and see which of the four lamps is not on. If all the size lamps are on, then you also need to check the brake light lamps, since relay K1 is also activated for these lamps, and if at least one of them burns out, the warning lamp on the instrument panel will light up. After all, brake lights also ensure traffic safety.
The electrical circuit of the side lights is protected by two fuses. F11 (5A), works on the side lamps on the starboard side, and F1(5A), on the starboard lamps, it also protects:
- license plate lamps;
- instrument panel lighting lamps;
- side light indicator lamp;
- trunk light lamp.
Therefore, if fuse F1 blows, troubleshooting will have to be done in all of the above electrical circuits.
If all the side light lamps do not light up, then first of all you need to check the Ш2 connector block in the mounting block (it is located horizontally), since it is through contact No. 7 of this plug connector that power is supplied to the side light lamps. A possible reason for the dimensions not turning on could be the three-position switch located on the front panel. The serviceability of the switch can be checked by ringing it with a tester and, if necessary, replaced.
Wiring test for non-working brake lights (ground test)
Let's look at the basic diagram: the brake lights and the reversing lamps have a common ground pin. If contact with this pin is broken, the reverse lamps will not turn on. Well, brake lights too.
Connector for connecting “internal” lights
On the left side there is a connector through which the wiring goes to the fifth door. The connector has black and red wires. Check the voltages on them. Most often the ground on the black wire does not ring. But maybe the connector itself needs to be cleaned.
If the “plus” does not come to the red wire, we check the “frog”. It's simple here:
- Disconnect the connector with two wires from the limit switch;
- Using 17mm wrenches, loosen the two nuts: holding the lower nut, rotate the upper one;
Removing the frog brake
By the way, one of the connector terminals receives a voltage of “12 Volts”. Check it!
How to Change the Dimensions Light Bulb on a VAZ 2110
Installation, repair and replacement of front and rear dimensions of the VAZ 2110
The SDA clearly states that it is not possible to drive in the dark or in poor visibility conditions without the dimensions included on both the front and rear of the vehicle. Today we will look at how the dimensions are placed on the VAZ 2110, what could be the cause of the breakdown, and how to fix them.
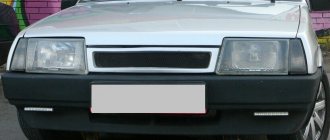
Vas 2110 with markers and DRLs
Business date, meeting
The front dimensions are called headlights and are found in the headlights in front of the car on either side of it. They are extreme on the sides of the lighting system and their name comes from the fact that they show the size of the car and the width of oncoming cars.
Various options for side and daytime lights
The rear dimensions are designed for the same mission. for you to move on. This is especially true when overtaking if you don't want someone who didn't make the real size hit your Swallow.
Adjustable position of rear lights
READ Where is the Fuel Pump Relay Cherie Amulet
This is an important tip: if you suddenly have to go at any cost and you get burned, the flask cannot be replaced with a new one in the left dimension, due to its absence, do not be lazy and move it to the right. And we will tell you how to do this.
device
Headlights (front dimensions) are part of the headlight. The rear dimensions are part of the rear light of the VAZ 2110, this is one of its sections. Nearby are the rear fog lights, tail lights, turn signal, reflector, brake light and size.
Causes of breakdowns
There can be many reasons for malfunctions. The most common is that the lamps are on, which naturally prevents the side lights from turning on. Particularly unreliable in this regard are the lamps brought to us from the Middle Kingdom.
Detailed description of the submersible lamp High beam, rotation and dimensions
Do it yourself.
REPLACING HEADLIGHT BLANKS BASED ON VAZ 2110, 2111, 2112
REPLACING TUBERS
Front side lights VAZ 2110
, 2111, 2112. REPLACEMENT OF LAMP
OVERALL DIMENSIONS
OF LADA.
Although they attract more than the “democratic” price, and at any wholesale outlet, you cannot encounter them. Therefore, it may be worth mentioning the saying that we are not such rich people that we buy cheap things twice.
READ Spark Lost VAZ 2110 16 Valves
Good branded light bulbs will last several times longer, and you won't have to change them forever.
Bulb Dimensions
Sometimes the dimensions “blink” or the instrument panel lights flash when they turn on the parking lights. Many blame this size on the relay but can't find it. The VAZ 2110 carburetor does not have a side relay, there is only a relay for high and low beams.
For a vehicle with an injection relay, locate all fuses in the mounting block. Moreover, if the relays light up one after the other, you should immediately contact an electrician as this indicates a short circuit somewhere in the circuit and therefore a burnt out vehicle.
Mounting block and relays and fuses
Never, under any circumstances, replace a blown fuse with a larger one, or one that is not a “fault” at all.
Repair
As already mentioned, it is prohibited to move the car in the evening or at night unless it is on fire. parking lights so we will look for the cause and then fix it.
If you are sure the electrical paths are working, first make sure the bulbs haven't burned out. And if they need replacement, do it.
READ What Oil to Use in Honda Civic
For the headlight, the replacement procedure is as follows:
- Open the lid;
- Disconnect the battery, or better yet, remove it. We're talking about electricity, which is dangerous;
- From the engine compartment, take the lamp with your hand, disconnect the wires going directly to the lamp from the unit;
- Remove the rubber cover;
- Move the lock to the side by unhooking the spring using the hook;
- Take this flask;
- We replace it with a new one and put everything back together.
When replacing, make sure the main lights are on.
Rear marker lamps on the VAZ 2110 are installed as follows:
- Turn off the car;
- Remove the contact part from the body side (open) the epiphany with the lamps. To do this, press the latches;
- Take this flask, replace it with a new one.
Remember that bare hands cannot touch the halogen lamp. Replace gloves. The fact is that when you touch the light bulb there will be dark spots. Moreover, this has been proven. This bulb burns out much faster.
Connection diagram
Before we start troubleshooting, let's look at the connection diagram for external lighting devices on the VAZ 2110.
Electrical diagram of external lighting devices on the VAZ 2110
The numbers on the diagram indicate:
1 – front side light lamps; 2 – mounting block; 3 – external lighting switch; 4 – ignition switch; 5 – indicator lamp for external lighting; 6 – tail light lamps; 7 – brake light lamps; 8 – license plate illumination; 9 – dashboard lighting switch; 10 – reverse alarm switch; 11 – brake indicator switch; 12 – on-board control system unit; 13 – reverse indicators; K1 – lamp control relay.
How does this scheme work? After turning on the external light switch 3, the voltage from the battery is supplied to the mounting block 2, then through fuses F1, F11 and the control relay it is supplied to the side lamps. In this case, F1 is responsible for the left side of the car (side), F11 for the right. Relay K1 turns on the warning light on the instrument panel if any of the side light lamps stops lighting.
Typical faults and their elimination
So, why might the dimensions not work on the VAZ 2110? There are several reasons, we will list them all:
- The fuse responsible for powering the parking lamps has blown.
- The power cable has broken.
- There was a short circuit in the supply wire to the car body.
- The control relay K1 has failed.
- The light bulbs have burned out.
- The exterior lighting switch is faulty.
Let's try to independently find the problem with the rear lights on the VAZ 2110 and fix it. First of all, let's analyze the situation. As mentioned above, fuse F11 is responsible for the starboard side, and F1 is responsible for the left side.
If only the rear lights do not light up, but the front ones work, then it is logical to assume that the fuses are in order. Otherwise (the side does not light up both front and rear), it makes sense to check the serviceability of the fuses in the mounting block. Where to find it will be described at the end of the article.
Now we need the so-called “control”, which is easy to assemble yourself. You need to take any indicator LED and a resistor with a resistance of 800 Ohms.
Let's start with the rear lights. We open the trunk and find two pockets in the upholstery at the level of the rear lighting fixtures that cover the lights. We bend them and get access to the power connector.
We bend the upholstery and see the back of the lights with the power connector
On the top and bottom of the lantern we find two latches, squeeze them and remove the board with the lamps from the lantern.
Carefully remove the power connector from the board. We connect one “control” probe to the body of the VAZ 2110 car in a place that can provide good electrical contact with the metal. We turn on the dimensions and measure the voltage at the connector socket to which the red (right side) or red-yellow wire (left side) goes.
If there is voltage, then the problem is in the flashlight. We remove the flexible board and carefully inspect the tracks - they often break due to vibration.
If everything is in order, then the reason is poor contact of the light bulb with the socket or its failure. We considered the case when there is voltage on the flashlight block. If it is not there, we continue the search.
We find the common power supply for the rear light devices (see diagram) and measure the voltage on it. The wires are still the same - red and yellow-red. If there is voltage, then the cause of the malfunction is a break in the wire going from this connector to the corresponding size. We inspect the harness, find a break, and fix it.
There is no tension - we move on. Now we need a mounting block. Where to find it will be described below. On the back of this block we find connector Ш2 and measure the voltage at the contacts to which the red and yellow-red wires go.
If it is, then the reason is a break in the wire running from the mounting block to the power supply block for the rear light devices. We inspect the harness, find it, eliminate it. No voltage? We measure the voltage at the same connector, the wire is black and white.
If it is there, then there are problems with the mounting block - fuses F1 and F11, control relay K1, broken tracks. We check the fuses, inspect the tracks, change the relay or install jumpers instead (see diagram).
Location of jumpers instead of control relay K1
If there is no voltage, the cause of the malfunction is a break in the black and white wire coming from the outdoor lighting switch to the mounting block, or the switch itself.
Important! Often the cause of a malfunction can be poor contact in the pads. When searching for a breakdown, it makes sense to disconnect them and make sure that the contacts are not oxidized and that the connectors are not filled with water or clogged with dirt.
Well, let’s talk separately about fuses that can burn out for two reasons:
- Voltage surge in the on-board network.
- Short circuit in power supply circuits.
In the first case, it is enough to replace the blown fuse with a device of the same rating (5A). In the second, the task becomes somewhat more complicated - after replacing the fuse, it burns out again. You will have to find a short circuit of the supply wires to the body, which is the negative power bus. We inspect the harnesses, find them, and remove them. Most often, insulation damage occurs where wires pass over and through the ribs of the body.
The most common lighting problems in the VAZ-2112
All faults that arise are divided into two categories:
- mechanical;
- electric.
During vehicle operation, external lighting devices are exposed to various negative influences. They are often rendered unusable:
- stones flying out from under the wheels of cars driving in front;
- sand;
- branches of bushes, etc.
Thus, the first thing to do if you were unable to turn on the headlights is to check their integrity. The simplest option in this case is to replace the entire unit that has become unusable. Removing it is not difficult. In addition, the headlight can be repaired
It is important to pay attention to restoring its tightness - ignoring this requirement leads to rapid failure of the entire unit, since moisture that gets inside contributes to:
- constant fogging of lenses;
- oxidation of contacts;
- rapid wear of fasteners.
The most common electrical failure is a light bulb burnout - this is usually indicated by the failure of only one of the headlights.
There are no special options here - you will have to change it to a working one. If the lamps are good, then you should suspect the following faults:
- the fuse link has burned out;
- the electromagnetic switching relay has deteriorated;
- one of the circuit contacts has come off (or oxidized);
- there is a break in the wires;
- there is no mass.
Where to look for the fuse
All that remains is to figure out the mounting block. Let's try to find it, check the fuses, and at the same time dismantle it to get to the connectors located on the back of the block. The mounting block is located to the left of the driver under the dashboard and is closed with a protective cover. Press the lock button and fold back the cover along with the mounting block.
Removing the cover of the mounting block in the VAZ 2110
Before us are rows of fuses (inserts) and relays. We are interested in inserts F1 and F11, which are responsible for the left and right sides, respectively. Both fuses are 5 A.
Numbering of fuses and relays in the VAZ 2110 mounting block
To get to the connectors, you need to unscrew the fixing screw using a Phillips screwdriver, after which the unit can be removed and turned over.
Removing the mounting block in the VAZ 2110
So we have learned how to troubleshoot rear parking lights in a VAZ 2110. Now, because of such a small thing, it is not necessary to contact a specialist whose services cost a lot of money.
Replacing the headlight bulb
Replacing the size lamp in the rear lights of a VAZ 2110 is quite simple. First of all, we dismantle the board with the lamps in the same way as we did when troubleshooting: we bend the upholstery flap, squeeze the two latches and remove the board from the lamp (see above). In this case, the power supply does not need to be disconnected - the length of the wires is quite enough to replace light bulbs. Before us are three lamps - one small and two large. We need the first one.
The side light bulb in the rear light is the smallest
We press it down slightly and, turning it counterclockwise, remove it from the socket. In place of the burnt one, we install a new one, also drowning and turning, but clockwise. Turn on the side light and check the result of the work. If everything is in order, we install the board in place, making sure that both latches work, and close the canopy with the upholstery flap.
Replacing the reverse switch
It is recommended to change the reverse sensor on an overpass by removing the engine armor. Disconnect the connector and unscrew the sensor using a 21 key. After removing the sensor, oil will run out of the hole, so prepare a new one in advance.
By the way, do you know how to improve the performance of the rear lights?
As you know, if any light fixtures malfunction, operating the vehicle is prohibited. And here there are two options: go to the nearest service station and pay a lot of money there, or try to fix the problem yourself. In this article, we will analyze the reasons for the reverse light “freezing” on the VAZ 2110 and try to fix the problem ourselves.
PRICES OF COMPONENTS
There is also a separate section for prices for all the parts that may be needed when repairing this part of the car, because if the side lights on a VAZ 2114 or the fuses have blown, they will still have to be replaced with new ones. In any case, all the components are quite cheap, all we might need:
- Marker lamp;
- Fuse;
- Power button;
- A whole fuse block.
Today, an ordinary white light bulb costs up to 30 rubles; of course, the price depends on the individual pricing policy of a particular seller. Individual fuses can be selected for up to 50 rubles, unless, of course, you want to install a higher quality option. Button, if you look for exactly the same one as the original one, you will have to pay up to 300 rubles. In some situations, more serious problems may arise and you will have to change the entire unit, this is quite an expensive proposition, together with all the wires it will cost up to 1000 rubles.
Replacing the sensor
And now it’s time to consider the process of replacing the reverse sensor on various VAZ cars - from 2106 to 2115. Here are the instructions.
VAZ 2107
Let's start with the VAZ 2107 car. On VAZ Classic models everything is done exactly the same.
So:
First, we look for the sensor - it is located on the right side of the gearbox, if you look at the car as it moves. It is very difficult to make a mistake - this is the only part in the gearbox where two wires fit.
- If the wires are broken, then look for protruding contacts.
- If the wires are still on the sensor, then disconnect them.
- Next, you will need a 22 key. They need to unscrew the sensor. For convenience, it is better to take a longer wrench, since over time the sensor will stick to the crankcase.
- If you cannot unscrew the reverse sensor using a wrench (head), then you need to do this using a hammer and chisel.
- Then clean the seat from dirt using a knife.
- Remove the metal washer along with the dirt and replace it with a new one.
- Insert the sensor and tighten it using the same wrench until it stops.
- Next you need to put the wires back on. If necessary, crimp the contacts with pliers.
- And now, the replacement of the reverse sensor on the VAZ 2107 is completed!
Some people have a question about oil - whether it will leak or not. In this case it will not leak.
VAZ 2109
Let us remind you that this point applies to the Samara family as a whole, and not just to the VAZ 2109 car:
- Remove the protection from the car engine, if any.
- The location of the sensor on a VAZ 2108 and similar cars is slightly different than on a Classic, since the car has front-wheel drive.
- As the vehicle moves, the sensor is located on the left side.
- If the Classic had to be driven into a viewing hole, then cars with front-wheel drive can simply be lifted under the left front wheel using a jack.
- Again, the electrical wiring leads to the sensor.
- Remove the wires.
- To remove the sensor you will need an extended 22mm socket and a wrench.
- Using the head, remove the sensor.
- Prepare a container and, as soon as you unscrew the sensor, place it so that the oil does not spill on the floor.
- Insert the new sensor as quickly as possible.
- Screw it in by hand first and then tighten it using the same socket and ratchet.
- Connect the electrical wiring wires.
- Add the required amount of oil.
All is ready!
VAZ 2110
Cars of the VAZ 2110 family are equipped with engines from the VAZ 2108. Therefore, there is no point in writing the same information a second time. The answer is: VAZ 2110 replacement of the reverse sensor - see the information above.
VAZ 2114
Replacing the reverse sensor on a VAZ 2114 or cars of the Samara-2 family. Instructions:
- The essence of the process is the same.
- Raise the car using a jack.
- If necessary, remove the engine protection, but this may not even be necessary.
- Find the sensor; on new Samara-2 models it has a slightly different location, but finding it will also not be difficult.
- Disconnect the electrical wiring connector from the sensor.
- Using a 22mm wrench (it’s more convenient to use a head, but you can also use a wrench) unscrew the sensor.
- Before removing the sensor from the connector, place an oil container.
- Take out the old sensor and insert the new one along with a new ring.
- Screw the sensor using a wrench or socket.
- Wipe the gearbox housing from oil traces.
- Connect the wires.
- Top up the level to the required level.
- Reinstall the engine protection (if necessary).
So, the sensors have been changed. Now you can start checking their functionality.
Common optical problems and how to fix them
Problems with automotive optics can be divided into mechanical and electrical problems.
During operation, automotive optics are subject to mechanical stress. It can be damaged by small and large stones, sand, branches of bushes, etc. The easiest way to eliminate damage is to replace the headlight or flashlight. To do this, you need to know how to remove the headlight on a VAZ 2112. But you can restore the optics with your own hands.
The following mechanical problems are possible:
- cracks and scratches on the glass surface;
- damage to fasteners;
- violation of tightness.
Scratches and cracks can be eliminated by grinding and polishing. Destroyed fasteners are replaced with new ones. If the seal is broken, the optics sweat, so it needs to be restored, as visibility deteriorates and the contacts oxidize. For serious mechanical damage in the form of chips, tools are selected depending on the degree of damage.
Before repairing, you should study the material used to make the optics. Depending on this, you can use cold or conventional welding.
When it comes to electrical problems, the most common cause is burnt out light bulbs. In this case, they need to be replaced.
If the reason is not the light bulbs, then the following malfunctions are possible:
- fuse is blown;
- The switching relay does not work;
- contacts are oxidized or burnt;
- switch is faulty;
- The integrity of the wiring is broken; ground is missing.
Replacing blown fuses
If the brake lights of the VAZ 2112 do not light up, the turn signals do not work, or the light has completely disappeared, you need to sequentially check all the elements that are part of the lighting system, including the fuse box and power supplies.
Signs of trouble
If the odometer suddenly refuses to work, and the speedometer works jerkily, or “lies” regarding speed and mileage, these are direct indications that the speed sensor or its drive is failing. It is also possible that there is a problem in the electrical circuit, the connector is failing, the pinout is mixed up, if the operation of this system has been interfered with, etc.
In addition, an indirect indication of a malfunction may be that the car stalls at idle (although there may be other reasons for this).
Naturally, if the speedometer begins to give deliberately false readings, and the “CHECK ENGINE” light is on on the dashboard, then the reason is the speed sensor.
How to replace side light bulbs on Renault Logan: video and photos
Any modern car has a wide variety of lighting bulbs. Some of them illuminate the interior of the car, while others provide visibility on the road. One of these important types of lamps is the side lighting lamp, thanks to which at night or in conditions of limited visibility you can easily distinguish the dimensions of the car.
Replacing the front light bulb on a Renault Logan
Many Renault Logan owners, when the light bulbs fail, go to a service station to replace them. But the problem can be solved on your own. Changing a parking light bulb is as easy as changing any other bulb. Moreover, if you have an alarm connected to these lights, the bulbs may burn out more often than usual.
Since each such light element has its own expiration date, no one is immune from the fact that one of them fails along the way and will have to be urgently replaced. In this article we will talk in detail about how to change the side light bulb on a Renault Logan.
Front headlight
Block headlight (auto edition)
In Logan, block headlights are installed, and therefore in one design there are low beam and high beam lamps and direction indicators. When replacing any of the lamps, it is not necessary to disconnect the battery. The fog lights are located separately from the headlight unit at the bottom of the bumper; more information about replacing the lamp in them is here.
The process of replacing marker lamps in detail
Some owners remove the block lamp completely, but this is a lot of unnecessary steps. My hand can easily fit into the gap, even where the battery is!
- Use the head to remove the headlight unit.
- Then you need to disconnect the negative wire from the headlight.
- Remove the entire front bumper.
- Disconnect the headlight range control cable.
- To move the headlight to the side you need to unscrew three screws.
To replace a side lighting element, no additional equipment is required; the process will not take more than 5 minutes.
- In order to replace the lamp, you need to open the hood and feel on the headlight unit for the side lamp socket, which is located just below the headlight lamp.
- Finding the lamp body by touch is not difficult. We took out the socket and tried to remove the burnt out lamp.
- Next, turn the cartridge to the left and remove it from the headlight housing. The lamp has been removed and we are preparing to install a new parking light lamp.
- To replace the lamp, just pull it. It is only necessary to remove the light bulb from the housing while wearing cotton gloves.
Troubleshooting methods
What are the troubleshooting options:
- If there is no backlight, you need to check the fuse and replace it if it is blown. All failed light bulbs must be replaced.
- If the sensors are not working, you should check the integrity of the wiring with a multimeter or other tester to check the wiring. Damaged sections of wires also need to be replaced.
- If the car interior is humid, over time this can lead to oxidation of the shield contacts. If such a malfunction occurs, the contacts must be cleaned or replaced.
- If the problem lies precisely in the inoperability of the instrument cluster, then it is better to entrust the repair to specialists. It is possible that in the process you will have to resolder some elements, so if you do not have experience in carrying out such events, then contact an electrician (the video was shot by Alexey Lipatov).
Instructions for dismantling the tidy
So, how to remove and disassemble the device for its subsequent repair or replacement:
To begin, you will need to use a Phillips screwdriver to unscrew the two self-tapping screws located on the top trim. After this, you also need to unscrew two more bolts, they are located on the bottom of the lining. Then you need to carefully detach the cover and put it aside. Next, the connectors with wiring from the buttons located on the sides of the device are disconnected. This will allow you to move the trim to the side. Only after these steps can you unscrew the two bolts that secure the tidy to the center console
They are located at the ends. Then you need to carefully slide the combination back, parallel to disconnecting it from the metal plates installed on top. For complete dismantling, you also need to disconnect the two connectors with the wiring on the back of the panel. Having done this, you can remove the device from the mounting location and begin repairing or replacing it. The assembly procedure is carried out in reverse order.
