Before answering this question, you must have an idea about car paints, their composition, method of application and preliminary preparation of the car body for the process of applying the paintwork itself. We will talk about this consistently and in detail below in this interesting and informative post.
First, let's look at the types of car paints and what they are.
- Metallic is a common name for inexpensive and at the same time high-quality paint. This material requires high-quality preparation of the body before painting (putty, primer). This paint has a fairly large selection of color shades that shimmer in the sun.
- Acrylic car paint is a two-component paint. The choice of shades is half that of metallics. However, it has a low price, which is its main advantage. Due to its affordable price, this enamel is very popular among owners of inexpensive cars. Many people choose this particular paint, because it does not need to be opened with varnish, and it shines like varnish.
- Alkyd enamel is one-component, so it takes much longer to dry. Of course, this paint is the cheapest, so you shouldn’t expect excellent quality from it. There are often cases when a car painted using modern painting technology becomes dull after half a year.
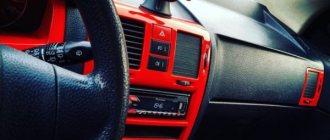
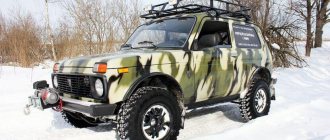
- Matte paints are gradually gaining popularity. Every year more and more matte cars appear on the road, and a significant part of them are tuned cars. Obviously, car tuning contributes to the appearance of matte enamels on store shelves. But so far there are not many people who want to transform their car, and the demand for these enamels is small.
- Powder paint for painting a car body - Powder paint for painting a car consists of a dry mixture of small particles of paint. Pre-magnetized particles are sprayed onto the car body and then, under the influence of high temperatures, they melt and form a dense, uniform film on the surface. Losses with this painting method are only 2%, since the paint that does not end up on the body is cleaned, recycled and used again for painting. At the same time, the paint is environmentally friendly and non-flammable.
- Water-based paints for auto body work - New in the field of paints for painting cars are water-based paints. They have existed for just over five years, but many European auto giants already paint all their cars using this method. Its advantage is its high environmental friendliness, since the paints do not contain harmful solvents. Another important advantage of water-based paints is their higher surface coverage. This is achieved due to the smaller size of the pigment particles. The quality of the coating is in no way inferior to solvent-based paints. Water-based paints have good adhesion and can therefore be applied to a variety of surfaces, including old paint.
Properties of car paint
Any paint for painting a car necessarily includes three main components
- Pigment is a substance that determines the color and tone of a car. In addition, this component has some other functions, including corrosion inhibition.
- A binder is a component that ensures that the pigment is firmly held on the surface of the car. In addition, it forms a protective glossy layer over the pigment after the paint has dried.
- Solvent - thanks to it, the paint is initially liquid with the fluidity necessary for application.
The hardness of car paint is determined relative to the hardness of glass as a percentage. The higher this percentage, the more resistant the paint is to scratches and various mechanical damage. As a rule, the hardness values of paints from various manufacturers range from 50-55%. It should, however, be taken into account that the greater the hardness of the enamel, the less its elasticity and the greater the likelihood of cracks forming in places of bending and vibration.
Complete repainting
Repainting a car completely is a long and serious process that requires dismantling the relevant components. If they are permanent, protect them from paint (cover them with film, duct tape, or apply Vaseline).
Experts recommend that before repainting the car, remove the previous layer of paintwork, thereby making your work more durable. Remember - the more different the new car enamel is in color, the more layers you will need, and, accordingly, the greater the risk that the coating will last a long time. If you decide to repaint your car using old paint, at least apply a primer over it for better adhesion of the composition and sand it first.
Preparing the car for painting
You can remove old paint before repainting your car a different color in one of two ways:
- mechanical - involves the use of a grinding wheel and a hard abrasive (spatula, brushes with iron bristles);
- chemical - involves the use of an auto-wash. This aggressive substance is made on the basis of orthophosphoric or formic acid. When using an auto-wash, remember the safety rules: respirators, use according to instructions, ensuring air access.
Mechanical methods for removing paint from a car
Having removed the old layer of paintwork, it is possible to repaint the car using the standard technology for painting a car with your own hands:
- wash and degrease the body;
- sand it first with coarse-grained sandpaper and then with fine-grained sandpaper, remove areas of corrosion;
- level out any unevenness, if any, using putty;
- apply a primer to ensure adhesion;
- after the primer has dried, apply a layer of auto enamel one at a time;
- After the last coat of paint has dried, apply varnish, let it dry, and then polish for added durability.
If you are changing the color of your body because scratches constantly appear there, try painting with Plastidip, a composition with protective functions that prevents exposure to chemicals and road abrasives.
Car enamel for rust
Surely few people have ever heard of this. But nevertheless, the auto paint market today offers such a high-quality product that copes with its task very effectively.
Sometimes rust paints are used to paint corroded car parts. It can literally be applied directly onto the rust. In this case, there is no need to completely remove corrosion from the metal surface with further priming of the cleaned surface. It is enough to simply rough the surface to remove loose layers of rust, and then you can apply paint directly to the metal.
Anti-rust paint contains fatty acids that neutralize rust and tempered glass particles that protect the metal surface. Silicones are also added to the paint, which have a water-repellent effect. Manufacturers of rust paint offer a very wide range of colors to choose from.
Painting can be done in various ways, either using a regular brush made from natural materials, or using a spray can or airless spray gun. The paint is applied in 2-3 layers. The paint dries in 1-1.5 hours, but complete hardening occurs after 14 hours.
Preparing a car for painting at home
To begin with, the car body is thoroughly washed from dirt so that its condition can be assessed, including defect detection of metal and existing paintwork. The further action plan will depend on the results of the inspection. This is like examining a patient before prescribing treatment. For some, it is enough to prescribe pills, but for others, it goes straight to the operating table.
Preparing for painting yourself will require sequential completion of several key steps:
- Stripping the car body
- Primers
- Puttying
- Grinding
After the car body or the surface of the wing or hood is prepared for painting, the most crucial moment comes. To do the work yourself, you need a spray gun. Without this tool, it is problematic to apply a high-quality coating to the car body, especially if painted with metallic paint. The fundamental difference between this type of painting is that first paint is applied to the surface of the wing, hood or body (usually in two layers) and then varnished. Without a spray gun, it will not be possible to provide an even, rich color that shimmers in the sun.
How to choose the right paint
The choice of paint depends not only on the desired result, but also on the capabilities of the owner. Considering that paints naturally differ from each other, the choice between them is fundamental.
Acrylic paint contains synthetic resins, which after drying create a fairly hard coating. The paint must be used together with a hardener, stirring them strictly according to the instructions. When mixed, a reaction occurs, due to which the required strength is achieved. After application, the paint is washed off only with the help of special solvents. However, acrylic has its drawbacks: high cost, the need to apply more than one layer and the selection of tinting colors that differ from the standard. In addition, hard acrylics do without varnish, but are difficult to polish, while with soft acrylics the opposite is true.
Alkyd paint is the most reliable option for protecting metal
- Alkyd paint. This is the best choice for someone who is not afraid to spend a lot of time, since alkyd paints are the most reliable in terms of metal protection. The paint resists weather conditions and chemicals well, is resistant to temperature fluctuations, and has a gloss comparable to acrylic at a lower cost. It is worth remembering that the substance must be applied in two layers, but excluding the hardener. After applying the alkyd coating, it takes time and special drying conditions: good ventilation and heating. However, despite all the possibilities of alkyd paint, it will not save you from corrosion.
Water-based paint has more disadvantages than advantages - Water-based paints. The coating formed by this substance is insoluble in water. The paint exhibits poor resistance to low temperatures. In addition, mandatory priming is required before applying the substance. However, the paint has high covering power and excellent adhesion. But another disadvantage is the difficulty of drying. Considering that the coating is formed through the evaporation of water, this takes time.
Powder paint is more suitable for serial work - Powder paint . The material is ideal for flow production. The powder works on the principle of magnetization to metal, and then the car needs to go through a polymerization oven. The result is a smooth and stable coating that will resist corrosion and chemicals. It is difficult to tint the powder, but manufacturers have a fairly wide range of colors. Despite all the advantages such as the absence of smudges and shagreens, the absence of the need to use a solvent or hardener, this option is far from the best due to the complexity and high cost of the equipment.
How to paint a car with a spray can or spray gun
Disadvantages and advantages of spray cans.
Do-it-yourself spray painting of a car has its advantages
- Anyone can do this.
- Apply to any surface: irregularities, bends, joints.
- The paint is distributed in an even layer.
- No additional equipment required: roller, brushes, compressor, spray gun.
Flaws
Unregulated pressure, drop size, torch size, Inability to dilute with a solvent and make the paint thinner, Inability to work with two-component materials, small volume. And all this for 4-5 euros per 150 g of paint in a can.
Tools for preparing and painting your car yourself
A spotlight or two. To paint a car in the garage, you will really need good light. In addition to light, it can also be used as a heating element for the surface to be painted. Floodlight power from 500 W to 1 kW.
Attachment (vinyl) for an electric drill. An indispensable item for removing corrosion, paint, primer and putty. The positive thing in comparison with the “grinder” is that it does not pick up the metal and does not heat the surface of the body.
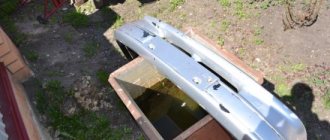
Construction hairdryer. Firstly, it is needed when preparing a car for painting to remove moldings, stickers and everything that we “stuck” on the car during styling. In addition, it is needed for repairing and painting bumpers or painting wheels. And accordingly, during body painting. Orbital sander. Indispensable in preparation for painting, for stripping putty and primer. It is also useful when polishing a body or polishing glass after repairing cracks, instead of a polishing machine. For this, special nozzles are used. The quality of processing and time are simply incomparable to manual work.
Planer for grinding. It is used when painting a car on your own for sanding large and flat areas. It is recommended to choose ones with clamps for attaching sandpaper. Painting mask - without it, painting a car on your own in the garage simply cannot begin. This is your health.
Spray gun (paint gun). It is the main instrument of production, because using a spray gun you apply almost all the ingredients of the paint coating: liquid putty, primer, paint and varnish. Compressor. This is a pair for the spray gun. For non-professional painting, unless you then open a painting area in your garage, a very ordinary compressor will do just fine. Don’t forget to add filters to collect moisture and oil from the air.
That's all, the most necessary equipment for painting a car in the garage. We purchase materials: putty, primer, paint, varnish, sandpaper. We hope you have already studied the technology for preparing for painting and painting a car. All. Let's get down to business.
Before you start painting the car body with your own hands, don’t be lazy, take an old fender, hood or door from a landfill behind the garages. And use them to carry out a full training cycle of painting a car with your own hands. This will help you understand the essence of your actions and carry out better car painting, for real.
Good luck with painting your car body yourself!
Expert opinion Ruslan Konstantinov Expert on automotive topics. Graduated from Izhevsk State Technical University named after M.T. Kalashnikov, specializing in “Operation of transport and technological machines and complexes.” More than 10 years of professional car repair experience.
When painting a car with your own hands, you need to understand that achieving an ideal result is almost impossible. When selling a car, any more or less experienced motorist will identify “homemade” painting due to minor defects and color or varnish transitions (a perfectly uniform layer can only be obtained with professional painting using special equipment)
When painting in a garage, it is important not only to choose the right tool, but also the color of the paint. If the end result differs from what was expected, then everything will have to be redone. To do this, you will need to clean, putty, degrease, prepare tools and paint materials
This is acceptable if there is local painting, but where can you find the time and patience to repaint the entire car? In fact, in the absence of tools and equipment, painting is impossible. If you also count the costs for them, and especially for the purchase of a compressor, it turns out that for a one-time job of painting your own car, it is cheaper to turn to specialists, and besides, they perform such work much better: in addition to the appropriate conditions and equipment, they have considerable experience. Without knowing many of the subtleties of painting, you can make a bunch of mistakes that the craftsmen will have to correct, and this is an additional expense, so if you don’t have confidence in your own abilities, you shouldn’t start such a large-scale event in the garage.
Home →
Tuning → Styling →
Spray gun for painting car body
Specialist painters who carry out painting work on cars during their body repair process largely depend on tools, which enable them to efficiently carry out the tasks set by the customer. Such a tool is a spray gun or a paint gun.
Naturally, it is not enough to buy a spray gun for the painting to be of high quality, because to work with such devices you need to have certain skills and an understanding of the operating principle. But their correct use will allow you to avoid streaks, drips and evenly distribute the paint liquid over the surface of the element being painted.
Spray guns can be divided into 2 main types
Manual. Suitable for water-based chalk paints. Visually it resembles a pump with an elongated spout - a fishing rod.
Electric. A professional device that works with complex types of paint and is used by qualified painters.
The first type of spray guns is mainly used for domestic use. With their help, simple repair work is performed. The latter are used for professional car painting; their use allows you to obtain the highest quality results. In addition to painting cars, professional spray guns are used for processing booths (paint booths), interior decoration, gardening, etc.
Let's sum it up
In painting, the first success factor is the correct selection of material used to restore the body. High-quality putty, good primer, expensive paint, as well as professional powerful tools for painting a car are the key to success. But the person doing the painting must also have skills. If you've never painted anything with a spray gun and a powerful compressor, try painting another metal surface. This could be, for example, a garage door. This will give you an understanding of how to hold and move the spray gun to get the desired result.
In most cases, using all the recommendations presented above will allow you to get excellent results. Your car will be painted with high quality, the place of repair will be difficult to detect visually. However, it is better to have the painting done by specialists. They have high-quality cameras and professional-grade painting equipment. This guarantees an excellent result, and the cost of such work is not so high as to neglect such an interesting opportunity. Have you ever painted a car yourself?
Operating principle of electric spray guns
Electric spray guns also have a simple design and the principle of operation is somewhat similar to manual ones. The operation of such a spray gun looks like this:
The diaphragm begins to oscillate due to the torque generated in the crankshaft.
When the diaphragm reaches its lower position, the suction valve opens, creating a gap. The paint is pumped into this gap.
When the diaphragm reaches the top position, the valve closes. The pressurized liquid is sent to a consumable reservoir.
The bypass valve controls the pressure and also serves to eliminate the possibility of clogging of the diaphragm.
The operation of the device begins after pressing a button located on the electric motor.
It is important not to start the spray gun while the suction hose is still in the paint tank. You can return the hose to this container only after turning off the device. It is necessary to apply paint and varnish liquid to the surface from a distance of 1 meter, performing movements in the form of a circle. Depending on the viscosity of the paint, the number of layers required is determined. If the viscosity is low, more layers need to be applied, and vice versa, if it is high, the number of layers is reduced.
How much does it cost to paint a car
This whole process will cost a considerable amount of money, hemorrhoids on your ass, and a bunch of mistakes. But the path goes on. Painting cars is difficult, but very interesting, and from all this you can later make some money: by tinting and repainting the cars of your neighbors in the garage. But be prepared for the fact that you will have to redo everything more than once, learn to select and use materials correctly, because in a “painting shop” the lion’s share of costs comes from materials and their overexpenditure. The price for such work is from 1000 USD to 3000 USD. This will include a minimum of tools, inexpensive consumables and paints. We don’t take into account the salary of our loved one!
Where to paint a car
It is best to do this, according to reviews, in high-quality auto painting shops, where more than a dozen bodies have already been painted, and this will not be some kind of Uncle Vasya’s garage, but a real isolated paint booth - where no dust or dirt will fly onto the body at the time of painting and they will not then blow out bubbles and dots on it.
If you want it cheap, then be prepared for low-quality putties, low-quality paints that fade in a couple of years, and other sorrows. I really don’t recommend saving on body painting. Then you will redo it and, as a result, you will spend a lot of nerves and money even more than if you had originally done it properly and with high-quality materials.
Step-by-step instructions for spray painting a car body
Now let's look at how to properly spray paint a car. Before starting work, shake the can vigorously. To avoid an unexpected effect, try the product on a different surface, performing the so-called rehearsal painting, but do not neglect the instructions. Spray paint must be applied from a distance of 30 centimeters from the surface.
The base coat is applied first, followed by 2-3 layers of paint, but take a fifteen-minute break between each application. The boundaries of each subsequent layer should be slightly larger than the previous one. The drying time for the last layer must be increased to 20 minutes. The final stage of such work is coating the treated surface with transparent varnish, and the technology for applying it is absolutely identical to the technology for applying the paint itself. Only in this case, the transition zone must be blurred within fifteen seconds after applying the varnish layer.
If you do not comply with all the above requirements, you may encounter the following defects
- In case of poor surface preparation, poor cleaning, priming, etc. the applied coating may very soon begin to peel off; the only way out in this case is to do all the work again, but at a higher quality
- Due to the high viscosity of the paint, strong spray pressure or too thick a final coat, the surface may not be painted evenly; this can only be corrected by smoothing the surface and applying a new coat.
- An incorrectly selected putty can lead to rapid fading of the treated surface; to eliminate such a defect, it is necessary to remove the old coating to the metal and apply a new one.
Personal experience of car painting
I want to share my experience of painting a car with my own hands. As practice shows, such situations happen quite often, so I hope that my recommendations and advice will help you.
Just recently I found myself in an unpleasant situation. I was turning around in the parking lot and I don’t even know how my wing hit a parking post. The unpleasant grinding of metal was like a knife in my heart. An unpleasant picture appeared before me: the car’s fender had quite deep scratches and chips, and the paintwork, like confetti, dusted the asphalt.
The only consolation for me in this situation was that my “opponent” turned out to be a parking post, and not a Lexus of the last year of production.
You can’t even imagine how upset I was driving home. The numbers of painting bills, car service costs and the cost of paint flashed clearly in my head. Our family budget is planned down to the penny. There was, of course, a stash, but I really didn’t want to draw from it, because it was my savings to buy a new laptop.
So now goodbye to the dream of a new device? I couldn't allow this to happen. I decided to act on my own. After reading mountains of information on the Internet and watching a large number of videos about painting a car, I came to the conclusion that everything is not so difficult and it is quite possible to do such work myself. Without thinking twice, I started painting the car.
Preparing the surface
The first thing I did was wash my car thoroughly. This must be done, since dirt and dust, as well as grease and bitumen stains, do not in any way contribute to the paint adhering tightly to the surface. It is best to wash your car with a special detergent. Treat stains that cannot be washed off with water and cleaning products with white spirit. Never use solvents or gasoline.
Now carefully examine the location of the damage. Depending on its location, you will need to remove the grille, bumpers, radio antenna, etc. In my case, there was no need for this.
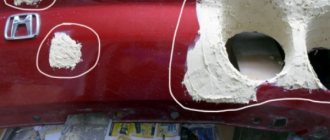
Next, I carefully examined the condition of the paintwork of the damaged area. I marked large defects, chips, cracks and dents with chalk. It is best to do this with acrylic quick-drying paint. It is sold in any store and comes in the form of aerosol cans. I didn’t have such paint on hand, so I used simple chalk. Then taking sandpaper No. 60, maybe 80 or 100, I sanded the damaged areas down to bare metal. Here I want to especially emphasize - precisely to pure metal. Otherwise, in a very short period of time, you risk getting a large rusty spot in this place.
When cleaning damage, try to ensure that the transition from the defective surface to the non-defective one is as smooth as possible. Make sure that there are no ledges, overhangs or depressions in the transition area. This is easy to check. Just stroke the stripping area with your hand, and you will feel by touch where you still need to sand. In this matter, the main thing is not to rush and do everything gradually. Having completed this stage of work, wipe the sanded area with a cotton cloth soaked in white spirit and dry thoroughly.
Smooth out defects with putty
Another step in preparing a car for painting at home is filling the damaged surface. I used:
- polyester synthetic autofill;
- metal and rubber spatulas.
Their width should correspond to the size of the damage.
I recommend using finishing putty, as it has a fine-grained structure and is very easy and simple to work with, even for a beginner. Usually the jar comes with detailed instructions. Actually, I acted on it. I mixed the putty with the hardener using a metal spatula. The proportions are indicated on the can. However, from my own experience I will say that the amount of putty should be taken approximately two full tablespoons, squeeze out the hardener into a “sausage” 3-4 cm long. Mix all components thoroughly for 30-40 seconds. You should start working immediately, otherwise the mixture will quickly harden and you will simply throw it away. Five minutes after cooking, the mixture begins to dry out and turns into lumps, which are simply impossible and impossible to work with.
The putty should be applied quite vigorously. The movements must be cross. The first layer should overlap the next one. You need to work quickly, but without unnecessary fuss. I will say that you will have to put in a lot of effort, but as my experience has shown, it pays off in spades. Especially when compared with the price of painting a car at a service station.
After filling the surface, let it dry well and harden. It took me about 45 minutes, considering that the air temperature was +20 degrees. It is easy to check the readiness of the surface. Take #80 sandpaper and rub it over the putty area. If there are no sticks on the sandpaper, and the putty itself is sprinkled with fine powder, then the surface is completely dry.
Stripping
Now you can start cleaning the surface. To do this, you will need sandpaper from #120 to #600. We start with coarse sandpaper and finish with sandpaper. This way you can level the surface and make it perfect. I recommend cleaning it dry without wetting it with water. Moisture that gets into the structure of the putty significantly deteriorates its properties and quality. It is better to control the stripping area with your hand. The final stage:
- Clean the surface from dust.
- Wipe with a rag soaked in white spirit.
- Dry.
- Apply a thin layer of primer from an aerosol can, lightly covering the untreated surface of the body.
Preparing for painting
We clean the treated area and cover the areas that cannot be painted.
I covered all the surrounding areas with newspapers, which I secured with masking tape. This way you prepare for yourself the area that needs to be painted. Now you need to sand the paintwork near the treated surface with sandpaper No. 1200. It should be matte. Remove the dust again and treat the area with white spirit.
It is very important to prepare the area in which you will paint the car. There should be no dust or dirt here. I painted my car in the garage. Therefore, first:
- I removed unnecessary objects and tools so that they would not interfere with work.
- Thoroughly cleaned the garage of dirt.
- I swept away dust from the ceiling and removed pieces of loose plaster that might have gotten onto a freshly painted car.
- I moistened the floor generously with water to prevent dust particles from scattering and settling on the painted surface.
Now you should dilute the enamel with a solvent to the required thickness. All proportions are indicated on the can or in the instructions. However, I will share my experience. When I watched a video about painting a car with my own hands, I saw a simple and effective way to determine the optimal paint thickness.
I did exactly this: I lowered a metal rod with a diameter of 2 mm into the paint and raised it above the can. The paint should flow from the rod at a rate of 3-4 drops per second.
Be sure to strain the diluted paint through a mesh funnel. I used a regular nylon stocking. Pour the mixture into the tank of a spray gun with nozzle No. 1.4. The supply air pressure should be approximately 2.5 to 3 Atm. It is necessary to paint the car with smooth back-and-forth movements in two or three layers from a distance of 150-250 mm. There should be a 15 minute gap between coats.
As you can see, there is nothing complicated in this process. It is only important to strictly follow the sequence and carefully follow all steps. From my own experience, I can say that the cost of painting a car that I painted myself is much lower than if I turned to a car service.
If you are interested, prices for painting a car in Moscow start from 30 - 35 thousand rubles. It will be cheaper in other regions. For example, an acquaintance had his car painted in Chelyabinsk, so he gave 20 thousand rubles. It all depends on the chosen artist. It’s good if you have friends who don’t mind giving this money, because you know that everything will turn out fine. The main thing is not to rush and not to be afraid. But I still bought a new laptop. Return to top
How to paint a car with a spray gun
This requires a lot of experience, but we’ll still tell you the general principles.
To obtain a high-quality result when painting, the gun must always be positioned correctly - at a right angle to the surface to be painted (the longitudinal axis of the nozzle must be oriented perpendicular to the surface).
The distance from the spray gun to the object to be painted should be:
- for high-pressure sprayers (conventional) - at least 20-25 cm;
- for HVLP - 10-15 cm;
- LVLP/RP - 15-20 cm.
Failure to maintain distance when painting can result in the following troubles.
- If you hold the sprayer too close, the concentration of paint per unit area to be painted will be higher, and the layer, accordingly, will be thicker. In this case, smudges, distortions of layers and an “orange peel” effect are possible.
- If you hold the sprayer too far away, the degree of fogging increases and the transfer of paintwork to the surface decreases. This leads to excessive consumption of material, and the coating turns out to be excessively “dry” and rough.
Painting is carried out in horizontal movements: the first pass is from left to right, the next is from right to left, and so on. The gun should be moved as parallel to the surface to be painted as possible (at a constant distance), the hand should not describe any additional circular movements. If the gun moves in an arc, the paint will lie unevenly - where the gun was closer the layer will be thicker, and vice versa.
The standard is to overlap one passage with another by two-thirds. As practice shows, this degree of overlap is the most optimal and allows you to avoid one of the main painting defects caused by insufficient overlap of the torch - stripes of different colors, especially on metallics.
The recommended speed of movement of the spray gun along the surface to be painted is approximately 40-50 cm/sec. That is, on a medium-sized part, one pass from edge to edge takes about 2 seconds (you can remember the musical “one and two”). This value allows for some deviations and may vary taking into account:
- paint torch size;
- the degree of its overlap;
- distance to the surface to be painted;
- settings and performance of the spray gun (paint supply, nozzle size, pressure).
For example, you can move the spray gun faster with a larger paint supply or slower with a smaller one and get coatings that are identical in all respects. Or, without changing the paint supply, you can move the spray gun faster with a larger torch overlap or slower with a smaller one - the painting results will be similar. So, as you can see, there are no ready-made recommendations and each painter may have his own style of work, his own technique for applying paintwork.
Compressor for car painting
Why do you need a compressor?
By using a compressor in combination with special interchangeable tools that require compressed air to operate, you can expand your capabilities as a repairman as much as your wallet will allow. I will give just a few points about using an air piston compressor
- Applying paints, varnishes and primers using a spray gun (car painting)
- Blowing, wherever you need to blow well
- Application of anti-corrosion compounds even into hard-to-reach hidden cavities of the car
- Working with polishing and grinding pneumatic tools
- Working with a wrench
Probably, if you think about it, there are many ways to use the compressor in the garage besides painting. So, we have already realized that we cannot do our work without this device. Moreover, many car repairmen jokingly call this unit the “breadwinner”. All that remains is to choose a compressor for painting according to our needs, and of course according to our wallet.
Necessary equipment and tools
It is impossible to paint a car well in the garage with your own hands without a special tool. Every car owner already has most of the attributes in his garage, and what you are missing can always be purchased inexpensively on the market.
Among the tools you may need are the following:
- a grinding machine necessary for removing the gloss of old paint and performing polishing;
- a construction hair dryer, which allows you to quickly and easily remove moldings and other elements attached to the body with glue;
- vinyl drill bit. It allows you to clean off rust and remove old paint;
- a spray gun with a compressor is the main tool for painting;
- sandpaper of different grain sizes and all kinds of spatulas;
- planes for cleaning putty.
Once you've collected all the necessary tools in the garage, it's time to think about supplies. At different stages of painting you will need:
- car shampoo, which will allow you to wash your car and remove any dirt;
- degreaser. It is necessary to ensure normal adhesion;
- putty for leveling the surface;
- primer and paint.
If everything you need is already prepared in your garage, then you can safely start painting the car.
Coating a car with varnish after painting
Preparation
Before you start work, you need to prepare. You need to connect and configure the equipment, prepare the surface and mix the varnish.
The surface to be varnished must be cleaned as much as possible from dirt and blown with compressed air. Otherwise, all the dust particles will be literally buried under a layer of varnish, but they can be very noticeable in sunlight, and polishing will not help here.
Car varnish should be diluted immediately before application. The fact is that it hardens quite quickly, so you shouldn’t cook it in large portions at once. It is better to carry out the whole process in several steps. Another very important point is that you need to mix thoroughly, otherwise the unevenness of the coating (and, more importantly, hardness) will be quite strong.
Coating
This procedure is much simpler than that for applying paint. By and large, you need to open the spray gun to maximum and get started. The essence is quite simple to grasp - you just need to practice on a test surface.
The varnish is applied to the car in 2-3 layers. The layers are increasing - the further you go, the thicker the layer. But you need to be wary of smudges, although they can be easily removed by mechanical polishing.
The first layer has a minimum thickness - the varnish must literally be sprayed onto the surface. The next ones are already applied to a mirror shine.
The spray gun is driven at a uniform speed, at an angle of 45 degrees to the surface in a forward mode (the spray torch looks at the part that has not yet been painted). It is better to start with joints and corners (as well as other transitions and irregularities), and only then cover a flat area.
Cleaning up defects
Take the car outside and inspect it carefully. Mark areas that have defects with a washable felt-tip pen or acrylic paint. Regular chalk will do. It is better to repeat the procedure twice to be sure that all defects are covered.
Take sandpaper No. 60, 80, 100. Sand problem areas down to metal. At the same time, do not allow the stripping to go beyond the defective area. The edges of the transition should be as smooth as possible. Check this by running your hand from the edges to the middle of the surface being treated. Remove dust from the body, wipe with a cotton towel and wipe again with white spirit. Leave the car for a couple of hours to dry.
Important! After the work is completed, drive the car into the garage so that dust does not accumulate on it outside.
How to paint car rims with your own hands
If you have learned how to professionally use a car spray gun or are at least good at painting body parts with a spray can, then painting car rims will not cause you any difficulties.
Dye.
First of all, we need a primer in cans and acrylic paint. It is advisable to choose the varnish from the same manufacturer as the paint. Why acrylic and not powder? Without a doubt, powder paint is an ideal solution, but the technology for its application requires special equipment.
Preparing the surface of a car wheel for painting
Naturally, before you paint your car's rims, you need to get rid of the old coating. Wash the disc thoroughly using a brush and preferably washing powder. It is precisely the Tide that we are tired of from advertising, but so dear, that you can quietly borrow from your wife. The ideal option would be to use drill attachments to thoroughly rinse the disc.
Painting car rims requires treating the entire surface of the rim. Let's start processing the surface of the disk. To do this, we again use a drill with attachments, as for polishing a car body, and manually clean the surface in hard-to-reach places or on the bends of the disc. While sanding, we rinse the disc with water from time to time.
Sandpaper is used in the following order: No. 200-400-600. During the sanding process, you can use automotive finishing putty to eliminate defects on the surface of the disc. You didn’t decide to paint a new disc, which means there are defects in any case.
Preparatory work
Before painting, you should perform some mandatory steps. Firstly, virtually all elements that are not directly part of the body are removed from the car. These include moldings, various trims, license plates, side mirrors and the like. Secondly, all holes, handles and glass are tightly covered with paper to prevent paint from getting in.
The following is a list of the following works:
- Troubleshooting and cleaning. Using existing equipment, all dust and dirt are completely removed. The condition of the body is monitored, and areas that need to be treated are determined.
- Putty. If small dents, cracks or minor deformations are nevertheless found on the body, they are carefully cleaned and smoothed using putty. You should have a smooth surface with no visible dents or bulges.
- Next comes sanding. The quality of car painting largely depends on it. It is recommended to use special powders that allow you to identify the smallest irregularities. First, rough sanding is done using high-grit sandpaper (P80 or P120). Then proceed to final sanding using P240 or P320 sandpaper.
- The primer is applied to the putty areas, and then several layers are applied to the entire surface to be painted. Before applying each subsequent layer, it is necessary to thoroughly dry the previous one.
This is the minimum you will have to do before painting your vehicle. The success of subsequent work depends on the quality of completed items.
Priming the disc surface before painting
Primer is an important step in the process of painting car rims. After sanding the disc, we process it, i.e. degrease the surface using solvent No. 646, and proceed directly to the priming process.
Important
We start the primer from the inner surface of the disk. We spray the primer, like all aerosol paints, at a distance of 25-30 cm and do not forget to shake the can from time to time. There is no need to say that we try to apply the primer layer evenly.
It is advisable to apply the primer in three layers when painting a disc. Each layer needs to dry for some time. After applying the third layer, it is highly recommended to force dry the painted surface. We haven't forgotten that painting car rims takes place in the garage? That is why an industrial hair dryer or, in extreme cases, your wife’s hair dryer, which you will need to discreetly borrow along with Tide, is very useful for drying discs.
Painting concrete/brick walls
The main feature of stone surfaces is their porous surface, which affects the painting process. A good result can only be achieved after applying several layers (three or more). In this case, there is a large consumption of paints and varnishes and material costs. To avoid this, you must first prime the walls.
Painting work is best done in summer. You cannot use wall paint if the temperature drops below +10 degrees. Otherwise, the material will take a very long time to dry and will not obtain the required strength.
Work is carried out according to the following instructions:
- cleaning the surface
, applying a primer, drying the walls; - paint preparation
, adding solvent and pigment; - saturating the roller
with paint in a special container, removing excess paint and applying the material to the surface; - on vertical walls, paint is applied from top to bottom
, painting relief zones and individual elements using a brush.
After the work is completed, you need to leave the garage open for a while - this will allow the walls to dry faster.
Coating car rims with varnish after painting
The procedure for painting discs is completely no different from the priming process, so we will not describe it in detail. We carry out all stages of painting in the same sequence and technology as primers. Don’t forget that when using acrylic paint you need to take safety precautions: protect your hands with gloves and your eyes with goggles.
It is better to coat car rims with varnish using varnish of the same brand as the paint you have chosen. Varnish is applied to car wheels in accordance with the instructions for use.
Powder paint
The use of powder paint opens up a wide range of possibilities. For professional craftsmen, such painting is quite expensive. If you have the necessary equipment, premises and normal conditions, you can do the painting in a garage yourself.
Powder painting a car can be done easily, but preparation for it will take a lot of time and require skill.
There are two options: using a full-featured camera or choosing a “garage” option. The first step is to find out the dimensions of the product that will be coated with paint. Painting a large object requires the presence of a sufficiently large area of the room and powerful equipment.
How to organize your camera:
- Thoroughly clean the room of dirt and dust.
- Improve the quality of electrical wiring, since the electric compressor uses a lot of electricity during operation.
- You can dry the room using electric heaters, not forgetting to follow safety precautions.
- Install an important element - the stove. You can do it yourself, following the diagrams that can be found on the Internet.
- Make sure to use a vacuum cleaner with a cyclone attachment to prevent rapid clogging.
The camera should be as clean as possible
It is important to ensure that you have special clothing. You should also be responsible for protecting your eyes and respiratory tract.
