The Lada Vesta car is equipped with a combined fuel filter, which includes elements for coarse (mesh) and fine purification of gasoline where the filter is a paper element - it is located in the fuel module. The replacement itself is not frequent, but it must be done. Unlike most models, here the fuel filters are located in close proximity to the electric fuel pump, also known as the fuel pump, which significantly complicates the independent replacement of the fuel filter on the Lada Vesta. Nevertheless, the car periodically needs such replacement, so let’s deal with the fuel system in advance. Read the article to the end and you will understand this topic: you will know where the fuel block is located on the Lada Vesta, what filter can be changed in it, and are there any analogues of this part!
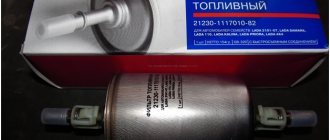
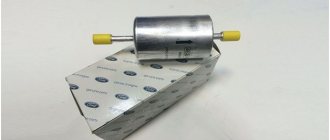
Factory filter Lada Vesta
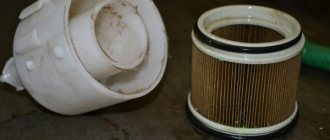
A distinctive feature of the car is the combination of 2 cleaning parts in the fuel module: coarse and fine. Coarse cleaning is a mesh that can be changed. Fine cleaning is a paper filter element built into the module - accordingly, it can only be replaced with a fuel pump. Instead of separate filters, this model has a fuel module. Previously, cars were equipped with 1 small and cheap fine filter element, which stood at the bottom near the gas tank. The mesh was located under the seat in the fuel block. On Vesta, the part combines coarse and fine fuel filters and an electric fuel pump. Therefore, replacing one individual broken element is difficult. Typically, specialists replace the entire assembly, which significantly increases the cost of the operation.
When ordering a new fuel module, use part number 21800113900900 or 8450008680. In this case, you will receive a factory-made fuel assembly. Its price starts from 3500 rubles. At the same time, different stores may call the part differently: fuel unit, electric fuel pump module, electric fuel pump, electric fuel pump.
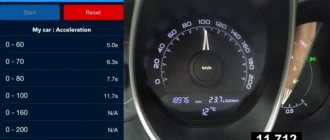
Part characteristics - The factory module of the Lada Vesta is a turbine-type electric fuel pump with a drainless fuel rail. The injectors that supply fuel are located in the intake pipe. The service life of the unit is higher than that of older versions of cars of this brand, but in the conditions of Russian realities, its replacement is required approximately every 180 thousand kilometers. They really say at the factory that it is designed for the entire service life of the car.
How to check and adjust the pressure of the Priora fuel pump
Normal pressure of the Priora fuel pump is necessary for the process of supplying the combustible mixture to the carburetor and its normal spraying through the nozzles. The slightest disruption in the operation of this system leads to the fact that either an excessively saturated or lean mixture is supplied to the combustion chamber, which is why the engine operates abnormally. How to check the fuel pump pressure, and what should be done if it is abnormal?
Checking the fuel pump pressure
The first thing to do is to specifically check the operation of the pump. To do this, just turn the ignition key not to the extreme position and listen to whether the electric fuel pump turns on (and this is exactly the variation that is installed in the Lada Priora car). If you hear a noise for a few seconds, followed by a click, everything is fine.
Using a pressure gauge, the check is performed on the ramp - this is where the protective valve cap is hidden, which does not allow air to get in, but presses the fuel out with pressure. The first step is to unscrew the cap and check whether the rubber in it is broken - this may be the main reason for the inoperability of the fuel pump. If it is damaged, it is better to completely replace it; fortunately, it is cheap. Then the spool is twisted. Next, a pressure gauge is connected to the outlet of the safety valve from the pump. Normal pressure is in the range of 380-400 kPa. If it is lower, then either the pump has failed or there is a blockage in the system. If it is more, then it is quite possible that the internal pressure gauge of the fuel pump is faulty and it is simply pumping fuel excessively to the carburetor. Replacing it is easy.
Naturally, before checking the pressure, the ignition is turned on, but the engine itself is not. The pump itself will equalize the pressure to the desired parameter. If this is not done, then the pressure will be at the level of 1 atmosphere with a slight deviation, because pumping is not performed.
It should also be taken into account that all manipulations are carried out at reduced fuel pump pressure. To do this you will need:
- remove the rear seat and gain access to the pump (by removing several screws on the rubberized cover);
- release the lock and let the fuel run out completely (the engine will be in neutral gear and will stall literally after a few seconds);
- Next, you need to turn on the ignition and equalize the pressure;
- It is also recommended to turn on the starter for 2-3 seconds and immediately reset the ignition key to its original position (turn off the ignition).
What happens if the pressure deviates from the norm?
If the pressure in the fuel pump is too high, too much fuel will be supplied to the carburetor.
The air will mix with it through the filter and burn in the cylinder. But if there is a lot of fuel and not enough oxygen, the mixture will not burn completely. At the same time, black smoke comes out of the exhaust pipe, and fuel drips from its end (may even be mixed with soot).
If the pressure in the system is very low, the mixture will be lean. There is too much oxygen. At the same time, the engine power is radically reduced; at idle speed the engine simply stalls, and the choke, of course, will not help, since it only regulates the operation of the throttle valve in the carburetor.
It is interesting that the on-board computer will not report a breakdown of the fuel pump - this is truly a huge mistake by VAZ engineers. In Priora, you can only read indicators when you connect a computer to the EMU unit, but not everyone can do this. And the indicators may not be true if the on-board computer itself is damaged. That's why checking with a pressure gauge on the ramp is the best option for checking pressure.
https://www.youtube.com/watch?v=QaJwthsYi3Q
Where is the fuel filter in Lada Vesta
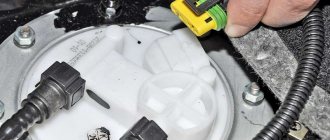
The filter element, electric pump, like all other parts of the fuel module in the car are located behind the rear seat of the car, so in order to replace one of the parts of the module or the entire unit, car enthusiasts have to remove the rear seat cushions and soundproofing pads. The closest thing, namely right behind the pump inlet, is a coarse filter - a mesh - this is the only part of the entire unit that you can change yourself.
Manufacturers of Lada Vesta do not recommend replacing module components on your own, however, car enthusiasts have still found a way to disassemble and change filters without outside help.
Why is it needed?
There is a coarse filter that comes first from the gas tank. After all, first the lid where the fuel tank is located is opened, a gun is inserted there, the magic button is pressed and the fuel flows. Yes, it takes a lot of your money along the way, but what can you do? The location of the tank can be on the left or right, but this does not play a special role. Coarse cleaning, which is a mesh that traps large particles of debris.
This is followed by a fine filter. This is exactly what we will talk about. This element is called a fuel filter. With its help, small particles are retained. But even they can penetrate your diesel engine or gasoline injector.
Dust, dirt, debris, rust elements. All this can penetrate the system, causing a clogged pipe, tube, valve, fuel hose, or fuel pump components. Nothing good will come of this if timely replacement is not made.
To understand how to replace the filter, which element to choose and how to choose an analogue for the device you are going to change, you need to have at least a basic understanding of such an important component of the car.
I suggest starting with varieties.
Kinds
Modern fuel filters installed on Ford Focus, Nissan Almera, Hyundai Solaris, Nexia, Mazda, Opel, BMW e60, Renault Logan and Megane, Kia Rio and many others have at least two degrees of purification.
- First degree. This is a rough cleansing that allows you to get rid of large contaminants. Not to be confused with a regular mesh in the tank, which is not available everywhere.
- Second degree. Fine cleaning. This is the main task that falls on the shoulders of the filter.
And here you probably have the main question - where is the filter device located? I don't know. No, I can answer, but if you tell me specifically what make of your car or what year of manufacture. After all, on the same Chevrolet Niva, different Opel, Toyota, Mazda models, on the Volkswagen Passat B3, as well as on the domestic VAZ 2114, 2112 and 2110, the location may differ.
However, they are always located somewhere between the engine and the gas tank, since the filter's job is to prevent contaminants from entering the engine while the fuel moves from the tank to the engine. What's in the gas tank itself? That's right, a coarse cleaning device. This is an additional filter element so that any unscrupulous gas stations do not spoil your car.
Now let’s talk about the types of filters themselves. What element will be on the car? It depends on the type of engine. There are three of them, as you know. Except for electric motors. Well, there is no need for a fuel filter, as you understand.
Therefore, there are three types of filters:
- carburetor;
- diesel;
- injection.
How to change the fuel filter
To change the filter element on the Lada Vesta you will need some tools: a hammer, a tenth wrench and a flat-head screwdriver. Step-by-step instructions for action include several steps:
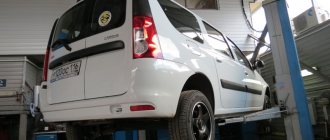
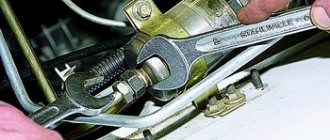
We lower the rear seat cushions and raise the soundproofing pad. Lightly pry up the edge of the fuel pump hatch cover and remove it. Disconnect the electric pump from the plug. Afterwards, you need to start the car and give it time to idle. After the car stalls itself, the ignition is turned off and the negative terminal is reset. Then the gasoline supply pipes are disconnected. To do this, simply press the tip latches and pull the fitting. The fuel ring is removed. It unscrews counterclockwise. If the process is somewhat difficult, pliers will come to the rescue. Finally, the module is removed, the pump tube is disconnected, as is the electric fuel pump itself. After the procedures, you can replace the fuel filter or other component of the unit. The reverse structure is also installed step by step.
How the module is disassembled
As noted above, the procedure for disassembling the electric fuel module of a Lada Vesta or Xray depends on what exactly is planned to be changed. There are both specific features in case of replacing one or another element, and a general procedure, regardless of what exactly needs to be repaired.
In the case when the fuel level indicator sensor is changed, you need to:
- First, remove the wire end from the pressure regulator terminal.
- While simultaneously pressing the latches, remove the wire block from the cover.
- Using a flat-head screwdriver, release the retainer that holds the block.
- After the block is completely disconnected, you can remove the sensor itself. To do this, you need to press two special clamps from the grooves.
A slightly different disassembly procedure is provided if you plan to replace the pressure regulator:
- As in the previous case, you need to start by removing the wire tip.
- After this, helping yourself with a flat screwdriver, you need to remove the special spring-shaped retainer.
- Only after this can the regulator itself be removed from the module cover.
As can be seen from the two cases considered, the most important role when disassembling the elements of the fuel module is played by the correct disconnection of wires and clamps.
Filter replacement interval
The design of this unit on the Lada Vesta itself is not bad, it is quite reliable, but the quality of modern gasoline in our country is questionable, so these consumables often become clogged, which leads to increased operation of the gas pump and, as a result, a reduction in its operating time. It is recommended to replace the filter after 180-200 thousand kilometers.
At the same time, official dealers change the entire assembly at once, so the cost of such a procedure on average is about 8,000 thousand rubles. If you want to save some money, you can purchase an analogue of the module, or replace only its individual parts yourself.
Analogues of the Lada Vesta filter
If the entire unit needs to be replaced, then the Lada Vesta owner has no chance to save money. However, individual elements of the system can be replaced with cheaper analogues. For example, you can install a gasoline pump from the Japanese company AISIN, which will cost about 3,000 rubles. Installation of an electric fuel pump from a Kia Rio car, the price for which is 4,000 rubles.
Important: the analogues will have to be slightly modified in order for them to fit the Lada Vesta.
How much such work is worth at a reduced price - the car owner must judge for himself. It is believed that while there are no official analogues, it is better to replace the fuel module in a trusted service center and with an original one. Perhaps in the future this procedure will be simplified, or the part itself will become cheaper.
Ford Focus Fan
Cabin filter Ford Focus 2: price and choice
Original cabin filter for Ford Focus 2 carbon. Thanks to the impregnation of the fibrous coating of the filter with carbon granules, the Focus 2 filter not only cleans the air of dust and other small debris, but also catalyzes burning vapors that come both from the engine of the car itself and from all harmful vapors entering the cabin. This filter is still included in the rating of the best air purification filters according to the most modern European standards and is installed on the Ford Focus 3 without changes. Well, except that they added two foam seals along the edges for tightness. The degree of air purification is from 85 to 95%. Price - from 480 (analogues) to 1200 rubles (original). More expensive than an air filter.
Before purchasing, check the Ford Focus 2 filter for mechanical damage. A normal original Ford Focus filter will cost from 750 rubles and above, do not skimp on your health.
Replacing the cabin filter on a Ford Focus 2
The cost of replacement at a car service is approximately 700 rubles.
When Ford engineers are stupid, they do it in such a way that even AvtoVAZ takes a break. During the design of the filter placement structure, they decided that even the “stupidness” could be worse than Russian engineers and made changing the cabin filter of a Ford Focus 2 torture. They shoved it under the dashboard, almost to the radio, and blocked the path to it with the gas and brake pedals. And they succeeded in this deceit. They probably just assembled the entire panel, installed the filter and put it on the car. How to change it is not their problem. Yes, replacing the air filter is much easier...
Gas pedal and filter cover removal tool:
- Small ratchet
- Grille extensions
- socket heads for 10 and 8
- Flexible extension or driveshaft for ratchet
A set of keys for any auto work
Replacing the cabin filter of a Ford Focus 3 is much easier, thank you that at least they thought of making the replacement easier on the next Focus model...
In general, the filter is located somewhere to the right and above the gas pedal. And in order to make the replacement, you either need to be no more than 30 cm tall, or have a very flexible boneless body and the super ability to turn the torso and head separately, at least 180 degrees. Even replacing the cabin filter in a Ford Focus 1 is easier. But on the new model, when Focus 2 came out, they decided to make this process more difficult. We take out the rug to get less dirty...
Ford Focus 2 has an electronic gas pedal; disconnect the plug from it by pressing the latch while simultaneously pulling the connector up.
And now, it’s time to take advantage of your bulging, long, illuminated eyes, which, according to the designers of Ford Focus 2, you also have. This is needed to unscrew the 3 pedal nuts, one at the bottom, two at the top. After all, both hands will be busy and you won’t be able to illuminate accurately. The designers of Focus 2 have all the listed abilities, since they thought that all other people could do the same.
In general, you see the studs on which the pedal is held - 2 on top, 1 on the bottom. And here is the electronic gas pedal of Ford Focus 2.
Then, we remove the cover and find a dirty, black with dust, dirty filter of the Ford Focus 2 air conditioner. It’s easy to find, but getting it out is a problem...
The Ford brakes also made the brake pedal a serious obstacle. The half-removed filter at the top rests against the pedal connection, clings with the back side to the gas pedal studs, folds almost in half and is thus removed.
The Ford Focus 3 cabin filter is the same, but has two seals at the ends of the filter for greater tightness
The Ford Focus 1 cabin filter is longer, it does not fit two...
The poor guy's condition, of course, was catastrophic... Be careful when installing a new filter. You, of course, will have to bend it “to death”, but do not overdo it and do not tear it on the studs of the gas pedal.
Front brake pads Ford Focus 2: selection, price, replacement+video
Replacing antifreeze Ford Focus 2, Video
Cleaning the Ford Focus air conditioner evaporator