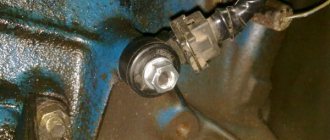
Unfortunately, a car owner most often thinks about replacing seals when there is an oil leak. The crankshaft oil seal (VAZ 2106) causes leakage of working fluid for the following reasons:
- car mileage over 100 thousand km;
- the machine has not been used for a long time;
- poor quality part;
- incorrect installation.
In the first case, the inner part of the reinforced cuff wears out, so it cannot fit tightly to the shaft and loses its shape. In the second case, there is a risk of the oil seal drying out, hardening or freezing. But the most dangerous thing is the poor quality of the crankshaft oil seal on the VAZ 2106. The use of unsuitable or bad parts most often leads to engine failure, causing significant repair costs. It is also possible that a complete replacement will be needed.
Oil seals VAZ-2106: types
KM "Credo" offers its customers the following oil seals for the VAZ 2106:
- steering shaft;
- gearbox input shaft;
- gearbox secondary shaft;
- front for crankshaft;
- rear for crankshaft;
- rear axle gearbox;
- bipod control shaft;
- axle shafts;
- pumps;
- hubs;
- valve
Thanks to our own production, VAZ 2106 car owners no longer need to spend a long time searching for a suitable reinforced cuff. We comply with all requirements of GOST 8752-79 and AvtoVAZ. Therefore, our oil seals and other spare parts are ideal for Zhiguli cars of the VAZ 2101-07 models, which are also called “classics” among car enthusiasts.
Any oil seal (VAZ 2106) from our company is manufactured exactly in the size required by the customer. And the use of only high-quality rubber guarantees a reliable and relatively long service life.
Very often, the rear axle oil seal (VAZ 2106) and other rubber parts from the Internet do not meet the established quality requirements. It is not uncommon to find cracks, delamination of material, or high roughness of the seal edge. These and other shortcomings not only cause a quick replacement of the part, but also increase the risk of failure of the engine itself.
Advantages of cooperation with MP CREDO
To avoid all the difficulties associated with spare parts for VAZ cars, it is necessary to order oil seals only from those that have been tested in St. Petersburg and the Leningrad region, offering favorable terms of cooperation. The client just needs to call and name the car model, as well as the required quantity of rubber goods. All orders are processed as quickly as possible, and each buyer receives a guarantee.
LLC "mp credo"
195279, St. Petersburg, Revolution Highway, 88
A leaking oil seal on the engine does not bode well for the driver, as this means that the engine is rapidly losing lubrication and it is only a matter of time before it seizes. This rule applies to all cars. It also applies to the VAZ 2106. The oil seals on the “six” have never been particularly reliable. However, there is good news: you can change them yourself. You just need to know how it's done.
What are seals used for?
In short, the oil seal is a seal that prevents oil from leaking out of the engine. On early models of “sixes” the seals looked like small rubber rings with a diameter of about 40 cm. And after a few years they became reinforced, since pure rubber is not durable and cracks quickly. Oil seals are installed at the ends of the crankshaft, front and rear.
Even a slight displacement of the oil seal in the groove leads to serious oil leakage. And the leak, in turn, leads to the fact that the rubbing parts in the engine cease to be lubricated. The coefficient of friction of these parts increases sharply and they begin to overheat, which can ultimately lead to the motor jamming. A jammed motor can only be restored after a lengthy and expensive overhaul (and even such repairs do not always help). So the seals on the crankshaft are extremely important parts, so the driver should carefully monitor their condition.
About the service life of oil seals
The VAZ 2106 operating instructions say that the service life of crankshaft oil seals is at least three years. The problem is that this is not always the case. For three years, oil seals can operate in conditions close to ideal. But there are simply no such conditions on domestic roads. If the driver drives mainly on unpaved or poorly paved roads, and his driving style is very aggressive, then the seals will leak earlier—in a year and a half or two .
Video “Assembling the engine of a classic VAZ car”
This video demonstrates the procedure for assembling an engine on a VAZ classic, including installing the crankshaft.
The crankshaft is the most important part of internal combustion engines with a crank mechanism. The health of the entire engine directly depends on its condition. A power unit with a worn crankshaft does not develop full power, and the oil pressure in such an engine is low even at rated speed, not to mention idle.
The VAZ 2106 crankshaft, the wear of which exceeds the permissible level, will not be able to operate reliably. Therefore, in order to prevent the engine from jamming, this part is removed and repaired.
Replacing crankshaft oil seals on a VAZ 2106
Let's figure out how to change the crankshaft seals on the "six". Let's start from the front.
Replacing the front oil seal
Before proceeding with the replacement, you should place the car in an inspection hole. And then be sure to check whether the ventilation in the crankcase is clogged. The meaning of this preparatory operation is simple: if the ventilation is clogged, then the new oil seal will also not hold oil, because the pressure in the engine will become excessive and will simply squeeze it out.
Required Tools
To complete the work, you will need a new front crankshaft oil seal (preferably the original VAZ one, the cost starts from 300 rubles), as well as the following tools:
- set of spanners;
- a pair of mounting blades;
- flat screwdriver;
- hammer;
- mandrel for pressing seals;
- goatee
Sequence of operations
It should be said right away that there are two ways to replace the front oil seal: one requires less effort and more experience. The second method is more labor-intensive, but the likelihood of error is lower. That is why we will focus on the second method, as the most suitable for a novice driver:
- The car is securely fixed to the pit using a handbrake and shoes. After this, the hood opens and the camshaft cover is removed from the engine. This is the stage that experienced drivers usually skip. The problem is that if you do not remove the camshaft cover, installing the oil seal will be very difficult, since there will be little room to work. Consequently, the probability of the oil seal being distorted is very high.
Above we discussed the mandrel with which the oil seal is pressed into the installation groove. I won’t be mistaken if I say that not every driver has such a thing in his garage. Moreover, it is not so easy to find it in a tool store today. A driver I know also encountered this problem and solved it in a very original way. He pressed the front oil seal using a piece of plastic tubing from an old Samsung vacuum cleaner. The diameter of this tube is 5 cm. The inner edge of the oil seal has the same diameter. The length of the pipe trim was 6 cm (the neighbor cut this pipe with an ordinary hacksaw). And to prevent the sharp edge of the pipe from cutting through the rubber seal, the neighbor processed it with a fine file, carefully rounding off the sharp edge. In addition, he hit this “mandrel” not with an ordinary hammer, but with a wooden mallet. According to him, this device still serves him well today. And 5 years have already passed.
Step-by-step instruction
Due to the limited space between the front of the engine and the radiator, it is difficult to press in a new oil seal without distortion. For this reason, experts recommend replacing the sealing element with the front engine cover removed. Of course, doing this on a mechanic’s workbench is much more convenient, but there are also pitfalls here. As practice shows, after such dismantling it is difficult to restore the tightness along the junction line of the oil pan, and in addition, there is a danger of breaking the internal threads in a rather delicate duralumin cover.
For this reason, we recommend using the more common and less labor-intensive method, in which the damaged oil seal is replaced directly on the engine. This work will require your attention and accuracy. It is more convenient to perform all manipulations on a lift, overpass or inspection pit.
- Put the car on the handbrake and set the gear lever to fourth speed.
- Disconnect the power terminals and remove the battery from the vehicle.
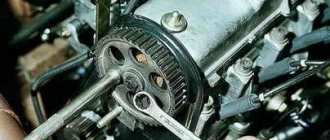
- Using a 17mm socket and a long wrench, loosen the self-locking nut securing the generator to the adjusting bar.
- Having installed a pry bar or the same wrench between the generator and the right subframe (spar), use it as a lever to move the generator towards the cylinder block. This will allow you to loosen the serpentine drive belt of the mounted mechanisms and remove it from the engine.
- Moving under the car, remove the mudguard and oil pan protection.
- Unscrew the ratchet nut using a special 38 socket wrench. In some cases, the fasteners grab so tightly that even the foot brake cannot be used to block the wheels. In this case, mechanics recommend removing the starter and using a strong wrench to block the flywheel. To remove a stuck nut, the wrench is extended with a suitable pipe. Please note that the crankshaft shank has a right-hand thread, so turn the ratchet counterclockwise.
- Remove the crankshaft pulley. For these purposes, use a mounting spatula, prying the part from different sides and using the tool as a lever. However, do not overdo it, as if you press too hard, you will break the front engine cover.
To play it safe, make sure you have a puller in your arsenal. With its help, you can easily and safely dismantle even those parts that are installed with a noticeable interference. - Clean the front part of the cover, the oil seal and its seat, otherwise dirt will get inside the engine when removing the sealing element.
- Using a strong, wide-bladed screwdriver, use a strong, wide-bladed screwdriver to pry up the seal with support from the oil seal socket. Tapping the handle of the tool, remove the damaged part.
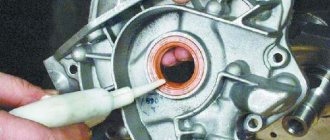
- Before installing a new oil seal, wipe its seat until it shines - this will make installation easier in the future. If the damaged oil seal is removed too easily, this indicates wear of the socket in the camshaft drive cover. To ensure sealing in the future, apply a layer of automotive sealant to the side surface of the new seal.
- Carefully install the oil seal into place. Make sure that it does not warp and fits evenly into the socket.
- Using a suitable mandrel (you can even take a wrench to remove the ratchet if it is the right thickness), carefully press the oil seal into place with a hammer.
- Carefully inspect the crankshaft pulley. If there is significant wear on its working part, then replacing the oil seal will not eliminate the problem of oil leakage. In this case, replace the part.
- Before installing the pulley, lubricate the inner and outer surfaces of the pulley hub with engine oil. Lubrication will make it easier to install the part on the crankshaft, and most importantly, it will prevent premature wear of the working edge of the oil seal in the first minutes of engine operation.
- While turning the pulley, align the groove with the key installed in the groove of the crankshaft. By shaking and simultaneously pressing on the part, ensure that the hub fits inside the oil seal.
- Screw the ratchet nut all the way in by hand and tighten with a wrench. According to the manufacturer's recommendation, the tightening torque does not exceed 101.3-125.64 N×m (10.34-12.8 kgf×m).
- Reinstall and tension the poly-V-belt of the accessory drive. Remember that excessive tension will cause accelerated wear on the alternator and coolant pump bearings. The deflection of the belt between the pump and the crankshaft with a pressure force of about 10 kgf x m is 12 - 17 mm.
- Tighten the generator mounting nut.
- Install the battery and connect it to the vehicle's on-board network. At this point the repair is considered complete.
To replace the crankshaft oil seal, you do not need any special knowledge or expensive tools. The work can be done with your own hands, spending 1-2 hours on it. By being careful in your work, you will forget about oil leaks for a long time and will be able to easily keep the engine compartment clean.
Important nuances
Now there are three important points to note, without which this article would be incomplete:
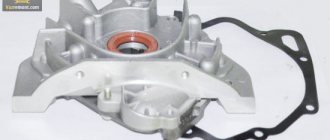
- seal sizes. When buying an oil seal at a spare parts store, you should definitely tell the seller which oil seal you need: front or rear. Despite the external similarity, the sizes of these oil seals are different. The dimensions of the front oil seal are 55*41*8 mm (these are the outer and inner diameters and thickness of the product), and the rear oil seal is 88*69*10 mm;
- Relatively recently, oil seals manufactured by Corteco appeared on sale. They are in high demand among owners of “sixes”. The fact is that the material for their manufacture is fluorine rubber. Oil seals made from it are more reliable and wear-resistant. So, if possible, it is better to purchase this particular part, despite the high price, which starts at 500 rubles;
A novice driver can easily change the front crankshaft oil seal on his own. You will have to tinker with the rear oil seal a little longer, but this task is quite capable. You just need to take your time and follow the above recommendations exactly.
Front crankshaft oil seal VAZ 2106
The main sign of front oil seal failure is contamination of the engine compartment with grease; it is simply impossible not to notice. Car owners are often very sensitive to any car breakdown. I am always upset, of course, by the cost of repairs, as well as by my own inability to solve simple technical problems. Replacing the front oil seal on a VAZ 2106 is not a complicated standard procedure (after reading the article you will see this), which allows you to avoid more serious problems with the engine (due to oil leakage).
How to Unscrew the Crankshaft Pulley Bolt of a VAZ 2110
How to remove a crankshaft pulley bolt: why is this so difficult for our client? An understanding motorist carries out the process of dismantling the crankshaft pulley in a quarter of an hour. But inexperienced drivers, trying to remove this element without outside help, are faced with many problems that they usually solve in the usual way. The repair and maintenance summary of at least some modern vehicles contains comprehensive information about the dismantling process, however, sometimes this does not help car owners. First of all, there are difficulties with fixing the P. It is very difficult to disassemble if the part constantly rotates and protrudes from the hands. Many people are also unclear on which side to get to the bolt where the pulley is held. Well, its powerful tightening usually makes the process of removing the assembly very difficult, since disassembly according to such criteria threatens to damage the coating of the body or parts of the engine compartment of the car. Our client still has car groups and auto service technicians putting a lot of effort into tightening the PP nut or bolt (in some TS models the mechanism rests on the bolt, in others on the nut). This is specifically so as not to unwind this part separately when using the car. P. If a bolt (nut) falls while driving, it will be difficult to bring the car back to life in order to continue driving it, and the repair itself will cost, believe me, a lot of money. Today, these mounts increase the level of self-clamping without engine assistance. And the final indestructibility of the bolt is explained by the phenomena of coking, adhesion and corrosion. Who is the second car owner trying to repair their beloved four-wheeled friend on their own? The problem is how to remove the crankshaft pulley. After reading the notes in the maintenance and repair manual, the procedure does not seem difficult at first, but when you first try to remove a bad bolt, it turns out that it is not easy.
What is an oil seal
An oil seal is a rubber-metal cuff that serves as a seal in various units and mechanisms with moving parts; For your information:
- The term “oil seal” has long been outdated, dating back to the times when the first models used a felt seal lubricated with grease (in common parlance with lard), it is more correct to call it a reinforced cuff or a radial cuff
- The cuff, thanks to its specific design, creates a seal and prevents lubricant from leaking; any malfunctions of its operation (misalignment, tears, abrasions, cracks) lead to oil leakage and the engine running dry, the consequences of such work are expensive and time-consuming major repairs
- Any slight displacement of the cuff from the standard location will certainly lead to oil leakage
- It is considered normal to change the cuffs approximately once every three years, but replacement may be required earlier, it all depends on the conditions of its use and various side problems
Typical malfunctions of crankshaft seal units
A modern oil seal is a resource part. There are models that can operate up to 1 million kilometers. A standard oil seal will “live” approximately 100,000 km. When the structure of the seals is damaged, oil begins to leak. A leaking oil seal may not affect engine performance, but you should not delay replacing it.
The formation of oil stains or build-ups in the area where the crankshaft exits the engine is a sure sign that the oil seal assembly is leaking.
In case of critical wear, the oil seal may not withstand internal pressure and may move from its seat. If the seal is pushed out, the engine will likely lose a significant amount of oil, which can lead to unplanned repairs.
If the crankshaft oil seal on your car repeatedly squeezes out, or the leak does not stop after replacing the oil seal, it means that a wear has formed on the surface of the shaft, and the size of the oil seal is larger than necessary for sealing. A shaft with such defects must be restored or replaced.
Causes and signs of oil seal malfunction
When the tightness of the sealed assembly is broken, lubricant leaks through the damaged cuff, it gets onto the rotating parts, and is sprayed throughout the engine compartment. The prerequisite for replacing the front oil seal on a VAZ 2106 is usually splashing of lubricant in different directions in the front part of the engine. Why this happens:
- Natural wear and tear of the cuff during use
- Installation of the cuff is skewed and, as a result, cracks appear on its body due to static stress
- Mechanical damage to the crankshaft oil seal
- Damage to the integrity of the working surface of the cuff when the engine overheats
- Poor quality (initially defective) oil seal, in other words – a fake.
Attention: The reason for oil leakage through the oil seals may be its insufficient viscosity or increased fluidity; this usually occurs if the owner uses a lubricant that does not meet the technical conditions of the engine (for example, synthetic oil instead of mineral oil)
Many car owners believe (and not without reason) that replacing the front oil seal on a VAZ 2106 is easy to do with your own hands. This allows them not only to save money and time, but also to gain experience in repairing a personal car. Let's not argue with them. It is only important to know some of the nuances, and this will become feasible for you too.
When and why to change the front oil seal
The manufacturer recommends replacing the front crankshaft oil seal of VAZ 2101-2107 engines every 150,000 km. However, in practice such replacement has to be performed more often. Accelerated wear of the sealing element and the appearance of engine oil leaks are caused by:
- skewed oil seal during installation;
- loss of elasticity due to engine overheating;
- increased radial runout of the drive pulley of mounted units;
- use of low-quality motor oil;
- wear on the crankshaft pulley hub.
In addition, we cannot rule out hardening of the cuff due to natural aging and the possibility of a manufacturing defect - unfortunately, the quality of parts for rear-wheel drive VAZ models leaves much to be desired.
It is impossible not to notice damage to the sealing element - the rotating pulley scatters oil in the front of the engine and throughout the engine compartment. However, do not think that such a malfunction only leads to oiling of the units and a decrease in the lubricant level. If engine oil gets on the generator belt and other rubber parts, it can quickly render them unusable.
Keep in mind that the appearance of a leak through the engine seals is provoked by another factor - increased crankcase gas pressure. For this reason, be sure to check the cleanliness of the engine ventilation system.
Something else useful for you:
