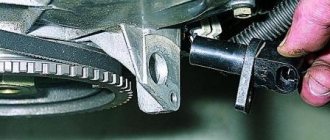
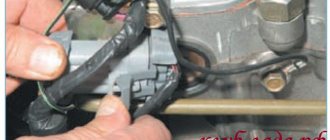
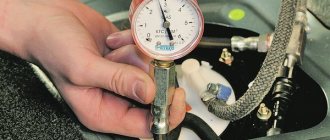
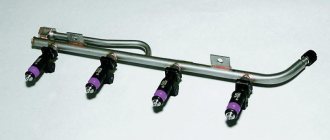
Almost all modern cars are built on injection engines, the VAZ 2114 is no exception. This type of engine made it possible to increase power and reduce fuel consumption of the vehicle as a whole. As you know, for the injector to work, you need many different parts and sensors involved in the operation of the engine. The fuel in such an engine is supplied under pressure, and then atomized and mixed with air, then enters the combustion chamber in the form of an air-fuel mixture. To spray fuel, fuel injectors are used, which operate under a certain pressure.
This article talks about VAZ 2114 fuel injectors, namely their purpose, design, signs of malfunction, methods of cleaning and self-replacement, as well as cost and much more.
Removal
2. Relieve the fuel pressure in the fuel line (see “Fuel line - pressure relief”).
4. Two 17 mm
unscrew the fitting (2) of the fuel rail tube, holding the hexagonal tip of the fuel line hose supplying fuel to the ramp. We remove the hose tip from the tube. Similarly, disconnect the fitting (3) of the fuel drain pipe into the tank. Release the clamp (1) securing the wiring harness.
5. Using a Phillips screwdriver, unscrew the screws securing the fuel pipes and remove the clamping bar of the bracket (see “Fuel rail of engine 21124 (1.6i 16V) - removal and installation”).
6. Remove the rubber sealing rings from the tubes (see “Fuel rail of engine 21124 (1.6i 16V) - removal and installation”). We replace damaged o-rings.
8. Disconnect the wiring harness block and disconnect it from the bracket (see “Injectors - check”).
9. Using a Phillips screwdriver, loosen the clamp securing the crankcase ventilation hose and remove the hose from the cylinder head cover pipe.
10 mm socket wrench
Using a ratchet, unscrew the bolt securing the oil level indicator tube.
. and remove the tube along with the pointer.
5mm hex wrench
unscrew the two bolts securing the fuel rail to the cylinder head.
12. Remove the fuel rail assembly with injectors, wiring harness and fuel pressure regulator.
Comment. To remove the fuel rail, you need to pull it towards you and then move it to the left side
Be careful!
Before checking the pressure of the fuel system, you need to make sure that it is intact and there is no depressurization, otherwise the measurements will be inaccurate. First of all, you need to open the hood, then turn off the ignition.
- Find the injector fuel rail.
- Remove the fuel pressure fitting plug and unscrew the nipple using a spool valve.
- Using rags and containers, remove any remaining fuel. Be careful to avoid contact with eyes.
- Connect the device hose to the fitting and secure it using the same clamp.
Disassembly
13. Using a slotted screwdriver, release the two brackets securing the wiring harness.
14. Disconnect the four wiring harness connectors from the injectors.
15. Remove the wiring harness from the fuel rail.
16. Move the spring clamp along the fuel rail and remove the injector.
17. Remove the spring clamp of the injector from the fuel rail.
18. 24 mm
Unscrew the nut of the fuel outlet pipe.
. and remove the end of the tube from the pressure regulator.
5mm hex wrench
unscrew the two bolts securing the fuel pressure regulator (1) and move the clamping bar (2) of the fuel supply tube along the fuel rail. Remove the fuel pressure regulator (3).
. and remove the tube from the ramp hole.
Warning! Damaged O-rings of fuel pipes and injectors must be replaced.
Signs indicating fuel system malfunctions:
- The engine is running rough or there are some interruptions in its operation.
- Idle speed floats, engine stalls at idle.
- Excessive fuel consumption occurs.
- CO in the exhaust is higher than normal.
If the car has similar indicators, the ECU at this moment works well, the problem is most likely in the fuel rail. To make sure that this is so, you need to check the pressure in the rail.
The process of cleaning injectors on a VAZ-2110
Before cleaning, it is necessary to realize that the motorist knows the design and operating principle of the unit, as well as the degree of responsibility for all operations performed and their consequences. If you are not so sure, it is recommended to contact a car service.
To begin with, it is necessary to dismantle the elements from the fuel line and completely remove them from the car. This was done for the convenience of transactions. So, let's start disassembling the unit and dismantling it:
- The engine has cooled down and operations can begin. De-energize the fuel pump. This can be done by turning off the fuse or removing the wire blocks from the power connector.
- We reduce the pressure in the fuel line.
Disconnect power from the fuel pump and relieve pressure.
We completely remove the terminal from the battery, since we will have to remove the ramp assembly.
Remove the battery terminal to remove the fuel rail.
- Disconnect all wires connected to the fuel rail.
- Remove the fuel supply pipe.
Once everything is disconnected, you can remove the fuel rail from the engine.Using a hexagon, unscrew the fastening bolts of the ramp and remove it along with the injectors.
Having disconnected the fuel hose, we dismantle the fuel rail.
Disconnect the mounting brackets and remove the injectors.
We remove the fastening brackets and dismantle the injectors from the ramp.
The injector seats must be covered to prevent foreign objects from getting into the manifold and cylinders, which could damage engine components.
After the injectors are removed from the car, you can proceed directly to the cleaning process:
- We remove the rubber seal from the nozzle itself.
Using a special nozzle cleaner, we wash the funnel-shaped surfaces and nozzles.
- Next, we clean the fuel supply channel.
- When manual cleaning is done, it is worth moving on to a more effective method.
- To do this, connect power to the injector. It is not recommended to use a standard car battery, since you can burn the injector winding and you will have to buy a new one. Ideal for mobile phone power supplies (charging).
- Using a standard syringe (used as an adapter) we connect a can of liquid for cleaning carburetors.
- After this, turn on the power for a few seconds. Do this several times until the stream from the nozzle becomes uniform. This operation must be carried out with each nozzle.
- The first method involves the use of automotive chemicals. A very effective, but significantly expensive method. To everything else, we can add that automotive chemicals are not safe to use for the human body, and therefore you should be extremely careful. When using chemicals, the nozzles do not need to be removed!
- Car service. Of course, this is the safest and most reliable way to clean injectors using a special stand. The obvious disadvantages include the cost of performing such work, since the price is often too high.
- Do-it-yourself injector cleaning. The most profitable and economical method of repair and restoration work on the fuel system. In this case, the car owner needs knowledge of the structure and operation of the elements, so as not to screw up anything, and also not to increase the cost of repairs.
Do-it-yourself procedure for connecting and cleaning injectors.
Cleaning methods
In practice, there are several types of injector cleaning. The most famous and used three methods:
Symptoms of a problem
If you clean and maintain the injector assembly in a timely manner, they can last quite a long time. But when to clean the elements is difficult to determine, so there are a number of signs of malfunction.
- Starting the engine with difficulties or not the first time.
- Loss of power and traction.
- Troubling is a clear sign of uneven fuel supply.
- Increased consumption.
- Jerking of the vehicle in the winter season.
If the above symptoms occur, it is necessary to urgently clean the injectors. After the procedure, the performance of the car engine should return to normal. If this does not happen, then you should look for reasons in another place, such as the fuel pump, fuel filter or cylinders.
Symptoms for replacement
Removed injectors
In fact, there are quite a lot of reasons why injectors may not work well. And below are the most common symptoms:
- Difficulty starting the engine in any weather;
- The engine is running erratically;
- The engine stalls at idle;
- High crankshaft rotation speed at idle speed;
- Loss of power, poor response to the accelerator pedal;
- When you press the gas, shocks or dips may appear;
- High gas consumption;
If the nozzle is dirty or damaged, it should be replaced or cleaned. There is no point in repairing it. It should also be noted that today injectors cannot last even 100 thousand km .
We clean the injectors with our own hands using carburetor cleaning fluid
Checking old injectors
Before replacing injectors, it is recommended to check them. This will allow you to determine whether it is working or not.
The test is carried out on a removed fuel rail, on a special stand.
Such a check can be done in almost any service.
Checking injectors on a bench
You can also check not all injectors at once, but each one separately. To do this, you will need to apply current to the part and install a container with fuel on it. When current is applied, the valve will operate and gasoline will spray out through the nozzle. But such a check is inaccurate and will still need to be checked at a stand.
The process of removing the fuel rail (+photo)
General view of the fuel rail
Before proceeding directly to the dismantling process, you need to understand that you will have to remove the injectors, and therefore you can simultaneously diagnose and clean this unit. So, let's consider the sequence of actions that are aimed at removing the fuel rail:
Unscrew the clamp and remove the crankcase ventilation hose
Unscrew the oil circulation pipes
Having disconnected the connectors, we disconnect the ramp from the on-board network
After unscrewing the fastening screws, we dismantle the fuel pipe bracket
Unscrew the screws by 5 and remove the ramp
Unscrew the fastenings of the fuel supply regulator and remove it
Reasons for withdrawal
There are several reasons for removing the fuel rail from the car:
- Cleaning injectors.
- Replacement or repair of the ramp itself.
- Removing the valve cover.
- Carrying out diagnostic and repair operations that involve engine disassembly.
- Other operations where removal of the ramp is required.
Fuel rail mounting diagram
Repair of injectors VAZ 2114/2115
Repairing injectors involves carrying out a number of works at once:
replacement of rubber seals.
After the products have been removed from the fuel rail, you need to take a good look at each of the four nozzles. If there are visible signs of leakage on the body, repair will not be practical. You will have to immediately replace the nozzle with a new one. The differences in flushing and cleaning procedures for 8-valve and 16-valve engines are not significant. Therefore, you can be guided by the same scheme.
Video: the easiest way
If the body is clean and there are no deformations or cracks on it, then repair work is allowed . To do this, you will need to remove the seal from the body and the sprayer. It is recommended to leave these parts in acetone or solvent for 1.5–2 hours. While the parts are being washed, you can use a vacuum cleaner to clean the fuel rail. Next, you need to carefully clean the place where the injectors fit into the ramp using a toothpick or a needle.
After this, you can start purging the nozzle from the inside. You will need a roll of electrical tape, an aerosol can for cleaning carburetors and a syringe. An aerosol cleaning liquid is supplied through a thin syringe into the nozzle cavity. It is better to wrap the joint between the syringe and the tube of the canister for sealing with electrical tape. It is recommended to repeat washing the nozzle from the inside three times. Afterwards the product must dry. As soon as the body itself, as well as the seal and sprayer dry after washing, you can assemble the nozzle and install it on the ramp.
A cheap product will perfectly remove dirt and deposits from the nozzle
Before installation, each nozzle is tested for resistance . The tester readings should be in the range of 11–15 ohms.
There is also a simple way to clean the injectors, without dismantling the fuel rail. However, it is only appropriate in cases where the injectors have not yet exhausted their entire service life (120–150 thousand kilometers). The use of cleaning additives in gasoline is allowed. In this case, all elements of the fuel system will be cleaned, but its closed nature does not allow removing dirt and sediment from low-quality gasoline.
The liquid is poured into the gas tank and, together with fuel, cleans all elements of the system
Replacing rubber rings and seals on injectors
Usually, when washing or repairing injectors, car enthusiasts immediately change all rubber elements. This is due to high wear rates. The cost of rings and seals is very low, but after replacement you can immediately observe the stability of the motor.
Rings and seals can be removed with one movement of the hand. However, installing new ones will require care, as it is easy to damage the rubber. The plastic element is first lubricated with gasoline, and then pulled in place of the old seal.
Spare parts for VAZ injectors can be purchased at a minimal price
Almost every driver can clean or replace the injectors on VAZ 2114/2115 cars on their own. Difficulties can arise only in the process of unscrewing the fuel rail or reconnecting the wires to the injector contacts. However, if each stage of work is carefully carried out, even a beginner can independently maintain this element of the fuel system.
Source
Features of the fuel rail design
What is the importance of this element? As already mentioned, a fuel rail or rail is used in engines with distributor fuel injection, that is, in diesel engines and modern engines.
The part is a hollow metal tube with closed ends. Bends are attached to the ramp for connecting small tubes connected to the nozzles. Also, there is a hole on the rail for installing a pressure regulator.
Purpose of the fuel rail
Most often, the ramp is attached to the intake manifold of the power plant. Its direct purpose is to distribute fuel to the injectors. At the moment of fuel supply, high-power pressure is created inside, which can destroy the ramp structure. To prevent this from happening, the manufacturing material is a single piece of metal pipe.
Since the fuel mixture contains various additives, the injectors attached to the ends of the outlet pipes often become clogged.
Cleaning and dismantling injectors
To clean the injectors, they must be removed, this must be done carefully, as the connectors and nozzles can be damaged. When dismantling the ramp, you must make sure that no dirt from the injectors gets inside the tubes, otherwise the entire cleaning operation will have to be repeated. We recommend washing the injectors every 20 - 30 thousand mileage.
Cleaning injectors
To clean the injectors yourself, you do not need to have great skills in car repairs; it is enough to have the desire to repair the car yourself and purchase the necessary parts to carry out this work.
For cleaning you will need:
- Carburetor cleaner;
- Syringe;
- Wire 2 m;
- Lamp 12V;
- Non-latching button (wires can be used);
- Lamp (serves as a current-limiting resistor);
- Injector connector;
- O-rings;
After all the parts are prepared, we assemble the washing device. We fill the syringe with up to half of the carburetor cleaner, and insert it into the nozzle with a diameter that fits perfectly.
We assemble a power circuit for opening and closing the nozzle. We connect everything as shown in the diagram.
Flushing
We connect the circuit to the battery and create pressure on the injector by pressing the syringe piston, as soon as pressure appears, press the button and close the circuit for 1-2 seconds, the injector will open, we repeat this procedure several times until the injector sprays fuel evenly.
How to remove the fuel rail on a VAZ-2111 car engine yourself
The next material on self-repair of vehicles is devoted to removing the fuel rail on the VAZ-2111 engine.
First, you need to disconnect the battery. Remove the positive terminal. We remove the ramp with the fuel pressure regulator and disconnect the vacuum hose from the regulator. Using two 17mm wrenches, unscrew the fuel pipe fittings, releasing the fuel pressure.
Disconnect the ramp electrical connector
Using a Phillips screwdriver, unscrew the screw of the bracket securing the fuel pipes
and remove it Using a “5” hexagon, unscrew the two screws securing the ramp. Pull the ramp along the axis of the injectors, remove all four injectors from their seats and remove the ramp towards the left side of the car
How to remove the fuel rail on a VAZ-2111 car engine yourself
Please rate this page
What injectors are installed on VAZ 2114/2115 cars
Almost all types of injectors that the VAZ 2114/2115 are equipped with at the factory can be considered interchangeable. Depending on the year of manufacture, injectors manufactured by Bosch and Siemens of different markings were installed on the car.
Model 0280 158 022. The product is compatible only with a 16-valve 1.6-liter engine. The nozzle is black and is designed to operate at an optimal pressure of 3.8 atmospheres.
Model 0280 158 017. An injector with this marking is installed on 8-valve engines with a volume of 1.6 liters. The body is also black.
Modification 0280 158 996 is considered obsolete, since injectors with this marking were installed on cars until 2006. The model was intended for 8-valve power units.
Standard equipment of VAZ 2114/2115 injection engines
VAZ20734 is made in an orange case. The model can be installed on a VAZ 2114/2115 of any year of manufacture, but the modification is paired with an 8-valve engine.
Model VAZ20735 is intended for a 16-valve engine. In terms of its characteristics, it is practically no different from the previous model. The nozzle has a blue marking.
Depending on the marking, it can be used on different types of engines
Preparatory work
- We take a pre-prepared pressure gauge, and to prevent fuel spills and air leakage, we wrap flax or fum tape around the tip.
- We are preparing a hose with a maximum internal diameter of 9 millimeters, and clamps will be needed to secure them.
- We place the prepared rags on the engine in such a way that the hose and pressure gauge fixed on it cannot roll off the surface. This is done to prevent excess fuel from spilling over the surface of the engine.
- We wrap flax or tape around the pressure gauge, then fix the hose on it and tighten everything with a clamp.
- On the ramp, unscrew the spool valve from the nipple (in this case, fuel splashes are possible due to the presence of residual pressure - approx.).
A regular wheel cap came in handy.
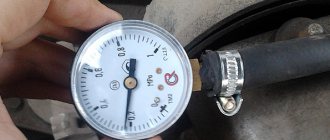
Pressure gauge with pipe assembly.
We place the pressure gauge on a previously prepared rag, and the preparatory work can be considered completed.
Measurement procedure
Before you start working, you can try to relieve the pressure in the fuel system. To do this, remove the fuel pump fuse (which is located on the right side of the panel, under the front passenger’s left foot - approx.). Where 3 relays and 3 fuses are located. In the photo below it is located under the number “5”. After removing the fuse, turn on the ignition and check by ear that the fuel pump is not pumping. We start the car and wait for the engine to stall.
- After everything is ready, we check the already attached end of the pressure gauge with the hose for a secure connection.
- Next, start the engine and look at the readings that appear.
Thus, we diagnose the results that appear and compare them with the results of the norm.
After all the work has been done, unscrew the hose with the pressure gauge, screw in the spool and return everything to its original state.
Note!
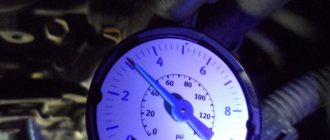
The peculiarity of measuring pressure using a pressure gauge is such that its initial value on the scale has a certain inaccuracy. That is, when the air analogue has a measurement period of 15-20 atmospheres, and for fuel control the required maximum value is 5-7 atmospheres, then all measurements taken will have an error equal to the initial values on the device. Therefore, pressure testing should be carried out on a pressure gauge with maximum values of up to 8 atmospheres.
We measure the pressure in the system without a check valve
If it happens that your engine does not have a check valve, then you need to know that in such a ramp there is a constant pressure of 3.6 to 4.0 atmospheres. But the order of measurements in general is completely similar to what is described above.
After reading this article, you can easily take measurements in the fuel rail and compare the results with standard indicators of serviceability in the fuel system.
Replacing injectors
The difficulty in identifying problems in the operation of injectors is that the fuel system is quite branched and it is necessary to diagnose the functionality of all its parts. For example, a malfunction such as a decrease in engine power can have two reasons - failure of the injectors or exhaustion of the pump's life.
Clogged injectors can result in sudden jerking of the engine while driving or unstable idle speed. In addition, an increase in fuel consumption can be considered a sign of injector failure.
You can check the functionality of each injector even without removing them. Simply start the engine and remove the wires from the connector of each injector one by one. If immediately after removal the engine starts to twitch or stalls, then the injector is fine. If the stability of the engine does not change with removal of the wire, then the injector needs to be thoroughly cleaned or even replaced.
This material will help you to independently replace or wash the injectors on VAZ 2110-2112 cars: https://vazweb.ru/desyatka/pitanie/zamena-forsunok-vaz-2110-8-klapanov.html
Video: replacing injectors on VAZ 2108 - 2115 injectors
PREVENTION OF THE FUEL SYSTEM VAZ-2114
Prevention, as a rule, comes down to regular cleaning and, if necessary, replacing the fuel pump filter and the main fuel system filter.
Also once every 25-30 thousand km. It is necessary to clean the injectors, which is performed exclusively at a service station. There are two methods for cleaning injectors, neither of which require removing them:
- Ultrasonic cleaning;
- Cleaning with a special washing liquid.
The most effective and expensive is ultrasonic cleaning, which makes it possible to bring back to life even heavily worn nozzles.
Methods for checking fuel rail pressure
The procedure for measuring the pressure in the VAZ 2114 ramp is carried out to identify a malfunction in the supply of gasoline to the injectors.
There may be several signs of a fuel system malfunction:
- instability in the operation of the car engine (motor trouble);
- increased volume of carbon monoxide at the outlet;
- unreasonably increased consumption of gasoline (increase to 30-50%);
- failures in the operation of the power unit;
- drop in engine power with a normally operating electronic control unit.
The first thing the car owner needs to do after identifying these malfunctions is to measure the pressure in the ramp.
Before work, you need to prepare the following tools and materials:
- pliers;
- screwdriver;
- sanitary linen;
- fuel or oxygen hose (internal diameter must be at least 8 mm);
- mechanical pressure gauge with a measurement limit of up to 7 atmospheres;
- several clamps;
- container for draining fuel;
- cap for twisting nipples.
Before starting work, you must ensure that the fuel system is tight. If you take measurements in the presence of microcracks or leaks, the results will be unreliable.
- We wrap plumbing flax under the pressure gauge nozzle, screw it into the hose and secure it with a clamp.
- Use your hands or pliers to remove the cap from the fuel rail.
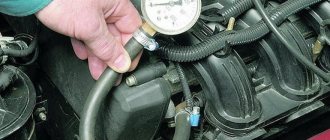
- Using the cap, unscrew the nipple and put on a hose with a pressure gauge. We secure the connection with a clamp.
- We start the engine and record the pressure gauge readings.
- To check the pressure regulator, disconnect the hose leading from the regulator to the intake manifold. In this case, the pressure gauge should show an increase in pressure to 3-3.2 atm. If the pressure readings do not change, there may be a problem with the fuel pump.
- Now you need to measure what maximum pressure the pump develops. Using pliers, the return fuel line is pinched. The new pump should show at least 6 atm. If the pressure gauge registers 5 atm, then the pump is already very worn out, but can still continue to work for some time. The pump is clearly faulty if the reading is less than 4 atm.
- We check the condition of the pipeline. To do this, we find the fuel pump assembly (under the rear seat) and determine the type of connection. A quick-release connection can be purchased in a store for literally pennies. If the connection is threaded, then the entire pipe is purchased and the tip is cut off. We put a hose with a pressure gauge on one end of it, and connect the other to the pump outlet. Now let's check the pressure. If the pressure gauge shows 6 atm, then we simply flush the entire system and replace the fine filter. When replacing the filter, direct the gasoline supply hose into a previously prepared container and turn on the ignition. We carefully inspect the fuel that has spilled into the container, install a new filter and repeat the procedure again. If after the new filter the gasoline is dirty, be sure to wash the injectors.
If after all the checks the problem remains, then a complete diagnosis of other systems (mass air flow sensor, idle speed sensor, cylinder compression and throttle position sensor) is necessary.
How to remove and clean
- Turn off the fuel supply from the fuel rail.
- Disconnect the electrical connector for the fuel injectors.
- We unscrew the two bolts securing the ramp and pull it out.
- We remove the injectors from the ramp and install them in a special stand
- After cleaning, put everything back together in reverse order.
Further in our photo report there are more detailed instructions.
We begin to remove the fuel injectors for further cleaning. The injectors are located behind the intake manifold.
The first thing we need to do is relieve the fuel pressure from the fuel rail. To do this, unscrew the plastic cap indicated by the arrow in the photo.
And use something sharp to press on the spool valve, first placing a container so as not to pour gasoline all over it.
What pressure indicators should be in the fuel system?
Normally, the fuel system should have the following measurement indicators:
- at idle: approximately 2.5 atm. If the pressure gauge shows less, the coarse filter probably needs to be cleaned or replaced;
- with the ignition on: at least 2.9-3.0 atm;
- with the vacuum hose removed: 3.3 atm. A reading of 3 atm is also considered acceptable;
- with a pinched drain tube: from 6.9 to 7.0 atm;
- when gasping, the pressure should immediately jump to 3 atm, and then drop to 2.5 atm.
COMPONENTS OF THE FUEL SYSTEM
The VAZ 2114 fuel system consists of the following main elements:
- Gas tank;
- Fuel pump;
- Gasoline filtration devices;
- Pipeline system;
- Fuel rail;
- Injectors;
- Waste disposal unit.
Fuel system diagram
Let's analyze each component separately.
GAS TANK
The VAZ 2114 gas tank is a container made of two equal metal parts. A neck is removed from the tank into which gasoline is poured. The neck is connected to the tank via a rubber pipe and clamps.
FUEL PUMP
The fuel pump is located directly in the tank. It has a fuel level sensor, which transmits information about the current amount of gasoline to the ECU. The gasoline pump is connected to a line through which gasoline is transported to the fuel rail. The fuel pump itself consists of several parts - coarse filters, wiring and an electric motor, which pumps fuel. As evidenced by reviews from owners of fourteenth cars, fuel pumps from the German company BOSCH have proven themselves to be the best.
FILTRATION DEVICE
The VAZ 2114 fuel injection system very much depends on the quality of the filter devices used. A bad filter will significantly reduce both the efficiency and the longevity of the entire system.
On the fourteenth, non-separable filters with a working element made of paper are installed. Such filters clog quite quickly, and they need to be changed at least once every 10-15 thousand kilometers.
FUEL RAIL
The fuel rail is located on the intake manifold housing. Its design consists of two parts, separated by a spring-loaded diaphragm. The first is the fuel one, in which the required level of gasoline pressure is set, the second is the air one, air is pumped into it, due to which the diaphragm compresses the fuel chamber and changes the pressure level in it.
Ramp
PIPING AND HOSES SYSTEM
To circulate gasoline from the gas tank to the injectors, the fourteenth uses steel fuel lines located on the bottom of the car. The VAZ 2114 fuel supply system also provides for a return pipeline through which excess gasoline from the injectors is returned back to the gas tank.
VAZ 2114 owners are advised to carefully monitor the condition of the fuel line in order to avoid gasoline leaks. Pipes should be checked regularly for deformation and corrosion.
INJECTORS
Injectors are valves actuated by electromagnetic control. They have a sprayer, with the help of which fuel under pressure is supplied directly to the combustion chambers.
Injectors are one of the most problematic parts of the fuel supply system of the fourteenth (as well as VAZ 2115 and VAZ 2113), the service life of which directly depends on the quality of the gasoline used. If the fine filter does not fully perform its functions, the injectors will become clogged, and from time to time you will need to clean them at a service station (doing this at home is very problematic).
A critical failure of the injectors is a short circuit or break in the winding, after which it is necessary to replace the failed part.
WASTE DISPOSAL UNIT
The EURO-3 environmental safety standard, to which the VAZ 2114 complies, provides for the presence of a gasoline vapor recovery chamber, for which the fourteenth uses an adsorber with activated carbon. The adsorber is connected to a throttle assembly, from which all resulting vapors are sucked out.
Adsorber
