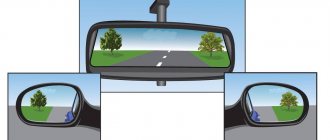
How to properly disassemble a side rear view mirror?
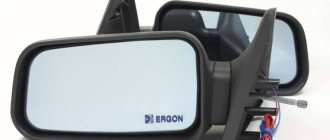
A rear view mirror is necessary for every car. They are not the same on different car models, but they perform a single function - they broaden the driver’s horizons.
Unfortunately, a frequent problem is the breakdown of these elements of the car. This part of the car is most vulnerable in a parking lot. Any “neighbor” can accidentally knock over a mirror. Unfortunately, in the event of a breakdown of this kind, there is only one way out - remove the damaged part and install a new one in its place. However, such a sad situation is not the only reason to change the mirror. This skill will also be required when repainting a car or if the mirror surface is scratched or cracked.
Side rearview mirror
Installation and connection of SE side mirrors on Priora
Category: Do-it-yourself external tuning of Priora
| The mirrors on the VAZ 2170 can be considered a gift from AvtoVAZ, because they are heated on all trim levels. Despite this, many car enthusiasts replace them with mirrors from Lada Priora Second Edition (SE). Most often, difficulties arise only during connection. |
Mirrors on the Priora SE and the old model, what is the difference?
1) The presence of turn signals on the mirrors. SE has them, old ones don't.
2) Visibility, it is greater on the SE mirrors.
3) Mirror mounting triangle. On the SE mirrors it fits better without any gaps.
4) Protection from rain. SE mirror housings provide less protection from rain and snow.
5) The external differences of the mirrors can be seen in the following photos:
At the moment, the price of SE mirrors on Lada Priora is about 3,300 rubles.
Installing SE mirrors on Priora
How to remove a mirror on a Priora. We follow these instructions, dismantle the old-style mirrors and install the SE mirrors in the reverse order.
Connecting rear view mirrors Priora (SE)
Old style mirrors have 2 connectors with wires:
Block No. 1: mirror control:
Block No. 2: heated mirrors:
SE mirrors have 3 connectors with wires (an additional plus (6th wire) is for the turn signal). Connecting new mirrors is carried out in the same way, all colors are the same, except for one - +12V mirror heating, brown is used instead of Gray.
Block No. 1: mirror control:
- red connects to red-blue.
- blue with blue-black.
- green with green-black.
Block No. 2: heated mirrors:
- Instead of gray there is brown, we combine it with blue-red (black-red).
- black with black (used for heating and for turn signals).
Block No. 3: direction indicators:
For those who haven’t figured it out, here’s a diagram for connecting the SE side mirrors on a Lada Priora:
The main thing is not to confuse the red-blue and blue-red wires. They are almost the same, so before connecting it is better to check them with a tester (multimeter or + 12V light bulb), connecting the minus of the tester to the body, and the (+) to the wire. If the lamp lights up after turning on the heated mirrors, then this is the correct wire that needs to be connected to the brown mirror wire.
Connecting the SE mirror turn signals: You can take the plus for the turn signals from the direction indicators in the car's wing.
- Left wing - blue-black and black wires.
- Right wing - blue and black.
By the way, for the VAZ 2172 the VAZ 2112 Coupe also borrows some body elements, for example, a spoiler.
The most common reason why many people replace the exterior mirror on a Priora is its failure due to the so-called impact “on the mirrors” from another car. This can happen on the highway when the road is too narrow, when two cars can hardly fit on the roadway. If you and your car are unlucky and the mirror breaks, then replacing it will not be difficult.
Removing the mirror
First we dismantle.
Naturally, it will be more convenient to disassemble the mirror removed from the car, so it should be removed. What is needed for this?
Removing a power mirror. First, you need to remove the mirror adjuster locking bracket, unscrew the three screws that secure the mirror to the door frame, and then remove the mirror itself.
Removing the electric mirror. The first thing to do is disconnect the negative terminal from the battery. Next, you need to disconnect the block from the electric drive wires, unscrew the three screws securing the mirror to the door and remove it.
Detailed and universal method
Universal method
Inside the car, you need to unclip the plastic cover that covers the mirror mounting screws. After removing the cover, unscrew the three screws that hold the mirror in place and remove it. After this, you need to carefully remove the rubber gaskets -
If the rubber gaskets are damaged, it will be very difficult to buy new ones; they are rarely sold separately.
Now you need to unscrew the two screws securing the mirror adjustment joystick. Disassembling the joysticks themselves is a simple procedure; you just need to carefully remember the position of the cables and the color, since different colors are responsible for their adjustment. Next, you need to remove the three screws that are located on the lower plastic corner - it is most susceptible to damage during vehicle operation. After that you need to remove it too. How to remove the mirror element has already been described above. After removing the mirror element, you need to unscrew the four screws and remove everything else.
Place on silicone glue
The easiest way, of course, is to ask a mechanic you know or send the car to a car service center if you need to replace the mirror or paint it. But most owners are accustomed to repairing their car themselves - after all, this is a significant saving of money.
First way
Using a curved object or screwdriver, flip the mirror over by gently pressing down on the inside. Trying to turn the mirror over from the edge may damage it. Some motorists use a variety of objects to remove the mirror element. It could even be all kinds of kitchen spatulas. Some wrap the edge of the spatula with electrical tape to avoid damaging, or rather, scratching the surface of the mirror. Others use a single hard blade. to fix the gap, and the other is softer to insert it into the formed groove.
Disassembling the mirror
Disassembly example
Repair of side mirrors Lada Kalina
How to remove and disassemble a side mirror
by car Lada
Kalina
.
Replacing the mirror element on the exterior rear view mirror of Kalinas, Grants and Prioras
Video review on how to independently replace the mirror element on the outside rear view mirror of such cars…
There are several ways to disassemble a car mirror.
First way
Using a curved object or a screwdriver, unclip the mirror by gently pressing it from the inside. Trying to pry the mirror off from the edge may damage it. Some car enthusiasts use a wide variety of objects to remove the mirror element. It could even be all kinds of kitchen spatulas. Some wrap the edge of the spatula with electrical tape so as not to damage, or rather, scratch the mirror surface. Others use one hard spatula to fix the gap, and a second softer one to thread it into the resulting gap.
Second way
In order to remove the mirror element, you should sharply hit the body with a soft object - it can be anything. In order to disconnect the mirror housing itself from the triangular mount, you need to remove the spring, unscrew the adjusting rod and remove the pin. Assembly and installation of the mirror is usually carried out in the reverse order.
Reasons for replacement and the process itself
Replacing a mirror on a Lada Kalina may be required in the following cases:
- if the mirror element is damaged due to impact or temperature change;
- if desired, improve the car;
- in the absence of a “part” (as a result of theft).
How to change a mirror yourself, and what is needed for this? With a little skill, the job can be done without difficulty. The main thing to consider is that dismantling and installing it yourself requires caution. This will avoid breaking the new element and damaging the car body.
When removing an element, you must turn it out to the maximum. This process will be indicated by the gap formed between the part and its body. In this matter, the main thing is not to damage the element motors. The structure itself is carefully unscrewed using a Phillips screwdriver.
It needs to be unscrewed from the car body and disconnected. This closes the question of how to disassemble a mirror. The next stage involves the installation of a new element.
The mirror element itself is located in the center, where it is safely secured with latches. The main thing is that it is secured correctly. To do this, you need to apply force and press on the part itself. Then the side element is screwed to the car body.
The process is not complicated, the main thing is not to damage the lining on the Kalina mirrors and not to spoil the mirror element itself.
How to remove a mirror from a windshield without breaking anything
09.10.2019
Issues discussed in the material:
- How to remove a mirror from the windshield on a domestic car
- How to do this on a foreign car
- How to install a mirror after dismantling
- What they say about removing the mirror from the windshield on car enthusiast forums
Every car enthusiast may have a situation when it is necessary to replace a broken windshield, or repair a rear view mirror, so information on how to remove a mirror from a windshield may be useful to anyone who owns a car.
Why remove the mirror from the windshield?
The side mirrors of a car may need to be removed in order, for example, to replace the glass on them, or in the event that the electric drive breaks down. It is worth noting that this must be done as carefully as possible, because this is a part of the body, damage to which will greatly deteriorate the appearance of the car. It is best to entrust this procedure to professionals, then you can be sure that everything will be fixed correctly and the paintwork will remain without damage. At the very least, the car service will take responsibility for the quality of repairs.
Even taking into account the fact that removing the side mirrors is quite easy, although the sequence of actions may vary on different brands of cars, independent dismantling can lead to damage to the electronics.
https://www.youtube.com/watch?v=tChRkpx-MLc
As for the rear view mirror in the cabin, here you can often come across a question from drivers: how can you remove it from the windshield without the help of a car service? Let's consider why such actions may be necessary:
- You may need to replace broken glass or repair electronics;
- if the mirror is not mounted tightly, sounds and vibrations may occur while driving;
- if you want to tint the windshield (remember that according to GOST, tint cannot exceed 25%);
- mirror upgrade, for example, with a rear view camera with parking sensors;
- installation in the area of the rear view mirror of any devices and sensors not included in the vehicle configuration.
“Where to change a windshield: signs of quality service” Read more
For many car enthusiasts, the process of such dismantling causes difficulties, which is not surprising, because no one wants to break a mirror, damage the ceiling or break the windshield. At the same time, there are a number of practical recommendations that will help you carry out this procedure correctly.
How to remove a mirror from the windshield on a domestic car
Cars of the Russian automobile industry produced before 2009 were not distinguished by complex innovative solutions in the field of fastenings. Therefore, their owners are lucky here - unscrewing two bolts and removing the part will most likely not be difficult for anyone.
You can propose a simple algorithm for removing the interior mirror from the windshield in a domestic car:
- you need to remove the plugs on the bolts (or skip this step if there are no plugs);
- hold the mirror with one hand so that it does not fall out, with the other slowly unscrew the bolts;
- Remove the mirror from the windshield and degrease the place where it is attached, for example, with alcohol.
Then, once the necessary repairs or upgrades have been made, everything needs to be secured in place. To do this, you just need to screw the bolts and put plastic plugs on them. It is important that the location of the patch on the windshield does not change after all the manipulations. As you can see, in the case of LADA cars, there are no problems with removing the mirror from the windshield yourself.
How to remove a mirror from the windshield in foreign cars
Is everything so simple with foreign cars? Let's try to figure it out. In fact, when removing a mirror from the windshield in foreign-made cars, a number of problems can actually arise, the biggest of which is the risk of damaging the windshield itself. The fact is that in foreign cars, in order to dismantle the mirror in the cabin, you need to put in a lot of effort, at the same time, the windshield is not designed for excessive pressure, and if you overdo it, it can simply crack.
“Types of windshields: what to look for when purchasing” Read more
We list the procedure for removing the rear view mirror from the windshield of a foreign car without the help of professionals:
- since the fastenings here are equipped with plugs, they must first be removed, most often this is easy to do without the use of any tools;
- further, the mirror needs to be pulled up, moving along the windshield towards the ceiling of the cabin, while it is important not to overdo it;
- When dismantling, you need to be careful with the fastening so as not to break it.
If you need to remove the mirror from the windshield of a foreign car in order to tint the windshield, we advise you to abandon this idea or immediately splurge on a new windshield. The fact is that you won’t be able to tear the bracket away from the glass, and even if you manage to do this, a mark from the bracket will still remain.
If the dismantling procedure is carried out successfully, then the mirror should be in your hands, while the bracket itself should remain in place. It is necessary to control the efforts when removing the mirror, since you can sharply pull it up by inertia when it has already come out of the fastening runners, then damage to the ceiling with sharp edges is ensured.
Foreign-made cars also often have a special rear-view mirror lock in the interior. This is either a latch or a pedal that must be pressed so that the mirror can be easily removed from the bracket. Safety precautions for carrying out the procedure are also important here, since you can accidentally cut your fingers.
How to try to remove the mirror mount from the windshield yourself
Using brute male force to remove the rear view mirror mounts in the cabin, you can inadvertently break the windshield.
Video
How to disassemble the side mirror on a VAZ 2110, see the following video:
Hello everyone, today there will be an article on replacing the mirror element of the exterior mirror on Kalina. Not long ago there was a comment on one post with a request to publish similar material, and now - I finally managed to make a visual aid for this repair.
So, we don’t need practically anything from a tool, a maximum of two screwdrivers: with a flat blade and with a cross-shaped blade. In principle, you can do this without removing the mirror from the car, but of course it’s more convenient to work with it removed.
Disassembling the mirror
Disassembly example
Repair of side mirrors Lada Kalina
How to remove and disassemble a side mirror
by car Lada
Kalina
.
Replacing the mirror element on the exterior rear view mirror of Kalinas, Grants and Prioras
Video review on how to independently replace the mirror element on the outside rear view mirror of such cars…
There are several ways to disassemble a car mirror.
First way
Using a curved object or a screwdriver, unclip the mirror by gently pressing it from the inside. Trying to pry the mirror off from the edge may damage it. Some car enthusiasts use a wide variety of objects to remove the mirror element. It could even be all kinds of kitchen spatulas. Some wrap the edge of the spatula with electrical tape so as not to damage, or rather, scratch the mirror surface. Others use one hard spatula to fix the gap, and a second softer one to thread it into the resulting gap.
Second way
In order to remove the mirror element, you should sharply hit the body with a soft object - it can be anything. In order to disconnect the mirror housing itself from the triangular mount, you need to remove the spring, unscrew the adjusting rod and remove the pin. Assembly and installation of the mirror is usually carried out in the reverse order.
Reasons for replacement and the process itself
- if the mirror element is damaged due to impact or temperature change;
- if desired, improve the car;
- in the absence of a “part” (as a result of theft).
How to change a mirror yourself, and what is needed for this? With a little skill, the job can be done without difficulty. The main thing to consider is that dismantling and installing it yourself requires caution. This will avoid breaking the new element and damaging the car body.
When removing an element, you must turn it out to the maximum. This process will be indicated by the gap formed between the part and its body. In this matter, the main thing is not to damage the element motors. The structure itself is carefully unscrewed using a Phillips screwdriver.
It needs to be unscrewed from the car body and disconnected. This closes the question of how to disassemble a mirror. The next stage involves the installation of a new element.
The mirror element itself is located in the center, where it is safely secured with latches. The main thing is that it is secured correctly. To do this, you need to apply force and press on the part itself. Then the side element is screwed to the car body.
The process is not complicated, the main thing is not to damage the lining on the Kalina mirrors and not to spoil the mirror element itself.
Methods for installing overlays
Step-by-step installation of the lining using adhesive-sealant (usually silicone).
If desired, you can always replace the adhesive sealant with double-sided tape. In this case, the tape is glued in several strips close to the outer edge of the nozzle or mirror, but not on the edge itself. Further, the technology is no different from that which involves the use of glue. If the pads come complete with fasteners rather than silicone, then their installation is even simpler. There are usually 3 to 5 latches. The antennae operate almost effortlessly, but they hold tightly.
Removing the outer and inner rear view mirrors
Rear view mirrors are an integral part of the car. Even those drivers who have equipped their “swallow” with a monitor or camera cannot do without mirrors. Therefore, keeping them in good condition is the primary task of every car owner. Before moving on to the procedure for dismantling the mirrors, we will list the tools that we will need for the job.
Tools required for dismantling
- Phillips screwdriver;
- flat blade screwdriver.
Replacing side mirror glass using the example of Priora, 2110, Ford Focus and Honda Fit
Download PDF
You can solve the issue of replacing the side mirror glass without contacting car service specialists, who will require a tidy sum for such repairs. Often, due to careless driving or ill-conceived construction of narrow lanes and driveways, the problem of damage to the side mirrors, as the most protruding elements of the car, arises. Sometimes you have to change the mirror completely, but there are times when you can limit yourself to replacing the mirror element of this block. There are also other reasons that can affect the disassembly of the side mirror.
This could be preparation for painting or a desire to repair this part of the car. How difficult it is to carry out this operation on your own on cars of popular brands will be discussed in today’s article. So, number one of our patients today is Lada Priora.
- 4. Then, in strict reverse order to the previous one, install the mirror element in its place.
All. The operation is completed.
Dismantling the mirror element of the people's car VAZ 2110 can be done in two ways.
The first of them is carried out in two stages:
1. Press down the lower part of the surface of the mirror element until a gap forms at the top between the glass and the side mirror housing; 2. Then, using a curved object, or if there is none, a screwdriver through the resulting gap, apply pressure to the center of the mirror from the inside. With this impact, its retaining clips should become detached. It is highly not recommended to press on the side with a screwdriver, as there is a possibility of damaging the mirror.
How to make a worthy choice?
Exterior mirrors are one of the most popular and essential parts of a car. Without them, it is impossible to monitor the situation and move along a busy highway. Side-view mirrors often require replacement, due to their high “trauma” during movement.
Before work, you need to choose the best option for the mirror part. This could be a similar or more advanced mirror for Kalina. If difficulties arise when choosing, you need to familiarize yourself with the basic adjustment mechanisms.
The following types of mirrors are distinguished:
Ease of use depends on the choice of mechanism. The hinge type mirror element is the simplest. Many modern cars do not have it.
Lever control is based on a joystick or lever, which is located inside the cabin, and it is connected to the side part using a thin cable.
The electric mirror element is a modern mechanism. It is found in new cars and is equipped with a lot of additional features. Its use means comfort and safety.
Main advantages of the electric mechanism:
Heated mirrors are modern developments that simplify the life of every motorist. Increased visibility allows you to better navigate city roads. This option reduces the likelihood of an accident by increasing the chances of noticing a dangerous moment. Finally, the clarity and appearance of this item is much better than the stock part.
The anti-reflective coating on the mirror on the viburnum allows you to reflect the sun and bright lights. The anti-dazzle effect maintains good visibility while driving.
Heated mirrors are a convenient option. Thanks to it, there is no need to scrape snow and ice from the glass. This is a very nice and convenient addition. Finally, a built-in signal repeater. This element of the Lada Kalina mirror allows you to notify all road users about upcoming maneuvers. This makes driving easier and safer.
When choosing the optimal mirror element for the Lada Kalina, you must take into account personal preferences. Naturally, we should not forget about convenience and safety.
Mirror covers Kalina: characteristics, installation
Owners of a Lada Kalina car often think about possible improvements to their vehicle. Changes may concern the functional properties of the car or its appearance. Lada Kalina in the first body version has a discreet but stylish design. As for the restyled model, the exterior of the car has a little more aggression, which, by the way, suits it very well.
Return to contents
General characteristics of the car
Lada of the latest generation
You can change the appearance of your car in different ways. What tricks do Lada owners go to in order for their vehicle to stand out from the gray mass of cars. Tuning can change the appearance of a car beyond recognition. New bumpers, airbrushing throughout the body, eyelashes on the headlights, engine and interior tuning - this is just a small list of possible changes. More modest car owners try to only slightly emphasize the individuality of the Lada.
Kalina in the cheapest configuration differs only in mirrors and door handles, which are not painted in body color. In order not to overpay when purchasing another package, and not to lose the appearance of the car, you can buy covers for mirrors and handles. These elements are sold in pairs; if one is lost or broken, you will have to purchase a new pair.
As for the restyled version of the Lada Kalina, even in the basic configuration, which is called “standard”, all elements are painted in the body color. In this case, car owners change anything in the appearance of the car only based on their own desires.
For Kalina, both in the old and in the new body, new mirror caps will not hurt. These elements will help change not only the color of the mirrors, but also their shape and function. Nowadays, the market offers a large assortment of linings, allowing you to select parts in accordance with the taste preferences and financial capabilities of the buyer. These can be standard attachments for Kalina mirrors or painted in body color or equipped with additional options. Variations of forms are also very diverse. Stylish embossed mirror caps give the car sporty features. With them the car looks faster and more energetic.
Regular linings made of black plastic will cost 2-3 times less than those painted in body color. But in any case, it is an inexpensive and quite accessible pleasure.
Return to contents
What are mirror caps used for?
Installing overlays is advisable for several reasons.
- The aerodynamic capabilities of the Lada Kalina are improving. At speeds above 80 km/h, the mirrors “whistle” noticeably less, since they have a more streamlined shape.
- The car acquires an attractive appearance. Different overlays make it possible to experiment with the appearance of the car without damaging the paintwork and the car owner’s wallet. Kalina, unlike most domestic passenger cars, has large exterior mirrors. This not only provides a good overview. Such linings give the car a certain charm.
Original mirror attachment
Having decided to purchase such parts for your car, it is important to know that the mirror caps that fit the Lada Kalina before 2013 will no longer fit on a car in a new body. In stores you can buy samples for each car variant; you just need to notify the seller about the make of the car and the year of its manufacture.
You can purchase chrome, black, white and other trims. They can take the form of ordinary stripes, be placed on the corners of mirrors, or completely repeat their shape. Corners that cover only part of the mirrors look like part of the styling. Their choice depends on the character and taste preferences of the owner.
Repair of the side rear view mirror or disassembly instructions (photo)
, which is attached with 3 pistons to the door itself. Next, use a cross-head screwdriver to unscrew 3 screws.
and the mirror ends up in your hands
Next comes the analysis of the mirror itself. To begin, remove the mirror element; to do this, pry it up on one side with your fingers and, using force, remove it (it is difficult to remove)
Here's a view of the inside of the mirror
(Here you can see the ends of the cables of different colors and one is missing), but here is the mirror element
Repair of side mirrors Lada Kalina
How to remove and disassemble a side mirror
by car Lada
Kalina
.
Replacing the mirror element on the exterior rear view mirror of Kalinas, Grants and Prioras
Video review on self- replacement
mirror element on the outside rear view mirror of such vehicles.
An autopsy showed that one of the cables with which the mirror element . mirror was found and it was decided to replace the cable. Unscrew the 4 screws that secure the turntable to which the mirror element is attached
and we see a torn cable
Unscrew 3 more screws securing the mirror housing to the base
Remove the boot seal
remove the adjustment lever
The cables are marked by color: red, blue, yellow. Visually we find the torn one and take it out. We take the same color from the donor and put it in its place, it is more convenient to insert it first into the turntable, then using a pliers into the adjustment lever. After assembly, I broke another cable and decided to replace everything.
Assembly is carried out in reverse order. This way I saved some money on the mirror.
Replacing mirror elements may be required for the following reasons:
1. The mirror element cracked due to impact or temperature changes
2. Replacing a regular mirror element with a heated mirror element
3. Mirror elements from the car were stolen.
The question arises: How to replace the mirror element? What is the technology and how to remove the mirror element yourself, without being a car service specialist. With little skills this is not difficult.
How to change the mirror element on a viburnum
DIY car repair and maintenance
The exterior rear view mirror on the Lada Kalina is designed and dismantled very simply and conveniently, like everything on this model of a domestic car (in my opinion, the best in terms of price-quality ratio).
This particular mirror is suitable for both Tens and Priora. As we can see in the photo above, the mirror mounting principle is the same as on other Ladas, with one small difference. The side mirror is attached to three self-tapping screws using a shaped screwdriver (see photo above).
The side mirror itself (in this case, simple, without a turn signal repeater, with manual adjustment) consists of two parts. The main part (the mirror itself) and the protective cover. Connect these parts carefully and accurately by aligning the grooves on the mirror and the inserts on the lid and press it. It should click into place.
Next, lean the mirror on the outside of the door so that all three guides and the cable connection fall into place (photo above). Then, screw in and tighten the three screws. Make sure that the mirror on the outside of the door is level and properly positioned.
And now, that same “one small difference” - instead of the Zhiguli plastic nut that we screw onto the connection of the control cables, here it is attached to the same Zhiguli corkscrew, which on the classics secures the door lock cylinder. And finally, put on the plastic panel so that the adjustment lever fits into the rubber frame, lean the panel against the two guides in the corresponding holes and press it.
Mirror for Kalina, price 3000 rubles (with mechanical adjustment and without repeater)
How to change the mirror element on Kalina? [photo]
Today we will talk about how to change the mirror element on Kalina yourself.
Replacing a mirror element on a Lada Kalina car is a rather rare operation, so we decided to tell you in detail and show how to do it yourself. Such a replacement may be necessary if the mirror element is broken, faded, as well as in cases of tuning installation - for example, heated mirror elements.
In our case, after 7 years of operation, the adhesive layer of the driver's mirror element has dried out. The glass came unstuck from the plastic base, and one fine day, after the door slammed, the glass safely flew onto the asphalt and broke.
It was not possible to find only the glass on sale separately - only the mirror elements are sold assembled, and in a set of two pieces. I had to buy a set for 700 rubles. And since the new mirror elements were of a different color (glass with a brown tint) and aspherical, both the driver and passenger elements had to be changed.
Video: Replacing the Rear View Mirror of Lada Kalina
For disassembly you need to take:
Add a few skilled hands to this toolkit and everything will work just fine.
As you know, rear and interior mirrors are removed in various ways.
Work in the salon
Let's start with the interior design. A lot here depends on what kind of machine you are working with.
Car manufacturers use different mounting systems. So base it on your specific situation. For example, such cars use different fastenings, such as:
- Deo Lanos;
- VAZ 2110;
- Chevrolet Niva;
- Ford Focus;
- Renault Logan;
- Chevrolet Cruze;
- Lada Prior;
- Lada Kalina;
- Hyundai Solaris and much more.
However, owners of inexpensive cars mostly do this work themselves.
And here you can quickly encounter glue and suction pumps or bolts and screws. These are the most common installation methods.
Domestic cars are mainly driven by bolts. Therefore, it will be easy to remove the structure. The cover is removed, the key is removed, and the equipment is unscrewed.
Cost of covers for Kalina mirrors
They cost on average from 500 to 1000 rubles, depending on the shape, color and method of attachment. Unpainted overlays can be purchased for only 200 rubles. Chinese cheap analogues cost very little (100-300 rubles), but are significantly inferior in quality. They are more fragile, brittle and inelastic.
Mirror covers for the Lada Kalina are the simplest but most noticeable tuning element!
The VAZ service station provides complete diagnostics and repairs of the Lada Kalina (1118) sedan.
Our car service specialists have extensive experience in maintaining and repairing VAZ vehicles, and thanks to our own auto parts store, we always have the necessary parts in stock.
View the price list for basic VAZ repair work
Prices for our car service services are significantly lower than the market average, which allows you to carry out high-quality repairs at an affordable price.
Replacing a Lada Priora mirror (VAZ Priora)
Mirrors on the Priora SE and the old model, what is the difference?
1) The presence of turn signals on the mirrors. SE has them, old ones don't.
2) Visibility, it is greater on the SE mirrors.
3) Mirror mounting triangle. On the SE mirrors it fits better without any gaps.
4) Protection from rain. SE mirror housings provide less protection from rain and snow.
5) The external differences of the mirrors can be seen in the following photos:
At the moment, the price of SE mirrors on Lada Priora is about 3,300 rubles.
Installing SE mirrors on Priora
How to remove a mirror on a Priora. We follow these instructions, dismantle the old-style mirrors and install the SE mirrors in the reverse order.

