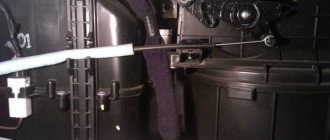
Today we will tell you how to replace the Kio Rio cabin filter of several generations.
One of the most popular models of the Korean company Kia is a car called Rio.
This car is in the budget segment. It quickly became popular due to its affordable price, while this model has a good appearance and is not devoid of equipment that ensures comfort.
The designers also took care of the ease of carrying out some maintenance work, which can be done by any car owner.
This primarily concerns such an element as the cabin filter.
Periodic replacement of this element allows you to maintain clean air in the cabin, so timely replacement is very important, and the operation of replacing it will not take much time.
Where is the cabin filter located?
Of course, this car already has several generations, and the Kia Rio is updated almost every year, but the designers do not change the location of the cabin filter.
It is located behind the glove compartment (glove compartment), located on the front panel on the passenger side.
Moreover, the cabin filter is installed there in all Kio Rio models - II and III generations, 2010-2015 model years. Of course, there are some replacement nuances for models of different years, but they are not significant and will be discussed below.
How to diagnose the problem?
Here it will be useful to determine the true need to replace the part, as well as where it is located. Smells in the cabin cannot fully indicate the fact of a blockage.
Here you need to independently verify the degree of clogging of the filter component. And know how to change the cabin filter.
- Given the need for verification, we proceed to action. Open the glove compartment lid and unfasten the latches present inside, which are located on the side surfaces.
- Kia Rio 3 allows you to diagnose without resorting to special efforts. Here you will need to rotate the element 360 degrees and remove it towards you.
- In the second generation of the popular model, the clamps had a composite design, and considerable effort was required to loosen them.
- Let's continue. After deactivating the fasteners, the filter element appears before the eye.
- Removal requires simple dismantling of the latches, after which the cover becomes accessible.
- We set it aside to provide sufficient access to the frame of the filter element itself.
- Only after removing the frame will it be possible to remove the filter and assess the degree of contamination of its working surface. We determine the condition by color. For a gray filter, vacuuming will be sufficient. If the element shows a black or dark gray tint, then it will need to be replaced in order to stop the harmful effects on the health of the people present in the Kia Rio 3 cabin.
Article on the topic: Which oil is recommended for Kia Rio
Replacement frequency
Before you go for a new filter, it is still worth knowing when, according to the regulations, the Kia Rio cabin filter is replaced.
The technical documentation that comes with the car indicates the mileage after which this element must be replaced and it is 45 thousand km.
But in reality, the frequency of replacement may be different. It depends on the operating conditions.
So, in southern latitudes, it is better to change the Kia Rio cabin filter more often, since the dust content of the air is higher. In northern latitudes, frequent replacement is not necessary.
It is worth noting that often this car goes to the buyer without this filter; instead, a frame with a fine mesh is installed. Therefore, after purchasing a car, it is better to immediately check for a filter.
Selecting a filter element
It is not difficult to purchase this consumable for the Kia Rio. There are quite enough manufacturers of filters for the cabin of this car.
You can purchase original consumables, or analogues. But in this case, it is better to buy this element from famous brands - Alco, Bosh, Corteco.
It is difficult to make a mistake when purchasing in terms of overall dimensions, since the Kia Rio cabin filter is installed on many cars of this manufacturer. And this consumable does not have a complex design.
It consists of corrugated paper arranged like an accordion in the form of a rectangle, with a edging around the perimeter of the same paper.
In addition to corrugated paper, the filter may also have a carbon layer.
When to change, what interior to install
To perform scheduled maintenance operations, there are regulations, as well as manufacturer recommendations. According to them, replacing the cabin filter of the Kia Rio II JB heating and air conditioning system should be done every 15,000 kilometers or once a year.
Considering that the operating conditions of the car in most cases will be far from ideal, experts advise performing this operation approximately twice as often, in spring and autumn.
- Windows often fog up;
- the appearance of unpleasant odors in the cabin when the airflow is turned on;
- deterioration of the stove and air conditioner;
Article on the topic: What oil to use for Kia Rio 4
They may make you doubt that the filter element is coping with its tasks and an unscheduled replacement will be required. In principle, these symptoms should be relied upon when choosing the correct replacement interval.
Suitable sizes
When choosing a filter element, owners do not always use products recommended by the car manufacturer. Everyone has their own reasons for this, some say that the original is unreasonably expensive. Some people in the region sell only analogues, so there is a need to know the sizes by which you can subsequently make a selection:
- Height: 17 mm
- Width: 200 mm
- Length: 225 mm
As a rule, sometimes analogues for Kia Rio II JB can be a few millimeters larger or smaller than the original, there is nothing wrong with that. And if the difference is measured in centimeters, then of course it’s worth looking for another option.
Selecting an original cabin filter
The manufacturer recommends using exclusively original consumables, which, in general, is not surprising. They themselves are of good quality and are widely available in car dealerships, but their price may seem overpriced to many car owners.
Regardless of the configuration, on all second-generation Kia Rios (including the restyled version), the manufacturer recommends installing a cabin air filter with article number 97133-2E210 (971332E210) or its full analogue 97133-2E200 (971332E200).
It is worth noting that sometimes consumables and other spare parts may be supplied to dealerships under different part numbers. Which can sometimes confuse those who want to purchase an original product.
When choosing between a dust and carbon product, car owners are advised to use a carbon filter element. This filter is more expensive, but it cleans the air much better.
Article on the topic: Where is the air filter on a Kia Rio
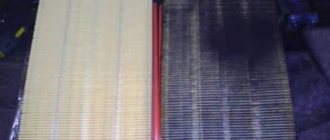
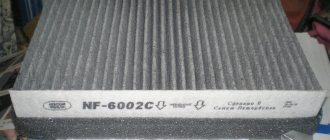
It is easy to distinguish - the paper filter accordion is impregnated with a carbon composition, and therefore has a dark gray color. The filter cleans the air flow from dust, fine dirt, germs, bacteria and enhances the protection of your lungs.
Which analogues to choose
In addition to simple cabin filters, there are also carbon filters that filter the air more effectively, but they are more expensive. The advantage of coal SF is that it does not allow foreign odors coming from the road (street) to penetrate into the car interior.
But this filter element also has a drawback - air does not pass through it well. GodWill and Corteco carbon filters are of fairly high quality and are a good replacement for the original.
However, in some retail outlets the price of the original second-generation Kia Rio cabin filter may be greatly inflated. In this case, it makes sense to purchase a non-original consumable item. In particular, cabin filters are considered quite popular:
Conventional dust cabin filters
- Mann Filter CU2336 – high-tech consumables from a well-known manufacturer
- BIG filter GB-9910 – popular brand, good fine cleaning
- Nevsky filter NF-6164 - Russian manufacturer with an affordable price
Carbon cabin filters
- TSN 9.7.115 – high-quality and thick carbon coating
- BIG filter GB9910/C – activated carbon
- Nevsky filter NF6164C – normal quality, affordable price
It makes sense to take a closer look at the products of other companies - they also specialize in the production of high-quality consumables for passenger cars:
- Corteco
- Filtron
- SCT
- Sakura
- GoodWill
- Fram
- JS Asakashi
- Champion
- Zekkert
- Masuma
- Nipparts
- Purflux
- Knecht Mahle
- RU54
Article on the topic: How to remove the Kia Rio gear knob
It is quite possible that sellers may recommend replacing the Rio II JB cabin filter with non-original cheap substitutes with a much smaller thickness. They are not worth buying, since their filtering characteristics are unlikely to be at the proper level.
Replacing a filter on a car produced in 2010-2011
First, we will consider the procedure for changing this consumable for a second-generation car (2010-2011), then we will change the cabin filter of Kia Rio of later years of production.
To perform the operation, you may only need a flat-head screwdriver.
To get to the cover of the filter we are interested in, we need to free the glove compartment from the restrictive latches.
They are located on the side walls of the glove box, so you need to open it and empty it of the things in it.
In order to pull out the clamps, you need to move them down (away from you) and pry them with a screwdriver to remove them.
When folding the glove compartment down, you will need to press lightly on the outside right side to remove another small latch located on the wall from the front panel.
After this, the glove compartment will completely lower down, providing access to the filter element cover.
The cover itself is attached to the body using latches located on its sides. These clips need to be squeezed with your fingers and the cover removed.
If there is no filter, you will need to pull out the frame with the mesh; it will not be needed in the future. If it is present, then the used element is simply removed.
The new filter must be installed correctly.
For this purpose, there are arrows and the inscription “Air Flow” on its end. When installing a filter with arrows marked, they should point downwards.
If there is no arrow, but only an inscription, then the filter must be installed so that the inscription is not upside down.
After installing the filter element, it is closed with a lid, then the glove box is put in place and secured with clips.
When to change, what interior to install
To perform scheduled maintenance operations, there are regulations, as well as manufacturer recommendations. According to them, replacing the cabin filter of the Kia Rio I DC heating and air conditioning system should be done every 15,000 kilometers or once a year.
Considering that the operating conditions of the car in most cases will be far from ideal, experts advise performing this operation approximately twice as often, in spring and autumn.
- Windows often fog up;
- the appearance of unpleasant odors in the cabin when the airflow is turned on;
- deterioration of the stove and air conditioner;
They may make you doubt that the filter element is coping with its tasks and an unscheduled replacement will be required. In principle, these symptoms should be relied upon when choosing the correct replacement interval.
Suitable sizes
When choosing a filter element, owners do not always use products recommended by the car manufacturer. Everyone has their own reasons for this, some say that the original is unreasonably expensive. Some people in the region sell only analogues, so there is a need to know the sizes by which you can subsequently make a selection.
2 elements with dimensions:
- Height: 25 mm
- Width: 100 mm
- Length: 235 mm
As a rule, sometimes analogues for the Kia Rio I DC may be a few millimeters larger or smaller than the original, there is nothing wrong with that. And if the difference is measured in centimeters, then of course it’s worth looking for another option.
Selecting an original cabin filter
The manufacturer recommends using exclusively original consumables, which, in general, is not surprising. They themselves are of good quality and are widely available in car dealerships, but their price may seem overpriced to many car owners.
Article on the topic: Is it possible to pour 5w40 instead of 5w30 into Kia Rio Lukoil oil
Regardless of the configuration, on all first-generation Kia Rios (including the restyled version), the manufacturer recommends installing a cabin air filter with article number 97619-FD200 (97619FD200).
The salon in this model is composite and consists of 2 parts. They are completely identical in size, the only difference being the so-called tongue-and-groove system on the side plastic edges.
It is worth noting that sometimes consumables and other spare parts may be supplied to dealerships under different part numbers. Which can sometimes confuse those who want to purchase an original product.
When choosing between a dust and carbon product, car owners are advised to use a carbon filter element. This filter is more expensive, but it cleans the air much better.
It is easy to distinguish - the paper filter accordion is impregnated with a carbon composition, and therefore has a dark gray color. The filter cleans the air flow from dust, fine dirt, germs, bacteria and enhances the protection of your lungs.
Which analogues to choose
In addition to simple cabin filters, there are also carbon filters that filter the air more effectively, but they are more expensive. The advantage of coal SF is that it does not allow foreign odors coming from the road (street) to penetrate into the car interior.
But this filter element also has a drawback - air does not pass through it well. GodWill and Corteco carbon filters are of fairly high quality and are a good replacement for the original.
Article on the topic: How to change the oil in a Kia Rio 3 automatic transmission
However, in some retail outlets the price of the original first-generation Kia Rio cabin filter may be greatly inflated. In this case, it makes sense to purchase a non-original consumable item. In particular, cabin filters are considered quite popular:
Conventional dust cabin filters
- Mann Filter CU 2521-2 – high-tech consumables from a well-known manufacturer
- Amd FC45 – popular brand, good fine cleaning
- Nevsky filter NF-6167-2 - Russian manufacturer with an affordable price
Carbon cabin filters
- Amd FC45C – high-quality and thick carbon coating
- BIG filter GB9935/C – activated carbon
- Nevsky filter NF6167C2 – normal quality, affordable price
It makes sense to take a closer look at the products of other companies - they also specialize in the production of high-quality consumables for passenger cars:
- Corteco
- Filtron
- SCT
- Sakura
- GoodWill
- Fram
- JS Asakashi
- Champion
- Zekkert
- Masuma
- Nipparts
- Purflux
- Knecht Mahle
- RU54
It is quite possible that sellers may recommend replacing the Rio I DC cabin filter with non-original cheap substitutes with a much smaller thickness. They are not worth buying, since their filtering characteristics are unlikely to be at the proper level.
