Each component in a car plays an important role, including the cabin filter, which is responsible for the cleanliness of the air inside the car. The performance of this element is important primarily for the health of the driver and his passengers, and also generally affects traffic safety.
How to properly replace the air filter in a VAZ-2109.
Peculiarities
The cabin filter cleans the air entering the car from dirt, dust, and unpleasant odors. All modern technical equipment are equipped with it. But VAZ 2109 cars from the factory are deprived of such a “cleaner”. The air in these vehicles enters the heater fan through the air intake box. It is for this reason that the heater often does not work due to contamination with all kinds of debris, of which there is more than enough on the road. The smallest particles enter the car interior, forcing the driver and passengers to breathe dust.
Way to solve the problem
Of course, you can’t drive such a car for a long time, especially with the windows closed, as you can get pneumonia or other respiratory diseases. Nevertheless, resourceful developers still found a way out of such an unpleasant situation by inventing a cabin filter adapter, which is a grille on which filter elements are attached. The unit is installed on the fan casing in the place where the air intake occurs.
Advantages and disadvantages of the adapter
Since the factory did not initially intend to use such a component, it is therefore not at all surprising that after installing the adapter, the level of air entering the car interior will decrease significantly. The advantages include effective resistance to dirt and dust, as well as protection from dust accumulation on the upholstery, panels, and windows of the car. The main advantage of this filter material lies in the ability to ensure clean air in the cabin, allowing the driver and passengers to breathe deeply.
Fuel purification in VAZ 2110–2112
Different filters are used in the fuel supply systems of carburetor and injection engines.
Gasoline for a carburetor engine passes through a fine filter installed in front of the fuel pump.
Gasoline for a carburetor engine passes through a fine filter installed in front of the fuel pump
This non-separable disposable unit is assembled in a transparent plastic case, thanks to which the condition of the paper filter element can be assessed visually. The filter is the same as in all carburetor cars. In addition to this, mesh types of cleaning the fuel intake, fuel pump and carburetor are guarding the purity of gasoline.
The filter installed in the power supply system of injection engines is also made of paper. But due to the fact that it works under high pressure, it is assembled in a non-separable metal case.
The fine fuel filter installed in the power supply system of injection engines is also made of paper. But due to the fact that it works under high pressure, it is assembled in a non-separable metal case
In addition to it, the system has a strainer installed in the fuel tank along with an electric fuel pump.
The strainer is installed in the fuel tank along with the electric fuel pump
When replacement is necessary
Signs for replacement are as follows:
- Reduced air flow - naturally detected - makes it more difficult to breathe in the cabin. Also, in the winter season, the stove does not work well, and in the summer it does not cool, and the front window quickly fogs up.
- Color - the stronger the contamination, the darker the color of the VAZ 2109 cabin filter.
- Service life - when it comes to an end, all the above symptoms appear.
Why do you need an adapter, how to make it yourself and install it
A solution was found: this is a cabin filter adapter from a VAZ 2110 for a VAZ 2109. This adapter can either be ordered online from the manufacturer, or you can design it yourself. For those who want to save money, here you can get drawings and patterns for making an adapter with your own hands.
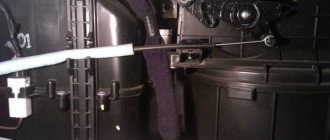
Installing the adapter is simple: it is installed instead of the standard stove motor casing using standard mounting holes. It consists of two parts for ease of installation in limited space in the air supply box. A VAZ 2110 cabin filter is installed in the installed adapter. The area of the hole through which air is drawn into the cabin is larger for such an adapter than for the standard casing, and therefore the weakening of the air flow going into the cabin, if noticeable, will be very small .
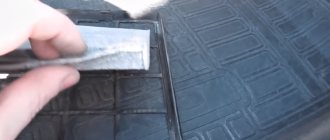
Before installing a purchased or home-made cabin filter adapter, it is advisable to clean the entire heater of debris: if you did not have any protection on the standard casing, there may be quite a lot of it there. You can remove accumulated debris from the bottom of the stove body using a home vacuum cleaner by removing the stove motor and inserting the vacuum cleaner pipe into the opened air intake hole. Then you should install a filter or replace the existing one.
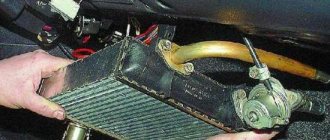
If you have a type “B” heater (see figure), in order to reach the bottom of the stove, you need to move the central damper to the “hot air” position. It would also be a good idea to clean the heater radiator - if the radiator is clogged and there is a cabin filter, the windows in the car may fog up.
Video about replacing the cabin filter and installing a new one in the adapter unit
Loading …
- Author: Roman
Rate this article: (3 votes, average: 5 out of 5)
How to change the cabin filter
Naturally, it is better if repair work is carried out by professionals. However, replacing the cabin filter is a very simple task that even an amateur can handle. So, in order to replace this automotive component in a VAZ 2109 with your own hands, you need to work according to the following rules and with the following tools:
Tool set
Prepare the following equipment:
- New (store-bought) or your own (made with your own hands) filter;
- Rags (must be clean);
- Phillips screwdriver;
- Sealed glue.
What to do
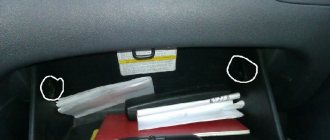
- Having opened the hood of the car, find the installation location of this filter element;
- Found the mounting location for this filter element, remove the rubber seal with all fasteners;
- Unscrew the screws that secure the casing;
- Remove the plastic plugs at the fixation points;
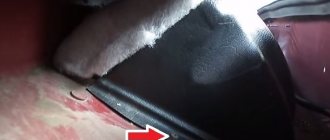
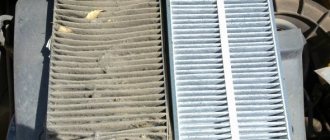
- Remove the casing of the heating system, and then remove the mesh located inside.
- The filter is accessible - remove it and replace it with a new one.
Installation should be done in the opposite order to disassembly.
We hope that this article was useful to you and provided answers to all your questions. After reading it, now you will be able to not only change the filter yourself, but also make it yourself! Good luck!
Checking the mass air flow sensor with a multimeter
- Set your multimeter to voltage measurement mode with a limit of two volts.
- Connect the positive probe to the fifth contact on the mass air flow sensor connector. The fifth pin produces an ADC signal. To make contact when the connector is connected, insert a pin without damaging the wire.
Connect the second probe to the negative on the battery.
Turn the key in the lock to the ignition position. Place the positive probe on the pin and record the reading.
In our case, the multimeter showed a voltage of 1.02V. The table below shows data on the ADC in volts and the state of the sensor.
| ADC (V) | Air flow sensor condition |
| 0.0996-1.01 | New sensor. |
| 1.01-1.02 | A working sensor with a large remaining life. |
| 1.02-1.03 | Acceptable condition, but the sensor is far from new. |
| 1.03-1.04 | Most of the resource has been exhausted, collect money to buy a new sensor. |
| 1.04-1.05 | The sensor has served its purpose and it is time to replace it. |
| 1.05 and higher | The sensor is the source of problems in engine operation. |
After checking with a multimeter, we decided to double-check this method and perform computer diagnostics at a service station. After the diagnostics were performed, we obtained an ADC value of 1.016V.
It is worth noting that for self-diagnosis you need a laptop with the OpenDiag program installed and a diagnostic cable.
Please note that the above-described check can only be done with a mass air flow sensor from the manufacturer Bosch with catalog numbers 0280218004, 0280218037, 0280218116.
The process of checking the mass air flow sensor with a VAZ 2110, 2111, 2112 multimeter is clearly shown in this video:
Installation instructions
Even a novice driver who has only recently gotten behind the wheel and does not have extensive experience in independently servicing or repairing vehicles can handle installing an adapter for the cabin filter from a VAZ-2110 on VAZ-21099 cars. If you act step by step, without breaking the sequence, and also follow basic personal safety measures, everything will work out. At the same time, you will spend money only on consumables, which will allow you to significantly save on car service costs.
- Lift the hood and lock it securely so that you do not have to work with one hand and support the lid with the other.
- Unscrew the fasteners that hold the frill, made of plastic. The fasteners are located almost under the windshield. It's not difficult to find them. The frill, consisting of 2 halves, is dismantled.
- Remove the rubber seal from the partition that separates the air intake box and the engine compartment.
- Next in line is a plastic casing. To remove it, you must first unscrew the mounting screws that hold the plastic in place. It is under this that the supposedly cabin filter is hidden. Although in fact this is an ineffective plate, covered with far from the best material. You need to get rid of him.
- It is recommended to thoroughly clean the space under the casing from accumulated dirt, dust and debris.
- At the same time, it is recommended to check the current condition of the electric fan of the stove. If the heater is operating normally, there are no complaints about the efficiency of the fan; there is no need to touch or dismantle it. The adapter can be easily installed without this.
- Now you can begin installing the adapter. Since it is divided into 2 parts, the first is the rear component of the apron for the cabin filter.
- Covering the electric fan with the back, insert the front of the adapter.
- Using staples, both parts are connected to each other.
- The adapter body itself is fixed in its seats using the existing holes. If you choose the right adapter, everything fits perfectly in terms of fastenings.
- Next, return the seal to its place and install the frill.
- A full-fledged cabin air purification filter is inserted onto the front part of the adapter.
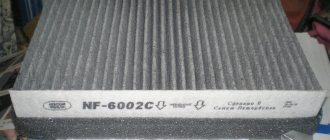
When installing the filter, carefully monitor the correct location of the filtration element. You should follow the arrows indicating the movement of air flows passing through the filter. The arrows should be directed inward, that is, towards the electric heater fan of your VAZ-21099. You can clearly see that purchasing and installing an adapter for the cabin filter on VAZ-21099 cars is extremely simple. Solving this problem will take literally 1 hour even for a novice car enthusiast, and no more than 3 thousand rubles with all consumables and the purchase of missing materials or tools. Although usually motorists manage to invest up to 2.5 thousand rubles.
Do not forget to test the operation of the heating and ventilation system with a new filter element. It would be a good idea to clean the air ducts, since a large amount of dust and contaminants could probably accumulate inside. Since they are already behind the new filter, you will not initially feel significant changes without cleaning the channels. As for replacing the cabin filter, the frequency of this procedure directly depends on the operating conditions. If you drive mostly in heavy traffic or on dusty roads, the filter life will decrease much faster. On average, consumables are changed every 5-7 thousand kilometers, or 1-2 times a year.
Installation
In fact, installing a cabin filter adapter on a VAZ 2109 is quite simple. The most important thing here is to get an adapter. Some people make it themselves, while others purchase it from auto stores or online. Decide for yourself what is more convenient for you to do.
- The adapter is installed in place of the standard stove motor casing. To mount the device, the existing holes for fasteners are suitable.
- The design of the adapter includes two components, which allows you to install the unit in confined spaces without much discomfort.
- It is not at all necessary to remove the cabin fan when installing the adapter.
- Lift the hood, unscrew the screws that hold the frill.
- Carefully remove the side of the frill from the visor.
- Remove the rubber seal. It is located on the partition separating the engine compartment from the air supply box.
- Remove all screws holding the factory heater fan shroud on.
- Remove the cover. You won't need it anymore.
- Install the back of the adapter structure first. The fasteners remain the same.
- Next, the front part of the device is installed.
- Using fastening brackets, the structure is connected together.
- Return the side of the frill to its place.
- Secure the adapter using self-tapping screws to the existing mounting holes.
- Place a rubber seal on the side.
- Insert into the installed filter adapter.
All that remains is to check how the new air purification system in the cabin will work. To do this, you need to drive several kilometers, feel new smells, or rather their absence in the car.
Loading …