On my own tuning – these are actions aimed at improving a number of characteristics of the car: appearance, comfortable conditions in the cabin and improving driving performance. Typically, all this work is carried out with standard factory-made car models, produced in large quantities and having the same, far from the best, parameters.
Recently, do-it-yourself car tuning has become popular. Everyone who seeks to modify their own car wants to see it endowed with a unique and unforgettable appearance. Among professional performers, this activity is called external car tuning, which involves performing a wide variety of operations of varying complexity. As a result of the efforts made, the vehicle becomes completely unrecognizable among numerous similar vehicles.
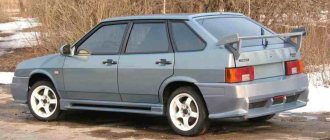
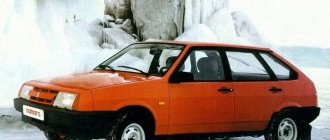
Little by little, cars from the “classic” family are becoming a thing of the past, including the VAZ 2107, whose production was closed in 2011. But this absolutely does not mean that the brand will soon be forgotten; on the contrary, there are all the prerequisites that the “Seven” will be seen on the roads for many more decades. The fact that this model has already become a classic contributed to the popularization of the trend: tuning vases with your own hands and made it an excellent springboard for various modifications and improvements, because today working on a “classic” is akin to a certain ritual.
The simplest solution is to do the tuning of the VAZ 2107 with your own hands, which can make changes to the appearance of the car - equipping the body and headlights with a variety of overlays. The next level of complexity is considered to be airbrushing - applying original drawings to a car. And, finally, replacing the standard plastic body kit with a sports one - installing aerodynamic elements: a spoiler or a wing. However, it is not at all necessary that everything be done just by replacing the radiator grille and bumper; do-it-yourself tuning of the 2107 involves modifications, including vital components.
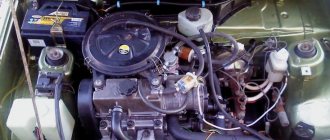
Engine modification
Refining the engine or tuning the VAZ 2107 in this unit is considered a relatively inexpensive activity, but as a result of these actions it is quite possible to obtain a significant increase in power indicators. It is not difficult to explain: the factory design of engines is not particularly accurate, and numerous technological deviations are not uncommon in them, already included in the nameplate power of the engine. After eliminating these flaws and inaccuracies, and introducing your own or someone else’s developments, it is quite possible to achieve significantly superior power compared to the factory version, a significantly longer engine life and its characteristics.
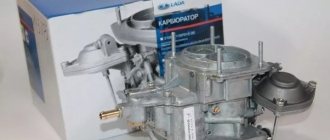
Carburetor modification
Tuning the carburetor helps to significantly improve the performance of the car. These works do not require as much financial resources as work with the power unit. Another noticeable advantage of such actions taken by a car enthusiast is the immediate achievement of a positive result.
Suspension modifications
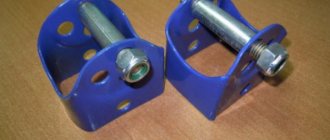
When the time comes to consider the issue of comfort and reliability of control, the first thing you need to think about is improving the suspension, especially if you are considering tuning the 2107 car, because for production VAZ cars, improving the suspension will not only not harm, for them it is even desirable. The main thing is to take into account the need for an integrated approach to tuning the suspension and the car as a whole.
The rear suspension springs are not stiff enough. Alternatively, you can install parts from Niva. Not only do they fit great, but they also have great staying power. Thus, the car will be endowed with “sporting” qualities. That is why it is important that a car with such characteristics is successfully combined with changes in the engine, interior and appearance.
Interior improvements
If we take into account the classic design of the Lada, then every second owner who wants to tune a VAZ 2107 car has a desire to bring its appearance to perfection, to make it unique. If you figure it out, it’s not difficult, the main thing is to clearly understand what needs to be done and strictly follow the order of work.
Below you can watch a video about tuning a VAZ 2107.
So, then there is a proposal to consider in more detail the actions being taken to make changes to the appearance and design of all the above-mentioned components in order.
Engine tuning 2107
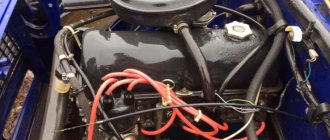
The car engine is undoubtedly the main component of the vehicle. And tuning in relation to it is aimed, first of all, at increasing power. This, in turn, causes the crankshaft to work intensively with increasing speed, which means there is a need to ensure ideal balancing of the parts in the crank mechanism. Possible weight in parts should be reduced to zero. Particular attention should be paid to the camshaft. By expanding the overlap phase, it is possible to achieve motor power of up to 30%, and this is quite a noticeable increase.
Of course, you still have to work hard to reduce the weight of the flywheel - during a sharp increase in speed, it takes power away from the engine. The next mandatory step will be the installation of special nozzles responsible for forced lubrication of the piston and cylinder. In addition to increasing durability and reducing the coefficient of friction, this action will also have a beneficial effect on improving the temperature regime of the piston head.
Leaving the cylinder head of a VAZ-2107 untouched in order to carry out a full engine tuning is out of the question. Runs here:
- Expansion of inlet and outlet channels.
- The diameter of the valves is being increased; it is advisable to replace their heads with more wear-resistant titanium ones.
- If the head channels are enlarged, logically the cross-section of the channels on the “spider” should be increased. This helps to increase engine power due to more complete exhaust gases and better fuel supply.
- If there is a desire to supplement the engine with a compressor/supercharger, here you can be sure that the engine will achieve a power of about 250 l/s, and maybe even 300 l/s. In this case, of course, you cannot do without altering the carburetor, but the efforts made will be fully justified by the result obtained.
- Another important nuance in changing the operation of the engine is refining the sound so that it becomes truly “cool”. This is achieved by converting the exhaust system to forward flow. Here it is worth considering that along with the bass, thanks to the direct-flow system, it will be possible to add about 10-15% to the engine power.
Increasing the displacement of the VAZ engine
As you know, one of the most important parameters in relation to internal combustion engines is the working volume. The engine’s power, throttle response, etc. depend on the volume of the engine.
It is more comfortable to operate a more powerful car, since the reserve of torque and power allows you to not “turn” the engine too much, since acceptable traction appears at lower speeds.
When it comes to increasing working volume, there are two main ways:
- change the diameter of the cylinders;
- increase the piston stroke by replacing the crankshaft;
These methods are actively practiced for tuning AvtoVAZ serial engines, which are found under the hoods of different models. More precisely, we are talking about the very first engine on the “penny” 2101 with a power of 60 hp. or the “eleventh” engine 21011, and the VAZ 2103-06 power unit with a power of 71-75 hp. Also, do not forget about the carburetor 80-horsepower 1.7 liter engine on the Niva model and other modifications of the above-mentioned internal combustion engines.
Let's get back to tuning. To perform modifications, you can use both serial parts and special elements for tuning. In the first case, the total cost of modifications will be noticeably cheaper, since serial parts are easier to find and cheaper to buy.
So, let's look at a specific example. If you have a VAZ 2101 engine, you can bore the cylinders to 79 mm, and then install pistons from the 21011 engine. The working volume will be 1294 cm3. To increase the piston stroke, you need to have a crankshaft from 2103 so that the stroke is 80 mm. Then you will need to purchase shortened connecting rods (by 7mm). As a result, the volume will be 1452 cm3.
It is quite obvious that if you bore the cylinders and at the same time increase the piston stroke, the end result will be a “penny” engine volume, which will be 1569 cm3. Note that similar operations are carried out with other motors on “classic” models.
Please note, regardless of the block, it is not recommended to bore cylinders larger than 3 mm, as the risks of severe thinning of the walls and reduced service life, as well as damage to the cooling system channels, increase significantly.
It is also important to consider that after installing a different crankshaft and increasing the piston stroke, the compression ratio increases, which will require the use of gasoline with a higher octane number. Additional adjustments to the compression ratio may also be necessary. The main thing is to choose the right shortened pistons, connecting rods, etc.
We also add that the simplest and cheapest method can be considered boring for repair pistons. However, even if the block is bored to the last repair size, the volume increases by no more than 30 “cubes”. In other words, you shouldn’t count on a significant increase in power in this case.
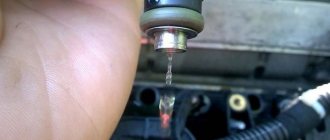
Tuning the carburetor VAZ 2107
This is a necessary action when making changes to the S7 engine. Tuning the 2107 carburetor itself is not complicated, it can be done even in the kitchen of your own apartment, and the effect will be achieved immediately. What we mean here is that the built-in power of the Zhiguli engine has significantly greater performance, which, unfortunately, cannot be achieved without making changes. Necessary actions:
- The first step is to remove the spring that connects the vacuum and the throttle valve. This will affect fuel consumption, approximately plus 0.5 liters, but the jerk of the car completely compensates for everything.
- A similar procedure applies to the secondary chamber damper - using a thin wire, you need to make a drive directly from the lever directly to the damper.
- The diffuser installed in the primary chamber is being replaced - from 3.5 to 4.5.
- The nozzle in the accelerator pump can be increased to “40”. This will not affect fuel consumption, but the start will be significantly faster.
- Next, the main jets are replaced. It is recommended to do this in increasing order, first installing a jet marked GTZ-162, ride it, get used to it, and look at the behavior of the engine. At the same time, if fuel consumption increased by 1 liter does not cause concern, you can install a GVZh-190 jet. Next, even cooler: replacing the primary chamber jet for a 1.5 liter engine - GTZ-130; for 1.6 liters - GTZ-135.
Helpful advice It is important not to forget about the individuality of each engine; increasing the jets should be done gradually. Otherwise, it will simply be filled with gasoline, fuel consumption will increase, and the opposite effect will occur.
There is also a warning that is better to heed: from some craftsmen you may hear a recommendation to organize a pressurized air supply into the air intake. This is absolutely impossible to do. The reason is intensive wear of the engine, and, accordingly, its failure. In this case, the air filter will not be able to cope with cleaning the air from dust, and the air pressure itself will practically not increase.
Related modifications: flywheel and fuel supply systems
A side effect of installing a crankshaft with an increased crank radius and larger diameter pistons is an increase in the moments of inertia of the moving parts of the engine. It becomes noticeably “dumber” as the speed increases, despite the fact that the “classic” engine is not initially sporty.
Since the inertia of the flywheel makes a huge contribution to the total moment of inertia (up to 80-90%) (its diameter is maximum, and the moment of inertia of rotation is proportional to the square of the radius), the most effective way to facilitate engine spin-up is to reduce the flywheel and clutch. In the now classic books of E.G. Singurindi, dedicated to the preparation of production cars for competitions, this issue was considered up to the presentation of specific drawings.
Although when the flywheel is lightened, its mechanical strength suffers, if the metal is cut correctly, this has no practical effect on reliability. After modification, dynamic balancing of the flywheel and crankshaft assembly is required.
Tuning flywheels make it possible to achieve an even greater reduction in the moment of inertia in comparison with machined cast iron ones. However, excessive relief is also a “thing in itself”, since it has a negative effect on the “lower parts” (it is more difficult to start, to drive hard).
The “classic” power system, be it a carburetor or fuel injection on the latest releases, is not very suitable for a tuned engine. Moreover, injection is the most promising: it’s not only about the ability to fine-tune the fuel supply and ignition, which in itself gives the maximum return from the engine, but also about a more advantageous configuration of the intake tract, especially with tuning receivers.
For the carburetor to operate, it is necessary to create a vacuum in its diffuser, that is, even in the most “extreme” tuning options, when an individual carburetor is installed on each cylinder, there is still parasitic resistance in the intake tract, which reduces the filling of the cylinders.
In injection systems, gasoline is supplied to the manifold under pressure, and it becomes possible to reduce resistance as much as possible (bored channels of the cylinder head and manifold, a throttle body of increased diameter, a receiver tuned for a specific engine). Standard ECUs allow easy flashing; programs for editing injection system calibrations and ready-made tuning firmware are also available.
Taking into account the same maximum unification of the Tolyatti conveyor, installing fuel injection on an initially carburetor engine is not a problem: the standard front cover is replaced with a new one, with a boss for the crankshaft position sensor, the old KV pulley is replaced with a new one, with a cut reference ring. The cylinder head is also the easiest to install from the “injection” model (the shapes of the intake channels are different, there are now no extra channels for supplying coolant to the carburetor manifold). Taking into account the fact that we are talking about complex tuning, it is best to immediately take a cylinder head from a Niva with fuel injection.
Tuning the suspension of the VAZ 2107
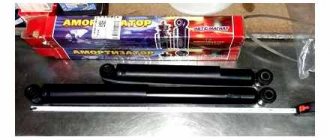
If serious tuning of the car is planned, and not its simple repair, the presence of a factory suspension on it is unacceptable. Let it remain only in memories, and not the best ones. But what needs to be done is to replace the shock absorbers, it is better to choose good German quality, but in the front part it is better to make the rod 2 centimeters shorter, tuning the rear suspension of the VAZ 2107 involves lowering them by 4 centimeters compared to the factory ones. This will keep the pre-force of the shock absorbers unchanged.
Next, the springs are replaced; it is recommended to install spare parts from Niva. Only at the front you will have to get rid of one coil, and on the rear springs you will have to remove two coils. To make the car stable in the transverse direction, the number of stabilizers is increased to three, while at the front it is better to pair two stabilizers on one side.
Using adjustable transverse and longitudinal rods, the parallelism of the axles and the adjustment of camber and wheel toe are adjusted. After all the actions taken, the “seven” acquired a completely different look: it looked more crouched to the ground.
Next, changes are made to the steering, or more precisely, to the steering column. It’s easier to remove the factory one and again install a spare part from the Niva. The alteration can be called minimal, and you won’t need a lot of money, besides, installing an electric booster is available. Of course, you will have to do some adjustment of the electric amplifier to the speaker, but these are not difficult steps. In order to facilitate the operation of the amplifier, it is better to use needle bearings for the steering sector, and ordinary ball bearings for the pendulum arm.
Useful advice When working on car suspension, in any case, work must be carried out with great care. Personal safety and the lives of others depend on this; you especially need to remember this when reworking the steering.
What to watch out for
After looking at photos of cool tuned sevens, some car enthusiasts begin to look at their “horse” differently. If just yesterday he seemed like a magnificent handsome man, then today I already want to do a little auto tuning on him. Price often doesn't matter. Some “hot guys” install a transparent glass sunroof on their classics, doors that open like a Lamborghini, install a heavy non-original engine, which has an expensive price... How reasonable is all this? In fact, the price of extensive body and engine modifications is extremely inflated. If you have a lot of money and want a cool car, isn’t it better to buy another solution? Fortunately, today there are many good options on the car market for every taste and color. But you should think about your own safety. Proper tuning for the VAZ 2107 is a good thing and often even very useful. It’s not bad when your cabin is warm, there is no unnecessary noise and beautiful music is playing. But many tuned sevens are good only at first glance. Incorrectly set adjustments, unsuitable spare parts, too heavy doors and other “foreign” objects can turn your car not into a means of transportation, but into a real death machine. And what difference will it make to you how your car accelerates if this car gets into a terrible accident? Therefore, before tuning your car, you need to think carefully several times about what exactly should be done and what should be avoided. Don't trust everything they write on the Internet. Consult with experts who really understand these issues. And make only those changes that are truly safe for you and your passengers.
Do-it-yourself tuning of the 2107 interior
Improvements to the engine, brakes and suspension of the car are, of course, undoubted advantages for the “seven”. But, nevertheless, tuning will not be considered complete if the interior of the car is left without attention. This is a place that is always in sight, it makes a certain impression on passengers, and the owner himself has to spend a lot of time in the car admiring the results of his work.
First you need to update the interior trim. Not every driver will be able to independently make new seat covers or reupholster the interior with leather, so you will most likely have to turn to a specialist for help. The choice of material for work depends on personal financial capabilities.
Many who do the work themselves prefer to replace the chairs. Typically, models are selected that are equipped with armrests and have lateral support.
It is recommended to install electric windows on the side doors and replace the handles.
The instrument panel usually undergoes major changes. It is preferable to replace it with a new one altogether.
It's worth considering replacing your music equipment. It is better to match the color of the acoustics to the color of the new upholstery material in the cabin. To do this, you should first consider samples of possible solutions in the photo.
Useful advice It should be taken into account that the factory generator is not able to cope with the loads generated by all the installed additional equipment, including lighting decorations. It is better to immediately plan to replace it, at least with an 80-amp one.
Another little trick has to do with the original design of the curtains hung on the windows. This requires a minimum of time and financial investment, but the effect can be created to the maximum.
How expensive is it
The cost of modifying a car entirely depends on what exactly needs to be improved, what spare parts you will have to buy for this, whether you buy the service at the appropriate car service center or do the tuning yourself. The price of the same change may vary several times depending on your requests. For example, a simple installation of fog lights can cost no more than a thousand rubles if you take inexpensive lamps and do everything yourself. If you want to install it yourself, and even entrust this task to specialists, then be prepared to spend several thousand on it. On the other hand, tuning is not repair. The car can easily survive without these optional modifications. Therefore, you need to take a simpler approach to cost: if you have a desire to improve something and have enough money for it, that’s great; there is no desire or money - well, let it remain as it is.
Tuning the dashboard of VAZ 2107
In order to make changes to the design or appearance of the instrument panel, it will first have to be disassembled. Using a screwdriver, carefully remove the instrument needles. To remove them, it is better to use pliers, but in order not to damage the rod, do not sharply pull them up. The needles are removed from the speedometer and tachometer.
- The scale of one and the other instrument is scanned. The production of additional scales can be organized using a computer or purchasing ready-made templates.
- The scales are printed and laminated with thick film. After this, holes are cut out and ironed between several sheets of white paper.
- Similar to removal, in the reverse process, the manufactured scales are installed in place of the previous ones.
- When working on instruments, you should think about using backlighting. First of all, you need to take care of removing filters from large devices.
- The tachometer and speedometer are removed from the panel. The light filters in the amount of 4 pieces and the shutters located near the light bulbs in the amount of 2 pieces are removed.
- The diodes are glued to the sealant. Diode wires are inserted through pre-prepared holes and soldered to the power paths of conventional light bulbs.
- Installation in the car is carried out.
Blue LEDs look impressive. When choosing a lens shape, it is recommended to take a closer look at the “funnel”; it scatters light better, and the blue color itself creates the effect of a luminous scale and arrows. To replace standard lamps, you will need 4 LED and one diode lamp.
When planning to tune a VAZ 2107 torpedo, you should think about installing a new dashboard. But you shouldn’t discard the option of refining the old one.
It is possible to use decorative inserts for devices. To do this, the edge is flared, the rim is removed, the device is disassembled and the scale is replaced.
Making changes to the appearance of the instrument panel requires carefully sticking the material onto the panel; the work is accompanied by cutting out holes for the instruments. After the fastening of the material is completed, all unnecessary elements are removed.
Salon
For many car owners, this is a source of personal pride. In this temporary house, the owners tend to collect all possible innovations for coziness and comfort, fashionable gadgets and completely necessary features.
To begin with, update the casing
. Of course, the leather interior on the seven will look a little strange. But it is quite possible to take care and purchase beautiful modern materials, paying attention to the selection of colors and the quality of the material. Reupholstery is usually done with the help of a craftsman who is well versed in this (because there are certain nuances). But you can master it on your own with the guidance of the Internet (on forums they usually share advice and even put entire master classes on public display).
Tuning the VAZ 2107 stove
Many owners of the “Seven” express dissatisfaction with the operation of the heating device. Refining the stove will help solve this problematic issue. To do this, you don’t have to purchase specialized tools; improvised tools are quite suitable.
Judging by the reviews, the stove radiator gives off enough heat and there is no need to resort to improving it, but what is worth working on is improving the airflow.
First of all, you need to seal the air ducts: here you need to pay attention to the joints.
The simplest tuning, which does not require any design changes, is to replace the standard fan motor with the one used in the “eight” or “nine”. This motor is characterized by high power and increased speed. To install it, you will have to modify the stove body - remove the comb designed to direct air flow to the feet.
The impeller is kept original, you just need to drill a 7 mm hole intended for the motor shaft.
For such an upgrade, you will also need to replace the resistor with a switch taken from the same car model from which the motor was taken. These are mandatory conditions for the changes to be effective.
External tuning of VAZ "Seven"
External tuning of VAZ is performed most often. The second most popular upgrade for the VAZ-2107 is interior tuning, which was already discussed above. External modifications bring great pleasure to car owners, since a beautiful picture will always please the eye and can become the highlight of the owner. The main thing is to give free rein to your imagination. The range is quite wide: from painting to replacing headlights. There is no point in touching on the topic of repainting a car or applying drawings or stickers to the body, since it is very simple and does not require special skills.
Tuning VAZ-2107 headlights requires selecting the LEDs you like, a drill, sealant, a panel for the headlights, resistors and connecting conductors.
First of all, you need to select the size of the panel for the headlights in accordance with their parameters. Then the drill comes into play. You need to make several holes at the same distance to install the LEDs, which subsequently need to be connected to each other using contact wires (plus to plus, and minus to minus). Assembled circuits of LEDs are connected to the headlight power supply blocks. For every 4 LEDs, a resistor is needed to provide resistance in the circuit.
Tuning doors VAZ 2107
The design of the "seven" doors is not particularly complex. But, still, it is worth paying attention to the locking mechanism. This refers to the installation of locks with a locking system. In addition, many people know the sound of doors closing in domestic cars compared to foreign cars.
Door structures and locks themselves are of great importance here. In the latest models of VAZ cars, the locking mechanism is hidden inside the doors, and a wear-resistant material like polyurethane is applied to the locking tongue. On old VAZs, the lock is mounted on the outside of the door, as are other parts. During contact in the process of closing metal to metal, an unpleasant metallic sound occurs.
But there is still a way out. Domestic manufacturers produce silent locks, as well as silent bolts. They are sold in pairs, fit most cars of the VAZ family and are not very expensive.
Tuning
Artem says he enjoys driving his car
Artem says he enjoys driving his car
As soon as the car was in Artem's hands, it was possible to place bets - will tuning begin soon? “Immediately” or “in a couple of days”? Moreover, the new owner is a student at MSTU “MAMI”, a person whose passion for cars will become a profession. He is studying at the Department of Automotive Design. So putting your hands on your car, especially having a garage at your disposal, is just a pleasure.
Tuning the hood of VAZ 2107
It is proposed to consider creating an individual shape of the hood cover using certain types of materials and simple tools.
- First, a foam mold is laid out on the existing lid. This is not a difficult task - foam plastic does not present any difficulties in use.
- Next, the foam is wrapped in aluminum foil; if necessary, aluminum tape is also used - this is necessary to prevent damage and deformation of the foam from exposure to the resin.
- The areas where the fiberglass and the hood come into contact are cleaned. If this point is ignored, the materials simply will not stick to each other. Only after this procedure is completed, glass fiber and resin are applied to the surface of the product.
- It takes time for the resin to harden, after which a thin layer of putty is applied to shape it. To avoid cracking, do not apply putty in a thick layer.
- To level the surface, excess putty must be removed: for this, an emery cloth is used.
- The hood is painted and the quality of its appearance is determined.
- Next is re-wrapping the surface of the part using fiberglass and subsequent treatment with resin. The process is repeated 4-5 times.
- Once the resin has finished curing, the created mold is detached from the old hood sample. The same process can be used to create the shape of the rear trunk lid.
- The surfaces are leveled, treated with putty, and prepared for painting.
- Before the painting procedure, the part must be tried on, defects eliminated, and gaps checked.
- To give the hood lid additional rigidity, aluminum strips are added to the inside.
- Paint is applied, time is waited, and the finished part is installed at the mounting points.
Appearance
Among the most popular and less expensive modifications are the installation of spoilers and a wing. In principle, both of them are quite functional things (though, rather, for racing and sports cars). So, in addition to taking care of beauty, you also get an improvement in the aerodynamic properties of your car.
Spoilers can be purchased at any auto store. It's easy to install them yourself, following the instructions. Some craftsmen make the wing from light metals on their own, but you can also buy it in the store. Installing it is also quite simple (usually on the trunk lid) - anyone can cope with the task.
The radiator grille is replaced with a more modern one. This procedure will not take much time and effort, but the appearance of your car will become more solid (or sportier - depending on the type of grille you choose). And some also add an overlay to the front bumper. Here you will have to tinker a lot, since you need drawings, measurements and templates. It is better to perform this operation with the help of, for example, a neighbor in the garage who has already done it.
You can install alloy wheels and lowered tires, which will significantly improve the modernity of the car. It couldn’t be easier to do this - there would be money allocated for modernization, because four good wheels from well-known companies and four high-quality tires would already cost a tidy sum. Well, everything is simple here: I bought it and changed it (on my own or at a tire shop).
Regarding the modernization of light and optics:
many install the popular xenon. They also improve the optics itself through which the headlight light passes. You can also install LED lights: both the headlights themselves and the car body. But this procedure is not for everyone, since at night the car turns into a Christmas tree. You can get by with a mini option: LED illumination of headlights and dimensions, rear numbers. And very light - the bottom of the car. Then, at least, it won’t look too wild at night.
Tuning the radiator grille of VAZ 2107
The radiator grille is one of the main components to which tuning is applied. This can be explained by the fact that the designers and constructors did not take into account during development the fact of intense corrosion formation and the appearance of rust on the hood. This drawback is largely due to the shape of the product itself.
In addition, the grille definitely represents the “face” of the vehicle, so motorists strive to tune the VAZ 2107 grille and give it the most original look. It is possible to purchase a ready-made product in a specialized store. Here they are presented in chrome, with a matte finish of any color. No special knowledge or effort is required for installation; installation is carried out in old places with reliable fixation.
Another way is to do the work yourself using the necessary materials and tools. For work you need: a jigsaw, scissors, cardboard or plastic, fiberglass, tape, polystyrene foam, epoxy glue. The removed standard lattice is used as a mold to create a new product.
- The shape of the central part of the workpiece is cut out with a jigsaw.
- Using plastic or cardboard, a contour is drawn around the inside of the workpiece. This creates the lattice shape.
- Next, the steps are identical to creating a new car hood shape.
Extreme options: superchargers and turbochargers
However, there is another method of boosting, which is perfectly suitable for an “ancient” engine with a relatively low compression ratio. We are, of course, talking about supercharging, and there are many options - you can apply the classic method of American hot rodding by installing a drive supercharger (the cheapest source is dismantling right-hand drive cars, keywords - SC-12, SC-14), you can choose with a large amount of work turbocharger.
However, at the same time, this method of boosting is also the most difficult to set up: a lean mixture and incorrectly selected ignition timing can “kill” the engine very quickly. At high boost pressures, it will be necessary not only to lower the geometric compression ratio, but also to completely rebuild the engine, replacing the pistons, connecting rods and crankshaft with stronger ones than the standard ones, so such a project will also become the most expensive.
In conclusion, we note that such simple “tuning” options as “zero” filters and direct-flow mufflers are useless without the modifications described in this article.
Also read our material in which we tell you what cramps are.
Autoclub78 https://autoclub78.ru
Tuning
Stamped rims with winter tires painted pink: fun
Stamped rims with winter tires painted pink: fun
In the meantime, most of all the owner of the “Seven” experimented with the suspension. Today, among classic tuners, there is a fashion for extreme understatement. In fact, this type of tuning itself has become classic. So Artem began sawing off the spring coils and changing the shock absorbers to lower ones. Now the “seven” is almost lying on the asphalt. It looks cool, of course, but it’s hard to understand how you can drive such a car. Moreover, quite often Artem has to visit his relatives in Voronezh, and the M4 Don highway in some places bears little resemblance to German autobahns or American highways... Artem says that he is used to the car’s behavior, and even drives along the highway completely calmly. Moreover, he enjoys the unusual character of the car. Maybe sometimes it’s a little harsh, but the “seven” practically does not roll on turns. I also took a ride in this car. Of course, the suspension cannot be called comfortable, it breaks even at the expansion joints of the bridge, but when the car goes on a flat road, you even begin to like such a low landing - it’s unusual. Somehow even unexpectedly. And funny. Phrases pop up in my head about a crocodile that walks lying down, and, of course, “It’s good that you are so green and flat!”...
Headlight and optics device 2107
VAZ 2107 cars are equipped with block headlights that combine high and low beam (one double-filament H4 lamp), turn indicators/hazard warning lights (P21W lamp) and dimensions (T4W) in one housing.
The headlights on the VAZ 2107 are identical to those on the 2104 and 2105. Their catalog numbers are 2105-3711011-10 or 2105-3711011-11 for the left, and 2105-3711010-10 or 2105-3711010-11 for the right headlight.
Standard VAZ 2107 headlights from three manufacturers are available for mass sale:
- Kirzhach . An original headlight with a high-quality reflector and optics that produces a clear beam of light. The cost is about 2-3 thousand rubles.
- OSVAR . An original headlight, slightly different in the shape of the glass pattern, but also producing a high-quality beam of light. It costs about the same - 2-3 thousand rubles.
- Formula of light . The Chinese analogue of the original costs from 1,000 rubles, but is of dubious quality. Correctly setting up such a VAZ 2107 headlight is often difficult or impossible, so buying this optics is not recommended.
Alternative, tuning headlights are also on sale, including those with xenon lenses, LED, and others. Their quality requires additional checks, so you should use them at your own peril and risk. In addition, non-standard optics on a VAZ may raise questions among traffic police officers who know well what the original headlights of a Zhiguli should look like.
The design of the VAZ 2107 headlight is quite simple; its main diagram is shown below.
VAZ 2107 headlight diagram: 1 – horizontal adjustment screw, 2 – lamp cover, 3 – power connector, 4 – installation screw-plug or hydraulic corrector, 5 – vertical adjustment screw
What is the size of the headlights on the VAZ-2107
Regardless of the manufacturer, the headlights on the seven are identical and interchangeable, but it only costs to use the same lighting fixtures on both sides. The overall dimensions of the VAZ 2107 headlights are 358.5 mm wide, 196 mm high and 210 mm deep.
Dimensions of VAZ 2107 headlights
How does headlight glass affect adjustment?
Glasses for VAZ 2107 headlights are produced by the same companies that produce assembled modules. Catalog number for the right one is 2105-3711070 or 21056-3711070, for the left one – 2105-3711071 or 21056-3711071. Standard optics are made of glass, but there are also plastic analogues.
Glass has better transparency and focusing characteristics , lasts longer , but if damaged, it distorts the illumination spot more strongly. Plastic is more shock-resistant , but collects scratches , can become cloudy and is afraid of overheating from more powerful lamps.
It is better to use glass for standard halogen lamps, and plastic optics are suitable for cold light, for example, lensed xenon or LED modules (they cannot be installed in a glass corrugated headlight at all: only under plastic or polished glass).
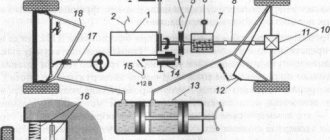
Procedure for installing a compressor on a VAZ 2107 carburetor
1. Remove the standard alternator belt and dismantle its fastening 2. Remove the air filter 3. Install pulleys from the Niva Chevrolet instead of the factory pulleys 4. Mount the compressor mounting bracket, as well as the compressor itself and the alternator belt according to the diagram below. (the bushings from the kit must be put on the studs between the mount and the compressor) 5. Place the corrugated pipe on the inlet of the compressor and install the filter. 6. We install pipes on the outlet of the compressor (they must be connected by a special pipe with a diameter of 60 mm and a length of 50 mm.) 7. We connect a 60 mm pipe with the valve, install a coupling, as well as a supply flange in the carburetor. 8. Use a blue hose to connect the compressor fitting and the carburetor fitting. 9. Disconnect the hose for crankcase ventilation, and secure all other connections with clamps. 10. The last point is adjusting the tension of the generator belt.
That's it for installing the supercharger, now you've got your 50 percent increase in power. Agree that this procedure is not as complicated as it may initially appear.