The area of paint will most likely be noticeable, especially to someone who knows where the chip used to be. You will simply look for this place with your eyes and you will definitely find it. But with careful painting, a stranger will definitely not notice anything.
My painted chips weren't even found by the insurance company's professional appraisers. They found two new ones, but didn’t even notice the old ones. Therefore, I can be confident in this method and am sharing it with you.
General information. Types of chips
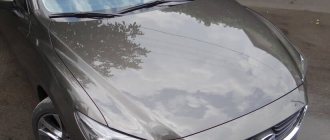
Most chips in paintwork are caused by stones falling from under the wheels of a car. There is an option to get chips on the hood when some objects fall, such as hail.
Conventionally, all types of chips can be divided into four groups:
- Superficial and shallow chips, which are located only on the top layer of the coating.
- Cracks are deep scratches that affect all layers of paint so that the primer can be seen.
- Deep cracks that affect all layers of the coating down to the metal base.
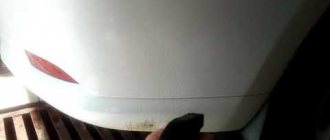
- Old chips, including significant damage that were not noticed earlier and led to metal corrosion.
The first group of chips can be eliminated quite easily, and with virtually no traces. For this, special coloring compounds are used, which are ways to recreate the original appearance even if the entire hood had small chips. The main thing here is to choose the exact shade. You can find it out from the information about the paint number under the hood or in consultation with a salesperson in a store; to accurately determine the paint, in the latter case it is better to take the gas tank cap with you.
What to do if there is a chip with a dent
It is much more difficult to eliminate such chips on the hood. How to remove? Such chips are formed as a result of hail or the fall of large crushed stone. Not only a crack, but also a small dent may form on the surface.
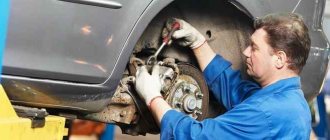
To remove a dent, it is recommended to place a wooden block on the inside of it, and then tap it with a mallet made of rubber. It is worth noting that such work requires caution and considerable experience. If you do not know how to perform such filigree procedures, then you should seek help from specialists. After removing the dent, the work described in the paragraph above is performed:
- A layer of primer is applied and sanded.
- Everything is carefully covered with auto enamel.
- Once the coating is dry, everything is sanded and then polished.
Repairing chips
...small chips
How to do it:
- Choose the right shade of paint,
- Clean the damaged area from dirt and unevenness, degrease,
- Apply a small amount of paint to the chip and press down so that the paint is distributed evenly over the surface and fills all the cracks.
- Remains of paint must be removed with a special liquid, which will additionally add shine to the area that was treated.
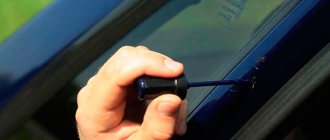
You can remove chips on the surface of the hood without painting with a special tinting pencil. The tone of the pencil can be chosen according to the same rules as above. After masking the chip, it is necessary to apply a protective polish, which will cover the traces of restoration work and restore the integrity of the paintwork.
... deep defects
If you see a metal base under the crack, then repair and restoration will be much more difficult. It is better to carry out all work in warm and sunny weather, at temperatures above 15 degrees. To work, you will need the necessary kit for painting and repair (alcohol or degreasing agent, primer, putty, paint of the desired color, polish) and the necessary tools (sandpaper, plastic card or spatula, a piece of non-fibrous fabric - felt, suede or cloth for cleaning monitors, toothpick).
To eliminate the defect yourself, you must perform the following sequence of actions:
- Rinse the entire surface well with car shampoo, this must be done especially carefully in places where there are chips,
- Rinse off the detergent with water
- Allow the car coating to dry completely,
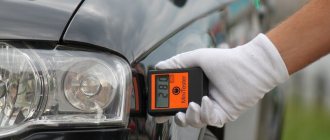
- Assess the nature of the damage that appears,
- Places where the metal base is visible under the scratches must be sanded using sandpaper and then degreased.
- Apply a small layer of acrylic putty evenly using a rubber spatula,
- After the putty has dried, apply a layer of primer and let it dry,
- Then cover the defect area with paint of the required shade in several layers, and then apply a finishing coat of varnish. Both paint and varnish can be applied using a regular syringe with a 1 mm needle.
If scratches appear only on the paint layer, and the primer remains intact, then it will be enough to use polishing paste for grouting, which will need to be left for 20 minutes, then cover the area with polish and apply gloss using a felt cloth.
If the base paint layer is damaged
How to remove chips on the hood on metallic paint and color coating? Each specialist offers his own method of dealing with damage to the hood. In some cases, when the chip has affected only the base layer of paint without reaching the primer, you can use regular auto enamel. It should be selected in accordance with the body color.
It is simply placed into the formed recess using a wooden toothpick or match. When the car enamel is completely dry, it is recommended to sand the treated area, carefully coat it with varnish, and then polish it. This will completely hide the chip. The treated area will not stand out on the hood.
Content:
Welcome to the kuzov.info blog!
p, blockquote 2,0,0,0,0 –>
In this article we will look at how to remove chips on a car with your own hands.
p, blockquote 3,0,0,0,0 –>
A lot of rock chips look terrible, especially on dark-colored cars. Even worse, chips damage the protective paint coating and contribute to the appearance of rust in these places. After some time, rust can increase in depth and diameter and be difficult to remove (see article on eliminating corrosion), so it is best to repair chips as quickly as possible from the moment they appear.
p, blockquote 4,0,1,0,0 –>
How to protect the hood from chips?
In order to prevent the occurrence of chips on the paintwork of a car, you must:
- Periodically apply a protective polish to the hood, which will create a film on the surface of the car. Teflon polish protects the paintwork for up to three months, epoxy polish for up to 12 months, body nanopolishing will protect against chipping for up to three years.
- In addition to protective polish, you can also use liquid glass, which prevents chipping for up to 38 months. After applying and drying the product, the surface must be polished using soft textiles.
- Another way to protect the hood is to use a fabric or leather cover,
- Anti-gravel film, which can be used to cover car parts, can also protect against chips; in addition, it can also act as an element of body decor.
Installing a plastic deflector is a less effective method of protection, since its main task is to deflect the flow of air with dust and stones from the body while driving.
Why do chips appear on a car?
Chips appear due to stones flying during movement, which fly out from under the wheels of other cars. The greater the distance you keep from other cars, the fewer chips will occur.
p, blockquote 5,0,0,0,0 –>
Stones don't fly out from under the wheels of other cars like bullets, they just rise up a little and don't have much acceleration. The speed of your car gives all the force to the impact that causes the chip. Thus, the faster you drive and the shorter the distance, the greater the likelihood of paint chips.
p, blockquote 6,0,0,0,0 –>
Results
In general, the complexity and quality of repairs greatly depend on the color of your car. It is easiest to repair chips on black cars. In this case, you can disguise even scratches that cover the entire side. Cars with poor coverage and light colors, as well as mother-of-pearl and chameleon colors, are the worst to repair. It is almost impossible to restore chips on white, yellow and red cars without traces. Chips on repaired silver cars will still be slightly darker than the base color. Therefore, pay special attention to the prevention of chipping and protect the paintwork of your car in advance.
Repairing chips with spray paint
If you are using spray paint, shake it thoroughly and spray into a small container. Next, dip a toothpick or brush into the paint and spread the paint inside the chip, starting from the middle. Repeat application of paint at intervals for drying. As a result, the paint should be slightly higher than the general surface, since it will settle after complete drying. You can finish at this stage, or continue leveling the applied paint by sanding. It is better to do this after 1-2 days, depending on the thickness of the paint and temperature conditions.
p, blockquote 15,0,0,0,0 –>
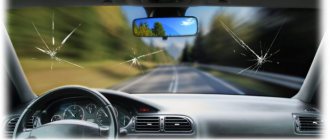
Surface scratches
photo: chipex.co.uk
They can be easily removed using scratch removers. Polish for a few minutes and wipe off any residue with a damp cloth. Let dry for about 15 minutes. Done!
This “painting” will have to be repeated at certain intervals, depending on the activity of use.
We do not recommend painting small chips and scratches with aerosol cans. You can easily overdo it and paint over the original paint. As a result, it will most likely be impossible to do without a trip to a car service center.
Simple body paint repair: tips
Professional body painting is expensive, but in some cases, with trouble-free operation, minor damage to the paintwork can be repaired on your own. Chips from stones, small scratches - all this is an integral part of any car if it is used and not stored in the garage as a relic.
It is important to know that damage to the paintwork on a car not only looks sloppy, but also carries the risk of rust, especially if the chip is deep and reaches the metal. Even very small damaged areas can be susceptible to corrosion. And as soon as rust appears on them, it can spread quite quickly (especially in the rainy off-season or “salty” winter with reagents) and expensive repairs simply cannot be avoided.
Therefore, any owner who cares about his car should, and in our deep conviction is obligated, to monitor such “little things” as damage to the body.
Even if at first glance they are frivolous and unnoticeable. see also
Recommendations for removing scratches from a car body yourself
But before you take a brush from a bottle of paint with the right color, it is important to arm yourself with some knowledge so as not to spoil the paintwork. Let's talk today about what you should focus on when repairing paint.
Pros and cons of surface protection
Precise selection of car hood protection will allow you to fully realize all its strengths and protect the body from damage.
Strengths and weaknesses of deflectors
The undeniable advantage of the deflector is the method of its fastening - on latches that do not require making holes in the hood. High-quality and reliable models are installed using stickers and metal fasteners. When choosing a deflector, special attention is paid to its surface - it must be perfectly smooth, without chips or nicks, otherwise the car body will be hopelessly damaged. The ease and simplicity of both installation and removal of the deflector are another of its advantages, allowing the car owner to remove or return the part at any time.
A correctly installed deflector protects the car from damage to the body.
When choosing a deflector, it is necessary to apply it to the hood of the car - there should be a small gap between the surfaces, due to which the air flow necessary to protect the body is created. Most drivers, dissatisfied with the use of deflectors due to the appearance of scratches and chips on the hood after such parts, selected them incorrectly, which led to such sad consequences.
And yet, deflectors have their drawbacks - for example, deterioration in aerodynamics while driving. This is not far from the truth - such designs really have a detrimental effect on aerodynamic drag. However, in the conditions of domestic roads this does not play a special role - it is almost impossible to accelerate a car to high speed, but catching a couple of stones is quite possible.
This is interesting: We independently connect the rear view camera to the navigator
Video: how the deflector works
Pros and cons of protective film
Automotive protective films are made of vinyl or polyurethane and are glued to the body using a special adhesive. They do not leave any obvious marks on the surface of the hood; moreover, they are practically invisible even in bright light. The most popular are polyurethane anti-gravel and vinyl protective films.
Vinyl film
This protective material is manufactured using casting technology. Vinyl is often used to cover the side surfaces of a car body, thereby protecting them from gravel, crushed stone and other objects that can damage the paintwork and metal.
Wrapping a car with vinyl film protects the body from minor damage
Advantages of vinyl film:
- The flexibility of the material allows you to cover almost all elements of the car body;
- Protection of paintwork from exposure to ultraviolet rays;
- Low cost compared to polyurethane film.
The disadvantages of vinyl film are its small thickness and strength, hardening under the influence of low temperatures. In addition, the material tears very easily, which can also be attributed to its disadvantages. At the same time, vinyl film is considered a universal protective material used for covering almost all elements of the car body.
Anti-gravel polyurethane film
This protective material is most often pasted over the front part of the hood, mirrors and bumper of the car. Compared to vinyl film, anti-gravel polyurethane film has several more advantages:
- High level of strength;
- Great thickness and density;
- Increased wear resistance;
- Long service life.
Wrapping a car with anti-gravel polyurethane film
At the same time, due to its increased thickness and density, polyurethane film cannot be used to protect elements with bends - it is not able to bend properly. To completely cover the surface of the body, cuts have to be made on the material. Anti-gravel film is not able to protect the paintwork from fading, since it transmits ultraviolet rays. The downside of polyurethane is that over time it begins to turn yellow.
How to prevent defects from occurring
To prevent frequent repair work, you will need to drive your car carefully. It is recommended to stock up on protective equipment for car body care. After all, it is easier to prevent scratches than to restore the original appearance of the vehicle.
Protective precautions include:
- When carefully caring for paintwork, dry rags should not be used to wipe off dust and dirt; it is prohibited to treat the body with aggressive agents that contain acetone;
- using protective equipment, waxing to prevent dirt and dust from entering;
- Careful driving of the vehicle - parking and entering the garage correctly.
Note! If you compare the costs of repainting a car and caring for it, then buying protective equipment for a car is a more budget-friendly option, so it is recommended to detect small scratches that have appeared on the body in a timely manner.
How to remove scratches on a car with your own hands
Small scratches are easier to remove on your own, but large ones will require some effort. In order for the car to acquire its original appearance, a lot of effort will need to be made.
How to remove small scratches on varnish
The easiest way to get rid of thin scratches that can be viewed from a certain angle. Such damage is completely invisible on a wet car. These scratches have slightly penetrated the paintwork.
Wax polish
To polish the car body, it is recommended to buy a special wax-based polish, which is applied to the car after washing. Thanks to a thin layer of wax when polishing the hood , the product fills scratches and forms a protective layer. The method has gained popularity due to its ease of use, as there is no need to buy special equipment. polish without any special skills. However, such protection lasts for a short time. After a while you will have to polish again.
Polishing machine and abrasive paste
Another method is used to remove scratches. Compared to wax polish, it has advantages. In order to polish your car yourself, you will need to buy a polishing machine and fine abrasive paste. Using a simple kit, you can remove scratches that affected the varnish but did not reach the paint.
Polishing is done by specialists. If you want to carry out the procedure yourself, it is recommended to prepare:
- napkins;
- polishing machine;
- spray;
- sanding paper P2000;
- fine abrasive paste.
Shortly before the procedure, the car should be washed with car shampoo and dry thoroughly. The car should be driven into a garage or placed under trees to prevent the body from heating up from the sun's rays. Moreover, scratches are more noticeable in the shadows.
Apply a little paste to the polishing wheel and get to work. First you need to set the speed at low speeds, and then gradually increase them. the car for a long time in the same place to prevent overheating of the varnish.
Be extremely careful! When polishing, it is recommended to frequently change the direction of movement of the machine - up and down, left and right. When processing, you need to cover a larger space located next to the crack. From time to time the circle should be cleaned of plaque.
Polishing is carried out until the strip disappears from view.
How to remove scratches from paint
How to polish scratches on a car if not only the varnish is affected, but also the paint? Using regular polish will not solve the problem. In this case, scratches on the car can be removed using a restoration pencil, the color of which matches the color of the vehicle.
A restoration pencil is a convenient way to deal with scratches. In appearance it resembles nail polish. In production, quick-hardening acrylic resins are used, which quickly fill scratches on the car .
Before you remove scratches on your car with your own hands, you need to clean the coating and degrease it. Then carefully paint over the scratches on the body with the brush located on the bottle.
After this, the paint should dry for 15 -25 minutes. Polishing of the scratch is carried out no earlier than a week after drying and polymerization. Before this, it is better not to wet the car.
How to remove scratches from a car body using improvised means? To restore the defect, the following are used:
- grout markers;
- brake fluid;
- toothpaste;
- technical aerosol WD-40.
Scratches on a car can be removed with rubbing pencils. They can be purchased at a parts store. If you can choose the color, you can carefully cover minor scratches on the car.
How to use the grout pencil correctly:
- after washing the car, you need to dry it and rub it with a cloth with gasoline solvent;
- wait a couple of minutes;
- if you find dirt stuck inside a crack, it is recommended to use fine-grained sandpaper;
- fill the strip with the contents of the pencil;
- after the paint has hardened, the coating will have to be polished with wax;
- Remove all excess with a napkin.
How to remove scratches with brake fluid? The point of using the product is that the liquid blurs the base paint and fills the space in the scratch with it. This manipulation is used only if a complete reconstruction of the part is intended.
Rules for using brake fluid:
- before work, you must wash the car and wait for the surface to dry;
- the product is applied to the material and the damage is rubbed with it;
- after 10 minutes, if the result of the work fully meets your expectations, the car can be washed.
Note! Rub only with a snow-white napkin. If you choose a rag with a print, the coloring pigment may get inside the stripe and the effect will be negative.
Rules for using toothpaste to repair scratches:
- the paste must have a whitening effect;
- Before adding shine, the surface must be degreased;
- the body is rubbed with a soft cloth;
- The applied toothpaste should be left for a quarter of an hour, and then wipe the area with a napkin.
To understand how to remove deep scratches with toothpaste, it is recommended to apply one coat and wait. If the result is not satisfactory, it is recommended to repeat the procedure again.
Using WD-40 Lubricant for Rubbing:
- VD-40 is a product that allows you to fill a scratch, but for a short period of time;
- the edges will need to be cleaned with fine-grained sandpaper;
- the product applied to a soft cloth is rubbed into the damaged area, making circular movements;
- Use dry material to remove any remaining product.
When working, it is recommended to use gloves to avoid damaging the skin of your hands.
All of the above options using available tools allow you to get rid of the dashes for a short time. But, due to the fact that the effect of their influence is short-lived, restoration will soon have to be done.
Removing scratches on the body with a Fix it Pro pencil
Fix it Pro is a transparent gel that does its job perfectly - seals the damaged area and acquires body color under ultraviolet light.
Removal of cracks is preceded by cleaning work. The body must dry.
To fill the crack, you will have to prepare a masking pencil - open the cap and insert a replacement brush. You need to gently press on the tube until the product appears in the nozzle of the rod. Now you need to fill the strip with gel.
A paper napkin is used to remove the excess layer. After completing the procedure, the machine should spend a day in the open air, preferably so that the rays of the sun fall on it. The trail will disappear!
How to remove scratches before priming
In case of large-scale cracks, you should immediately discard simple means, including a pencil. In this case they will be ineffective. The only way to fill a hole is with paint.
Step-by-step instructions: how to restore before priming:
- Preparatory stage. To remove defects on the body, you need to purchase a can of automotive paint. When choosing streak removal products, it is recommended to find a special kit that includes paint, varnish and sponges.
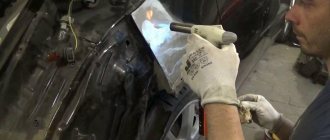
- Start of the procedure. A solvent must be used to degrease the surface. Then you need to take a regular sheet of paper and cut a hole in it that is the same size as the crack itself. With the help of a sheet it will be possible to protect the surface of the body without damage.
- Painting. The prepared sheet must be positioned so that it is located at a distance of several centimeters from the body. You need to spray paint through the hole cut in it. It is important to ensure that the paint is even with the undamaged surface. To do this you need to use sandpaper. The deeper the damage, the longer it will take to work. It is necessary to paint in several stages, and a day should pass between applying the next layer. After completing the work, it is necessary to polish the body.
If the area down to the metal is damaged, you will have to work with special tools and equipment, as well as in a suitable garage.
How to remove deep scratches and chips
All hope rests on the paint. The primer is applied first, then the paint and a layer of varnish. Finally, when the coating has dried, polish it.
Useful around the house! More often there are kits of products that are suitable for restoring surfaces with chips and cracks. The kit consists of acrylic paint, surface wipe, varnish, regular primer and anti-rust primer.
The car is washed and dried before restoration. If rust is found on a chip, it is recommended to clean it with fine sandpaper. After degreasing the surface, you will have to seal the borders with masking tape.
After treating the coating with anti-rust primer, it is necessary to allow time to dry. The next layer is a regular primer. Paint is used to stabilize the surface.
How to remove scratches on plastic
The interior of a car is no less susceptible to streaking than the body. Scuffs appear on the thresholds, as well as on the interiors and door panels.
Plastic restoration
Plastic restorers will help give the cladding a new look. At the auto store you can buy special sprays, aerosols, and milk. Due to the fact that they have good penetrating ability, they easily fill cavities. After everything, you need to use a polish to restore the surface's freshness and shine.
Each package contains instructions. Traditionally, restoration compounds must be applied to a previously cleaned and dry surface. After application, leave the product on the panel or other plastic and wait until it dries. Finally, it is recommended to take a microfiber cloth and polish the surface.
Materials used
Our store has everything you need for independent and professional car body repair. In this article, the following materials from the online store were used to repair chips:
- Degreaser and degreasing wipes - for cleaning the surface before applying paint;
- Automotive enamel by color code or touch-up kit for chips - automotive paint in the color of the car to eliminate chips;
- Acrylic one-component varnish - to protect the base paint from external influences (present in a set with touch-up paint for chips from RAL1.RU).
| Go to the catalog of car paint colors by color code (labeling). | Car paints |