First, briefly about the situation. Over time, on old cars, and even on new ones, the doors begin to sag. On old cars, they sag from time to time (natural wear), from irregular lubrication, or rather, from lack of lubrication at all. But on new ones, the metal and its quality probably play a role. Well, the frequency of use. This mainly affects the front door hinges; if the car was in a taxi, then the rear ones too. but still the rear ones are smaller.
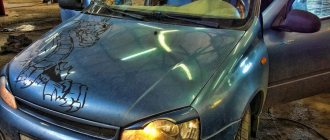
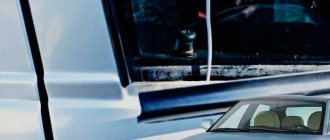
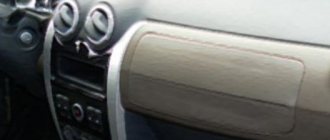
The front doors of my car were hanging loose. The gap between the frame and the roof became large, the rubber did not fit well. I thought about how to do it. Digesting the entire loop is difficult and time-consuming. It’s also difficult to set everything up so that it works smoothly. But people are digesting it, I ruled out this option. I don’t have a semi-automatic weapon, and poking with an electrode is not convenient. High accuracy is needed there. And if it’s the first time, there’s no point in changing it. can be simply repaired.
Yesterday on the day off, my father and I decided to do some repairs. It’s better to do this whole thing together.
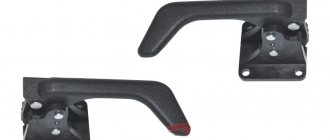
Let's look at how the loop itself is constructed.
It can wear out differently.
Play can appear both in the main part of the loop, that is, in the ears, and in the outer part (which is screwed to the stand) where the cotter pin goes. The difference in this wear location depends on where the cotter pin is inserted more tightly at the factory.
If the cotter pin is inserted tightly into the ears of the main part of the loop, and there is a gap in the outer canopy, then naturally everything in the ears will rust and stay in place, only the outer canopy will work and the middle part will wear out. If it turns out the other way around, that at the factory the cotter pin is inserted tightly into the outer canopy, but the lugs are loose, then the cotter pin in the lugs will work and wear out, but will rust inside, in the middle part of the outer canopy.
In my case, there were two options. The left door has wear in the ears. And on the right door in the middle part of the outer awnings. (As it turned out later, the cotter pin actually broke inside) and it had to be replaced along with the external canopy.
We take a grinder with a thin circle and make cuts on the ears, where it dangles. If it dangles inside the outer canopy, then we cut it.
The pins of VAZ door hinges are a sore spot for owners of cars from “kopeck” to 2114. These cars use not the highest quality hinges, which become loose after just a few months of active use of the car. They also become unusable due to hard locks, when you need to slam the door hard to close, and also because of roads, when driving on which not only the hinges, but also the body itself slowly but surely deforms. If the hinges completely become unusable, then the doors will simply stop closing, since the clip will not fit into the lock (grip). How to replace fingers?
Door hinge repair options
Failure or severely deformed hinges are repaired using the following methods:
- Complete door replacement. It is complicated by the fact that it is not always possible to find new VAZs for old ones. You have to buy old elements that are partially worn out.
Replacing door hinges, as well as fingers, is the most rational option in this case. It's inexpensive and relatively easy to do. If necessary, additional equipment can always be rented at a service center or automotive supply store. The cost of the hinges themselves for the VAZ 2110 and similar models is only about 300-500 rubles. You can also find old, used ones for sale. You will have to pay less for them. But new VAZ 2110 doors will cost several thousand rubles. And they are sold, as a rule, without glass and cladding. Their installation is an additional waste of money.
Replacing pins in hinges
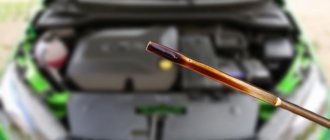
So, if the repair only involves replacing the fingers, then the first thing you will need to do is remove the door to gain access to the hinges (3-4 fasteners are simply unscrewed, depending on the model). Next, the fingers are knocked out. If they do not come out due to corrosion or deformation, then you should first thoroughly fill everything with WD-40 to remove the rust and repeat the operation. If this fails, you will have to drill out the pins or replace the hinges completely.
When installing new pins, be sure to lubricate them with grease or oil, and after installation, adjust the door (lower or raise it a few millimeters through a tightening rod). The door should fit accurately into the catch when closing without additional physical effort. Otherwise, the wear and tear on both doors and hinges will be much higher. After 1-2 years of such operation, you will have to completely replace the door along with the hinges.
The main difficulty in repairing VAZ door hinges is to correctly knock out the pins (the same fingers). It’s most convenient to just rivet it and then straighten the loop if necessary. The most aesthetic method is to drill out each end of the finger, after which its edges are ground off or simply squeezed. The drill is immediately taken to the minimum size, then gradually increases literally by millimeter. This will take quite a lot of time, but the loop will not be damaged.
If the finger has other deformations, it may be necessary to make a through hole through the pins. This will not prevent the use of new fingers in the future. For this purpose, either an impact screwdriver or a powerful drill with a high-quality drill bit (carbon steel is ideal) will be useful.
Removal
3. On the connecting blocks of the wiring harness laid in the door, mark the color of the insulation of each wire connected to it.
4. Disconnect the wiring harness block from the windshield wiper gear motor block (see “Rear window wiper - removal and installation”). In the block that supplies voltage to the gear motor block, use a slotted screwdriver with a thin blade or an awl to tighten the locking tendrils of the wire tips. Disconnect the wires from the block.
5. In a similar way, remove from the block the tip of the wire that supplies power to the additional brake signal (see “Spoiler - removal and installation”).
7. Disconnect the wire of the door glass heating element (see “Tailgate glass - removal and installation”).
8. Pull the wires out of the tailgate.
9. Inside the car, after removing the decorative trim, use a 17 mm
Unscrew the upper seat belt mounting bolt.
Warning! Be careful not to lose the spacer located under the bolt.
10. Using a Phillips screwdriver, unscrew the two self-tapping screws securing the rear pillar trim.
11. Release the trim from under the glass seal and move the upper part of the trim away from the pillar. We remove the trim on the other side of the car in the same way.
12. Remove the rear handrail trim. Use a Phillips screwdriver to unscrew the rear handrail fastening screw.
13. Remove the handrail support plate.
14. Similarly, disconnect the rear fastening of the handrail on the opposite side of the ceiling.
15. Using a puller or a slotted screwdriver, remove the clamps of the three holders of the rear part of the headliner.
16. Take out the holders.
18. We move the edges of the upholstery out from under the glass seal and move the back part of the upholstery away from the ceiling at a distance of 5-7 cm.
Warning! To avoid bending the headliner, do not apply force.
19. Under the headliner with a 10 mm
Using a ratchet, unscrew two nuts securing the door hinges to the car body and remove the tailgate.
Warning! One of the nuts on the left loop secures the tip of the “mass” wires. When installing the door, do not forget to connect them!
10 mm socket wrench
Unscrew two bolts securing the hinges to the door frame and remove the hinges.
Replacing the entire hinge
If the door is sagging, then the likely cause is deformation or mechanical wear of the hinges. It is corrected by completely replacing them, along with the fingers. You don't have to buy them. You can make it yourself if you have a metal cutting machine. Such repairs will be cheap - you will only have to pay for the purchase of high-quality metal plates.
It is recommended to cut the loops strictly along the boundaries of their wedging. Fingers are placed last. And again, you need to lubricate them, hammer them, and lock them, as the manufacturer himself recommends. Replacement without taking into account their manufacture (if you do it yourself) will take at most several hours, including removing and reinstalling the doors. All that remains is to make the adjustment. And you should understand that in the next few days the noose may fall. This is shrinkage. The door may creak and may not always slam shut normally. If necessary, readjustment is performed.
How to set up curtains in a Soviet closet, they are completely different there
Hello, Mila! Please send me a photo on WhatsApp or email [email protected] and I will give you a detailed answer. Ideally, replace them with new ones
Hello Dmitry. After a year of use, the crocodile hinges began to make a shooting sound at the end of closing. How can they be repaired? Why is this happening? Thank you.
Hello Andrei! After a year of use, the hinges sagged under the weight of the door. The clicking sound is the horizontal plates of the hinge clinging to the vertical rivets on the axles. You can try to bend them, how much is enough? Easier to replace. And don’t skimp on the manufacturer; the stingy pays twice.
Final door adjustment
Adjusting a door after replacing pins or hinges is about aligning the locks to the normal level for precise closure of the catch. If you plan to replace them, then it is better to focus on the so-called silent locks. They cost slightly more, but allow the closing mechanism itself to not wear out so quickly. When installing them, you can select any level. They work on the principle of a classic latch. At the moment of closing, they do not create additional resistance, so the door will close even with a slight push. The lock will no longer be able to open while moving.
After installing the hinges or fingers, you need to use a building level to check whether the VAZ door is level.
If yes, you can start adjusting. It is best to do this from a clamp. Everything with it is quite simple - we move it a little higher and towards the cabin. You can do this a few millimeters at a time until the closing force is minimal.
Tools and materials
Proper soundproofing of car doors begins with preparing the tools and necessary materials:
The materials can be bought as a ready-made set (the price is slightly higher), or in sheets, briefly about their properties:
- Viproplast is the most popular and affordable vibration-absorbing material today
- Vibroplast does not require heating during installation if the air temperature is 25 degrees or higher
- Vibroplast is resistant to water and other aggressive environments, does not absorb moisture from the air
- Vibroplast has high elasticity, so it can be conveniently applied to any textured surfaces
- Complete versatility of application of vibroplast (it can be used for sound insulation in any area of the car)
- Vibroplast has anti-corrosion properties and provides additional protection against corrosion
- Vibroplast has excellent sealing properties, so it provides good sealing of surfaces
- Accent is a sound-absorbing porous material with a special improved structure
- High frequency absorption range
- Absorbs about 90 percent of noise
- Excellent thermal insulator
- Covered with metallized film on top
- Bitoplast is a sealing material with sound-absorbing properties
- The mounting layer makes it easier to use
- High wear resistance, durability
- Madeleine is probably the most favorite material among most installers, allowing to compensate for friction and completely eliminate the occurrence of squeaks and other sounds.
- Although it is also “anti-creaking”, it is much thinner than Bitoplast, which allows it to be used in places where the gaps are very small, and the thickness of madeline is only 1-1.5 millimeters
- It is also very simple to install: you just need to stick a piece of Madeleine on one of the two rubbing surfaces, and all friction disappears and squeaks too, so it is simply irreplaceable in soundproofing the doors and interior of any car
Reasons for sagging doors
Several reasons play a role in the reliability of door fixation and the absence of sagging:
- Extensive wear on hinges and axles. The door of the vases began to close poorly, and opened with considerable effort.
- A metal squeak that appears when the vehicle moves on an uneven road is indicated by loosening of the door fastening.
- Failure to match the door fixing elements is accompanied by distortion of the hinges and the formation of cracks in the door body. This leads to uneven gaps, which contributes to the appearance of water in the cabin after rain.
- The door sagged after being hit in an accident.
- The doors were installed or adjusted incorrectly.
How to remove sagging doors
Advice: Before starting work, it is necessary to establish the cause of the sagging.
A small test may help with this:
- You need to grasp the bottom of the door with both hands. Then they need to be easily loosened and the presence of a gap in the vertical plane determined. There is no play allowed in the VAZ 2109 door hinge.
- The door is grasped with your hands from above and below and turned along the horizontal axis, moving the door is not allowed, there should be no gap.
- The place where the door hinges are fixed to the body of the VAZ 2109 is visually inspected and the hinges of the serviceable and sagging doors are compared, the differences in them are determined and a conclusion is made.
After researching and finding out the causes of the sagging, repairs can begin. In this case it is necessary:
- If the door sagging is due to increased wear on the hinge axis, then it is better to replace this element.
- Replacing the entire hinge assembly for a VAZ 2109 door is required if there are signs of wear or tear in the entire mechanism, then the cost of repair will be significantly less than when installing several new, heavily worn parts at once.
Operations to replace failed parts must be completed by adjusting the correct position of the door. In this case:
Tip: You can make it easier to adjust the position of the door after removing its counterpart.
- The door closes and its best position along the vertical axis is determined visually.
- If the door line runs parallel to the body, and the door itself can be shifted down or up relative to it, you need to slightly loosen the fastening of the hinges, both upper and lower, while raising or lowering the door. The door position is fixed with a screw.
- If a door equipped with a lock has a corner end that is slightly below the required level, and the hinges are in good condition, you need to unscrew the bottom hinge lock and level the door position. In this case, you need to place thin metal plates or washers under the loop itself, as can be seen in the photo.
How to align a VAZ 2109 car door
One way to align doors is to use a bolt. For this:
- A bolt of the same size as the pin is used.
- With the head up, the element is placed on the lower hinge of the door from the inside. In this case, part of the bolt should hang down on the edge of the loop.
- The door is carefully closed, and the bolt remains clamped inside the hinge.
- The door is then quietly closed and the result is recorded.
- The operation is repeated if necessary.
There are special instructions for repairing a door when it sagging, when the gap between the doors and the car body has increased. For this:
- The door is removed and its trim is removed.
- A longitudinal cut is made in the bottom loop using a small grinder.
- The remains of the finger are knocked out with a core.
Tip: When replacing a pin in a VAZ2109 door hinge, you can use a valve from a classic VAZ car, without internal filling.
Repair of hinges on VAZ 2109 doors
- Using a hammer, the canopy is pressed onto the valve stem.
Advice: You cannot tighten the element too much, the rod should be slightly pinched, you need to leave a small gap for welding.
- After achieving the required pinch, the valve must be cut to the length of the door hinge.
- The new element is inserted into the cut part, with its thick end remaining on top.
- The part is welded with an electrode. It is necessary to ensure that after welding the rotation of the finger is free.
- Excess metal is removed with a grinder and the assembly is painted.
The most reliable, but not the easiest way is to replace the door hinges on a VAZ 2109 car. In any case, the option for repairing door hinges depends on the degree of wear and sagging of the door itself.