Is there power steering on the VAZ 2115
External tuning is of course great, but until the internal work is done, it’s still not worth starting.
Today we’ll talk about such an important thing as the power steering on the VAZ 2115. The device is a combination of several components. This is a special pump and actuator. As a rule, the last element is combined with the VAZ 2115 steering rack.
Manufacturers do not install power steering, but its installation is still provided. The equipment itself will cost a tidy sum, but here the car enthusiast decides for himself: is tuning a VAZ 2115 worth that kind of money? After purchasing a new device, you need to go to a service center and order the installation of power steering. However, you can do all the work yourself.
Before we begin installation, we check all the components: special gearbox, pump, pulley, hydraulic cylinder, fluid reservoir and hoses. If everything is in place, then soon the power steering on the VAZ 2115 will show itself in action. We proceed to install the pump on the cylinder head, after which we carefully attach the pump itself. The next stage is replacing the crankshaft pulley; it will act as a drive for the power steering pump. The drive comes through a belt.
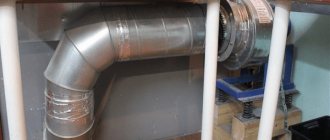
Now you need to replace the steering gear. Before installing a new one, you need to prepare a regular place. We'll work on the bipod, maybe we'll have to make a hole in the front panel. We choose a place for the tank with liquid, pay attention that the plastic walls do not come into contact with heating elements.
Installation of the cylinder is carried out strictly in accordance with the instructions. The system is almost assembled, all that’s left is to connect the high-pressure hoses and tighten them with clamps. Pour special power steering fluid into the reservoir. We pump the system and enjoy the work done, the power steering for 2115 is ready for work!
2001 was the year of the appearance of a new project from the domestic automaker AvtoVAZ. The model had two names - Samara-2 or VAZ 2114. In fact, it was an improved version of the well-known nine.
EUR kit
The modernization turned out to be very serious, affecting literally all components of the car. The steering system was no exception. Unlike many other models produced by AvtoVAZ, the 2114 offered a choice of two power steering units - hydraulic power steering and electric power steering .
Installation of power steering 2110-2112 in VAZ 2109
Task: installing power steering on Lada 2109
We remove the old generator, its bracket and pulley (the pulley must be placed under the ridge belt).
Let's move on to the pump, it already comes with a bracket from LADA 2110
We need to modify it, namely, remove the support (we simply unscrew it) and saw off the ears to which the support was screwed (they rest against the lever), and in the end we get this product.
Having estimated the engine, it turned out that the third (rightmost mount) is also in the way for us; it gets on the bolt that mounts the engine mount. You can, of course, file it in a figure, take a longer bolt and leave it as is , but it seemed to me that two bolts are enough to hold the pump, so we remove it too.
Then everything is simple: we put a pump in place of the former generator (our generator will move higher)
One bolt fit perfectly, the second one needed a short one; I didn’t have it (you can see it in the photo above), I screwed it on as best I could in order to continue the assembly and understand what else was needed.
Next we install a new generator bracket. I took the bracket from Kalina for the tension pulley; when assembled with the generator, the whole thing looks like this.
So we install the bracket, it stands up without any difficulties, 3 bolts and everything is in place
What remains is the final generator (by the way, the gene is also from 2110) and this is where problems arose. I had to adapt it a little, using metal scissors.
Then we just install the generator without hindrance and put on the belt.
In general, that's all. The power steering pump on the VAZ 2109 is installed and working. By the way, the belt needed is 6PK975 or 6pk970.
First of all, remove the old rail. In general, nothing complicated, we remove the steering tips, unscrew the bolt that connects the steering rack and the steering shaft (located in the pedals) and unscrew the rack itself, it is held on by 4 bolts.
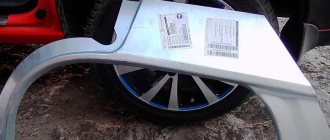
We take a new rail. The number one problem is the tie rods. It is necessary to leave the relatives from the nine (or the collapse will not be done) They differ in silent blocks and their diameter.
On the left in the photo, the rod from the nine has a smaller internal diameter and the bolt from the ten will not fit into it, plus there is a bushing sticking out of the silent block, which we also don’t need. There are two options for solving this problem: First, cut off the bushing and drill a larger hole. The second is to take new silent blocks from dozens, grind them and press them into the first service that comes up. I went with option number 2 and it turned out like this.
Today I went to the alignment and they told me that it was all bullshit and the thrust could have been left at ten, but what can I do? Internet, such Internet)
That's it with the rods. Problem number two is the size of the window in the engine panel. It’s small and a rail from ten won’t get there by any miracle.
That is, you need to cut. I overdid it a little, and there was a gap on top of me. about 1cm
Half of this hole is now covered by a casing that goes from above, but in any case there is .
To prevent this from happening to you, do not cut too much upward. From the main hole, saw upward 1 cm further if necessary.
So, the rods for the VAZ 2110 are ready, there is .
First of all, you need to unscrew all the tubes, in order to do this without problems and not tear off the splines (like me, for example), tap each bolt and they will unscrew without effort. After the tubes are unscrewed, you need to remove the mechanism itself, it can also be removed without problems (2 bolts), and in the end you will be left with a bare rail.
And now she will enter her place through the right window (near the wheel) without any problems. Next is the assembly (before you start installing the rack, practice inserting the mechanism into the rack, there is a certain principle, you need to rotate the shaft counterclockwise and press down) We push the rack. We find more or less free space under the hood and put it together in it. I did this somewhere between the vacuum and carb.
We screw it from the end of the tube through the same window as we inserted the rail
Once everything is screwed down, we put the rail in its rightful place and tighten it. I advise you to disassemble the high-pressure hose into pieces and screw it on when the rail is already in place. Next to the rack we put the rods in place.
The next (and last) problem is the steering shaft. it needs to be shortened. Measure 7 times, cut 1 time (extra)
We go to a turner, grind out a bushing (or find a piece of pipe of a suitable diameter) and weld the whole thing. I also drilled a couple of holes and drove bolts into them.
Mounting the tank, also based on taste and color, I did this: I took the standard bracket and sawed off the excess from it.
Result: everything works. The steering wheel can be turned with just one finger. The steering wheel is stable, does not jump out of your hands on bumps, and does not pull anywhere. And of course, a short rack of 2.8 turns instead of the standard 3.8, this is a small miracle that makes itself felt, a very sensitive sharp steering wheel, in yards with a lot of sharp turns you want to ride in circles. In general, a short rack is perhaps the coolest modification of all that I have done to the chassis and it radically changes the steering.
The work on installing power steering on a VAZ 2109 has been completed.
Steering column VAZ 2108, 2109, 21099
Installation of an adjustable steering column from a VAZ 2114 in a VAZ 2109
Types and advantages of power steering
The steering of the VAZ 2114 has undergone significant changes when compared with its predecessors in the form of the first generation Samara. Driving has become really better.
Installation kit
Customers had the opportunity to choose between electric power steering and power steering, that is, electric power steering and power steering. But how do these systems differ from each other, which one should you prefer and why? Let's try to figure this out.
Electric booster
Electric power steering operates using pulses of electrical current. This is a rather complex system in which each individual part has its own important role. Because of this, when at least one unit fails, the operation of the entire device is disrupted, it can completely stop working.
Electromechanical amplifier circuit
The task of the car owner whose car has an EUR installed is to constantly monitor the condition of the unit. A special controller is responsible for the operation of current pulses. With its help, the driver can independently set the degree of gain.
The EUR performs several tasks.
Power steering
The hydraulic booster includes a large number of elements that require not only constant monitoring, but also careful handling.
The operating principle of the power steering is based on the interaction of the steering with the oil fluid, which is contained in a special container. This is where the name of the type of amplifier comes from, since the work is based on the force of the working fluid.
Despite the rather complex technology, power steering is effective, safe, provides comfortable control, and allows you to control the behavior of the car even if the front wheels break down.
Alas, the hydraulic booster is not without its drawbacks. The main one is frequent breakdowns. They arise mainly due to leakage of working fluid.
The functions of the power steering are as follows:
Characteristics of the VAZ 2114 model
The Samara is a pretty nice five-door hatchback that began production back in the nineties, but was released to the public only in the early 2000s. Unlike previous projects, Samara had enhanced technical features, developed a significantly higher speed, remaining well controlled at a speed of 160-170 km/h (this is a very good indicator for domestic cars).
READ How to find out what alarm system is on your car
The car had such characteristics as reliability, practicality, resistance to adverse external factors, endurance and good dynamics. What else is needed on our extreme roads, especially if we talk about the provinces? In general, the car became in demand and for many years received the title of sales leader; after all, not everyone can afford foreign cars, but here the appearance is satisfactory and the quality is tolerable.
But, of course, like all AvtoVAZ cars, Samara had not only advantages. A number of shortcomings have gathered clouds of formidable criticism over the car, which continues to this day. In particular, professionals note the fragility of many elements, the insufficient working condition of the engine and transmission, and the brake system, which too often fail.
The steering system of the first generation Samara was a C grade, so the engineers were faced with the difficult task of seriously correcting flaws and technical defects. In 2009, a restyled version, Samara-2, or VAZ 2114, went on sale, which turned out to be much better, more efficient, more practical and in some ways even more aesthetically pleasing than its predecessor.
In addition to many improved characteristics, which include an engine formatted to meet the needs of drivers, more powerful and robust, the appearance of new equipment, a more modern steering system was observed. The steering wheel of AvtoVAZ cars has always been unstable and needed additional strengthening. Now such an opportunity has appeared; if you wish, you can install power steering on a VAZ, and who likes it better: electric power steering or power steering.
In 2010, another minor stage of restyling took place, which slightly updated a number of engines; a 1.6-liter engine appeared that meets European quality standards. In 2014, an updated version of the VAZ was released again. This time, engineers worked a lot on the new dashboard to make it not only stylish, but also multifunctional. Of course, no matter how hard talented engineers try, Samara is still significantly inferior even to the budget projects of Western or Eastern concerns.
Disadvantages of power steering and electric power steering
Many car owners prefer installing electric power steering on the VAZ 2114 as a replacement for the standard power steering. However, is such a decision justified from a practical point of view?
Connection
To answer this question, it is necessary to consider not only the positive aspects of this or that amplifier, which we have already done, but also point out their main disadvantages.
What is better for the VAZ 2114? Let's try to figure this out.
With this short list the list of shortcomings can be completed. But it is worth paying attention to some nuances.
Possible problems
Some drivers note that in a VAZ 2114 with a hydraulic booster, the control system becomes as if weightless. This can be confusing. When the gain is lost, the steering wheel has to be turned more often.
A fairly common problem caused by the fact that the hydraulic booster operates directly from the power unit. In order to correct the situation, the hydrach is connected not directly to the engine, but using a gain regulator. Another option is to use an amplifier with an electric drive function. Today, such a device is not difficult to find, and it costs relatively little.
Wiring
As for replacing the hydraulic booster with an electric booster, this is a more than possible option for improving the car. It is considered one of the simplest but most effective types of technical tuning. However, it is strongly not recommended to perform such operations yourself.
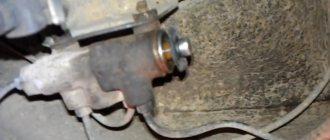
The grenade replacement process in detail
To begin with, before starting the replacement procedure itself, you need to decide on the tools. So, what will be needed when replacing the internal grenade: knobs and heads 13-17, as well as 30; keys 17 and 19; jack; lamp; pliers; CV joint lubrication; wheel wrench; and the spare part itself.
Go!
Now that everything is assembled, you can begin the replacement procedure:
Grenade selection
The choice of the inner CV joint should be taken seriously and carefully, since it is one of the main drive parts of the car. As practice shows, this part quite often fails on cars of the VAZ 2113-2115 family. Therefore, it is worth carefully selecting a spare part not only by price, but also by quality.
Original
Analogs
In addition to original spare parts, you can find quite a lot of analogues on the automotive market, which are in no way inferior to the original in quality and price. All of them are certified and recommended for installation on this vehicle. So, let's look at what analogues can be installed on the VAZ-2114:
Some VAZ-2114 owners recommend tripoid grenades for installation.
What is needed for installation
You will need to directly purchase electric power steering for the VAZ-2114; users have only positive reviews of various manufacturers of these devices. And the cost of such devices ranges from 15,000 to 25,000 rubles. The following elements must also be included in the kit:
If you purchase this device in a store, be sure to check the package contents. If some elements are not in the box, then it is better not to buy the device, as problems may arise during installation.
Adjusting the steering wheel position
If you don’t like the height and position of the steering wheel, then you will need to grind the edges of the shaft to the size you need or install gaskets between the plate and the body. It is worth remembering that the electric power steering is automatically switched off at speeds above 50 km/h, unlike the same power steering.
Installing electric power steering on your own is quite possible. You just have to remember that even for an experienced driver it will take a lot of time and effort. But for a lover of comfortable driving, the result will justify all costs and hopes.
Let's look at how you can do this yourself in this article. This article will consist of two parts, in the first part we will look at the installation of the power steering pump, in the second - the installation of the steering rack under the power steering.
Go. First, remove the generator with bracket:
The pulley for the generator belt needs a ripple pulley, as in the figure below, so if there is another one, then we change it to this one:
This is what the VAZ 2110 power steering pump looks like together with the bracket:
The bracket needs to be modified, namely, unscrew the engine mount, saw off the ears of its mounting, and also saw off the far right mount (it gets in the way). In the end it should look like this:
Next, instead of the generator, which we will install above, we install a power steering pump:
As you can see, the second bolt will need to be shorter.
Why not hydraulic booster?
The electric power steering on the VAZ-2114, the installation description of which will be given below, has a number of advantages when compared with hydraulic devices. The hydraulic booster requires a pump that creates pressure to operate the steering wheel. And these are already unnecessary elements in the design.
The condition of the pump must be constantly monitored; leaks may appear in it, which will lead to failure of the power steering. The electric device is much simpler, its service life is very long, it is undemanding in maintenance, which will be very useful for lazy drivers. And most importantly, the cost of an electric amplifier is almost half as much. And when operating a car there are no costs at all.
How to unscrew a broken brake bleeder fitting
If you find that your brake line is leaking, it will need to be replaced. Any hydraulic system operates only as a closed system. Air inside or leaking fluid can compromise its potential and result in soft or no brakes at all. But how to bleed the brakes if the fitting is completely licked or destroyed.
Installation of EUR
How much does this pleasure cost? And where can I get it? Ivan, this pleasure costs about 16 thousand rubles.
I bought everything, who can install it?
Does Samara 2 have its own EUR or can it be installed from Kalina?
Hello Ivan! Which EUR kit should I buy for Priopa or Kalina?
If noticeable scratches appear on the body of your car, do not rush to have the car repainted at an auto service center. Small paint chips, cracks, scuffs and scratches can be repaired yourself using a regular can of paint.
A story article that talks about how a guy repaired the heater of a BAZ 2110. From it you will learn why the heater in this car can malfunction, how it can be repaired repair, and why it is better to immediately contact a car service.
The article will be useful to owners of the VAZ 2109. It is dedicated to repairing the gearbox. Here it is explained how the malfunction occurs, typical problems and how to fix them. You will learn how to determine that the oil has expired.
Electric power steering on the VAZ-2114 is installed only by the owners; none of the cars were equipped with such devices from the factory. But to increase comfort and improve control, motorists install electric amplifiers from Priora or Kalina.
Minor difficulties may arise during installation. But it will be much more difficult to pass the technical inspection. Essentially, you are tampering with the steering design, which is strictly prohibited by traffic rules. The driver has no right to make changes to either the steering or the brake system.
Disassembling the steering control
Before installing the electric power steering on the VAZ-2114, the photo of which is given in the article, you need to perform several preparatory steps:
It is advisable to have the operating instructions at hand when carrying out work; everything is explained in it very clearly. After dismantling the steering column itself, you need to unscrew the studs and screws. Screws with shear-type heads must be unscrewed using a chisel.
The work is very tedious and boring, but you will complete it quite quickly. After unscrewing the top bolt securing the cardan to the column, completely free the mechanism. After this, dismantle the steering column and remove the cardan by unscrewing the bolt on the lower mount. It may be necessary to loosen the clamp located at the bottom of the cardan using a chisel.
When is it necessary to bleed the brakes?
The first of these is that the drive pipelines are exposed to negative environmental influences. The rear brake pipelines on VAZs are made of soft metals (copper, brass) and they pass under the bottom of the car. Oxidation processes and possible shock loads during operation can cause cracks or breakdowns in the pipeline. The drive of the front mechanisms is composite, one part of the pipeline is metal, and the second is rubber. Over time, the rubber “ages” and cracks appear on it.
Device installation
After dismantling all steering components, it is necessary to install the plate. Before this, use a grinder to file the upper studs and install the electric power steering housing, cardan and plate; all these elements are included in the kit.
Electric power steering on a VAZ-2114 (a detailed description is given in the operating instructions) can be installed in literally a matter of minutes. It will take you much longer to dismantle all the elements. When installing, be sure to change the standard cardan to the one included in the kit. Don’t rush to assemble the steering column just yet, because you still need to connect the device to the car’s on-board network.
Connection to electrical equipment
The electric power steering control unit takes a signal from the speed and crankshaft speed sensors. Connection to the vehicle electrical systems is carried out as follows:
At this point, the connection of the power section can be considered complete. Connecting controls is done as follows:
This completes the connection. You can install electric power steering on a VAZ-2114 with your own hands without any problems. But it’s better to do all this at a service station so that the technicians can issue you a document confirming the correct installation of the equipment. Only in this case will you get rid of problems during maintenance.
VAZ brake bleeder dimensions
A car's brakes are an important part of ensuring its proper and safe operation. Any breakdown of the brake system can lead to problems or even tragedy. To avoid problems when driving, it is necessary to constantly monitor the condition of each element of the brakes, especially the brake fluid.
Bleeding the brakes is possible in different ways. It is possible to contact a car service. In this case, the car's brakes are pumped using a special device. It is an effective technical device that helps remove air masses from the car brake system. This professional unit, which is used to bleed the brake system, is equipped with adapters for different car models.
Change of oil
So, opening the hood we can see the first and most noticeable element, which includes the power steering. In general, the remaining elements fit into the steering gear housing and are no longer distributed throughout the engine compartment and car body. We will also immediately need some kind of container into which we will drain the already used liquid. Anything can fit, even a bucket, even a canister. We do not recommend that you throw away the drained oil; it will be quite useful in some minor repairs just for lubrication. Under no circumstances should you add it to the already new oil of your VAZ 2114: the oil must be homogeneous. You also need to let the car engine cool down so that everything cools down and if the oil gets on your hands, it doesn’t burn your skin.
Now we need to drain the oil from the expansion tank. To do this, you need to uncork the lid and carefully pull out the hose that sticks out at the bottom of the tank.
In its place, you immediately need to insert the hose that is lowered into the container that we prepared in advance to drain the already used liquid. Now, under the influence of gravity, the oil will slowly ooze into our container.
The next step is to start the engine, and you immediately need to start turning the steering wheel from side to side so that the pump begins to pump oil through the system through the tank, and little of it will be poured into the container. This procedure must be done until the power steering stops working and the steering wheel stops moving. Thus, it turned out that there was no fluid left in the steering system of the VAZ 2114.
Now you need to immediately proceed to pouring new oil. We must turn off the engine and return to its place the hose that was originally at the bottom of the tank. Fill two-thirds of the oil tank level and start the engine. Now you need to turn the steering wheel again from side to side so that the power steering is pumped with oil and the air is released from the system.
You also need to leave the tank lid open to allow air to escape. As the liquid leaves the tank, we will need to add oil. You will have to turn the steering wheel until the oil stops leaving, after which you need to tightly seal the tank.
That's all, this is exactly how the working fluid is replaced in the amplifier of a VAZ 2114 car. As you can see, there is nothing complicated about it, you can easily do it yourself and even without help. The oil must be selected carefully so that it is ideally suited to the design of this car.
We work independently
It is possible to carry out all the steps to rid the VAZ-2110 brake system of air yourself. This fairly simple method also allows you to complete all the assigned tasks alone:
- the brake fluid reservoir cap is replaced with an old clutch reservoir cap with a hole pre-drilled in it into which a car nipple is inserted;
- the compressor sets the pressure to 1.5-2 atmospheres and supplies it to the installed nipple on the tank lid;
- the second hose is put on the fitting through which the brakes are pumped, and its other end is lowered into a container (for example, a bottle);
- When air stops coming out of the hose, the fitting can be closed.
This operation is repeated on all wheels of the car. It is worth noting that in camping conditions the compressor can be replaced even with a regular bicycle pump, which will be somewhat more difficult than working with a compressor, but with due diligence it is also effective.
Functionality check
After you have connected all the elements of the system, you need to install the steering wheel and check the functionality of the mechanism. If you are satisfied with the work, then you need to assemble all the elements in the reverse order. After this, start the engine and try turning the steering wheel at low speed.
In this case, the electric drive should work to help you turn the wheels in the desired direction. Then you need to accelerate the car. At high speed, the electric power steering on the VAZ-2114 should not work. Otherwise, you most likely made a mistake when connecting the wires coming from the sensors.
The principle of operation of the GTZ and its main problems
The master brake cylinder of the VAZ 2114 is a device that converts pressing the brake pedal into increased pressure inside the system. It works on the vacuum principle and requires complete sealing of the brake fluid path.
Removed master brake cylinder VAZ 2114
Any violation of this tightness becomes the reason for the “disappearance” of the brakes, namely:
- air entering the system;
- the appearance of cracks in the line and leakage of brake fluid;
- wear or damage to the integrity of the gaskets.
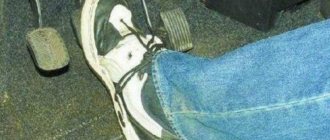
Checking the tightness of the brake system is very simple - you need to press the brake pedal with the engine not running, and then, without releasing it, start the engine. If immediately after this the pedal “fails,” then the line is completely sealed and the brakes are working properly.
Location of the main brake cylinder VAZ 2114
Is it possible to install a hydraulic booster on a VAZ 2107
If we talk about equipping the “seven” with a non-factory power steering, then we can consider this operation appropriate and even necessary.
The installation of power steering on a VAZ 2107 is dictated by the complexity of the vehicle’s management in various operating modes. Only with a booster does the quality of control and reliability of driving on uneven roads improve.
Thus, structurally, the “seven” of any year of manufacture is ready for installation work, however, it is recommended to turn to specialists for this service, since it will be extremely difficult to install the power steering mechanisms yourself.
Source
How to unscrew the brake bleeder fitting?
Very often, the brake bleeder fitting on the wheel brake cylinder (both front and rear) can “sour” and cannot be unscrewed.
Using the example of the bleeding fitting of the front brake mechanism (caliper) of a VAZ 2109 (2108, 21099) car, we will tell you how to independently overcome this problem, which does not allow you to properly bleed the hydraulic drive of the brake system.
Tools for unscrewing the fitting
A special wrench for bleeding brakes (a good, not “licked” special wrench with a crimp head is the first condition for the successful completion of this work)
A special wrench for unscrewing the fittings in the brake system of a car
Preparatory work
— We fix the car on a level surface
Jack up and remove one of the front wheels of the car
— Clean the caliper (brake mechanism) from dirt
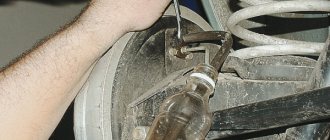
We use a metal brush. Pay special attention to the brake bleeder fitting. We thoroughly clean it and treat it with a penetrating liquid. Thorough cleaning is the second main condition for the successful completion of this work.
How to unscrew the brake bleeder fitting?
— Loosen the contact between the fitting and the brake cylinder
To do this, lightly tap it from different sides with a small hammer. We try not to damage the fitting and cylinder. This is the third main condition for successfully unscrewing the fitting.
Tap (lightly) the bleeder fitting with a large hammer
— Unscrew the fitting using a special key
We use a spanner wrench (with a crimp head) to bleed brakes with a diameter of 8 mm. We put the key on the fitting and tighten the fixing bolt to ensure a tight fit. We unscrew the fitting. When unscrewing, periodically twist it back and forth.
Unscrew the fitting using a special key
After loosening the fitting, brake fluid should flow out of it. If this does not happen, we try to clean its outlet hole with a needle or awl.
In this simple way (subject to the three conditions described above), you can unscrew a “soured” fitting in most cases. If this fails, the fitting will either have to be drilled out or the wheel brake cylinder replaced with a new one or a known good one. Sometimes replacing a cylinder is advisable because its piston has been jammed for a long time and cannot be developed.
Notes and additions
If you or someone before you has already tried to unscrew the bleeder fitting and “licked” its edges, you can slightly restore them with a file so that there is something to grab onto with a special key.
If the fitting is broken, you can try to drill it out with a drill of a slightly smaller diameter. Then remove the debris and screw in a new fitting.
To prevent the fitting from “souring,” it is necessary to put a protective rubber ring and a protective cap on it. As a result, in any conditions, the fitting will be unscrewed with a regular 8 mm spanner or a special socket wrench (see the image at the beginning of the article).
Source