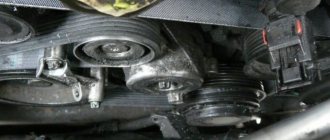
Fuel mixture quality adjustment screw Solex 21083
Why do you need a Solex 21083 carburetor quality screw?
The quality screw is necessary to change the composition of the fuel mixture entering the car engine at idle (idle). By turning the screw we lean the fuel mixture, by turning it away we enrich it. In this way, you can adjust the air/gasoline ratio to ensure it operates at a minimum stable idle speed.
Where is the quality screw installed on the Solex 21083 carburetor?
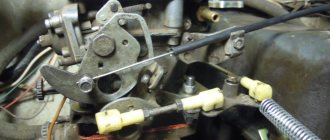
The fuel mixture quality adjustment screw is installed in the lower part of the carburetor body, at the outlet of the emulsion channel. The screw is screwed into a special channel at the bottom of the carburetor body. It changes the flow area of the outlet.
The outlet of the CXX Solex 21083 through which the fuel mixture is sprayed, the composition of which is regulated by a quality screw.
How does a Solex 21083 quality screw work?
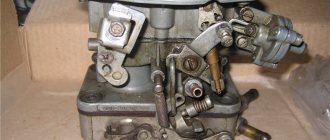
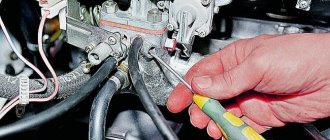
The Solex 21083 carburetor quality screw is a metal screw of a certain shape with a thread. A rubber O-ring is installed on it to prevent excess air from entering the CXX channel. One end of the screw has the shape of a needle; the other has a cut for a 3 mm slotted screwdriver. See photo at the beginning of the article.
How does the fuel mixture quality adjustment screw work?
The easiest way to see how the quality screw works is in the Solex 21083 CXX diagram.
Under the number “14” is the quality screw.
A mixture of air and gasoline (fuel emulsion) is formed at the CXX fuel nozzle, where gasoline entering the carburetor CXX from the float chamber and air from the air duct are mixed. Under the influence of vacuum at the edge of the throttle valve of the first chamber, it is pulled through the emulsion channel and the CXX outlet into the engine intake manifold. The engine runs on this fuel mixture.
If we tighten the quality screw all the way, we will completely block the outlet of the emulsion channel of the idle system. Fuel stops flowing into the engine and it stalls.
If you turn the quality screw out a little, fuel will begin to flow into the engine and it will idle.
In order for the car engine to operate stably at idle, you should unscrew the quality screw at least half a turn from the stop and adjust the idle speed with setting the position of the fuel mixture quantity screw. It is necessary to achieve such a mutual position of these two screws that the idle speed is 650-700 rpm and the CO content in the exhaust gases is within normal limits.
Malfunction of the fuel mixture quality screw
There are only two malfunctions: clogging of the idle air system outlet and damage to the rubber O-ring on the screw.
Over time, the idle air system outlet becomes clogged with deposits and soot from the engine intake manifold. The quality screw needle ceases to play the role of a locking device, since the hole is already clogged. Depending on the degree of contamination, the engine begins to idle unsteadily or the idle speed disappears altogether. When turning the quality screw when adjusting the XX speed, the reaction will be weak or not at all.
You can quickly clean the outlet, quality screw and emulsion channel yourself without disassembling the carburetor using a cleaning aerosol. Details about the cleaning procedure: “Cleaning the idle system of the Solex carburetor 2108, 21081, 21083.”
The channel where the quality screw is installed leads directly to the CXX emulsion channel and its outlet. Therefore, this is one of the places where foreign air is likely to “suck” into the carburetor. Foreign air depletes the fuel mixture, as a result of which the engine does not have enough energy to rotate the crankshaft at idle, and it begins to “triple” and tries to stall. The reason for the air leak is a worn rubber o-ring on the quality screw. It may fail due to age or careless repairs.
Replacing the ring with a new one will help correct the problem of air “sucking” into the carburetor and restore normal idle speed of the car engine.
Notes and additions
If, with the quality screw fully tightened, the car engine does not stall, but continues to run, you should look for places where fuel is likely to enter the engine in addition to the carburetor idle system
Or pay attention to the position of the throttle valve of the first chamber. Perhaps it is very slightly open and in addition to the outlet hole of the CXX, underneath it there is an exit slot of the transition system of the first chamber and the fuel is drawn out of it by vacuum
The position of the throttle valve is regulated by the quantity screw, which with its tip rests on the lever on its axis.
Solex carburetor design
The Solex carburetor has several models, namely:
The main modification of this brand of carburetors is SOLEX 21083. This model has the smallest diffuser cross-section. In terms of structure, all Solex models are the same, there are only some differences (different brands and models of cars have their own modification). Therefore, the Solex settings for all models are the same.
The Solex carburetor type is emulsion. It is installed only on cars with engines with contactless ignition.
Solex device:
- two chambers with throttle valves;
- chamber dosing system;
- transition systems for both chambers;
- idle speed system only for the first chamber.
Classification of Solex carburetors by configuration:
- Semi-automatic starting system.
- Carburetor accelerator pump.
- Power mode economizer.
Have you heard about a car device that can reduce fuel consumption, the FuelFree fuel saver?
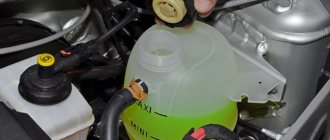
Setting the float chamber level
First of all, you need to pay attention to the fuel level in the float chamber.
The adjustment procedure is as follows:
- It is necessary to start the engine and carefully apply gas to check the efficiency of the carburetor;
- Remove the air filter from the carburetor and the fuel hose.
- Unscrew the 5 bolts and remove the carburetor cover. Be sure to vertically so as not to damage its floats. Place this cover on a flat surface.
- When removing the carburetor cap, the fuel level should be at the red lines. The fuel depth must be measured. This figure should be about 29 mm. The procedure should be carried out immediately after removing the carburetor cap, since gasoline tends to evaporate.
- The height of the floats needs to be adjusted. We measure the distance from the cardboard gasket of the carburetor cover to the top of each float.
- The recommended figure is 34 mm. If necessary, you need to bend the levers and float tongue.
- Let's start adjusting the full stroke of the floats. The permissible lift of the lower angle of the float is 15 mm, and the full stroke of the float is 25 mm. Make sure that the edges of the floats are parallel to the sealing surface of the cover.
Video
This video shows how to clean a Solex carburetor
This video is about tuning the small diffuser of a Solex carburetor
This is a general video on improving the SOLEX carburetor.
For a long time, front-wheel drive VAZ 2108-09-099 cars were equipped with carburetor engines, and only closer to the beginning of the 2000s, a fuel injection system began to be installed on VAZ cars.
This article will discuss the Solex 21083 carburetor: device, adjustment, configuration of the unit, its features, as well as main malfunctions.
Idle speed setting
After setting the level in the float chamber, we assemble the carburetor and warm up the car engine to operating temperature. In this video, they will tell you and show you how to set the idle speed in a Solex carburetor, as well as the main reasons for its absence.
Next, we turn it off and carry out the following operations:
- Using a flat-head screwdriver, tighten the mixture quality screw until it stops (position 7).
- We turn it back from this position 4 - 5 turns.
- We start the engine, do not forget to completely remove the choke, and using the mixture quantity screw (position 6) set the minimum engine speed to about 800 per minute so that the engine runs stably.
- We tighten the mixture quality screw until the engine starts to run unstably. Then we turn it back 0.5 - 1 turn, which should bring the engine to a relatively stable position.
- Using the mixture screw, set the engine speed to about 800 - 900 per minute. If the engine starts to stall, unscrew the mixture quality screw a little more.
When setting the idle speed, some problems may arise:
The engine does not slow down when the mixture screw is tightened (a lot of fuel gets into the idle channel and this screw cannot shut it off).
Causes:
- large jets installed;
- the solenoid valve is not tightly screwed in, and fuel is sucked past the nozzle;
- deformation of the nozzle seat or itself.
So, for example, if the engine stalls when removing the wire from the solenoid valve, this means that the jet is installed too large.
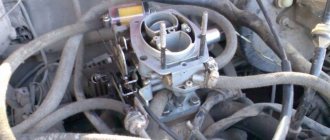
Design and features
The product has a pair of chambers equipped with throttle valves with metering devices. There are also transition systems and the ability to regulate idle speed. The Solex design contains important components, thanks to which the carburetor is considered reliable and economical:
- economizer: ensures stable operation of the internal combustion engine in transient conditions;
- accelerator pump: enriches the mixture when the throttle valve is opened;
- semi-automatic starting device: guarantees ignition of the fuel-air mixture at low temperatures;
- transition system: needed for a smooth transition of the engine operating mode from an average load level to a maximum one;
- filter.
Adjusting the accelerator pump
Accelerator pump metering systems
The main task of the accelerator pump is to supply a smooth and powerful stream of gasoline through the open throttle valve of the carburetor (dripping and sluggish streams are not allowed). The stream of gasoline should enter directly into the manifold, without touching the walls of the diffuser and throttle valve.
Flowing of gasoline down the diffuser stack or throttle valve is not allowed, since the car will become very blunt and jerky when you press the gas sharply.
An accelerator pump with two spouts must be installed in different chambers. You can insert two spouts into the primary chamber - this can increase the agility of the car, but also lead to excessive “overflow”.
How to check Solex
To ensure high-quality work on adjusting and tuning the carburetor, you should ensure that sand particles, etc. do not get on the throttle valves. If solid particles get into the carburetor, this can lead to an expensive overhaul of the internal combustion engine (due to some small thing).
After you have adjusted the carburetor correctly, you need to check the accelerator pump. When the throttle valve is opened slightly, the nozzle should spray gasoline. Here is the answer to the question: why does the car jerk when driving? If a stream of gasoline from the sprayer appears late, then this precisely leads to braking when you press on the gas and the car jerking.
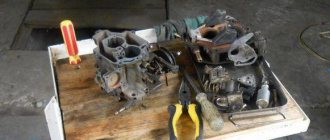
To clean the carburetor, it must be disassembled. First, we unscrew the fuel and air jets, as well as the emulsion tubes. If it is difficult to remember what is where in the carburetor device, then it is most convenient to photograph each step.
Setting the transient mode of carburetor operation
At idle speed, the carburetor throttle valves close and a high vacuum area is created under them, which allows gasoline to be “sucked” out of the idle channel through the nozzle. If the damper is opened sharply, the vacuum decreases sharply, which disrupts the normal operation of the main dosing system of the first chamber and a failure appears.
To eliminate these symptoms, adjust the idle jet or accelerator pump nozzles. The adjustment must be made on a warm car engine.
The idle jets or accelerator pump are changed one by one to prevent dips and delays when you press the gas sharply.
You may need to adjust the idle speed a little. Over-enrichment is not transiently displayed as black smoke coming from the exhaust pipe.
Do-it-yourself interior tuning. How to do this and what is needed for this can be found on our unique website.
From here, you can learn how to do tuning a Chevrolet Niva with your own hands.
In this informative article, you will learn how to polish a windshield with your own hands.
It is recommended to install an accelerator pump with 40x40 nozzles, and an idle nozzle with parameters from 35 to 40. If there are dips from a lean mixture and it is not possible to adjust the idle speed due to the idle nozzle being too large, then both accelerator pump nozzles can be placed in the first camera as shown in the picture.
Solex carburetor tuning
Tuning, that is, improvement, modification of the carburetor is carried out to increase engine power and improve driving dynamics.
Important! In order to achieve maximum power, there must be a minimum of resistance at the carburetor inlet. With high resistance, the quality of the mixture is not always “at its best” (sometimes “poor”, sometimes “rich”).
If you sharply open the throttle valve with the Solex carburetor set at the factory, the air flow speed decreases, as a result of which less gasoline is supplied to the carburetor. Because of this, power drops significantly at low speeds.
The procedure for increasing engine power by tuning the Solex carburetor:
- We carefully disassemble the carburetor.
- We wash and blow, and divide into two halves.
- Pay attention to the air damper axis. There are protruding screws on this axis, which creates additional resistance while the car is moving. Any little things are important when tuning, so these protruding screws need to be smoothed out.
- Remove the axle and air damper from the top. The axle needs to be sharpened.
- From the lower part you need to pull out the throttle valves with their axles. At this stage, using a file we make the flaps larger. We hide the screw caps inside the axle. There are screws with conical heads, you can use them. The throttle valve needs to be assembled.
- Now we are tuning the diffusers. To improve the aerodynamics of the diffusers, it is necessary to make the legs in the shape of wings. We also check the protrusions of the factory casting; if there are any, they need to be ground off.
- The accelerator pump must have 2 tubes installed in one chamber. There is an opinion among some that when I use two tubes for each camera, “dips” may appear, that is, you press on the gas, but the car does not move.
In general, the basis of tuning is smoothing, erasing protrusions and irregularities. Any unevenness in the fuel and air mixing chamber creates resistance.
Setting up a second camera
As a rule, the second chamber of the carburetor is not adjustable, since all the shortcomings of the factory jets are compensated for by the econostat. The fact is that at high speeds, when a vacuum occurs in the carburetor, additional gasoline is supplied through the econostat, which makes it possible to enrich the mixture.
Only the accelerator pump nozzle can be adjusted if its jet does not fall between the diffuser wall and the throttle valve.
All of the above techniques for tuning the carburetor are basic in its regulation, however, some craftsmen can additionally drill channels and throttle valves, and solder epulsion tubes.
The first thing you need to start with is setting the level in the float chambers. In the manual, the level is set according to the position of the floats relative to the carburetor cover using a special template. I’ll say right away - this method can be safely sent away, just like the myth that with . The fact is that everyone has different fuel pumps, a different number of gaskets under them, some have a return line, some have it plugged, as a result - different pressure on the shut-off valve (carburetor needle), which in most cases leads to severe overflow . Therefore, the method for setting the gasoline level is as follows:
— We start the engine, let it run for 5 minutes, gently rev up the gas, because... can shoot either the carburetor or the exhaust. It is worth noting here that any Solex at any volume should start, even with terrible overflow and poor jets. My Solex for 1.8L started up immediately on the 1.5L engine, despite the fact that it was terribly overflowing. – After the engine has run, turn it off. – Remove the fuel supply hose; gasoline will carefully spray out of it. This must be done so that when removing the carburetor cover, gasoline from the hose under pressure does not flow into the chamber and affect the readings. – Unscrew the 5 screws that hold the carburetor cover and remove the choke cable. – Lift the carburetor cover strictly horizontally (!) so as not to damage the floats. – Using a caliper or ruler, measure the distance from the surface of the gasoline in the chambers to the mating surface of the carburetor cover (see photo above). It should lie within 23-25mm in both chambers, but the levels in the chambers will differ from each other because Our collector is not horizontal, so we measure the level in each chamber and take the average. If the level is more or less than the specified level, carefully bend the tongue of the floats in the desired direction, remove some of the gasoline from the chambers so that the old level does not interfere with the new measurement, and assemble everything in the reverse order. We start it and look into the carburetor chambers with a flashlight for at least 30 seconds, during which time not a single drop of gasoline should fall from the small diffusers. Dripping from diffusers indicates overflow. At the same time, under no circumstances should you use gas, otherwise the carburetor may sneeze, which can have a disastrous effect on your eyes! Next, we measure the level in the chamber again, if everything is normal, the first stage is completed. I caught the required level after removing the cover for the 3rd time. You should not set the level without starting the engine, but only by pumping it up with the handle - you will get an overflow with the engine running (more applicable to those who have the return line turned off)
Idle speed setting.
After setting the level, warm up the engine to operating temperature, turn it off and perform the following actions:
1. Using a flat screwdriver, feel for the mixture quality screw in the hole in the carburetor sole (pos. 7) 2. Turn it clockwise until it stops, but do not use force, otherwise you will break the thread! 3. From this position, turn it back 5-6 turns 4. Start the engine, remove the choke completely and use the quantity screw (item 6) to set the minimum speed so that the engine runs stably and there is minimal vacuum in the vacuum advance fitting (we try through the tube vacuum advancer on the tongue) The revolutions should be in the range of 500-1200, this indicates the serviceability of the carburetor.) 5. We begin to tighten the quality screw until the engine begins to operate unstably and turn it back 1-1.5 turns to return stable operation. The quality screw must be turned slowly. 6. Set the speed screw at XX to about 850-900. If there are problems with this and the engine starts to stall, then add a little quality screw, unscrewing it 7. We repeat steps 5-6 until we find the optimal ratio at which the engine will operate stably and have minimal vacuum in the tube.
Where to begin
You should start setting up the Solex 21083 carburetor by adjusting the fuel level in the float chamber. This involves directly starting the engine and warming it up for five minutes. Then the motor is turned off and the following steps are performed:
- The fuel supply hose is carefully separated to prevent gasoline from entering the chamber during further operation.
- The five screws securing the cover are removed.
- The choke system cable is removed.
- The lid is lifted horizontally with extreme caution so that the floats are not damaged.
- In the chamber itself, the fuel level is measured using a ruler or caliper.
The distance from the top level of gasoline to the edge of the sealing surface of the lid should be from twenty-three to twenty-five millimeters. It is necessary to select an average value, since the fuel level is not able to be in a constant state due to the manifold, which itself does not have the ability to be in a horizontal position all the time. If there is a deviation from the norm in the parameters set earlier, then it is enough to bend the float holders to correct the situation.
Some gasoline is then removed and the reverse carburetor assembly process begins. The key word here is reverse, which means performing the same process, but starting from the end.
At the stage of the engine control check, it is necessary, of course, to start it, and then for about thirty seconds observe the flow of fuel into the chambers from the small diffusers, using a small flashlight for a better view. If gasoline arrives, then there is an overflow and another adjustment of the fuel level is required. To carry it out, you need to turn off the engine and re-carry out fuel measurements in the chambers.
If the parameters are within the permitted standards, then the adjustment of the Solex carburetor ends here. Then the transition to the next stage occurs.
Basic faults
In order to make adjustments, you need to know several typical faults. Since this unit is responsible for dynamic characteristics, breakdowns include:
- Problems starting the engine, engine sneezing.
- Jerks, jerking, frequent failures on the accelerator pedal.
- Lack of overclocking options.
- Increased fuel consumption.
So, if while operating your car you were able to detect one or more faults from this list, then the part needs repair.
You need to know that the maximum adjustment of the DAAZ 2107 1107010 carburetor is possible only with the unit removed. The process does not involve cleaning this device with lint or woolen rags. You also won’t need any wires to clean the jets.
When making adjustments yourself, you must first remove the cover from the assembly. Then you can proceed to adjusting the float chamber. It's comfortable.
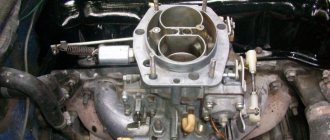
Removing and installing Solex
In order to repair or purge (flush) the carburetor, it must be removed. Removing the unit is quite simple; almost any motorist can do it independently. We remove the device as follows:
- turn off the ignition, first of all we remove the air filter housing;
- remove the return spring from the throttle valve actuator;
- disconnect the throttle cable;
- unscrew the fastenings of the choke cable;
- unscrew the four nuts on which the carburetor body itself is attached;
- dismantle the unit.
Installation is carried out in reverse order.
Refinement of the carburetor, how to increase efficiency
If you want to improve the performance and efficiency of your carburetor, you should upgrade it. There are several options for this modification:
1. To stabilize the fuel level, it is necessary to install a shut-off needle, which is more reliable in operation.
2. Change the level in the float chamber by replacing the valve needle. This gives an excellent effect and ensures maximum stability of level indicators. In addition, such tuning guarantees that a balanced mixture of fuel enters the engine at various transition and speed conditions of the engine.
3. You can also remove the EPH system, which will significantly increase the reliability of the engine. In this case, the only negative point is an increase in fuel consumption by approximately five or seven percent.
4. Throttle sawing will help achieve several benefits, in particular, improving a more even and smooth distribution of the fuel mixture throughout the cylinders (this improvement is necessary for the engine to idle) and a significant reduction in carbon dioxide emissions. This modification reduces fuel consumption by up to two percent.
5. Polishing diffusers can increase flow speed and reduce aerodynamic losses. In this case, the desired effect will be achieved only by polishing to an ideal and even state.
Sources
- https://kamaz1981.ru/vaz/ne-glohnet-pri-zakrucivanii-vozdusnogo-vinta-v-karburatore-vaz-2107.html
- https://kalina-2.ru/otechestvennie-avto/kak-otregulirovat-vint-kachestva-na-karbjuratore
Did you manage to solve your problem using the recommendations from the article?
Yes!
46.52%
No. More answers required. I'll ask in the comments now.
37.79%
Partially. There are still questions. I'll write in the comments now.
15.69%
Voted: 733