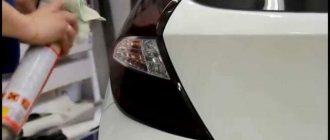
And thanks to tinting, staying inside the vehicle can be made more comfortable. Tinted windows not only serve as protection against sunlight entering the interior, but also hide what is happening inside the car from prying eyes.
The tinting process is a procedure for darkening car windows using a special film with different throughput. The most common films for tinting are dark-colored films, but sometimes you can find cars tinted with colored films.
Car owners often tint their car windows on their own, which costs much less than if they turned to a specialized service for this. In fact, the whole process is not that complicated, and all the tools and supplies can be easily purchased.
Tools and materials for creating and gluing film
You can make tinting for car windows yourself using special consumables. To create, you will need a sheet of polyester (PET) no more than 0.5 mm thick and a film that will be applied to the plastic. The following set of tools is also required:
- knife with replaceable blades;
- pencil for drawing outlines;
- metal scissors;
- forcing to smooth out irregularities on the film;
- a spray bottle for applying a soap solution to the surface of the glass.
The forcing can be purchased at a construction supply or outdoor advertising store.
In addition to tools and materials, it is necessary to first prepare a cleaned and smooth surface on which the film will be applied to the plastic. For this purpose, you can use glass with a thickness of 15 mm or more.
Preparatory activities
There is nothing complicated in preparing the surfaces that you are going to tint. But it is important to approach this stage as responsibly as possible.
To ensure that everything on your car looks no worse than in the photo, follow the basic rules for glass processing.
- Start with regular glass cleaning. Moreover, it is better to act one by one. Whichever glass you cover, wash it. Otherwise, while the work is being carried out, the rest will become contaminated, and the result will not be the best;
- After removing all contaminants, prepare a soap solution. To prepare it, you will need car shampoo or liquid soap diluted in a large amount of water;
- Pour the solution into a spray bottle and then apply to the surface;
- Wipe the glass dry using paper napkins;
- Make another solution, but with a stronger consistency. You should get soap foam.
The second solution is required already as part of film application. Therefore, it should be prepared after you have washed the windows and prepared the material for application.
We cut out the tint
Before gluing the tint onto the car, it is better to study the video instructions for cutting the tint material (at the end of the article), since all further work depends on this stage.
Cutting can be done directly on the glass of the machine, but for beginners it is better to prepare a special glass stand for this. Next, we cut out and apply the film in one of two ways.
1 way
- Cut out a rectangle.
- Wet the glass. This is necessary so that the tinting material does not “run around”.
- Place a film filter on the glass outside of the pattern machine. In the future, the film will be glued from the inside, but for cutting it is more convenient to work from the outside.
- Cut the blank along the curves of the glass with an allowance of 5-10 mm; for convenience, lower the window by at least 5 cm.
- Perform molding.
- Transfer the pattern to the stand and cut off the sharp corners a little.
- Prepare strips of film (10 cm each) and stick them on the front side to make “tails” for which you will remove the protective layer.
Method 2
- Use ready-made patterns that can be selected for a specific car model in any store.
- Cut out the workpiece, leaving a small allowance of 5-10 mm.
- Apply the installation compound to the inside of the glass and attach the pattern.
- Perform fitting and shaping.
- Glue the tails.
Separately, it is worth saying a few words about film formation. You should not do this while pasting, as in this case you will get “arrows” and unevenness. Therefore, it is better to do the molding in advance. To do this, at the cutting stage, when you attach the workpiece to the glass, you need to supply hot air to it. After this, you need to go over the film by forcing it so that the material lays tightly on the glass, taking its shape. This will make it easier for you to remove the protective layer.
After this, the most important work of applying the film begins.
Choosing the best film for self-window wrapping
To make the optimal choice, many parameters should be taken into account. The first is the type of film. They come in painted and metalized varieties (there are others, but inexperienced pasters should not mess with them). The second option is preferable, as it is more durable and provides good protection from sunlight, but the price is twice as high. It makes sense to take high-quality colored film for “training”. Its resource will last for 2-3 years, after which (based on the experience gained) you will decide which one to glue for the second time.
You should not take the cheapest options (most often Chinese) to learn how to tint. During installation, you will encounter additional difficulties: creases, poor glue and rapid wear. With such materials and without experience, it is unlikely that you will be able to complete the pasting process.
Recommended and trusted manufacturers (if there is a quality certificate, there may be fakes):
- SunTek - strong adhesive, high strength and excellent thermal insulation. The Standard series is suitable for beginners. An example of one of the varieties of SunTek film
- Llumar has been on the market for a long time, so the production process is mature and the quality is high. The ATR 10 LUX series has a bronze tint. The price is above average. Is one of the top manufacturers
- Sun-gard - painted films from this manufacturer have a five-year warranty due to the protective silicone coating. Most Sun-gard films are six-layer.
- SunControl has a “trick” in ultraviolet protection. The company is Indian, but the quality does not suffer from this. SunControl pleases with an abundance of tint coating colors
- SolarGard uses expensive metals (copper, aluminum, titanium) in the production of its films. This gives an excellent variety of shades not available from other manufacturers (white, blue, bright green and many others). SolarGard factories are located in the USA
Choose which brand suits your liking and wallet, and we’ll get to work.
Why do you need to tint your car?
If you want to protect yourself from prying eyes, the best option would be to tint your car . Tinting has several other useful functions .
- The film coating has the property of reflecting heat rays. In summer, the car interior will not be so hot, the plastic elements will not heat up, and the sun's rays will not annoy the driver and passengers.
- The film blocks ultraviolet radiation. In a cabin whose windows are covered with a tinted coating, the upholstery and plastic elements will not fade so quickly.
- Provides additional strength. Tinted windows are more difficult to break.
- This tuning improves the appearance of the car. The design of the car acquires a certain gloss and chic, of course, provided that your vehicle is well-groomed and clean.
Video Vehicle tinting technology
In this video you can learn everything you need to tint your car.
Tinting is an affordable tuning tool that significantly transforms a car. And in our latitudes, the appearance of your favorite car is of significant importance. There are many offers on the market for such a popular service - gluing tint film. But the more options there are, the more difficult it is to find a contractor who can guarantee quality. Therefore, it is quite logical to do everything thoroughly and with your own hands. And we’ll talk about the nuances of how to tint a car yourself and glue the film correctly below.
Installing tinting nets on front windows
Installing front tinted car windows (with light transmission less than 70%!) is prohibited by traffic regulations, and nets are also not allowed if they interfere with the driver’s visibility while driving. But, at the risk of being fined, drivers still install mesh tinting on their front car windows at their own peril and risk. Let's look at how these nets are attached to a Chevrolet Lanos.
The nets for Lanos are framed, each of them has a label on the inside. The mesh tint is attached using four steel hooks covered with polymer material; the hooks have a curved shape.
The grid is set up as follows:
- open the front door, lower the glass all the way down;
- In total, you need to install four hooks to attach the mesh, look at where these points are located;
- the first point is located at the bottom of the frame, behind the glass;
- the second is at the top on the same side;
- the third is on top of the frame;
- the fourth – in the area of the side mirror;
- to install the hooks in their places, it is necessary to pull out the door seal, the mesh fasteners are installed under it;
- Having installed the hooks, we return the seal to its place, pressing it to the door frame;
- snap the mesh onto the hooks - that’s it, it’s already installed, now all that’s left is to squeeze the hooks with your fingers so that the mesh stays more securely in place;
- We put mesh tint on the other front door.
As you can see, the meshes are very easy to install and can be dismantled just as easily. In order not to get into trouble with the traffic police, you can remove the nets along the way. It should be noted that curtains are not prohibited on any rear windows, so you can safely install them without fear of problems with traffic cops. There are also window curtains that are held on by magnets, making them even easier to remove and install.
Applying film for tinting on the rear window of a car
The process of cleaning the rear window of a car is slightly different as it has heating filaments and extreme care must be taken not to damage them. It is also recommended to use a plastic spatula instead of a scraper.
- After cleaning, the glass should be washed with a hard sponge, wiped dry using a hard scrub and wiped with a napkin around the perimeter.
- Before applying the film for tinting, moisten the glass generously with the solution, while covering the rear shelf with a rag or some other available material so as not to flood the car’s electrical equipment with water.
To apply the tint film to the rear window, it is better to use an assistant.
- When removing the liner, immediately wet the exposed adhesive layer with a soap and water solution.
- Carefully, without touching the adhesive layer to foreign objects, place the workpiece on the glass - this is a very important operation and requires a certain skill.
- Make sure that the film does not curl, wrinkle or bend.
The adhesive layer of the pattern should only touch the treated surface of the glass and, in no case, any parts of the car’s interior or the installer’s clothing.
Align the pattern with the glass so that there are no gaps, and begin to smooth it using a rubber pressing tool.
When tinting the rear window, smooth the film from the center to the edges so that no air or water bubbles remain under it. Use a plastic spatula in hard-to-reach places.
- Next, moisten the tint film and squeeze out the remaining solution from under it using hard forcing.
- Squeeze along the heating threads - from the center to the edges.
- Then perform this operation by hard forcing, but already wrapped in a napkin.
The final stage is pressing the tint film around the perimeter by forcing, while simultaneously heating the glass from the outside using a hairdryer.
Be careful not to overheat the glass with a hairdryer - it may burst!
General procedure
Glass tinting occurs using a soap and water solution in the proportion of 3 to 5 drops of washing shampoo per liter of water.
It is necessary to mix this solution thoroughly; it is advisable to use an automatic sprayer.
Then the external glass cleaning is carried out. This must be done not only without fail, but also very efficiently, since the technology requires complete cleanliness of the tinted surface. Any grain of sand may end up being an air bubble.
In this way, you can tint any domestic and foreign cars.
General stages of work:
FIRST STAGE. The glass is cleaned from dust and dirt, as well as degreased. If you are going to tint the windows without removing them, it is advisable, but not necessary, to remove the rubber seals. SECOND PHASE. It consists of making a solution of shampoos or non-aggressive detergents. It needs to be poured into a special spray bottle.
Pay attention to the correct preparation of the solution. Add 5 drops of detergent to 1.5 liters of water and shake the entire mixture vigorously.
It is better to pour the resulting solution into a container with a sprayer. THIRD STAGE. Making paper patterns. They will be needed to cut the tint film into the required shape. If you are unsure of your measurements, leave a slight tolerance. They are then easily removed using a cutter. If your hand is already full, then this point can be missed. FOURTH STAGE. The pattern and the tinting process itself.
Characteristics of removable tinting
Removable tinting is a film that has a static effect of adhering to car glass. In terms of external characteristics, it differs slightly from ordinary film. The only noticeable difference is that after gluing it there is a clouding effect, which disappears as a result of shrinkage.
The main characteristics of removable auto-tinting include increased resistance to low temperatures and mechanical stress. During long-term use, the film is not damaged or deformed. Removable tinting perfectly protects the interior from ultraviolet radiation and does not interfere with normal illumination.
Plastic removable tint option
A distinctive feature of removable film compared to conventional film is the possibility of reusable use without loss of proper appearance and effectiveness. Regardless of the number of removals and re-installations with your own hands, it will protect the interior of the car and hold firmly to the windows.
At the same time, it is worth knowing that, most likely, a fine cannot be avoided when stopped by an inspection officer. Judicial practice shows that in most cases the court takes the side of the traffic police, relying on the fact that at the time the illegal actions were recorded (in our case, the presence of tinting not in accordance with GOST), the driver had already violated the norms, that is, the offense had already taken place.
Types of film coating
The product is divided depending on the purpose and type into the following types:
- protective film;
- armor film;
- marketing;
- tinting.
Anti-vandal film can withstand strong impacts from blunt objects and protects the car not only from illegal entry, but also from flying objects. Thick armor is glued to the glass from the inside, and in some cases from the outside. The highest degree of transparency does not reduce visibility when driving and does not refract sunlight. The difference between armor and protective material is thickness, chemical composition and density.
Perforated film is used to darken the rear hemisphere of the glazing or for marketing purposes. Color advertising is printed on the outside, which is clearly visible from a distance, and on the inside, the glass remains visible thanks to small holes.
Tinting has gained wide popularity for its ease of application and excellent performance in the refraction of sunlight. One side is covered with a thin layer of glue and is installed on the glass using a soap solution. This material does not have an armored layer; it can easily be scratched by sharpened objects.
Smart glass film is not cheap and is installed on premium cars. Each laminated glass is adjustable in terms of darkness using a special switch. Such a product must be properly glued and the blocks must be correctly connected to the car’s electronic network in order to control it. To install a similar function, it is better to contact a car service.
Quality manufacturers include:
- Llumar;
- SunTek;
- Sun-gard;
- SunControl;
- 3M;
- ASWF;
- SolarGard;
- Johnson.
When choosing the type of coating, the degree of darkness, strength characteristics, the presence of an adhesive layer and resistance to temperature changes are taken into account.
Preparing everything you need
Before applying the tint, you need to prepare a clean and dry place to work, as well as a standard set of tools:
- Tinting film that meets the requirements of GOST 5727-88. Light transmittance for the windshield must be at least 75%!, for the front side windows - 70%!, for the rear side and rear - any. Typically, 4 side windows require 1 roll of film filter.
- Liquid soap (without dyes) to fix the film. It is better to use special installation compounds that do not leave streaks, or a 10-20 percent solution of any transparent shampoo.
- Plastic sticker for smoothing tint. Usually it comes complete with a film filter, but if you don’t have one, you can use any elastic plastic, rubber spatula or construction rubber eraser. Also in the store you can find special distillers for removing bubbles (chisler - for hard-to-reach places, slammer - for squeezing the edges, bloomax - for forcing out liquid).
- Scrapers for cleaning glass surfaces. 12 cm products of various shapes are best suited.
- Spray bottle (manual) for applying soap solution.
- Blade or utility knife. The latter is made of mild steel, so it is convenient to cut the film without fear of the glass being scratched.
- Soft rags, clean rags or napkins made of lint-free material.
- Industrial dryer.
If you are tinting your car yourself for the first time, it would be a good idea to purchase special camouflage markers and tapes. With their help you can correct minor errors.
You should also ensure that you have easy access to clean, cold tap water. The room should be free of insects and dust.
If everything is prepared, you can start cutting the film filter.
Useful tips
It is recommended to take a partner with you who will help you carry out all the procedures, since without the help of others it is actually impossible to tint car windows with your own hands. the VAZ 2110 in particular has often begun to be tinted, because the car has gained enormous popularity, but many, trying to do it alone, make a huge number of different mistakes. It is also worth seeing that all work should be carried out in a dust-free room, and if you are carrying out the function on the street, then this must be done exclusively in calm weather.
Law and punishment for installing inappropriate tint
To avoid having to remove only the pasted tint at the first traffic police post, you should take into account the permissible standards. According to the law, or rather GOST 5727–88, the windshield must transmit at least 75% of light, and the front side windows - 70%! A dark stripe is allowed on the windshield, but not more than 14 cm from the top edge. There are no restrictions on rear windows. The only thing is that deep tinting (less than 5%!) requires the installation of rear-view mirrors on both sides (i.e., possible on all modern cars).
The percentage of light transmittance you choose depends on your goals and applicable regulations.
The penalty for non-compliance with these standards is not very large - 500 rubles. Since the spring of 2015, “frightening” information has been circulating on the Internet about a new law, which provides for a threefold increase in the amount of the fine (with a repeat of 5,000 rubles). At the beginning of autumn 2016, the law had not been adopted.
Thanks to installers, the service of installing reusable tinting has become quite popular. Like, if you were caught with a removable film, then nothing will happen. But reality shows the opposite. In 95% of cases, the court takes the side of the traffic police, arguing that at the time the vehicle was stopped, the offense had already occurred, and therefore, you may well be fined.
We tint car side windows
Before pasting the side windows, it is better to remove the glass and wash it with soapy water.
Making a pattern for the tint film
Before making the tint, we will make a pattern from the film . For cutting you will need a table; it must be clean and of a suitable size in order to cut the material not only for the side windows, but also for the rear window.
The cutting must be done taking into account allowances for errors, apply the film to the glass and add 5-7 mm on all sides, use a marker to mark the cut line and cut it out. If the glass will not stretch, the edge is made minimal, 2 mm.
Side window tinting sequence
We have the blank, now let’s start gluing it.
- Before fixing the tint, the entire area to be pasted is generously moistened with soapy water from a spray bottle.
- The gluing process starts from the top. Two-thirds of the protective layer is removed from the film and also sprayed with the solution. Hands should also be moistened with water.
- The workpiece is applied with an adhesive layer and aligned along the top edge.
- If everything is smooth and there are no gaps, begin to force the liquid from the center to the edge. These actions must be performed carefully. In this case, the film can slide over the surface. Use a soft cloth, and then a hard spatula and a hair dryer.
- After removing the bubbles, the protruding edges of the pattern are cut off with a stationery knife.
- Next you need to glue and also smooth the bottom part. The protective layer is removed from the pattern, the adhesive layer is moistened with a soap solution and applied to the glass surface. The liquid is distilled out in the same way as when gluing the upper area. To avoid vertical folds , follow the direction of movement: from the center to the edges.
How to make and stick with your own hands: instructions
To avoid mistakes when creating and then applying removable tint yourself, you should follow the step-by-step instructions. To make a film, you must perform the following steps:
Remove the pattern from the glass. First you need to glue a transparent protective layer from the film, carefully smooth it over the surface using a solution of soap and water, and using a knife, cut off the side contours and the bottom along the sealing rubber inserts. After this, you need to slightly lower the glass and cut off the film along the upper border. The result is a transparent glass-shaped sample.
Having prepared the pattern, you need to transfer it to a sheet of thick paper and insert it between the glass and the seals. Next, you will need to lift the glass all the way and fit all the parts to the seals. If the contour along the top part coincides unevenly with the edges of the glass, you need to cut off the protruding elements and ensure that the edges match exactly.
Having adjusted the pattern to the size of the glass, you can remove it and cut out plastic blanks based on it. To speed up the process, the blanks can be made in pairs, since the right and left glasses have the same dimensions and shape. After cutting out the blanks with metal scissors, it is worth sanding them along the edges.
After creating the blanks, you need to prepare patterns from the tint film. Removable tinting requires gluing the blanks on both sides, so you need to cut out two pieces of film of the same format. Then it is enough to remove the layer of protection on one side and wait for the static effect to disappear.
The entire area of the polyester workpiece must be wetted with a soap solution 10–15 minutes after performing the previous step. A similar procedure is performed with a tint film using a spray bottle. If the humidity is not enough, the film may not stick securely in the future.
The treated film should be applied to the plastic blank and smoothed over the entire area using forcing. After careful alignment, the excess edges are cut off along the contour of the glass with a knife.
After applying the tint film to all workpieces, you should dry the resulting products for a couple of hours
It is important to ensure that no air bubbles appear on the workpieces. After the first side is completely dry, you need to let the second side dry.
The result is a ready-made removable tint, for gluing it you just need to attach it to the glass.
How to install and remove film on static
By making your own car window tinting, you can quickly install it on the windows and remove it when not necessary. A well-made overlay will serve its purpose for many years.
How to tint a car's rear window
It is not uncommon to see tinted windows with the film peeling off, or air bubbles visible on the car glass. All defects occur due to the fact that when applying the film material the surface was poorly washed, and when installing the TP, water and air were not sufficiently expelled from under it.
Before tinting the rear window (RW), it must be washed very well, not only from the outside, but also from the inside.
Next we perform tinting in the following order:
- apply a 1.5 m wide film to the rear window, cut off the TP along the contour with a small margin;
- heating with a hairdryer, straighten the film with a spatula, straightening it from the middle to the edges;
- the film should be heated carefully; if overheated, it may become deformed, which will lead to damage to the material;
- using the lighting inside the cabin, we cut out the formed TP along the contour, the size of the workpiece should be approximately 2 mm larger around the perimeter of the white glass, that is, slightly overlap the black edging;
- Before gluing the film material, thoroughly wash the glass from the inside. Each speck of dust remaining on the surface of the surface forms an air bubble;
- wash off the soap suds with a stream of water under pressure;
- We remove the protective layer from the film, while simultaneously wetting the TP with a soap solution. The tint film has two sides - lavsan and tinting (adhesive), so when installing the sides you need to not mix up the sides and install the tint material correctly;
- open the door, place the film in your place, you need to do this together. The TP should be applied smoothly, without sudden movements - you should not touch the adhesive side, nor create dust with your movements. It should be noted that it is more difficult to install the film in a sedan than in a hatchback;
- Having fixed the tinting material on the glass surface, we begin to carefully straighten and smooth it with a spatula, expel air and water from under the film with movements from the center to the edges of the surface;
- Use a rubber spatula to squeeze out the remaining water between the surface and the film;
- to smooth the TP along the edges of the glass in a sedan, we use a forcing tool (trowel) with a long handle, since getting to the edges here is not easy;
- To speed up the drying process of the glue, warm up the surface using a hairdryer.
Despite the apparent simplicity of the work, it is very difficult to properly lay the film on the rear window, and tinting may not work the first time. The most important thing in this matter is to take your time and do everything strictly according to the instructions.
Reupholstery of the interior of a VAZ Lada 2106 car in auto repair shops in Moscow
- Afto-service
- st. Polikarpova, 27, building 3
- 7 (495) 99… show all
- company website
- Stomobil
- st. Yeniseiskaya, house ownership 36 building 12
- 7 (495) 20… show all
- company website
- Lr-technik
- street 1st Varshavsky proezd, building 1A, building 10
- 7 (963) 63… show all
- company website
- once a day, 09:00–21:00
- Comandante
- street 1st Dorozhny passage, building 5
- 7 (915) 12… show all
- company website
- Dvs
- Altufevskoe highway 27A
- 7 (495) 92… show all
- company website
- Tiger box
- Bolshaya Filevskaya st., ow. 1
- 7 (915) 12… show all
- company website
- London-auto
- Dmitrovskoe highway street, building 9, building 4
- 7 (985) 45… show all
- company website
- RF-motors
- St. Malaya Yushunskaya, 1, building 1
- 7 (499) 13… show all
- company website
- Autoelite service
- st. Yeniseiskaya, house 7, k3
- 7 (495) 96… show all
- company website
- Gag-auto
- 65 km MKAD outer side, Strogino metro station
- 7 (495) 54… show all
- company website
- Tigerboxru
- Bolshaya Filevskaya street, building vl1
- 7 (926) 33… show all
- company website
- Tue-Sat 10:00–20:00
- Apollo Motors
- street General Dorokhov street, building 10D
- 7 (495) 50… show all
- company website
- once a day, 10:00–21:00

