08 September 2015 Lada.Online 178 229 28
APS-6 is a standard anti-theft device for Lada Priora/Kalina/Granta/Niva cars. On Luxe trim levels the standard immobilizer is activated from the factory, but on simpler versions you have to do it yourself. The article provides instructions for learning the key and activating the immobilizer.
The delivery set includes 3 keys: 2 black “working” keys (hereinafter referred to as RK ) and a red “master key” (hereinafter referred to as MK ) for training the system. The indicator lamp (hereinafter referred to as CL ) signals the programming state. Its rapid flashing (5 times per second) indicates that the learning procedure is being performed correctly. Stopping fast flashing means:
- wrong action;
- exceeding the time provided for completing the training procedure;
- malfunction;
- This RK has already been trained by another immobilizer (does not fit the ECU).
Lada Kalina Hatchback Hot4err › Logbook › The key is dead, long live the key! Kalina key training
Hi all.
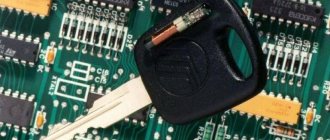
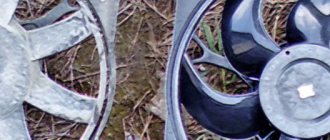
It's time to tell about the trouble with Kalina's key, which happened very suddenly. One fine autumn day, I was in a hurry to attend an appointment. Naturally in time. Naturally, time was tight) I ran out of the house, took out the key as I went, pressed the door open button... I pressed the door open button again. Nothing happens. From the word absolutely. I stop abruptly. I'm dumb for a couple of seconds. I look at the key. I press all his buttons. Zero emotions. My first thought was, damn, the battery turned out to be bad, even though I replaced it a couple of weeks ago. I run for a screwdriver to gnaw the battery with my teeth (an interesting international feature of using dead batteries, right?)) I open the key. And there a surprise awaited me. A broken piece of some part. Later, from “your Internet” I learned that this part is called a quartz resonator. The most likely reason for its breakdown is the key periodically falling onto different surfaces. Although I couldn’t remember in my head the last time this happened. But these thoughts flowed somewhere in the background of the thinking process, because most of all at that moment I was in great oh... surprise. I immediately imagined a situation where such a sudden thing happened to me in another city, hundreds of kilometers from home. We can say that it was lucky that the trouble happened right at the doorstep of the house. I ran home to get the master key.
After a week and a half, I got tired of looking for the door opening buttons on the key when approaching the car)) The biggest inconvenience was getting a small passenger into the car during the rain. You need to somehow run up, first open the driver's door with the key, then press the button on the door to open all the other doors, run around the car, open the door, put the baby in the seat... ahem. I wanted to return to my old life with a remote control key) At this moment, an old thought-dream flashed about a throwaway key, but there were no normal copies in the city, and I didn’t really want to wait. Therefore, after searching several spare parts stores, I bought a key with buttons.
Here is my translation, maybe it will be useful to someone) For ease of understanding, I called the master key a master, and I called the remote control key with the immobilizer a remote control.
1. Close all the doors (I even locked them from the inside) 2. Turn the ignition on by the master for 6 seconds. OFF 3. Turn the ignition on using the remote control. beep 3 - 2. OFF. 4. Master ON beep 3 - 2. 5. Master OFF DO NOT REMOVE! —- 6 seconds — 1 beep —- the indicator (small machine) on the panel flashes quickly 6. Master ON for 2-3 seconds. —- Hazard warning light and beep 7. Remove the master — wait 10 seconds. —- Insert remote control ON
Little tips: - you need to sit as comfortably as possible in comfortable clothes. Everything needs to be done quickly. If we take a little time, then we start all over again. Either the translated instructions helped, or replacing the battery with a proven fresh one, but it worked right away. The first days with the new key I really got a kick from its size, from the feeling of it in the ignition switch, from the way you start the car with this key)). I thought with horror that on the ninth family the native key is exactly the same as that of us, Kalinovodov, master) Good luck to everyone)
How to train the key of a Lada Priora, Kalina, Grant (activation of the standard immobilizer)
Replacing the remote control battery
The remote control is equipped with a CR2032 lithium battery, the initial supply voltage of which is 3 V. If the remote control supply voltage is within normal limits, then each time you press any button on the remote control, the indicator lights up with a short flash. If, when you press any button on the remote control, the indicator lights up with two short flashes or does not light up at all, then you should replace the battery with a new one.
To do this, you need to unscrew the screw from the side of the case opposite the control buttons, separate the halves of the case, remove the board from the case, replace the battery with a new one, observing the polarity; insert the board into the case; snap the housing halves together and tighten the screw.
Instructions for programming the key in Lada Kalina, Priora, Grant, etc.
- Close all doors. Turn on the ignition with the training key and wait in the on state for at least 6 seconds.
- Turn off the ignition. The indicator light in the warning lamp unit should flash quickly (at a frequency of 5 times per second) while the learning procedure is being carried out correctly. If the lamp stops flashing quickly, it indicates an incorrect operation, an out-of-time interval, or a malfunction. Remove the training key from the ignition switch.
- While the warning lamp is flashing (about 6 seconds), insert the remote control and turn on the ignition. The immobilizer buzzer should emit three beeps. If the buzzer does not sound and the indicator has stopped flashing, this means: - the time interval of 6 seconds has been exceeded and it is necessary to repeat the learning procedure, starting from step 1; -immobilizer is faulty
- Wait 6 seconds for the buzzer to emit two more beeps and turn off the ignition.
- If it is necessary to train the second remote control, then you should perform steps 3...4 again, using the second learning remote control to turn on the ignition. If not, continue from step 6.
- After turning off the ignition for no more than 6 seconds, while the indicator is flashing, remove the remote control, insert the learning key and turn on the ignition. The buzzer should beep three times. Wait 6 seconds until the buzzer beeps two more times.
- Turn off the ignition without removing the training key, wait 6 seconds until the buzzer sounds a single sound signal. The indicator should flash twice as fast. If the sound signal does not sound and the flashing indicator stops, you should return to step 1 and repeat the learning procedure. If a repeated failure occurs when performing step 7, this means that the ECM was previously trained with a different key, in which case the controller should be replaced.
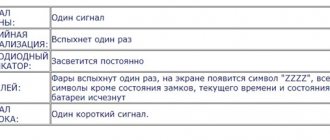
- After the buzzer gives a single sound signal, no later than 3 seconds, turn on the ignition for 2...3 seconds and then turn it off (after turning on the ignition, the buzzer will sound three times and the indicator will stop flashing). The hazard warning lights should flash and the car horn should beep.
- Remove the learning key. Wait with the ignition off for at least 10 seconds. Insert the working key and turn on the ignition. Wait 6 seconds, if the indicator does not flash, test start the engine, the engine should start. If the indicator flashes, turn off the ignition and wait at least 10 seconds. Turn on the ignition. The warning light should not flash and the engine should start. If, after turning on the ignition, after 6 seconds the indicator lights up with a constant light, then the learning procedure must be repeated, starting from step 1.
Purpose:
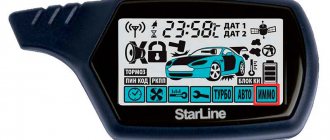
The remote control is designed for remote control of locking and unlocking of car doors, turning on and off super-locking doors, turning on and off the alarm system, raising the windows, controlling the locking of the tailgate (trunk lid), and also as a coded electronic key for the APS-6 immobilizer
The remote control is mounted on the blade of the ignition switch key type 1118-3704010 and is designed to operate:
- with electrical package control unit 1118-6512020
- with driver's door module 1118-3763080, 2170-3763080-00/10
2) via transponder channel:
- with immobilizer control unit APS-6 2123-3840010-ХХ;
- with immobilizer control unit APS-6.1 1118-3840010-ХХ;
- with electrical package controller-2170-3763040.
Resynchronization of remote control codes
In cases where the remote control buttons are pressed outside the range of the radio channel, the “floating” code counter in the remote control goes out of synchronization with the counter in the system control unit. If the number of button presses outside the signal reception area of the system exceeds 1000, the system stops responding to remote control commands. In this case, the remote control training procedure should be repeated.
Updated August 01, 2022
Due to the increasing number of cases of lost training (master) keys for car owners of Kalina, Priora, Grant, Niva-Chevrolet, we are introducing a new type of service: registration of working keys in these cars, without a master key!
Pulse programming
When connecting a central lock, it is not enough to perform all the steps in the correct sequence; you also need to select the required pulse duration for the locks to operate. If it is too large, the actuators will overheat; if it is insufficient, it will not be enough to open and close. In the luxury configuration, all electronics usually “fall asleep” after 15 minutes of inactivity. To awaken it, an additional impulse is needed.
Central locking is a simple device, but it can secure your car from criminals much more effectively than a police cap on the passenger seat. The centralized door lock system is the most convenient way to quickly open and close them. If this security system is supplemented with a good car alarm, this will prevent you from ending up in a situation where your car is stolen or damaged.
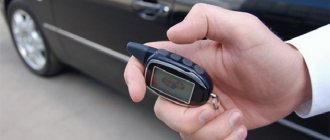
Having tried to open the car using the key fob, one fine day you may find that the lock continues to operate and the car does not respond to key presses. In such a situation, it will be possible to unlock one door or even the central locking system by simply unlocking the driver's door lock. Only the security mode is not deactivated. The central locking, in turn, may not respond to commands for two reasons - the battery in the key fob is dead or synchronization is lost. How to solve these problems is discussed further.
How to train a Lada Kalina key
Lucky
, thanks for the instructions! I just bought a spare key fob and want to “train” it.
Added after 17 hours 17 minutes 13 seconds
Nah. Fuck, I’ll train him (an additional key). I couldn't find the immobilizer bypass unit today. It contains a training key for auto-start.
Added after 24 hours 3 minutes 24 seconds
That's it, the issue is resolved.
The only thing that slowed me down in the process of learning an additional key was the incorrectness of the instructions from Lucky
.
Here are his instructions: 1. Collect the black key.
2. Close the doors. 3. Turn on with the RED key.
- 3 squeaks. Pull out the key. 4. Quickly (within 5-6 seconds) turn on BLACK
.
- 3 squeaks + 2 squeaks. 5. Quickly (within 5-6 seconds) turn on RED
- 3 beeps + 2 beeps. 6. Turn off the ignition KEY IN THE LOCK. - 1 squeak. 7. Quickly (within 5-6 seconds) turn on the ignition for 5 SECONDS. (Attention. Be sure to wait for the beep signal - there is an ambush in this place). The emergency lights flashed and signal 8 beeped. Turn off the ignition. KEY IN THE LOCK until the machine goes out on the panel
When I used this instruction, the first key was erased from my memory, and the second was learned.
I retrained the keys back and forth about 15 times until I realized what the problem was.
So! In order to be guaranteed to have 2 working trained keys, you must do the following: step 4. must be repeated 2 times, that is, at the beginning, insert the first working key - 3 beeps - 2 beeps - remove the key - insert the second working key - 3 beeps - 2 squeak
, then follow the instructions.
So, I give the full version of the instructions for training the second working key:
1). Collect the second black key. 2). Close the doors. 3). Activate with the RED KEY
ignition.
— 3 squeaks (there may not be any, then wait 6 seconds)
.
Pull out the key. 4). Quickly (within 5-6 seconds) turn on with the FIRST BLACK KEY
.
- 3 squeaks + 2 squeaks. Pull out the key. 5). Quickly (within 5-6 seconds) turn on with the SECOND BLACK KEY
.
- 3 squeaks + 2 squeaks. Pull out the key. 6). Quickly (within 5-6 seconds) turn on with the RED KEY
.
- 3 squeaks + 2 squeaks. 7). Turn off the ignition. Do not remove the key from the lock! - 1 squeak. 8). Quickly (within 5-6 seconds) turn on the ignition for 5 SECONDS. (Attention. Be sure to wait for the signal - there is an ambush in this place). The emergency lights flashed and the signal beeped. 9). Turn off the ignition. RED KEY
in the lock until the machine on the panel goes out.
The orange “car with key” icon should be lit (or blinking) the entire time the key learning procedure is underway. If it goes out, start all over again.
The correctness of learning is checked by installing the key in the lock and turning it to position II (the instruments turn on, the car does not start). If after 5-7 seconds the orange car icon with the key does not light up, the key has been trained correctly.
Remember that the car may not start the first time with a new key. Just don't panic, but try to start it again. Often the first attempt is spent on final synchronization of the dongle and controller.
Setting a secret code
The APS-6 module, if it has been activated, cannot be taken and turned off for the entire duration of further use. But there is a procedure for setting the code that you will later use to start the engine. If you set the code once, you can start the engine with a blank, but you will have to enter the code value with the gas pedal. Here we will look at how to set a value that is thought up in advance and consists of 6 decimal digits. Read carefully.
Setting the code is always combined with the operation of “writing” the keys. That is, you will need all the keys that you plan to use. This also applies to the “training” key.
Red mark on the training key
The ignition switch is equipped with three marks: 0, I, II. You will move the key between the first two. Close all doors and follow these steps:
- Place the training key in the lock, move it to position I, and after 6 seconds again to position 0 (the lamp with the “machine” will begin to blink);
- Change the key to “normal”, turn on the ignition (position I), wait for the sound signal;
- If multiple keys are used, perform “step 2” for each of them, first removing the “previous” key;
- Reinstall the training key in the lock, move it to position I. After the sound signal, turn off the ignition (position 0), wait for the signal and move the key to position I. The horn will sound, the “dimensions” will blink;
- The learning key remains in the lock and the ignition is on. Wait a minute until the Check Engine light goes off;
- Start dialing: short presses set the first digit, and the transition to the next digit is initiated by a long press (until the “Check Engine” goes out);
- After dialing the 6th digit, the Check Engine light does not go out. Wait 12 seconds, release the gas pedal, remove the learning key.
Congratulations on successfully completing the secret sequence.
Be aware that the numbers in the code sequence can take values from “1” to “9”. Zero is excluded.
How to train a key on Kalina
The remote control keys for door locks for the Lada Kalina are programmed similarly to the keys for the Lada Priora, Niva and UAZ Patriot SUV. With the exception of a red master key, no equipment is required.
You will need
Instructions
1. The remote control for door locks, alarms, windows, trunk and immobilizer is mounted on the blade of the ignition key and is designed to work both via a radio channel and via a transponder channel. Safety precautions when handling it are the same as with other electronic devices: protect them from mechanical damage, moisture, heat and hypothermia, etc.
2. Before you start working with the remote control, activate it (train it) using the immobilizer master key. It differs from other keys in being red in color. After activation, the remote control will be able to work as an immobilizer code key and unlock it to start the engine. The system allows activation and operation simultaneously with two remote controls.
3. Before starting training, make sure that there is at least 10 liters of fuel in the gas tank. Otherwise, you risk getting confused by the sound signals given by the machine. Close all doors, turn on the ignition with the master key and wait at least 6 seconds. After this, turn off the ignition. In this case, the indicator in the control lamp unit should begin to flash rapidly and continue to do so during each training procedure. If this blinking stops, it means you made a mistake, went beyond the allotted time, or some kind of malfunction occurred.
4. Remove the master key from the ignition switch. After this, before 6 seconds have passed, insert the learning key into the palace and turn on the ignition. In this case, the immobilizer should sound three beeps, and after 6 seconds – two more. Remove the learned key from the ignition. If learning does not happen, repeat the procedure again, being careful not to go beyond the 6-second interval, or look for a malfunction in the immobilizer.
Note! Use the training procedure in the following cases: activating a new key, erasing an old remote control, changing the system password when selling a car, changing an immobilizer or controller. Train only new keys that have never been used for this procedure before, or those that have already been trained with the support of the master key being used. Be careful not to use the master key itself. Keep it in the right place.
Restoring synchronization
If the keys have been “registered” again, it is often necessary to restore synchronization. Restoration is carried out in 1 step.
Main (non-learning) key in the ignition switch
Take the key you are going to use to start the car. Turn on the ignition, wait 6 seconds. Let's say the immobilizer light starts flashing. Then turn off the ignition and wait another 10 seconds. The error will be fixed.
If, after following these steps, you cannot correct the error, there is only one piece of advice: you will have to “record” all the keys again.
AvtoVAZ key training procedure (Video)
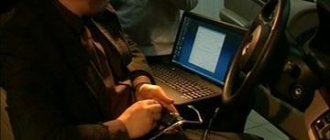
And once again about learning ignition keys on cars produced by AVTOVAZ. Not everyone apparently understands the technology for reading the key code and, accordingly, the learning procedure causes difficulties.
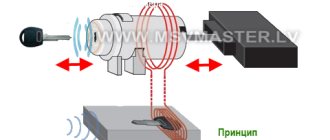
The key code is read remotely! And in fact, there is no need to even insert the key into the ignition switch, because you can turn on the ignition with a simple jumper (connect the pink wire on the ignition switch block and the blue-black one) and the ignition is on.
The main thing is the presence of both a training chip (in a key with a red plug) and then a working chip or control panel in the reader area (communication coil). Correct operation is ensured when the chips are located at a distance of up to 3 cm from the coil and approximately in the center.
The coil is located under a plastic cover that covers the lock cylinder. The easiest way to carry out the procedure is to still have a sting from your key, even without a chip. The main purpose of the sting is to turn the ignition on and off during the procedure.
At the end of the article there is a video on how to train or retrain keys in a way that may be necessary if you need to train an additional chip or if an anti-theft lock with a different key is installed...
All steps in the learning process are announced by the beepper of the body electronics unit.
Insert the learning key or bring the learning chip in, turn on the ignition, wait 2-3 seconds, turn off the ignition.
The immobilizer light blinked - the procedure opened. The lamp will blink during the entire procedure. And if it suddenly goes out, it means something went wrong or you made a mistake somewhere. Start over...
Removed the training key or chip to the side.
We inserted a working key or brought a working chip, turned on the ignition - we wait...
Three beeps, pause, two beeps, turn off the ignition.
Removed the working key (if you need to train another working chip or key, repeat the previous step with the second chip or key...
They inserted the learning key again or brought up the learning chip (this is the last step - closing the procedure) and turned on the ignition...
Three beeps, a pause, two beeps, the ignition is turned off, but we do not remove the training chip from the communication coil. We watch the lamp. After the warning lamp doubles its flashing frequency (on previous generation cars) or the buzzer sounds (Priora 2, Kalina 2, Granta Lux), turn on the ignition again and wait 3 seconds. That's it - training is complete!
to the article: Procedure for learning AvtoVAZ keys (Video)
In the LADA KALINA operating manual, it says twice in bold Russian on white: “The remote control training procedure must be carried out at pre-sale preparation points in the presence of the car owner. If the owner of the vehicle refuses to carry out this procedure, an entry must be made in the service book with the signatures of the dealer and the owner,” however, in the showroom when purchasing the vehicle, they did not offer me anything like that, and quoting this phrase had no effect - in response to me they mumbled something inarticulate, indicating the high professional training of the employees. Armed with the article “Procedure for learning AvtoVAZ keys” printed from your website and the “Technical passport “Transponder for APS-6″”, I tried to retrain the transponder according to the instructions contained in them, but got stuck at the very beginning. “Turn off the ignition and remove the learning transponder from the ignition switch. The immobilizer lamp on the instrument panel is flashing - it’s not flashing, it is, however, that’s all. Hence the question. Either the above materials do not apply to my 2015 Kalina 219420, or I misunderstood something. Could you please clarify the situation?
Good afternoon! What should you do if the training key is lost and the immobilizer is activated? I purchased a new training key, but how can I unsubscribe the old key? The new key, of course, is not recognized by the immobilizer and it is impossible to enter the binding procedure
Comment submission panel Cancel comment
Log in using your social media account Login to leave a comment.
Collection of “people's councils”
If the central locking is not working properly, but you know that the key fobs are fully functional, you can try the following steps:
- The power supply circuit of the central locking controller is protected by fuse F22. This element can be replaced or simply disabled and then installed back;
- Let's say no current flows to the actuator of one door. Then find the terminal block by opening the door 90 degrees. In order for the broken contact to be restored, sometimes it is enough to disconnect the mating connector and connect it again;
- Even if the key fob is working, check whether the self-tapping screw is screwed in all the way. It is recommended to loosen the fastening a little, and then everything works reliably.
To follow “tip number 1”, look for the fifth fuse from the top in the mounting block. The rating of this element is 15 Amperes.
Here is the correct fuse
So, I’ll start with the fact that about a year ago the first problems appeared with the standard alarm key fob on my Kalina. And this manifested itself in the following way: every now and then the buttons began to work, the doors did not open at the first press, and sometimes you just had to stand for five minutes at the car while you opened the central locking with the button.
In general, after disassembling the key fob, it turned out that some element inside it bounced off the microcircuit (I don’t know what to call it, I’m not involved in electronics). In general, this was precisely the reason for the key’s operation in such a country.
At first I ignored all this and continued to drive like this, and now instead of pressing the key fob button, I had to constantly insert the key into the door lock, which is not very convenient. This went on for more than six months, until the time of cold weather arrived. I think there’s no need to talk once again about the delights of the situation when the door lock, or rather its cylinder, freezes. And that is why it was decided to buy a new key fob for Kalina’s standard key and carry out the training procedure for it.
Immobilizer training on viburnum
Welcome! Immobilizer - This is a device thanks to which the car breaks the chain in the system (which chain the car chooses to break), thanks to this the car will either not start, or it will start but after a very short time it will stall, but over time such moments happen that the immobilizer you have to train, this happens for various reasons, for example, you need to change the password for the immobilizer (This is very useful when strangers find out the password for the immobilizer), or if you lose the working keys (the working key is the one that starts the car), the immobilizer also has to be retrained, otherwise the car just won't work.
Note! To retrain the immobilizer, you just need to stock up on: A working key, as well as a training key (It is included with the purchase of the car)!
Summary:
Where is the immobilizer located? It is located behind the center console (this console is indicated by a red arrow), this was done for security purposes so that criminals could not quickly get to it, but still, even if you turn off the immobilizer or disconnect the wire block from it, the car still won’t start, because besides this, there are also brains (Controller) with which you will also need to tinker, for clarity so that you understand its location (We indicate the location only so that you can change it in case you lose the training keys, or if you want to disable immobilizer) just below we have placed a photo, on it the approximate location of this device is circled, and in a small picture it is indicated with a blue arrow and in this picture the center console is also removed, as you have already noticed.