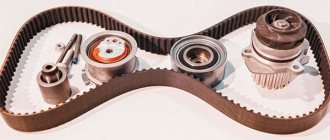
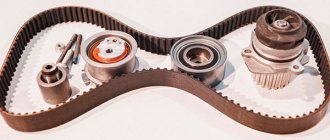
The parts that are responsible for opening and closing the engine valve are installed along with the drive belt. The belt is often subject to wear and tear and is quickly used up. change the VAZ 2109 timing belt yourself, without turning to specialists for help. In this article we have collected complete information. You will soon see that replacing the VAZ 2109 timing belt is simple and does not require special skills. Enjoy reading.
The engine GMZ controls the valves and cylinders. This set of parts begins to work using a belt. According to the standards, replacement of the timing belt and shaft belt in the VAZ 2109 and VAZ 21099 is carried out every 40-50 thousand km. Experts say: “If you have time to replace the belt, the driver will reduce the likelihood of cracks and breakage.”
Many car owners turn to specialists for help. But, as practice shows, it is quite possible to replace the belt on a VAZ 2109 yourself. Replacing the VAZ timing belt will not take you much time. Just follow the instructions.
Replacing timing belt 2109
To replace, purchase a new timing belt 2108 and tension pulley, preferably factory-made, or from a trusted manufacturer, avoiding purchasing a belt from an unknown company.
Replacing the timing belt can be done both in a garage and on an open, flat area. The procedure for replacing the timing belt of a VAZ 2109
Before starting work, remove the terminal from the battery for the safety of electrical equipment during replacement. The vehicle is secured with wheel chocks (chocks) to securely hold it in place during operation.
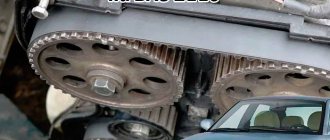
The protective cover of the timing belt is removed and the engine is set to the factory marks. In the front part of the engine, on the side of the timing belt 2108, it is necessary to combine the mark on the camshaft pulley and the upper boss (top left) for fastening the timing belt cover.
This will be the first mark, and the second is located in the clutch housing hatch, located under the distributor. The hatch is closed with a rubber plug that needs to be pulled out.
Further, if the marks are set correctly (the first mark is already aligned), then in the triangular cutout of the hatch there should be a mark placed on the end of the flywheel.
Then the front right wheel is removed and a reliable support is placed under the car body. In the absence of one, you can place a 20 liter gasoline canister on its edge as an additional support. Next, the protective pad is removed from the side of the removed wheel to gain access to the crankshaft pulley and the generator belt, which also needs to be removed.
After removing the protective pad, the tension of the generator belt is released, it moves towards the cylinder block and the belt is removed. Then, using a 19 mm wrench and socket, the pulley mounting bolt is released. To fix the crankshaft while unscrewing the bolt, you can insert the tip of a “serious” screwdriver between the flywheel teeth in the clutch housing hatch. The pulley bolt is unscrewed and the crankshaft pulley is removed, which can be left hanging on the generator belt.
Next, the fastening of the tension roller is loosened and the timing belt 2109 and the roller itself are removed. A new tension roller is installed and a new timing belt 2108 is started, starting the installation of the belt from its right “branch”. After installation, the belt is tensioned by moving the tension roller and fixed in a tensioned position. A correctly tensioned belt should rotate 90 degrees perpendicular to its plane under the force of your hand.
After installing the timing belt and the new tension pulley, check that the marks match. When the crankshaft pulley is removed, you can additionally check the mark on the crankshaft placed on its sprocket and the cutout on the oil pump boss.
If the belt is installed correctly, the marks should remain in place; if they do not match, the installation must be repeated. Having achieved the coincidence of the marks, the engine crankshaft must be turned two turns and once again check the compatibility of the factory marks.
If the marks match, then everything is assembled in the reverse order and the engine is started for testing. When an extraneous hum appears after starting the engine, this indicates that the belt is overtightened and needs to be adjusted again. Next, you need to put on the timing belt protective cover 2109 and make sure that the belt does not touch it and the engine runs clean. If extraneous noise appears, the cover must be adjusted on the mounting bolts, finding the desired position.
Now comes the fun part - installing a new belt.
We check that all marks match. We first place the belt on the crankshaft and pump. Then we tighten the right descending branch of the belt and put it on the camshaft pulley and tension roller. We check all the marks again and tighten the belt with a roller. The tension is considered sufficient if, with the force of two fingers, you can twist the longest branch of the belt by a maximum of 90 degrees. It’s easier to take the right branch of the belt with two fingers and twist it, if more than 90 is not very bad, but less is very bad. An overtightened belt will wear out quickly and will also reduce the life of the pump.
We place the bottom protective plastic cover. And on the crankshaft pulley we mark the twentieth tooth after skipping two teeth. We count counterclockwise.
This mark corresponds to the top dead center of the first cylinder. We put the pulley in place and the mark should be against the crankshaft position sensor. More precisely, against the small iron core of the sensor. Sometimes it gets into the gap between the teeth, this is considered acceptable. We tighten the pulley in the same way as we unscrewed it, with the help of a partner.
We turn the crankshaft two turns and check the marks; this is where our mark on the pulley comes in handy.
If everything is in trouble, we collect everything that we took apart. As they say in smart books, install the parts in the reverse order of removal. Don't forget to add antifreeze.
We start the car, accept congratulations from family and friends and head off to adventure.
How to replace the timing belt on a VAZ 2108 - 21099
We can say that the belt is a fairly modern and functional design, and most modern engines use it. Compared to a chain, a belt has many more advantages.
These advantages are as follows: the condition of the timing drive is much easier to check, it is much easier to replace the timing belt itself, the amount of noise is reduced and the amount of losses is also reduced, since with the chain there is a loss between the chain shoe and the chain itself. But the belt also has its drawbacks, despite its enormous advantages. Sometimes the belt breaks.
If the timing belt breaks, the valves become bent and the pistons become damaged. Although, breaking it happens quite rarely, and if you monitor the condition of the belt and change it, breaking will not happen.
What you need to know
There are a number of signs indicating that it is time to change the timing belt on VAZ cars:
- black exhaust gases;
- uncharacteristic engine vibration during operation;
- difficult starting of the power plant;
- the appearance of noise in the motor.
If you replace a part, you must also change the roller. The pump requires mandatory diagnostics, as it rarely lasts more than 90,000 kilometers. These procedures can be classified as scheduled repairs.
If the belt breaks, the pump or pulley jams, then restoration work becomes unscheduled. To reduce the risk of such troubles, it is recommended to change the belt and its components more often - once every 35,000-40,000 kilometers.
How long does it take to replace the belt in VAZ 2108 and - 09 models?
When replacing the timing belt, try to follow the manufacturer's recommendations, but also remember that wear occurs on the gears. As a rule, replacement is carried out after 35 or 40 thousand kilometers. Some experts even recommend replacing earlier, due to the quality of the parts. But personally, I think the best option is to replace this belt after 25 or 30 thousand km, because the consumption at such a mileage cannot be called high.
- Try to clean the engine itself of oil, dirt and dust (in general, such cleaning is good for the engine).
- Then remove the protection cover that hides the belt itself in the drive.
Replacing the flywheel crown of VAZ 21093
The crown was eaten. The engine was still starting from the starter, but was already making plaintive creaks and clunking noises. The crown itself costs about 200 rubles, which is significantly cheaper than the assembled flywheel.
To replace the flywheel crown, you need to remove the gearbox, clutch basket and the flywheel itself.
Removal of the box was carried out according to a simplified scenario - without draining the oil and disconnecting the drives. To do this, we completely remove both trailing arms (in everyday life called sabers), remove the starter, disconnect the rocker, the reverse sensor ground wires, and both gearbox supports. Since the arms are removed, the struts have enough lateral travel to separate the transmission from the engine. We simply put the removed box on the “floor”, there is access to the clutch and flywheel.
To unscrew the flywheel bolts, it must be fixed. You can use a standard clamp, or you can make a more convenient tool. In our case, we used a guide from a server rack with drilled holes. We fasten the guide to the flywheel with the basket mounting bolts, and use it to hold the flywheel from turning (the photo shows the flywheel with a new crown).
Before removing the flywheel, do not forget to mark the relative positions of the crankshaft and flywheel. We knock down the old crown using a drift and a hammer. You can use a driver, for example 3/8, as a drift, and the flywheel itself has semicircular grooves for this. We warm up the new crown by wrapping it in newspapers and setting it on fire, after which we put it on the flywheel (with the inner chamfer facing the flywheel) and lightly tap it until it shrinks into place. The entire crown replacement procedure takes about 15 minutes.
We assemble everything in reverse order. The tightening torque of the flywheel bolts according to the instructions is 62 - 89 N*m. They pulled with a torque of 75. Similarly with the basket bolts - at the set 19 - 31 N * m, they tightened with a torque of 25. Of course, we pull the bolts crosswise to avoid distortions and ensure uniformity of force.
To center the driven disk, we use a 1/4 extension, with wound electrical tape for diameters of 15mm and 20mm (adjustable locally).
At the same time, the clutch fork bushings were replaced. The old lower bushing had a total gap of about 1mm, as a result the fork was seriously loose. This may have caused the release bearing to fail some time ago.
The lower bushing is bronze, the same as the starter bushings (tested by us in repairing the trapezium wipers of the BMW E36), they easily break under force. To remove it, simply drive a screwdriver into it between the lower support and the “ear”, and then pull it up. You can simply crumble it on the spot; this requires little effort. Having removed the fragments, we hammer a new bushing into place and lubricate it. The upper bushing is plastic, we change it at the same time. Now the fork fits like a glove, there is no lateral play.
When installing the gearbox, it is convenient to jack it up and install it by tilting the engine. Without a suspended jack, this procedure is somewhat more complicated. Again, tighten the box bolts evenly, without distortion.
PS We tighten the bolts for securing the transverse arm and stabilizer when the car is installed on the wheels, i.e. under load.
Where are the timing marks on a VAZ?
The 8-valve VAZ engine has one camshaft, and it is much easier to set marks on it than on a twin-shaft engine. Let's look at all the possible ways to find the extreme position of the camshaft and crankshaft.
Photo of VAZ 2108 timing marks
On the camshaft, as a rule, there is a mark on the pulley, such a small mark, and on the cylinder head there is an ebb with which this mark should coincide, or rather not even an ebb, but a protrusion on the shield, on the left side, when looking at the engine and camshaft from the front. Sometimes these marks are not observed; what to do in this case is described below.
The crankshaft is aligned according to the mark on the flywheel, on the gearbox, near the engine on top there is a hatch covered with a rubber plug. If you remove the plug, you will see marks on the flywheel and a protruding rod from the engine, which should coincide. But there may be a problem: the fact is that if the engine was disassembled and the flywheel was removed, then the flywheel can be placed on either side, that is, the mark will be God knows where, but not at TDC. There is no guide or eccentric on the flywheel; whichever side you put it on, that’s what it will become, even if you turn it 180 degrees.
In this case, you can look for the mark on the front of the engine - on the pulley and the return flow on the oil pump on the engine. But this is not the case on all engines; often this mark is missing. What to do in situations where no tags are found? Now the fun begins, in fact, marks are not needed on this engine, you can do without them.
Installation
Now directly about how to return a new timing belt to its place. There is nothing complicated here either, but we still recommend watching visual videos and studying the instructions.
- As soon as you have examined the condition of the unit and decided to change something, proceed to assembling the mechanism.
- It is easier to do the work so that all the inscriptions are turned in your direction, that is, towards the right wing of the car.
- Replace the pulley unless it needs to be replaced.
- Next, put on the belt. Moreover, it should be put on the lower gear first, and then on the upper one. Not the other way around.
- Make sure there is no sagging.
- Place the timing belt behind the water pump and tension pulley.
- Tighten the tension roller using a special wrench.
- If you do not have such a key, use a simple key and a screwdriver.
- Be sure to adjust your new strap properly. The adjustment is carried out until the moment when you can no longer turn it at an angle of more than 90 degrees. This is the best option for tightening the strap for the VAZ 2109.
- Turn the pulley several times. This will ensure that the marks on the timing gear and flywheel are in the correct position.
- If for some reason the tags do not match, we have bad news. You will have to remove the strap again and adjust the position again.
The main difficulty in replacing a timing belt lies not in the complexity of the processes performed, but in the time that needs to be spent on repairs.
A competent approach, attentiveness and the use of a high-quality new belt will allow you to easily restore the operation of the gas distribution mechanism and save hundreds of rubles on visiting a car service center.
To make driving a car enjoyable, you need to constantly monitor its technical condition and regularly change all consumables. is one such material. The article provides instructions for a VAZ 2108 with a carburetor and includes a demonstration video that will turn the replacement process for any driver from a burdensome duty into a pleasure.
Briefly about the main thing
The technology for setting timing marks on a VAZ 2106 engine is performed with the chain removed. A sprocket mounted on the camshaft without a chain is fixed with a screwdriver and tightened with a wrench. After rotating the camshaft in the desired direction and combining the drilling with the boss on the bed, the gear is again immobilized with a suitable object and dismantled. Next, the new chain is installed.
Perfect alignment of the marks can only be achieved by using a split gear. However, this is not at all necessary to comply with. It is quite possible that the camshaft marks coincide and the crankshaft pulley moves a little forward.
During most adjustment work on the VAZ 2109-2108 engine, it is necessary to install the gas distribution mechanism according to the marks. This must be done to ensure that the piston of the first and fourth cylinders are at top dead center. In order to install the pistons at TDC, it is necessary that the marks of the camshaft and crankshaft coincide.
Replacement (preparatory stage)
Before setting timing marks on the VAZ-2109, you need to remove the old belt and install a new one. To do this you need to perform partial disassembly:
- Loosen the bolts on the wheels and jack up the right side of the car.
- Remove the wheel.
- Remove the protective plastic casing. It is necessary to unscrew the three bolts that secure the part to the block.
- Remove the alternator belt. To do this, loosen the upper nut located on the bracket. Next, the generator moves towards the motor, this weakens the belt tension, thanks to which the latter can be removed without much effort.
- Remove the generator pulley.
The procedure for replacing the timing belt VAZ 2109 1.5 liters 8 valves
Old VAZ 2109 with a 1.5 8 valve engine, timing belt replacement. In general, it could be a VAZ 2114 or 2110, there is no difference in operation, the eight-valve engine is the same everywhere. Together with the belt, we will change the pump, the tension roller and two pulleys, the camshaft and the crankshaft. If the timing belt breaks, the valves on this engine do not bend, but it is better not to let it get to that point. Changing the pump and roller is a prerequisite so that after a thousand kilometers you don’t have to disassemble everything again. But it’s up to you to decide for the pulley, the price is 150 rubles per pair. There were cars where a slightly bent pulley caused the belt to slip and gradually wear out, reducing its service life. On this car the belt was worn down in half.
We recommend that you periodically check the condition of the belt to avoid annoying consequences and not have to look for someone to take it to a repair shop. Replace every 40,000 kilometers.
And here is the patient himself.
To replace it, we need a key for the tension roller, the price is half a hundred rubles. You can buy it at any auto store. As well as a set of keys and sockets and two hours of free time.
Replacement Guide
Manufacturers recommend replacing the timing belt on a VAZ 2108 with a carburetor after 60-75 thousand kilometers. Considering that the car is operated in different conditions, it is recommended to do a visual inspection of the components every 15 thousand kilometers.
Replacement should be done if the following defects are found:
When inspecting the unit, you should pay attention to other elements.
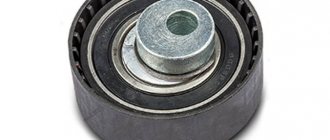
The tension roller usually comes with the strap.
If oil leaks are detected, the seals most likely need to be replaced. If there are scratches, chips, or play on the surface of the pump, it should be replaced. How long the parts will last depends on their quality and operating conditions.
Required Tools
To carry out the replacement procedure on a VAZ 2108, you need to prepare the usual tools:
If you do not have a special key to turn the tension roller, you can use pliers and two nails.
Stages of work
To make it convenient to work with the car, it should be driven onto a flat surface or a lifting device.
The replacement itself consists of the following steps:
Checking the tension of the timing belt
After installing the strap, you need to check its tension. To do this, you need to turn the belt in the space between the camshaft and crankshaft pulleys 90 degrees. If it turns more than 90 degrees with a little effort, it needs to be tightened more.
At the last stage, be sure to check the alignment of the installation marks.
This completes the replacement of the timing belt on the VAZ 2108 carburetor.
It is very important to know and understand!
In conclusion, it is worth saying that a timing belt break leads to a major overhaul of the entire engine. Because this is where the valves and pistons hit, and they begin to bend. That is why you should check the part at a certain interval of time in order to immediately identify defects and malfunctions; if they exist, immediately replace the timing belt itself and all components, do not wait until something irreparable happens. And also correctly set all the marks on the VAZ 2109 timing belt, and carry out the tension correctly. In another case, it can scroll, and if it is too tight, it will easily break off, while having a strong impact on the rest of the engine. Even a novice driver can perform all the work presented; the main thing is to study everything carefully and set the marks correctly so that there is no malfunction of the gas distribution mechanism. After all, the good operation of the car engine will depend on this.
Popular questions related to element repair
You can repair the crown yourself, but isn't it easier to buy a new one? For rich people, definitely, yes. It’s easier to buy a new part and have it replaced at a service station. For the average Russian, this option will not be profitable, since repairs will save 5-6 times.
Ground flywheel teeth
The difficulty with replacement is that you can install the new crown with teeth incorrectly. And then, at best, the flywheel rim will quickly wear off, or at worst, the starter gear will be “killed.”
Another question often asked by motorists. Why doesn't the flywheel initially flow with teeth, the crown is put on?
Article on the topic: Auto scanner elm327 - review and reviews
The answer to the question lies in the design of the flywheel. As planned, it should not only be durable, but also heavy enough to withstand various loads. However, if you make it completely cast, from cast iron or other heavy metal, this will be wrong; the mass of the product will be too large.
To minimize mass flaws, designers came up with a modern flywheel design, consisting of a main part (cast iron) and an insert part (steel).
And finally, if the entire flywheel is made entirely, then when grinding the teeth, the entire product will have to be replaced, which will again become expensive in a financial sense. And so only the insert part is changed, thus, during repairs, only the rim is replaced.
Why does the timing belt break on a VAZ 2109?
Many people wonder why the timing belt breaks only after it has happened. You will be lucky if such a breakdown occurs, for example, somewhere in the yards while the engine is warming up, and not on the highway between cities. Therefore, so that you do not find yourself in such situations, you need to know why this happens. There are several reasons for belt breaks:
- Natural wear of the part.
- Buying a defective belt.
- Contact with technical fluids on the belt.
- Malfunction of timing drive parts.
Let's discuss each point in more detail.
Natural wear of the part.
During operation, the belt not only wears out, but also bends, resulting in microcracks that subsequently grow and lead to belt breakage.
Each node has its own service life. The timing belt of the eight-valve VAZ engine operates for 60 thousand kilometers.
Buying a defective belt.
Don't skimp on critical spare parts. By saving 100-200 rubles you can be stuck on the road for a long time.
Contact with technical fluids on the belt.
Oil or coolant can easily get on the timing belt. Oil gets in due to wear on the camshaft and crankshaft seals, and antifreeze can leak out when the pump wears out.
Malfunction of timing drive parts.
Timing drive parts include:
- Camshaft and crankshaft gears.
- Tension roller
- Pump drive gear
When replacement is required
The timing belt is responsible for the operation of the gas distribution mechanism.
Try in every possible way to avoid breaking the belt while driving, otherwise this may negatively affect the condition of the engine and the cost of its repair.
The most dangerous is the contact, the “meeting” between two main elements - the piston and the valve. In this case, the unit becomes deformed, requiring expensive restoration of the car.
There are several main criteria that indicate the need to replace the unit.
| Sign of wear | Peculiarities |
| Natural wear and tear | Each element has a certain resource, a margin of safety, above which it can “jump” only in rare exceptions. For timing belts on nines it is 50-60 thousand kilometers |
| Visual signs of wear | If you examine the condition of the strap, if there are any malfunctions, this will manifest itself in the form of defects, cracks, and peeling along the edges. All this suggests that you cannot continue to operate the car with such a strap; replacement is required. |
| Oil or coolant on the surface | Another sign that the strap is outdated and needs to be replaced. At the same time, do not forget to check for leaks in their cooling system and oil channels |
| Retighten the strap | When the service life has not yet come to an end, the strap may still become loose. To eliminate this, it is tensioned. But over time, the tension reaches its limit, the strap becomes overtightened and is no longer able to return to the desired position. For replacement and only |
| Tooth wear | If there are problems with the teeth, when moving, the belt simply begins to slip while the crankshaft rotates. Here you will have to change the gears and the belt itself |
How to remove the timing belt on a VAZ 2109.
First of all, we engage fifth gear (this is done to make it easier to crank the engine when we align the marks), loosen the nuts on the front left wheel and jack it up. Open the hood, remove the protective cover and look at the position of the mark on the gear.
If you change the belt on a VAZ before it breaks.
Rotate the wheel until the marks on the gear and on the plate match.
After the marks coincide in this place, open the inspection hole plug in the clutch housing and check whether the slot on the housing coincides with the mark on the flywheel.
If there are no marks on the flywheel, then rotate the wheel so that the camshaft gear makes one more revolution. If this time no risk appears near the mark in the clutch housing, read how to change the timing belt on a VAZ 2109 if the belt breaks. If the mark coincides with the mark, unscrew the crankshaft bolt and go to the section “Lower timing mark of VAZ 2109”
If the timing belt on the VAZ 2109 is broken and you are planning to change it.
We remove the wheel, remove the plastic fender liner, if you have one. Unscrew the crankshaft pulley bolt.
If you don’t know how to unscrew the VAZ crankshaft bolt, then I’ll tell you a little trick.
If you have someone to help you, then ask the assistant, without removing the car from fifth gear, to press the brake as hard as possible. Meanwhile, we take the head and the larger lever and twist it counterclockwise with all our might.
If you are alone in this difficult situation, then the steps are as follows: check that the car is in gear and screw in 2 bolts that screw the wheels into the hub and between them insert a crowbar, reinforcement, a strong stick (whatever you find, as long as it doesn’t break) and press it into the ground. Next, take the head, extension and larger lever and unscrew the bolt, making sure that the car does not fall off the jack.
Lower timing mark of VAZ 2109.
After unscrewing the bolt securing the generator drive pulley, look at the alignment of the marks on the crankshaft gear and on the oil pump housing, they should match.
When the marks on the upper and lower gears are set, you can unscrew the tension roller and remove the roller and timing belt.
Begin
Everything we need.
We unscrew the three ten bolts securing the protective timing cover and remove it.
Next, loosen the nut thirteen that secure the generator and unscrew the tension bolt ten.
We take the generator to the engine and remove the belt.
Installing a timing belt on a VAZ 2109 injector.
Before installing the belt, check all marks again. When installing the belt, there should be no slack in the belt between the camshaft and crankshaft gears, otherwise the marks will go away. It is best for the belt to be slightly tensioned in this place. It is allowed that the marks differ by approximately half a gear tooth. We install the tension roller. Before him, a washer is put on the bolt, and only then the roller itself.
How to properly tension the timing belt on a VAZ 2109.
The belt can be tensioned either with or without a special key. A special key can replace a screwdriver and 2 nails or self-tapping screws. We insert the nails into the holes of the roller, insert a screwdriver between them and twist counterclockwise. A good tension is considered to be the moment when the belt between the camshaft and crankshaft gears can be twisted 90 degrees with little effort. With the engine running, in this place the belt should run straight like a string, without beating. It should also make noises such as creaks and whistles.
After tensioning the belt, turn the crankshaft 2 turns and see if the marks on the gears match. If everything matches, then we collect the rest in reverse order.
I hope in the article “How to change the timing belt on a VAZ 2109” you found answers to all your questions. If something is unclear, leave your question in the comments.
Now comes the fun part - installing a new belt.
We check that all marks match. We first place the belt on the crankshaft and pump. Then we tighten the right descending branch of the belt and put it on the camshaft pulley and tension roller. We check all the marks again and tighten the belt with a roller. The tension is considered sufficient if, with the force of two fingers, you can twist the longest branch of the belt by a maximum of 90 degrees. It’s easier to take the right branch of the belt with two fingers and twist it, if more than 90 is not very bad, but less is very bad. An overtightened belt will wear out quickly and will also reduce the life of the pump.
We place the bottom protective plastic cover. And on the crankshaft pulley we mark the twentieth tooth after skipping two teeth. We count counterclockwise.
This mark corresponds to the top dead center of the first cylinder. We put the pulley in place and the mark should be against the crankshaft position sensor. More precisely, against the small iron core of the sensor. Sometimes it gets into the gap between the teeth, this is considered acceptable. We tighten the pulley in the same way as we unscrewed it, with the help of a partner.
We turn the crankshaft two turns and check the marks; this is where our mark on the pulley comes in handy.
If everything is in trouble, we collect everything that we took apart. As they say in smart books, install the parts in the reverse order of removal. Don't forget to add antifreeze.
We start the car, accept congratulations from family and friends and head off to adventure.
VAZ flywheel crown
Flywheel VAZ 2109
Typically, the VAZ 2109 flywheel lasts a long time and rarely breaks. The exception is wear on the teeth of the crown of this unit. Quite often, this breakdown occurs due to poor-quality crown material, in which case the part must be replaced.
Flywheel in a VAZ 2109 transmission
The VAZ 2109 flywheel is part of the transmission of this car. It is located between the engine and the clutch. This unit is the output point of the internal combustion engine (ICE) and the input point of the car drive; it is connected to the drive shaft of the gearbox (Gearbox). In a car, the flywheel performs three functions:
- Increases the uniformity of rotation of the engine crankshaft, smoothes out fluctuations in the amount of torque transmitted from the pistons of the combustion chambers through the crank mechanism to the crankshaft of the internal combustion engine. The fact is that with each revolution of the crankshaft, two explosive acts of combustion of the fuel-air mixture take place in the car’s cylinders, and if not for the flywheel, the crankshaft would twitch violently twice for each revolution. The flywheel smoothes out these pulsations, accumulating and releasing kinetic energy of rotational motion.
- Provides transmission of torque from the engine to the gearbox. This unit is the primary, driving disk of the clutch mechanism. When the clutch pedal is released, the driven disk is pressed against the flywheel, ensures rotation of the gearbox output shaft and causes the driving front wheels of the VAZ 2109 to rotate.
- When starting a car, the flywheel transmits torque from the starter to the engine crankshaft. When the ignition key is turned to the “starter” position, the starter gear engages with the ring teeth, thus spinning the flywheel and crankshaft. An ignition spark is supplied to the cylinders and the engine starts. The ignition key returns to the “ignition” position and the starter gear disengages from the ring gear.
From the point of view of operation, it is the crown that is the most vulnerable point. The most common failure is wear of its teeth. If wear reaches a critical level, the starter gear does not engage with the ring gear and starting the engine from the battery becomes impossible. You have to start it with a push.
Removing transmission elements
Repairing and replacing the VAZ 2109 flywheel are procedures of medium complexity and can be done on your own if you have some experience. In addition, you will need a workshop with an inspection pit, a standard set of plumbing tools, a gas burner to warm up the crown when installing it, and a torque wrench for tightening the bolts with a calibrated force.
How to remove the flywheel with minimal effort? The design of the VAZ 2109 gearbox and clutch makes it possible to dismantle them without draining the oil and disassembling the gearbox. To remove the transmission, perform the following operations:
- Remove both trailing arms (often called sabers) and remove the starter.
- Disconnect both box supports and the rocker. Don't forget to disconnect the reverse sensor contacts.
- Remove the gearbox disconnected from the engine. This will give you access to the flywheel. Before dismantling, carefully mark its current position in relation to the crankshaft.
- When unscrewing the flywheel mounting bolts, it is advisable to ask someone to hold it to avoid it falling out. Be careful, it weighs about six kilograms.
Place the removed flywheel on a round podium so that the crown hangs above the working surface of your bench. Gently knock down the crown using a drift and a medium-sized hammer, without applying excessive force. Some car enthusiasts try to help themselves by heating the part. Replacing the flywheel crown on a VAZ 2109 does not require this - it heats up along with the flywheel, and the coefficient of thermal expansion of the parts practically coincides and no thermal gap is formed.
How to change a flywheel without heating? Unfortunately, no way. The reverse installation of the crown involves the use of heat shrinkage. In order to install the new crown in place, it is necessary to heat it to approximately 200 degrees. This can be done with a portable gas burner. Smoothly move the burner flame along the rim of the crown, ensuring uniform heating of the part to the specified temperature. The procedure will take you approximately 10-15 minutes.
Once the crown is properly warmed up, grab it with pliers and place it on the flywheel with the chamfer facing down. Using light hammer blows, press the part until it fits snugly against the flange. Let cool quietly in the air.
How to replace bearings without removing the engine?
Many car owners think and write on forums that it is impossible to get to the liners without removing or removing them from the engine hood. However, such operations are carried out by repairmen on ships, where the size of the parts is enormous and too much force is required to remove the engine. And if the technique exists, it can be used for simple cars.
- Park the vehicle on a ramp to gain easy access to the engine. If there is protection installed on it, it should be removed and the lubricant drained.
- Remove the box, front cover and loosen the camshaft chain in advance. If you're not too lazy, it's better to remove it entirely so it doesn't interfere.
- Remove the starter and pan (if the beam does not interfere). If it interferes with operation, you will have to lift the motor and pull out the pan from under it.
- You now have access to the crankshaft. The easiest way is to replace the connecting rod bearings. The old bearings are pulled out after unscrewing the head screws; it’s easy to put new ones in place, just don’t forget to lubricate them well with the same engine oil that is in your engine.
- It is more difficult to replace the main bearings without removing the engine. You will need to lower the crankshaft by loosening its fastening. You don’t need to lower it much, ten, maximum fifteen centimeters.
- Now it will be easier to pull out the earbuds. But you will need an aluminum rivet, which must be inserted into the lubrication hole, so it will push the bearing out. The main thing is that the size of the rivet is suitable and does not scratch the crankshaft.
Removing, installing and troubleshooting the flywheel
The flywheel is removed for replacement or repair if the ring gear is damaged or if the friction surface is damaged or severely worn.
| The flywheel is installed at the rear end of the crankshaft and secured to it with six bolts (bottom rear view, clutch and gearbox removed): 1 – ring gear; 2 – fastening bolt; a – friction surface. |
You will need: a screwdriver, a 17mm socket wrench, a torque wrench.
| 1. Remove the gearbox from the vehicle (see Section 5 “Transmission”, “Removing and installing the gearbox”). |
| 2. Remove the clutch from the flywheel (see section 5 “Transmission”, “Removing and installing the clutch”). |
| 3. Secure the flywheel from turning with a mounting blade, as shown in the photo, and... | 4. ... remove the six flywheel mounting bolts. |
| 5. Remove the support washer while holding the flywheel. | 6. Remove the flywheel. |
| 7. Check the condition of the ring gear; If the teeth are damaged, replace the flywheel. |
| Rice. 4.7. Flywheel: 1 – surface of attachment to the crankshaft flange; 2 – clutch mounting surface; 3 – supporting surface of the clutch driven disc |
| 8. The flywheel surfaces mating to the crankshaft and the clutch driven disc must be free of scratches, burrs and completely flat. If there are scratches on the working surface 3 (Fig. 4.7) of the flywheel under the clutch driven disc, grind this surface, removing a layer of metal no more than 1 mm thick. Then grind surface 2, maintaining a size of 0.5±0.1 mm and ensuring parallelism of surfaces 2 and 3 relative to surface 1. The tolerance for non-parallelism is 0.1 mm. After grooving, install the flywheel on the mandrel, centering it along the mounting hole with the emphasis on surface 1, check the runout of planes 3 and 2. At the extreme points, the indicator should not show runouts exceeding 0.1 mm. |
NOTE
Pay attention to the tightness of the ring gear and the condition of its teeth. If the ring can be moved on the flywheel or the teeth are badly worn, replace the flywheel and ring assembly.
Replacing the crown is quite complicated and requires the performer to have certain skills, as well as the use of a special tool.
| 9. Install the flywheel and the removed components and parts in the reverse order of removal. The flywheel can be installed on the crankshaft in two opposite positions, determined by the location of the mounting holes. However, at the factory it is balanced together with the crankshaft, so it must be installed strictly in its original position. For correct installation, a mark is made on the flywheel in the form of a conical hole, which should be oriented during installation in the same direction as the connecting rod journal of the 4th (1st) cylinder. If the crankshaft was turned after removing the flywheel, set the piston of the 4th cylinder to the TDC position of the compression stroke (see “Installing the piston of the 4th cylinder to the TDC position of the compression stroke”), then another half turn and install the flywheel on the crankshaft, turning it with the mark vertically down. Tighten the flywheel mounting bolts evenly crosswise to the torque given in appendix. 1. |
Removing transmission elements
Repairing and replacing the VAZ 2109 flywheel are procedures of medium complexity and can be done on your own if you have some experience. In addition, you will need a workshop with an inspection pit, a standard set of plumbing tools, a gas burner to warm up the crown when installing it, and a torque wrench for tightening the bolts with a calibrated force.
How to remove the flywheel with minimal effort? The design of the VAZ 2109 gearbox and clutch makes it possible to dismantle them without draining the oil and disassembling the gearbox. To remove the transmission, perform the following operations:
- Remove both trailing arms (often called sabers) and remove the starter.
- Disconnect both box supports and the rocker. Don't forget to disconnect the reverse sensor contacts.
- Remove the gearbox disconnected from the engine. This will give you access to the flywheel. Before dismantling, carefully mark its current position in relation to the crankshaft.
- When unscrewing the flywheel mounting bolts, it is advisable to ask someone to hold it to avoid it falling out. Be careful, it weighs about six kilograms.
Removing and connecting a new starter
In absolutely any of the cases described above, you will be faced with the need to take a closer look at the device. It should be noted that with the release of the VAZ 2109, the question of how to remove the starter became more easily resolved, because in this model the arrangement of components under the hood is much simpler. So, you will need socket and socket wrenches and an inspection hole. Now, regardless of whether it is necessary to replace only the bushings or the entire VAZ 2109 starter, it must be removed. First of all, all the wires of the traction relay are disconnected, after which the block is dismantled. Don't forget to remove the high voltage wire from the battery.
The next step is to dismantle the engine crankcase protection; to do this, simply unscrew the mounting bolts. Then the approach to the mechanism of interest to us is cleared. To remove it, you need to unscrew three nuts - two on the block and one in the engine compartment. The connection diagram for the new VAZ 2109 starter is the same, only it is in the reverse order, so it will not cause any difficulties.
Disassembly begins with the fact that you need to carefully knock down the locking and restrictive ring, and then, unscrewing the fasteners of the back cover, remove it. Now we get to the graphite brushes, stator and armature. It should be noted that there may not be a gearbox in this part, in which case the stator is taken out after the armature. If the design still includes this element, then you need to act somewhat differently. Although it is not difficult to remember how to disassemble the gear starter on a VAZ 2109 if it fails. The scheme will just work in reverse - the stator itself is pulled out first, then the armature, and the gearbox comes last.
Now you can imagine how to remove, assemble, install and connect the VAZ 2109 starter; you no longer need to bother the mechanic with such issues.
What is used in VAZ cars?
It is not surprising that for VAZ cars, for example, such as 2112, 2114, 2110, as already noted, a variety of flywheels are used. In cars of this family, a conventional flywheel is used, not a dual-mass flywheel. True, for the representative of each VAZ family it is different, differing in the weight and size of the clutch disc.
So, all VAZ classics are equipped with a flywheel from 2101, Niva and Chevy Niva - from 21213. Eights are equipped with products from 2109. Tens, Kalinas, Priors, Grants use a flywheel from VAZ 2110. All types of flywheels, from VAZ of various families, for example such , like 2112, 2114, 2110, are distinguished by different seats, outer diameters and crowns. » alt=»»> The role and importance of the flywheel in an internal combustion engine is difficult to overestimate, and probably simply impossible. It is this that smoothes out jerks, creates normal conditions for the operation of the transmission and reduces vibration from the engine transmitted to the body. In order to increase its efficiency, various designs are used, although often the design in the form of a conventional disk works quite successfully in the engine.
