In what cases is Niva lifting done?
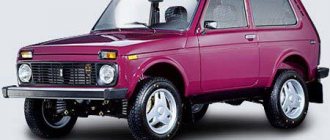
We are buying a lift kit for a Chevy Niva 4×4.
It is ideal for a lift. Making a Niva-2121 elevator with your own hands, the drawings, the dimensions of which are freely available, will not be difficult. Thanks to such a trick, you can make your car more stable on the road and overcome a lot of obstacles with it. Of course, to bring a truly high-quality Niva elevator to life with your own hands, you will have to work hard.
The process will take time and require effort, because even the easiest elevator requires a significant immersion in the technical aspects of the issue. However, the end result will live up to all expectations, allowing the modest Niva to show its exceptional side.
To increase ground clearance, it is best to use the factory lift kit and follow the instructions that came with it. In this case, to make a suspension lift, the Niva (VAZ-2121) will be upgraded in no more than 1 day.
Currently, there are 4 ways to lift a Niva car:
- Installation of rigid long springs and a spacer over the upper ball.
- Installing spacers under the spring cup and a spacer above the upper ball.
- By installing large wheels (a significant disadvantage is that the arches will need to be cut).
- Lowering the beam down to the desired height.
Further, for a better understanding, all methods will be considered separately.
The first two methods are the easiest to perform. However, at the same time, these methods are incorrect, since with this design the lower arm moves lower relative to the body, as a result of which the car is lifted.
Experts consider the third method to be more correct. Since when lifting is carried out, the suspension will retain the driving characteristics that were specified at the factory during manufacture. Therefore, by making a lift in this way, the driver does not sacrifice the speed of the car in any way. In addition, this will help avoid unwanted steering and changes in the operation of the braking system.
This way you can install large radius wheels without cutting the arches.
Lifting the front end occurs by installing directed washers under the lower spring pad (this creates the desired angle of the front spring). A washer is installed under the upper lever under the spring, in other words, we unload the lever. After this, you need to swap the steering knuckle arms. Thanks to this, the tie rod ends will go from top to bottom. Sometimes during the installation of an elevator, shock absorbers, springs, and spacers are changed.
In the rear, a lift is made by installing new rear spring cups, which are bolted above the standard ones. In addition, the brackets are changed to move the rear shock absorber mounting point higher by 5 cm.
The short upper rods of the rear axle are enlarged or adjusted so that the shank rotates more easily and does not bite the spider. In addition, the reaction rods of the rear axle are strengthened with an angle or by installing double ones.
Also, if the need arises, you can install a long brake hose, bleed the brakes, adjust the rear spool and adjust the spring bumpers.
- For lovers of tourism and travel. It's no secret that most people like to get away from the city.
- For various types of competitions: trials, rally raids, trophy raids.
Elevator kit for Niva: theory and practice
The theory of this operation is based on the fact that the car's axle rests on a reaction rod for lateral stability and two trailing arms. The vertical movement of the bridge is limited up to the bumper pads and down - by shock absorbers. The length and power of the springs when lifting the Niva 2121 car must be selected and installed so as not to upset the balance in this system. To do this, professionals, performing the Niva 21214 lift with their own hands, move the mounting pads, shock absorbers and springs to a verified equal distance. Experience shows that not every amateur will be able to lift 21214 on his own due to imbalance.
The Niva 21214 lift is practically an installation on the front of long-travel shock absorbers, additional spacers for ball joints (placed from below), and springs from the Chevrolet Niva. On the rear axle of the Niva 21214 car, welding is done for reinforcement, and an A-shaped lever made of a square profile is installed so that the rear of the car works symmetrically and holds the load well. The lever is often made from the lower suspension from a VAZ 2108 and is attached to the body with two bolts from the upper links of the rear axle and to the bridge through the ball joint to the platform.
In specialized stores you can buy a kit for Niva, manufactured at the factory with a guarantee. For example, a stocking for the rear axle will cost 12-14 thousand rubles and will allow the Niva 21213 car to avoid bending in the area of the standard rear axle in conditions of bad roads with increased load. It is made using a special technology, which makes it possible to increase strength without additional weight. Along with it, when tuning the Niva with your own hands, you can install reinforced lower rods and an adjustable transverse rod for the rear axle.
Advantages
The main advantages of lifting are:
- Increased ground clearance
- It becomes possible to install larger tires
- Improves its permeability and appearance
- The mechanism becomes more secure
The key element in modifying the Niva is the installation of a lift kit.
In addition to the advantages, there are also disadvantages, these include:
- Due to the fact that the bend angle of the drives changes, their service life decreases
- The center of gravity of the car shifts, this leads to a change in response when cornering
- The load on the chassis and transmission increases, which leads to rapid wear of all elements. Therefore, before converting your car, you should take into account all these disadvantages.
Installing a lift kit has an ambiguous effect on the driving performance of the car. The advantages of this type of tuning include:
- Increased ground clearance.
- Improved machine design.
- Possibility of installing larger wheels and mud tires with large lugs.
- Improving cross-country ability on rough terrain.
- Reduces the likelihood of damage to the engine crankcase, exhaust pipe or transmission.
However, the suspension lift not only has a positive effect on the characteristics of the Chevrolet Niva.
A change in the factory design manifests itself in the form of the following disadvantages:
- The breaking angle of CV joints increases. This reduces the service life of the drives.
- The center of gravity rises. The car's behavior when cornering worsens and the likelihood of capsizing increases.
- The load on the transmission and chassis is growing. As a result, parts wear out faster.
If you lift the front suspension, the result is an increase in the distance to the surface in front. However, this will be enough to prevent squats on the beam, since the front takes up more than 60% of the total weight of the car.
In addition, the vehicle's airtight permeability improves. This occurs as a result of an increase in departure and entry angles and a decrease in the radius of transverse and longitudinal maneuverability. But lifting in this way significantly reduces the performance of CV joints and factory boots.
How to raise the suspension on a Niva and what will it give?
The front suspension lift allows you to increase the distance to the ground of the front of the car. But this procedure is enough to prevent anyone from kicking on the bridge beam. Since the front part of the car accounts for 60-65% of the total weight of the car. Upgrading the suspension will make it possible to improve the vehicle's cross-country ability and reduce the exit/arrival radius due to increased angles. Lifting on your own or at a specialized service station significantly reduces the service life of CV joints and boots. This negative phenomenon can be solved by replacing or lowering the boots by 10 mm, which will reduce the angle and increase the wear resistance of the CV joints.
Advice. What shock absorbers should I put on Niva 21214? Experts recommend installing gas-oil shock absorbers from KYB and SACHS. Experience shows that Chevy-Niva shock absorbers, specially designed for this car model, usually do not survive for long.
What will you need for the job?
In order to slightly increase the ground clearance, it is advisable to use a factory lift - a kit for Niva-2121, sold both in company stores and in car markets. Using the included instructions, you can carry out the desired tuning in just 1 day. However, there is one significant drawback: the suspension lift is produced exactly as much as the manufacturer considers necessary.
At the same time, if there is an urgent need to tailor the car to specific needs or the specifics of the road, you can make a lift kit for the Niva on your own.
You just need to prepare the following set of tools:
- rear and front springs (the best parts on a Chevrolet Niva are 31.5 cm long and 1.57 cm thick, but these parameters can easily be changed according to the owner’s requirements);
- rubber spacers for springs with special metal cups;
- shock absorbers;
- spacers for the upper ball joint (not sold in stores, so they can only be made to order);
- brackets for rear shock absorbers;
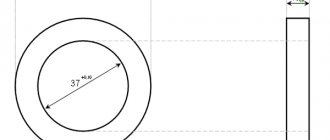
- washers for the Niva-21214 cup of an enlarged type with an internal diameter of 1 cm and an external diameter of 3 cm;
- jack;
- boards;
- spring ties.
When choosing spacers for springs for rear shock absorbers, you don’t have to go too deep into the search and make them yourself from an ordinary metal corner. The internal diameter of the product is 13.2 mm, the external diameter is 32 mm.
In addition, during the work you must refer to the diagram (Fig. 1).
Also interesting: Chassis, front suspension, device, Design, operation, description, device, car repair Niva VAZ 2121, engine, assembly, disassembly, transmissions, gearboxes
And, if all the subtleties of the technical stuffing of 2131, as well as 2121, are agreed upon and ordered, you can immediately get to work. Just a few hours of painstaking work, and the Niva tuning will be completed.
Complete set for Niva 21213
Everything you need for remodeling
In the store you can also purchase a complete lift kit for the Niva, which includes:
- spacers for rear shock absorbers for Niva 21214, 2131, etc.;
- bracket used when moving the attachment points from the brake hoses;
- modified rod for adjusting braking forces;
- rod for rear suspension (transverse);
- steel brackets for moving the mounting points from the rear shock absorbers (give a lift of 5 cm);
- rods for rear suspension (adjustable, upper);
- steel spacers for the upper supports of the rear springs, including compression stroke limiters for the upper rear suspension (with a height of 5 cm);
- steel spacers for the upper ball joints, 2 cm thick;
- steel spacers for cups for upper springs, quantity 8 pcs.;
- brackets for anti-roll bar model 2131, etc.
A lift kit costs about 10-11 thousand rubles, does not require replacing shock absorbers or purchasing additional parts, and has a 5-year warranty. This set assumes that the optimal tires will be 30 x 9.5 R15, which you can install on Niva wheels with your own hands.
The factory-produced Niva kit differs for models produced in different years. For example, there are assemblies for cars that came off the assembly line after 2009, after 2012, etc. There is a separate lift kit for model 21214 with an anti-lock brake system. It features features such as extended rear shock absorbers that are not found on the base model.
Factory Niva elevator
How to raise a cornfield? The easiest way to lift a Niva is to use an already tested lift kit that was manufactured in the factory. When using the kit, you can increase the ground clearance by 5 cm. We change the tires from R15 to R16. This is the most economical option. Ground clearance increases by 4-5 cm. Suitable for village roads and fishing.
Everything for the elevator can be purchased separately. For example, we buy springs from a Chevy Niva 2123, they are longer than those on the regular Niva 2121 model. Then we take 5cm polyurethane gaskets back, gas-oil shock absorbers from a Chevrolet Niva, they are longer than on the regular model, and accordingly they have more travel. The rear also needs an adjustable rod so that the bridge does not go away.
For the front of the car we also take springs from the Chevy Niva, they are one turn larger than the usual springs on the Niva 2121. We put a round gasket under the ball, then we file it down ourselves so that there is no friction from the wheel when driving. We install a gas-oil shock absorber from a Chevrolet Niva on the front and back. It is important to understand that if the Niva is old and the suspension is not known when it was changed, during lifting all the “sores” come out and you need to be prepared for this.
Suspension lift NIVA
The content of the article :
- About the Niva independent suspension lift
- “Combat” suspension settings for NIVA
- "Civil" suspension lift NIVA
- Small rear suspension lift for Niva
About the Niva independent suspension lift
The word “Lift”, as is known, is translated as “lifting”; all that remains is to figure out what, how and where.
We will discuss the classic double wishbone of our all-loved car, aka Niva.
What does the stroke size depend on?
From the angle of operation of the constant velocity joint (aka CV joint) and the length of the arms. (and accordingly the operating angles of the ball joints)
The longer the lever, the larger the arc its extreme point describes, shifting at the same angle.
The maximum operating angle of the CV joint is a constant value and depends on its design.
In order for the suspension to oscillate within certain geometric limits, without going beyond the permissible parameters (CV joint angle, body parts, etc.), the compression and rebound strokes are limited by rubber buffers.
We cannot jump beyond these limits without changing the length of the levers and the design of the CV joint. — (By reducing the bump stop, we increase the angle of operation of the CV joint beyond the design one, which can cause wedging and rapid wear).
By installing a stiffer (longer) spring (or reducing the mass per axle), we change the static position of the levers. Let's say 5 cm.
This increases ground clearance. It is necessary to understand that this increase is not the same at all points of the suspension and is not constant when the car is moving. A fundamentally important point to understand is that after the suspension lift, the previous upper possible position of the wheel is retained (as we remember, it is still limited by the buffer).
This means that when hitting an obstacle, hanging diagonally, etc. etc. the spring from the lift kit can be compressed to the same length as the standard one (we do not take into account the collision of the coils of the spring), the suspension arms rest against the bump stops, and the wheel actually takes the upper position in the arch, exactly corresponding to the position of the wheel on a car without a suspension lift and with a regular spring.
The ground clearance of the car thus constantly changes - from increased by 5 cm when the car is standing to standard - in dynamics.
Conclusion - the suspension lift does not allow you to install wheels of a larger diameter than on a car with a standard suspension.
Since the static position of the levers has changed, the ratio of up and down strokes has also changed. On a lifted suspension, the compression stroke has increased, which is good from the point of view of energy consumption.
But the rebound stroke has decreased, which is bad from the point of view of articulation and behavior on uneven surfaces.
This is neither bad nor good, it is such a property. The stroke balance must be selected depending on the conditions of use of the suspension and the vehicle.
Ideally, the suspension should have an adjustable elastic element (spring) to adjust the stroke ratio to specific conditions.
The topic is very complex and beyond the scope of this post.
Let's go back to the elevator.
We want to install larger diameter wheels, what should we do?
Option one is the simplest. Increase the compression bumper. The suspension travel will decrease, the extreme position of the lever will move away.
The more we sacrifice the magnitude of the stroke, the greater the magnitude of the elevator.
If articulation is not important, you can resort to this method as the simplest.
Option two is to remove body parts and other structural elements to the required distance. For example, by trimming the wheel arches (the method essentially does not apply to the suspension lift, but it solves the problem).
Option three is to move the suspension elements.
This scheme does not increase ground clearance, but it does make it possible to install larger wheels. In this case, all parts of the suspension remain in their original position; only their attachment points are changed (created anew, moved down).
Theoretically, the size of the elevator can be any. Also, no one is stopping us from playing with the ratio of moves, as before.
If you still continue to use tuning springs and spacers to install larger wheels, please re-read this text again.
Setting up the “combat” suspension for NIVA
Progress of adjustment of the lifted suspension for NIVA:
1. Take the necessary wheels.
2. Take out the springs (the car is standing on bump stops).
Making a Niva 2121 elevator with your own hands, drawings, dimensions
Conventionally, the installation can be divided into 2 stages: installation of the rear and front suspension. It all starts with a fairly ordinary procedure - removing the wheels and releasing the silent blocks. Now, in order for the Niva-21214 to be securely fastened, a jack should be installed under its ball joint and the car should be raised until the spring is completely compressed.
All that remains to be done in the future is to unscrew the ball joints and remove the stabilizer. During operation, it is very important not to damage the brake hoses located in the immediate vicinity. Those bolts that are located at the wheel must be replaced with their extended equivalents.
A stabilizer is installed on the lower and upper ball joint. Now the front suspension lift can be considered fully improved and ready for work. It remains to do a similar, albeit slightly more complex, lifting for the rear suspension.
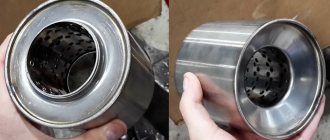
For these purposes, you will need another tool - a semi-automatic welding machine. With its help, additional parts will be installed on top of the standard cups, which will definitely have to be welded. Such a lift of the rear suspension can lead to its movement forward, which is strictly unacceptable. To prevent such a development of events, all rods need to be slightly lengthened.
It would be a good idea to lengthen the size of the brake adjuster rocker arm and move the lower cup slightly. Particularly vulnerable at this moment is the driveshaft crosspiece, which is more than easy to touch in the heat of work. And it is the new size of the cups and filigree work that will protect it from premature failure.
The final battle is the attachment of shock absorbers and a mandatory visit to the service station. Now the rear and front springs of the Niva are reinforced. Any, even the most harmless tuning needs vigilant monitoring by a professional. And even more so, an improved Chevy Niva with your own hands.
Hello, dear friends! Today I propose to talk to you about the elevator kit for the Niva. This could be a Chevrolet Niva, that is, series 2123, or the more “our” Niva Urban, 2131 or 4x4, and representatives of the 2121 series, that is, 21213, 21214. It all depends on what kind of car you have at your disposal.
Russia, Ukraine, Belarus and a number of other countries are the greatest admirers of Niva cars. They are affordable and provide many benefits.
Some people prefer to do everything themselves. I can’t say that modifying the front and rear suspension of a Niv car will be an easy job in a minute. No, you will have to spend a lot of effort, time and patience on this.
You can find out how much such a service costs at a service station. The price for a professional lift is steep, so not every owner of a not-so-expensive crossover like the Niva is willing to spend that kind of money, having the opportunity to do everything themselves. And if you put a power bumper and an expeditionary trunk on top, it will turn out great. At least now on a round-the-world trip on Niva.
Rear lift
Lifting the rear axle of the Niva using cups is more reliable and easier to perform. They are secured with bolts over the factory ones. In addition, brackets are added - they will raise the mounting points for the rear shock absorbers by 5 centimeters.
- The upper rods will already be too short for the structure. They are built up or converted into manageable ones;
- Rear axle thrust rods also need improvement. Most often they are simply reinforced with a corner, but sometimes they are changed to double ones. Enthusiasts can strengthen the system with a Tolyatti stabilizing device, but this is a different level of work: digestion will be required;
- The transverse rod is modified to a split rod, with adjustment;
- You may need to replace the brake hose with a longer one. And without a doubt, you will need to pump the brakes and adjust the spool valve at the rear.
To install wider wheels, you need to check the ball joints and the pendulum: weak or worn ones will be covered almost immediately. If you choose exactly this method of raising the Niva 2121 with your own hands, you will end up with a clearance of 25 cm at the bottom of the RZM and 44.5 at the empty cut. At the same time, it will be equally comfortable to drive it both on normal roads and off-road, which makes such a lift doubly attractive.
In another way, increasing the ground clearance is called a lift and this is done not only because of beauty, for an SUV this is a “vital” issue. It is the distance from the bottom to the ground that determines the maneuverability of the vehicle. Lifting is divided into two large groups: body and suspension-oriented. The first option is simpler and safer. During the body's increase in ground clearance, the center of gravity of the car practically does not change, and accordingly the handling does not change, moreover, even a simple washer can be used here as a spacer.
How to lift a Niva yourself
If you want to do the Niva lift yourself, then take this procedure very seriously, since despite the simplicity of the work, the slightest mistake will result in irreversible consequences in the future. Therefore, no matter what the car becomes unusable for use, you must strictly follow all the rules, and if there are any doubts, then it is better to turn to a professional.
In order to carry out all the work, it is enough to buy a ready-made lift kit, but there are car owners who upgrade the parts themselves, if you are one of them, then you need to stock up on the following parts:
- Set of springs
- Rubber spacers for springs with steel cups
- Shock absorber kit
- Special spacers for ball joints, the thickness of which should be approximately 30 millimeters
- Make a special mount for the rear shock absorbers
- There are twelve spacer washers under the cup with the following dimensions:
- For cups and long ball bolts
- Two jacks and a spring tie
You also need to additionally make special spacers for the rear shock absorbers. They can be made from corners, and bushings whose thickness should be approximately 32 millimeters are welded to them.
Advice from experienced people: do-it-yourself Niva lifting
Increasing the vehicle's ground clearance
Do-it-yourself Niva lift is an operation that does not increase the ground clearance, but makes it possible to install larger wheels that improve the operation of the car in off-road conditions. Basically, the elevator of Niva 21214 and other models is carried out in two directions:
- Tourism for those who like to get away from civilization using cheap, relatively imported SUVs, Niva 21213 or Niva 21214, which have the same all-wheel drive and available spare parts for little money.
- Competitions in the class of trials, rally raids, trophy raids, orienteering, where Niva 2121 or 2131 cars not only drive, but also “jump”, overcome mud obstacles, etc.
How is the installation carried out?
To lift the front suspension of a Niva Chevrolet, you need to do the following:
- Raise the car with a jack and remove the wheel. We take the second jack, install it under the bottom of the ball and lift it until the spring is compressed. When the spring is compressed, it must be tightened with a special device
- We loosen the bracket at the shock absorber and remove the two ball joints along with the stabilizer
- We remove the spring. We move the hub to the side and install it on the holder
- We change the outer wheel bolts to longer ones, to do this we bend the bump stop by 4 millimeters
- We install washer spacers between the cup and the lever
- Install the spring, cups and spacers. Center them relative to each other and jack up the lever
- The stabilizer and ball return to their place, screw the shock absorber
- The hub returns to its place and then we install the wheel back
Also interesting: Buy Niva Lynx in Vladimir - prices for the new Lada “Bronto” (Niva Pickup)
At this point, the installation of the lift kit on the front suspension of the Niva is completed; in the same way we perform all the actions on the other side.
In this case, you will need a welding machine. When everything is ready, perform the following steps:
- Cups are placed under the springs
- We install a set of rear shock absorbers and attach the bracket by welding, as a result the rear axle will move slightly forward. To prevent this, it is advisable to lengthen all rods
- The lower cup is cut off and moved 3 centimeters. This must be done carefully, as the crosspiece may be damaged.
- We take the cups and weld them to a new place
- We lengthen the rocker arm of the brake system, as a result of which it should lengthen by 3 centimeters
- We weld fingers under the shock absorbers
The work can be considered completed.
After all the lifting work, you will need to install the main pairs, which will have completely different gear ratios, and if you had alloy wheels, they will need to be replaced with regular stampings. It is also advisable to purchase and install a self-locking differential on rear-wheel drive.
The domestic SUV VAZ Niva is an excellent analogue to modern imported SUVs and even some all-wheel drive jeeps. This machine was initially distinguished by its light weight, high ground clearance and high maintainability. However, for more confident off-road driving, some car owners make their own suspension lift. “Niva” then rises another ten centimeters and is able to overcome a lot of obstacles.
Now we move on to the second stage of our lifting work - modernization of the rear suspension. Here you need to prepare a semi-automatic welding machine, and drive the car into the inspection pit. The first step here is to install a few more cups under the springs. These parts are installed on top of the standard ones using bolts.
If you use this method of modernization, the suspension (Niva VAZ-2121 and Chevrolet Niva) will, of course, become more reliable and suitable for off-road driving. However, at the same time, you will have to forget about alloy wheels - only stamped ones can be installed on such a car. It is worth paying attention to the fact that increasing the diameter of the wheels will lead to greater torque - then you will have to change the gear ratios of the main pairs. In addition, after such an upgrade you will need to install a limited-slip differential on the rear axle, and this is again an additional expense.
Necessary tools for work
- ordinary jack;
- hijack jack;
- spring remover;
- wheel wrench;
- set of socket heads with ratchet;
- set of open-end wrenches;
- mount;
- wooden deck (stump).
It is advisable to perform such work with a partner. First of all, it's safer. Secondly, some lifting work is performed with four hands. Let's take the front suspension as an example.
Raise the front end. You can safely cling to the standard bumper, only the jack is installed under the pipe securing it.
By removing the wheel, we get full access to the lever and spring. The front suspension 21214 is made using a double wishbone design, which simplifies the task.
For safety reasons, it is advisable to install some kind of support under the bottom power spar: for example, a wooden block.
The lever travel is limited by the shock absorber. Unscrew its fastening and move it to the side.
Next you need to free the suspension from the anti-roll bar. The mounting bolts may become stuck due to corrosion, so we will use a penetrating liquid (such as WD-40). The stabilizer silent block clamp can be pryed off with a pry bar.
Then disconnect the hub from the lower arm. To do this, you need to jack up the suspension and fix the steering knuckle of the wheel. You can tie it with wire. Then unscrew the 3 mounting bolts and release the ball joint.
We fix the spring with ties and lower the jack. We remove the old elastic element. In some cases, it is enough to simply lower the lever with your foot, and the spring will come out without the use of ties.
Remove the upper support rings from the old springs . With their help, the elastic element is centered in the cups.
They come together easily with a hammer and screwdriver. We install the rings on new, longer springs.
We put the elastic elements in their regular places and jack up the lower arm until it is completely aligned with the lower cup. At the same time, an assistant centers the shock absorber eye and moves the steering knuckle to the mounting location of the lower ball joint.
We tighten the ball “triangle” and attach the shock absorber mounting axis.
By manipulating the jack, we “catch” the mounting holes for the stabilizer bar clamp. With its bolts it should get into the normal place without distortion.
After such modernization, the clearance increases by 30-50 mm . This is enough to install wheels of larger diameter, and the bottom will still rise above the ground.
The rear axle of the Niva can be lifted by installing spacer supports of increased height. When using a size of up to 50 mm (according to changes in front end height), no modifications to the rear axle are required.
By lifting the rear axle, maintenance can be carried out on the axle and brake system.
The handbrake cable may need to be replaced. It is lengthened by a couple of centimeters. Otherwise, the Niva lift will lead to increased wear of the brake pads in the rear drums. Disconnect the lower shock absorber mounts and lower them until the springs stretch.
We take out the elastic elements and knock off the support rings from them. We clean the upper cup and carry out anticorrosive treatment. We install new supports of increased size and seat the springs using a jack.
We fasten the shock absorbers, assemble the axle, and mount the wheels.
Such a lift will not arouse suspicion among traffic police inspectors, and the cross-country ability of your NIVA 2121 will improve. No drawings, much less homemade parts, are required. You buy new springs and about the rates, the rest is a matter of technology. Labor costs for an elevator of one NIVA are two people/one day off.
Materials and tools
In order to produce a suspension lift (Chevy Niva diesel) ourselves, we need to prepare the following set of spare parts:
- Set of front and rear springs. Here parts that are 31.5 centimeters long and 1.57 centimeters thick fit perfectly on the Chevrolet Niva. You can buy springs and other parameters - it all depends on your taste.
- Rubber spacers with metal cups. We will install them under the springs.
- Shock absorbers. As practice shows, the products of the Premium and Excel-G brands are the most suitable for Niva. But again, it all depends on how stiff the suspension you want to get in the end.
- Spacers for the upper ball joint. You can hardly find them in a store, so it would be wiser to order them from a familiar turner. The thickness of the spacers is about 2-3 centimeters. In this case, you will have to make the brackets for the rear shock absorbers yourself.
- Enlarged washers for the cup. Their internal diameter should be 1 centimeter, external - 3 centimeters. We will need 12 of these washers in total.
- You should purchase special extended bolts for the upper ball joints and cup. Parts from the G8 muffler (M8x65) and from the VAZ suspension arm M10x75x1.25 are suitable here, 6 and 4 units, respectively.
- Several jacks, spring ties and boards for backing.
I don’t argue that in Samara, Nizhny Novgorod, Moscow or cities like Yekaterinburg and St. Petersburg there are many companies ready to do any amount of work on your car and suspension in particular for your money.
If you decide to do everything yourself, I have nothing against it. I only advise you to use only factory-made, high-quality kits for the Niva elevator.
Kits from Izh Techno have earned good reviews; you can also find excellent options in the store on Sedova Street in St. Petersburg. This store is called Niva 4x4. The T 34 lift kit also showed excellent performance. Each of them is excellent for the Niva, which is why it is widely used by car owners when modifying the front and rear suspension.
There is an option to assemble the kit yourself. But this will require accurate drawings and even more time and effort. I don’t see the point in this, since it is better to take a ready-made set after looking at a review of different sets.
To work you will need to take:
- front and always rear new springs;
- spacers made of rubber for springs with a metal cup;
- spacers for the Nivov ball joint (upper);
- shock absorbers;
- brackets for rear shock absorber springs;
- cup washers;
- set of tools;
- jack;
- durable boards;
- ties for working with springs.
Sizes are selected individually, based on what kind of car you have and what results you are aiming for. You can buy something without any problems. Although some elements will have to be ordered or done yourself. That's why buying a ready-made lift kit seems preferable to me.
Get ready to go. Photo and video instructions will help you.
Subtleties of lifting
In this type of car suspension tuning, such as lifting, you always need to maintain common sense and be able to stop in time. It is important to know that during modification, the bend angle of the drives changes, which automatically leads to a reduction in their service life. In most cases, such car tuning is done to order, since everything depends on the wishes of each car owner; an individual suspension modernization project is drawn up for each car. The center of gravity also shifts and, as a result, the overall behavior of the car on the road changes. It is believed that the maximum wheel size should not exceed 235/75 r15. It is necessary to increase the ground clearance only with minimal load on the chassis, otherwise serious problems may arise.
Tuning the suspension of such a car is very popular among hunters and fishermen. The cross-country ability of this vehicle has already proven itself at a high level, and the suspension upgrades made increase them even more. This makes it even more popular and functional.
Modified all-terrain vehicle
You should only use a lift for a Chevrolet Niva if you spend time off-road, because a lifted car reduces the life of the suspension, transmission and the life of chassis parts. If you know that you will spend time hunting and fishing, then it is worth carrying out such an upgrade. Remember that choosing wheels for your car is an important aspect of tuning. Lifting is also suitable for people who love wild nature and are not afraid of difficulties while riding. But be prepared that parts will wear out faster during such extreme driving.
- Go to page:
Niva elevator
Post by Pilot » Dec 12, 2009, 04:16 pm
The standard Niva has a ground clearance of 220 mm. Because of this, it is very problematic to drive on a serious rut. To significantly reduce this problem, you can make a suspension lift and install wheels larger than standard ones.
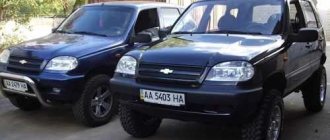
The photo shows the car after the lift on tires size 235/75 R15
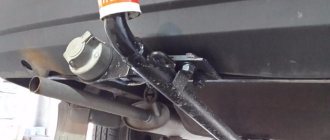
Clearance under the front beam before and after the elevator
Raised Niva on 235/75 R15 tires and standard on 205/70 R16 tires
There is now 32 cm of clearance under the front beam. So it is now more difficult to sit on it.
In what cases is Niva lifting done?
Increasing clearance is a labor-intensive procedure. It requires special skills and tools. Therefore, lifting is usually performed at a service station. However, if you have the skills, you can install the elevator kit yourself. In this case, it is necessary to pay attention to the following points:
- Lifting requires an integrated approach. Simultaneously with the increase in ground clearance, it is necessary to change the shock absorbers and thrust rods. Otherwise, the suspension lift will make the car unusable.
- On the right side of the rear of the body there is a gas tank with ventilation pipes. This must be taken into account if, in addition to lifting, you decide to enlarge the wheel arches.
- If there is a significant change in ground clearance, you should install an extended brake hose and adjust the bump stops. You will also have to reconfigure the pressure regulator in the rear brake circuit.
For tuning at home, it is better to use ready-made factory-made lift kits.
Installation of wheels with a large outer radius. In this case, the craftsmen are faced with a limitation - tires that are too large do not fit into the wheel arches. You have to widen them or move the wheel outside the car, installing extended hubs.
And also interesting: Comparison of small SUVs (Lada 4×4 Urban and Suzuki Jimny) » Lada.Online - all the most interesting and useful about LADA cars
Installation of spacers. This method allows you to slightly raise the body and does not require much labor.
Installation of larger springs. This method is more expensive, but allows you to achieve a greater lifting height of the body.
Installation of wheel reducers on the rear axle. These parts allow the hubs to be lowered and increase the distance from the axle to the ground.
Downward displacement of the front beam. To do this, you will have to weld special fasteners onto the side members and install extended arms.
Installation of extended springs and spacers under ball joints. A simple and inexpensive way to greatly increase ground clearance.
We will divide all the work into two parts. At the first stage we will modernize the front suspension, at the second - the rear. So, let's get to work. First, remove the wheels and release the silent blocks. Next, install a jack under the ball joint, place a board under the latter and raise the car until the spring is compressed.
After this, we install the ties on the spring, tighten it and unscrew the shock absorber mount. Next, remove the lower and upper ball joints and remove the stabilizer. Release the lever and remove the spring. How is the suspension lift done? The Niva remains stationary for now, and at this time we turn the wheel hub to the side and place it on a stand. It is important not to damage the brake hoses.
The Niva lift can be carried out either independently or in a car repair shop. In special stores you can purchase a kit for Niva, which was produced at the factory. However, it is worth remembering that this is still an intervention in the car. Therefore, you need to carry out this process yourself only if you have knowledge and experience. If you are in doubt, it is best to turn to professionals.
Which lift is suitable for the 2121 series?
In professional circles, do-it-yourself car lifts are divided into body lifts and suspension lifts. The bodywork, accordingly, is designed to lift the body when stands are placed under it, the hose is modified, etc. Such tuning is quite simple, but it is not suitable for Niva 21213, 21214 or 2121, since these cars do not have a frame. Frame structures can be found on the Niva 2329, but only on the rear suspension. Therefore, a Niva 21214 body lift using only our own resources is unlikely.
The Niva suspension lifting is considered more attractive for increasing the vehicle's cross-country ability, since it lifts the entire vehicle and makes it possible to install wheels of a certain diameter without cutting the arches. It is assumed that if a suspension lift of 6 cm is made, then 29-inch wheels can be installed painlessly. They will easily fit in the existing arches, which is enough for the minimum “charge” of the car after the Niva 21214 elevator was made with your own hands.
In order to install extreme 33-inch wheels, you will need to cut out the arches and do suspension tuning, since cutting the arches alone only slightly increases the ground clearance and geometric cross-country ability. At the same time, cutting arches 21214 with your own hands without changing the suspension has the advantages that you can get rid of rusted elements, not disrupt the operation of the suspension, and CV joints will have a shortened service life only due to increased loads.
As a rule, the standard Niva 21214 lift is carried out when 31 wheels are installed, which are considered optimal for increasing cross-country ability.
Clearance value
Ground clearance, or otherwise Niva 4X4 ground clearance, is relevant not only off-road, but also in the city. The higher the Niva 2121’s ground clearance, the higher the seating position and the better the visibility. The driver of an SUV receives earlier and more information about the road situation. This means it can react to it in a timely manner. If the ground clearance is higher on a Niva 4X4, then there is a greater chance of avoiding an emergency.
The large glass area and good visibility of the Chevrolet Niva helps to spot holes in the asphalt. Speed bumps and other obstacles. Most obstacles can be overcome by walking without slowing down. Long-travel suspension is famous for its energy intensity. After all, it is designed for off-road driving.
Installation of a ready-made lift kit for Niva 21212
To understand the process, let’s look at the geometry of the suspension on NIVA SUVs (front axle). The drawings clearly demonstrate the position of the elements relative to each other. If you organize an elevator only by increasing the length of the spring, its bending radius decreases, and lateral loads appear on the mountings of the levers.
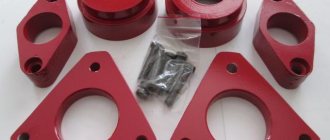
To compensate for this side effect, spacers are used: under the spring cup and ball joint.
The standard version shows that the axle shaft (CV joint) is located virtually parallel to the ground.
The spacer is installed between the spring and the lever. The radius of curvature of the elastic element is small, the softness of the suspension is maintained. The fastening is reliable, there is no backlash. Disadvantage - the additional element adds unsprung masses (aluminum parts can be used to reduce weight).
The spacer is installed between the cup and the spring. There are no unsprung masses, the radius of curvature of the elastic element is even smaller than in the previous version. The disadvantage is that the attachment of the additional element is not so reliable.
In all cases, the elevator changes the position of the axle shaft. The load on the tripods (gimbals) increases. When lowering the suspension, the travel of the upper arm to the bump stop decreases. To restore the geometry, a spacer is installed under the upper ball joint.
Factory kits are designed taking into account all the design nuances of the front axle and rear axle.
The set includes:
- drawings for correct installation;
- spacers;
- extended shock absorbers;
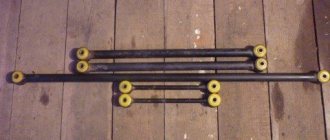
- new trailing arms for the axle;
- extended panhard rod;
- new bowls and springs.
Some kits for Niva 2121 offer extended brake hoses. When lowering the wheels, the standard brake system may be too short.
Replacement process: To install the lift kit, a garage with a pit and a standard set of repair tools are enough. Those who independently service the VAZ 21214 know what we are talking about. Preparation of the front axle is described in the Niva budget elevator section.
Only when installing the kit is the steering knuckle removed completely. If you manage to fix it without removing the CV joint, good. Usually it is completely separated from the suspension.
Next, dismantle the lower spring cup and install three ring spacers under it. There are no more modifications to this lever. An enlarged support ring is installed on top of the elastic element.
To compensate for the divergence of the levers, we mount a spacer under the upper ball mount. Since all the parts are from the same set, the sizes are synchronized.
This element is the most responsible. If the geometry “floats”, the front suspension travel will be disrupted. To fine-tune the height, the monolithic upper ball spacer can be replaced with stacked washers. By selecting the quantity, you adjust the parameters of the front axle, just like on a rally car.
If the kit includes new shock absorbers, they should be installed. On standard ones, the rebound stroke may not be enough, and your 21212 will squirm on potholes. The rear axle is completely removed, especially if new support cups are welded under the springs. The eyelets for the levers remain standard, the extended parts from the kit have standard fastenings.
Depending on the size of the front axle lift, you may be limited to raised cups, or add spacers for the springs. It is better to choose a customizable Panhard rod. You can adjust its length when changing the clearance height.
To understand the process in dynamics, you can watch a video of the Niva’s independent elevator.
Lift options
How and where you will make a lift for your crossover, decide for yourself. I will try to tell you about all the nuances of this procedure so that you understand what to expect and what to prepare for.
I will say right away that a body lift lifts the entire body by using stands, modifying the hose and other parts. In theory, such tuning is very simple, but in the case of the Niva it is not used. And why all? Yes, because the Niva 2121 and other representatives of the series do not have a frame. If there was a frame, then there would be no questions.
From this we conclude that for our Niva the optimal solution would be suspension lifting. It provides the following benefits:
- increases crossover cross-country ability;
- lifts the entire machine;
- allows you to install larger wheels without having to trim the arches;
- provides the car with a more attractive appearance;
- makes the Niva an ideal car for fishing, hunting and driving on the most difficult sections of roads and off-roads.
If you raise the car by about 45 mm, achieve a lift of 50 mm, or even take the height to a bold 60 mm, you can easily insert wheels with a diameter of up to 29 inches into the factory arches. Do not forget that installing large wheels affects fuel consumption.
Many people mistakenly believe that it is easier to cut out the arches, insert 33-inch tires there and thereby raise the car. In practice, with such solutions the machine rises slightly. Most importantly, this does not greatly affect the geometric cross-country ability. I would recommend installing 31-inch wheels and lifting at the same time. This combination will provide the best result. Just choose your car wheels wisely and don’t forget about the seasonal rules for storing tires.
I'll make one remark. When lifting the car, the service life of the internal CV joint and the factory boot is reduced. To fix the problem, try replacing the internal boots on the CV joint with external ones, and also lower the FRM (front axle gearbox) by 10 mm. This way it will be possible to reduce the angle of operation of the CV joint.
Read news about the new Niva
- Do-it-yourself Niva 2121 elevator: drawings, dimensions
- Do-it-yourself Niva 2121 elevator: drawings, dimensions || Niva lift suspension spacers
- Do-it-yourself Niva suspension lift. How to lift the front and rear suspension of a Niva car?
- Niva Chevrolet suspension lift
- The modernized Lada Niva Legend (4x4) 2021 was shown on the Internet
- Lada 4×4 Bronto - sales stopped, new details » Lada.Online - all the most interesting and useful about LADA cars
- Description of the instrument panel Lada 4×4 (VAZ 2121, 2131) » Lada.Online - all the most interesting and useful about LADA cars
- Chevrolet Niva gasoline consumption per 100 km
Important information for motorists
If the driver is going to lift an old car, then it is necessary to remember the internal CV joints (they can move out of place). Therefore, you need to be careful and, if necessary, replace them with new ones. You can also fix the problem by reducing the drive angle by uncoupling the front axle.
When installing 33-inch wheels on a Niva car, you will have to cut out the arches and also perform suspension tuning. If you cut out the arches, you can increase the car's ground clearance and airtight strength. Thanks to this, the car will be able to drive even in the dirtiest and most impassable places.
Installation of a ready-made lifting kit for Niva 21212
To understand the process, let’s look at the geometry of the suspension on NIVA SUVs (front axle). The drawings clearly demonstrate the position of the elements relative to each other. If you organize an elevator only by increasing the length of the spring, its bending radius decreases, and lateral loads appear on the mountings of the levers. To compensate for this side effect, spacers are used: under the spring cup and ball joint.
The standard version shows that the axle shaft (CV joint) is located virtually parallel to the ground. The spacer is installed between the spring and the lever. The radius of curvature of the elastic element is small, the softness of the suspension is maintained. The fastening is reliable, there is no backlash. Disadvantage - the additional element adds unsprung masses (aluminum parts can be used to reduce weight). The spacer is installed between the cup and the spring. There are no unsprung masses, the radius of curvature of the elastic element is even smaller than in the previous version. The disadvantage is that the attachment of the additional element is not so reliable.
In all cases, the elevator changes the position of the axle shaft. The load on the tripods (gimbals) increases. When lowering the suspension, the travel of the upper arm to the bump stop decreases. To restore the geometry, a spacer is installed under the upper ball joint. Factory kits are designed taking into account all the design nuances of the front axle and rear axle.
The set includes:
- Drawings for correct installation Spacers Extended shock absorbers New trailing arms for the axle Extended panhard rod New cups and springs
Lifting options
Increasing clearance with wheel gears. The rarest method of lifting: they are not mass-produced; individual craftsmen make them from scratch. In addition, the use of such modernization in urban conditions is very difficult; it is only suitable for real field conditions.
- Lowering the beam is aimed at making it possible to install slopes with a large diameter. This is done in two ways: in the first, the second spars are welded, in the second, the beam is cut in the calculated place and a kind of extension is welded there. Involves a transfer of helmsman;
- The simplest and non-violating method is the direct installation of large wheels. There is practically no need to convert anything, just trim the arches. There is no need to adjust the brakes after this, the wheel alignment lasts a long time, and driving the car is not complicated. The only drawback can be considered a slight increase in clearance - within 4-5 cm, but for many this is enough;
- Those who don’t get enough of the extra boost from large slopes lift the Niva with spacers above the upper ball joint in combination with changing the springs to stiffer/longer springs or with spacers under the spring cup.
Video 2
Regardless of whether you have chosen a budget or professional elevator, after final assembly it is necessary to conduct test runs. If there are flaws in the installation, or the dimensions are incorrect, it is better to check it away from public roads.
Independent manual modification of the suspension is making changes to the design of the car. When using Niva on public roads, you may be checked by a traffic police officer. This is followed by penalties - up to and including deprivation of registration.
It is advisable to formalize all completed work in the “NAMI-PTIA-FUND”. Once you receive the certificate of conformity, you will save yourself from troubles during further operation.
Types of lifting
There are two ways to lift a car.
- Body lift. In this case, the car body is raised above the wheel axles using stands for it, modification of the hose, etc. This option is not suitable for the Niva 2121, since its design does not include a frame. As an option, you can trim the wheel arches, which will allow you to place wheels of a larger radius in them. In this case, it additionally becomes possible to cut off the edges of the arches damaged by rust. At the same time, the clearance increases within 4-5 cm.
- Suspension lift. It is more attractive for increasing the cross-country ability of a car. We “raise” the entire car without cutting the arches, using spacers and washers for the shock absorbers, and installing larger springs on them. In this case, the clearance can be increased by 5-8 cm.
Sometimes both the first and second methods are combined. This makes tuning more expensive, but allows you to raise the body by a significant amount.
The simplest, safest and most cost-effective lift of the Niva 2121 is the installation of rubber spacers over the suspension springs.
To increase the ground clearance by 1.5 cm, it is enough to install K-139 tires, the size of which is an inch larger than the factory one. Don't chase heights. With a high lift, you can “break” the spar or axle shafts. The risk of the vehicle rolling over also increases.