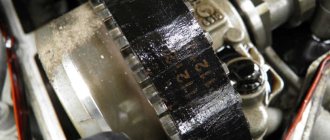
Aligning marks on shafts
If everything is ok, you can reassemble.
Conclusion
It is not difficult to change the timing belt on “Chery For”, guided by this instruction and at least a little repair experience. At the same time, you can save on car service costs and gain invaluable experience in car repairs. Thus, it will be possible to check the gas distribution mechanism more often without turning to a car service center for help.
If you constantly monitor the condition of the motor devices, the machine will work correctly and will not malfunction while on the road.
Video “Replacing the timing belt on a Cherie Fore” Video
This video will help you better understand the features of replacing the timing belt for your Cherie For car.
The Chinese-made Chery Fora is known in Europe under the name Vortex Estina. In Russia, this compact front-wheel drive sedan has gained considerable popularity due to its relative unpretentiousness and affordable price category. However, any vehicle, even the most durable one, needs timely maintenance of its component units. In particular, over time, the timing belt may need to be replaced. Otherwise, Vortex Estina will not last longer than the warranty period.
But what are the signs that your Vortex Estina timing belt needs to be replaced? How, in accordance with the instructions, can you replace this part yourself? What tools, consumables and technical units will be needed for this? You can find answers to each of the questions presented above in the current article.
Signs that replacement is needed
The Vortex Estin timing belt is a solid rubber band with a textured inner surface. This unit serves as a connecting link between the crankshaft and camshaft. The timing belt is located under the hood of the vehicle (behind the boot).
But when does the unit in question need to be replaced? In accordance with the official replacement regulations prescribed in the Vortex Estin operating instructions, the timing belt needs to be updated at intervals of 100,000 - 150,000 km. However, in some cases the replacement frequency should be increased. Most often, premature replacement of the timing belt in the Vortex Estin system is required for the following reasons:
- Excessive use of the machine. For example, a driver is fond of extreme driving at high speeds;
- The terrain where the vehicle's main mileage is made is extremely hilly;
- The car is equipped with additional weighting, for example, a trailer.
The unit used is not of high quality;
The following phenomena can be identified as signs of the need for an urgent update of the unit:
- Strong shaking of the power mechanism while driving;
- Complications during engine operation. For example, the engine starts jerkily or does not start at all. In general, the Vortex Astin engine, when the timing belt is dysfunctional, is not able to operate at full power;
- Dense dark smoke from the vehicle exhaust;
- Scuffs, cracks, holes and breaks in the used tape. The timing belt is designed in such a way that even minor damage is visible to the naked eye. However, even microcracks on the unit pose a real threat to the elements of the Estin Vortex mechanism. The problem is that the belt can break at high speed, and the worn threads on its inside can cause a collision between the pistons and valves. All this can lead to breakdown of the gas distribution mechanism, as well as to an emergency situation on the road;
- The Vortex Estin water pump is not working properly.
To avoid serious breakdowns and emergency situations on the road, it is recommended to check the condition of the timing belt every 25,000 kilometers.
Owner review
The Chinese sedan has gained quite wide popularity in the market, so a sufficient number of opinions have accumulated about it. Below is a response from one of the many users.
My history of owning Cherie Fora begins in 2007. At the time of purchase, it became my first car, so I don’t really have anything to compare it with. At the same time, I worked as a corporate driver for several years and had the opportunity to drive a Toyota Camry V30 and Volkswagen Passat B5.
For the first year and a half there were no special problems in operation. During this time (70 thousand kilometers), the Fora has proven itself to be a relatively quiet sedan with useful equipment, as well as a good ride. Among the malfunctions that have arisen are the breakdown of the heater motor and wear of the shock absorber struts.
After the specified mileage, increased engine oil consumption began to appear. Also, the interior began to creak due to the increased gaps between the panels. Another unpleasant feature is the corrosion of the body and its weak paintwork.
At a mileage of 85 thousand kilometers, the “Chinese” was successfully sold. It was operated with care and, perhaps, that’s why no special oddities emerged. Overall, Cherie left a positive impression and I can’t say anything bad about her.
Price policy
| Auto | Cost (rubles) |
| Chery Fora (A21) | from 75 to 240 thousand |
The price of a Chinese sedan can vary greatly. It all depends on the actual condition of the car, its service life and mileage, as well as on all kinds of “tuning”.
With a hint of respectability
Cherie Fora has a neat and laconic body design. It is worth noting the lensed headlight optics of a triangular configuration, a pseudo-aluminum radiator grille, mirrors and bumpers, which are painted in body color.
The rounded roof gives the profile larger dimensions than it actually is, and the extended wheel arches somewhat widen the sedan when viewed from the front.
Office atmosphere
Inside, light colors predominate - the front panel, door trim, and seat upholstery are beige. Visually, this color scheme makes the interior more spacious and solid. However, the quality of the materials was not surprising - the plastic is hard and echoing, and the eco-leather is very rough.
The instrument panel is easy to read during daylight hours due to clear, large digitization. At night, reading readings is difficult due to the bluish backlight. The on-board computer is informative, but the font is small.
Chery Arrizo 7 - a new direction
The standard audio system produces quite passable sound, especially at mid frequencies. Although it clearly lacks a color screen with the ability to play video, as well as project images from the rear view camera.
The driver's seat is flat and lacks pronounced side support bolsters. On the one hand, this makes it possible for even a large person to sit behind the wheel; on the other hand, the body is not fixed.
As for the rear sofa, even three people can sit here with a height of 180 centimeters - there is enough space for the knees and only the head can rest against the low roof.
The luggage compartment volume is 420 liters.
Focus on comfort
The top-end 2.0-liter engine has, at first glance, impressive power potential. However, it is not able to provide Chery Fora with decent acceleration dynamics. The reason is a clear lack of torque at low speeds, as well as stretched gear ratios of the manual transmission. The latter, in addition, suffers from poor shift clarity and long lever strokes.
The steering is “empty”, uninformative, which makes maneuvering at high speed an unpleasant experience. When cornering, there is a lot of roll and sway, and there is pronounced understeer with a sharp drift of the front axle. Therefore, you need to carefully calculate the trajectory of the arc and not exceed the speed.
Chery Amulet - second life
But the ride comfort can be praised. The long-travel suspension is quite energy-intensive, which allows it to cope with most road bumps and provide an acceptable smooth ride.
Photo by Chery Fora:
Required Tools
Before you begin the procedure for updating the tape in the gas distribution mechanism of a car, you need to carefully prepare. In particular, the car owner must make sure that he has all the materials necessary for the upcoming work. But what tools are required to replace the timing belt yourself in Vortex Estina? The list is presented below:
- Jack;
- Technical fixator;
- Assorted socket and socket wrenches;
- Screwdriver or awl;
- Pliers;
- Lint-free rags or towels.
You will also need a number of replacement parts:
- Rollers;
- New timing belt;
- Oil seals;
- Gaskets.
Vortex Estina itself is installed on a horizontal lift or overpass. A garage pit is also suitable for such work. The vehicle must be positioned completely horizontally and in such a way that the mechanic has access to the underside of the vehicle.
Important to consider! Most car owners prefer to carry out the complex and lengthy procedure of replacing the timing belt at a Technical Service Station. The fact is that the gas distribution mechanism of the Vortex Estin is extremely scrupulous. Therefore, it is not recommended to replace the unit in question yourself without the experience of an auto mechanic.
Download a video and cut an mp3 - we make it easy!
Our website is a great tool for entertainment and relaxation! You can always view and download online videos, funny videos, hidden camera videos, feature films, documentaries, amateur and home videos, music videos, videos about football, sports, accidents and disasters, humor, music, cartoons, anime, TV series and many other videos are completely free and without registration. Convert this video to mp3 and other formats: mp3, aac, m4a, ogg, wma, mp4, 3gp, avi, flv, mpg and wmv. Online Radio is a selection of radio stations by country, style and quality. Online Jokes are popular jokes to choose from by style. Cutting mp3 into ringtones online. Video converter to mp3 and other formats. Online Television - these are popular TV channels to choose from. TV channels are broadcast absolutely free in real time - broadcast online.
Any internal combustion engine is equipped with a timing belt. Many drivers do not pay due attention to it, although its condition must be monitored as closely as other consumables. The article describes the functions of the timing belt and gives step-by-step instructions for replacing it on a Cherie Fora car.
[Hide]
Replacing the timing belt on a Vortex Estina
The steps for replacing the timing belt on a Vortex Estina 1 6 with your own hands are provided in the following step-by-step instructions:
- Removing the terminal from the Vortex Estin battery. This is done in order to de-energize the machine mechanism for the period of work with its systems;
- Raising the vehicle engine using a jack;
- Removing the upper casing;
- Motor bracket flap;
- Loosening of the mechanism fastening rollers;
- Removing the crankshaft pulley. To do this, the right fender liner is first removed;
- Removing the tension roller;
- Removing the lower timing cover of the Vortex Estin;
- Setting marks that will later help return the mechanism to its original position. To do this, screw a bolt into the tail of the crankshaft clockwise so that the technical holes are located opposite each other. For convenience, you can mark the correct location of the elements using a soft, simple pencil;
- Removing the old Vortex Estin timing belt. If the coating on its inner part has crumbled and fallen into the lower part of the mechanism, this technical debris should be removed, since in the future it can cause significant harm to the machine;
- Checking the tension rollers and, if necessary, replacing these components;
- Installing a new belt and tensioning the unit on the gears of the vehicle mechanism;
- Rotate the first roller to the right. This is necessary to increase the tension of the new unit. The tape can be considered finally tensioned only if the roller pin coincides with the lower technical hole;
- Rotation of the second roller. It is important to take into account that the maximum tightening should not be allowed. Otherwise, the pressure on the tape will increase, and its embossed side will quickly wear off. In addition, if the tension is excessive, the risk of timing belt rupture increases during the movement of the Vortex Estin;
- Returning all considered units to their original position. In this case, you should focus on the pre-set marks.
After the final installation of the elements of the car’s gas distribution mechanism, the engine starts for 5-7 minutes. If there is no extraneous noise, shaking, and the engine starts smoothly, we can conclude that the procedure for replacing the timing belt on the Vortex Estina was completed successfully.
Reviews about self-replacement
I changed the timing belt myself after a mileage of 50 thousand km. I didn’t experience any particular difficulties, since I performed a similar operation several times on other engines. To make it easier to set the installation marks for subsequent belt replacements, marks were placed on the camshaft pulleys.
I bought a used car, so I decided to replace all consumables and engine lubricants. I purchased spare parts from trusted suppliers and changed the timing belt in the garage. The work took about three hours, most of the effort was spent on installing marks in the timing drive. After that I drove 15 thousand km. There are no problems with the engine.
To watch online, click on the video ⤵
REPLACING THE TIMING BELT “Chery Fora, A21, Chery Elara, Vortex Estina.” with your own hands Read more
Replacing the timing belt Chery Fora / Vortex Estina part 2 Read more
A quick way to replace the timing belt on a Cherie Fora is Vortex Read more
Replacing the timing belt on Chery Istar 2 0 Read more
Replacing the timing belt Chery Fora / Vortex Estina (Chery Fora / Vortex Estina) part 1 Read more
Replacing the timing belt and pump on Chery Fora, Renault Megane 16 valves without tools. More details
correct timing belt replacement for Chery Fora, Chery Tiggo, Vortex 1.6, 1.8, 2.0 Read more
Vortex Estina. Replacing the timing belt kit. (On the knee) Read more
“GT” Cherry Elara (Fora) “Acteco-2.0” Timing belt jump and its consequences! Part 1. More details
Replacing the timing belt on a Chery Fora Read more
Vortex Estina scared me. Replacement of rollers and multi-ribbed belt. More details
Replacing the timing belt on a Cherie Tigo Read more
the valves are bent, the timing belt is broken “Chery Fora, A21, Chery Elara, Vortex Estina.” More details
When to change the timing belt for Acteco 1.6, 1.8, 2 l engines? For Chery Fora, Chery Tiggo Read more
Replacing the timing belt Read more
Replacing the timing belt for Cherry Veri, Cherry A13, Cherry Bonus More details
Replacing the timing belt on a Chery Tiggo with an Acteco 1.8 engine with your own hands Read more
Checking the condition of the timing belt Chery Eastar 2 0 More details
Scheduled car maintenance for Chery Tiggo
| Standard maintenance Chery Tiggo | Specify |
| Replacing spark plugs | 600 |
| Replacing the timing belt | 4000 |
| Replacing the drive belt | 1600 |
| Replacing the drive belt rollers | 800 |
In our technical department, special promotions are widely held for CHERY car owners! Therefore, the price for replacing the timing belt of a Cherie Tigo
won't hurt your wallet.
Having a warehouse store makes it possible to carry out any repair of your equipment efficiently and quickly. Having partnership programs with major suppliers, we have the ability to provide you with any spare parts in the shortest possible time, if the component is not available in stock at the moment.
To watch online, click on the video ⤵
REPLACING THE TIMING BELT “Chery Fora, A21, Chery Elara, Vortex Estina.” with your own hands Read more
Replacing the timing belt Chery Fora / Vortex Estina part 2 Read more
A quick way to replace the timing belt on a Cherie Fora is Vortex Read more
Replacing the timing belt on Chery Istar 2 0 Read more
Replacing the timing belt Chery Fora / Vortex Estina (Chery Fora / Vortex Estina) part 1 Read more
Replacing the timing belt and pump on Chery Fora, Renault Megane 16 valves without tools. More details
correct timing belt replacement for Chery Fora, Chery Tiggo, Vortex 1.6, 1.8, 2.0 Read more
Vortex Estina. Replacing the timing belt kit. (On the knee) Read more
“GT” Cherry Elara (Fora) “Acteco-2.0” Timing belt jump and its consequences! Part 1. More details
Replacing the timing belt on a Chery Fora Read more
Vortex Estina scared me. Replacement of rollers and multi-ribbed belt. More details
Replacing the timing belt on a Cherie Tigo Read more
the valves are bent, the timing belt is broken “Chery Fora, A21, Chery Elara, Vortex Estina.” More details
When to change the timing belt for Acteco 1.6, 1.8, 2 l engines? For Chery Fora, Chery Tiggo Read more
Replacing the timing belt Read more
Replacing the timing belt for Cherry Veri, Cherry A13, Cherry Bonus More details
Replacing the timing belt on a Chery Tiggo with an Acteco 1.8 engine with your own hands Read more
Checking the condition of the timing belt Chery Eastar 2 0 More details
The Chinese-made Chery Fora is known in Europe under the name Vortex Estina. In Russia, this compact front-wheel drive sedan has gained considerable popularity due to its relative unpretentiousness and affordable price category. However, any vehicle, even the most durable one, needs timely maintenance of its component units. In particular, over time, the timing belt may need to be replaced. Otherwise, Vortex Estina will not last longer than the warranty period.
But what are the signs that your Vortex Estina timing belt needs to be replaced? How, in accordance with the instructions, can you replace this part yourself? What tools, consumables and technical units will be needed for this? You can find answers to each of the questions presented above in the current article.
About the car
The first mention of this car appeared in 2005 after the Shanghai Auto Show. It was given the index A21, and in 2006 the car went into production as Chery A5. For consumers in Russia it is known as Fora. This model is assembled in Kaliningrad, again using the Seat Toledo as a basis. The car received its original appearance, which looks organically on the road with other cars representing global automotive trends.
The power unit is a motor that the Austrian company AVL helped develop. It has four cylinders, 16 valves, variable valve timing. Gasoline with an octane number of at least 92 is used as fuel. The engine displacement is 2 thousand cm 3 with a power of 130 hp. Today, cars with a slightly reduced displacement to 1600 cm 3 have appeared on the roads. Power also dropped to 109 hp. The engine valve mechanism drove the timing belt.
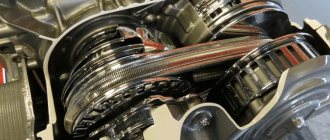
Gas distribution mechanism diagram
Are the valves bending?
The timing mechanism drive and hydraulic valve lifters require special attention and maintenance. Neglecting this leads to significant damage to the power unit of this car. When a toothed belt breaks in the timing mechanism drive, the pistons meet the valves. Not only valves are damaged, but also pistons and connecting rods. Repairing the engine after such damage will require large financial investments. To avoid this, it is necessary to monitor the condition of this mechanism during each vehicle maintenance.
This operation can be carried out by any car owner. The vehicle manufacturer recommends replacing the belt at a mileage of no more than 60 thousand km. This figure may be different depending on the operating conditions of the machine, the quality of consumables used, and maintenance. There are known cases when the drive belt broke after a mileage of only about 20 thousand km, and this entailed additional costs for major engine repairs.
Signs that replacement is needed
The Vortex Estin timing belt is a solid rubber band with a textured inner surface. This unit serves as a connecting link between the crankshaft and camshaft. The timing belt is located under the hood of the vehicle (behind the boot).
But when does the unit in question need to be replaced? In accordance with the official replacement regulations prescribed in the Vortex Estin operating instructions, the timing belt needs to be updated at intervals of 100,000 - 150,000 km. However, in some cases the replacement frequency should be increased. Most often, premature replacement of the timing belt in the Vortex Estin system is required for the following reasons:
- Excessive use of the machine. For example, a driver is fond of extreme driving at high speeds;
- The unit used is not of high quality;
- The terrain where the vehicle's main mileage is made is extremely hilly;
- The car is equipped with additional weighting, for example, a trailer.
The following phenomena can be identified as signs of the need for an urgent update of the unit:
- Strong shaking of the power mechanism while driving;
- Complications during engine operation. For example, the engine starts jerkily or does not start at all. In general, the Vortex Astin engine, when the timing belt is dysfunctional, is not able to operate at full power;
- Dense dark smoke from the vehicle exhaust;
- Scuffs, cracks, holes and breaks in the used tape. The timing belt is designed in such a way that even minor damage is visible to the naked eye. However, even microcracks on the unit pose a real threat to the elements of the Estin Vortex mechanism. The problem is that the belt can break at high speed, and the worn threads on its inside can cause a collision between the pistons and valves. All this can lead to breakdown of the gas distribution mechanism, as well as to an emergency situation on the road;
- The Vortex Estin water pump is not working properly.
To avoid serious breakdowns and emergency situations on the road, it is recommended to check the condition of the timing belt every 25,000 kilometers.
VESKO-TRANS.RU
AutoNews / Reviews / Tests
How to set timing marks on a Cherie Fora
At least some gasoline engines are belt-powered. Many drivers don't pay much attention to this, although it should be monitored as closely as other expenses. The article describes the features of the timing belt and provides step-by-step instructions for replacing it on a Cheri For car.
Functions of the timing belt
The main function of the timing belt is to synchronize the operation of the engine shafts included in the gas distribution system: the crankshaft and distribution. It transmits torque from the crankshaft to the camshafts. Thus, fuel and air enter the cylinders, and flue gases are removed. The belt drive ensures that the valves and pistons move in sync because they do not meet together.
If a belt breaks, the valves hit the pistons and become bent, leading to costly repairs.
In addition, the timing belt is a drive belt for the water pump, which places additional stress on it. The efficiency of time and components depends on the condition of the belt drive.
The need to replace the timing belt is manifested in the following features:
- motor malfunction;
- increased fuel consumption;
- falling ability of the car;
- engine overheating.
The efficiency of the gas distribution mechanism and auxiliary equipment depends on the condition of the belt drive. To avoid belt failure and engine overhaul, it must be replaced in accordance with the rules at 50 thousand kilometers.
In addition, it is often necessary to visually inspect timing components and replace them if deficiencies are identified.
The belt must be replaced if the following defects are detected:
- wear of both internal and external surfaces;
- deficiencies, teething;
- cracks on the outer surface;
- frayed ends;
- peeling of material from the base;
- traces of oil on surfaces.
The service life of the belt depends on the properties of the product, the criteria by which the car is driven, and the driver's driving style.
How to change the timing belt?
To facilitate this function, place the vehicle on a lift or in an inspection groove.
Set of tools
The following tools are required for replacement:
- call set;
- set of heads;
- with rotating key
- screwdriver;
- connector;
- Engine stand.
It is better to take unique supplies, otherwise there is a possibility of buying a fake. Bad materials are cheaper and can cause a lot of problems along the way.
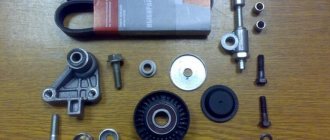
Repair kit for Chery Fore
Stages
The process of replacing the timing belt on a Chery Fore car consists of the following steps:
- First, raise the car jack, remove the front right wheel and place the car on the prepared stand.
- We then turn off the machine by disconnecting the negative terminal of the battery.
- We then remove any equipment that will get in the way. Unscrew the clamps and remove the air filter housing.
- By unscrewing the mounting bolts, it is necessary to remove the wide tank.
Required Tools
Before you begin the procedure for updating the tape in the gas distribution mechanism of a car, you need to carefully prepare. In particular, the car owner must make sure that he has all the materials necessary for the upcoming work. But what tools are required to replace the timing belt yourself in Vortex Estina? The list is presented below:
- Jack;
- Technical fixator;
- Assorted socket and socket wrenches;
- Screwdriver or awl;
- Pliers;
- Lint-free rags or towels.
You will also need a number of replacement parts:
- Rollers;
- New timing belt;
- Oil seals;
- Gaskets.
Vortex Estina itself is installed on a horizontal lift or overpass. A garage pit is also suitable for such work. The vehicle must be positioned completely horizontally and in such a way that the mechanic has access to the underside of the vehicle.
Important to consider! Most car owners prefer to carry out the complex and lengthy procedure of replacing the timing belt at a Technical Service Station. The fact is that the gas distribution mechanism of the Vortex Estin is extremely scrupulous. Therefore, it is not recommended to replace the unit in question yourself without the experience of an auto mechanic.
Installing timing pulley 473H-1007060AB
Installing timing pulley 473H-1007060AB
There are many conflicting opinions on the Internet about the interchangeability of rollers 473h-1007060ab and 473h-1007060. Many car repair shops cannot install a new type of roller on a car due, to put it mildly, to their incompetence.
Everyone suffers - buyers who travel all over the city in search of an old-style video clip, of which there are fewer and fewer on the market. Stores because customers return the pulley, and sometimes even the entire timing belt kit. Well, actually the clients' cars, because...
The old-style roller was replaced with a new one for a reason, but because of its significant shortcomings.
It's no secret that cars, after releasing a batch on the market, do not stop improving. The improvement process proceeds as follows: a client, having bought a car, after some time discovers that one or another part has failed.
He goes to an authorized center, the failed part is replaced and, based on the data that it fails ahead of schedule, the car plant draws conclusions about which components and mechanisms are not reliable enough. Next, the car manufacturer instructs engineers to fix the problem.
They, in turn, develop a new unit, and all new cars begin to be equipped with already improved parts.
But it would be at least stupid to supply new parts to the assembly line, and continue to repair already produced cars with structurally imperfect parts, so the new unit is made in such a way as to be as suitable as possible for both old and new cars.
This is exactly the fate of the tension pulley 473h-1007060, which was installed on cars of the Chery line (the most common of them are Chery Fora (Vortex Estina), Chery Kimo, Chery QQ6, Chery Tiggo (Vortex Tingo)).
The timing roller was not reliable enough and often broke, causing the timing belt to break with all the ensuing consequences. That is why the Chery plant, together with roller suppliers Gates, have developed a new roller 473h-1007060ab, in which the roller is fixed to the engine only by a bolt. The design of the roller is such that this is enough for reliable fixation.
However, these are not all the differences. Upon closer examination, we see that the old-style roller has antennae in its upper part, which allow the timing belt to be tensioned with exactly the force that is necessary for its correct operation. There are no such tendrils on the video of the new sample, but the designers did not forget about the importance of correct tension.
If we look closely, we will see a small black mark near the hexagon space. The belt must be tensioned until the risk coincides with another, which is not currently visible. In addition, the tension with this roller is carried out in the opposite direction than with the old-style roller. Well, that's probably all the differences.
Installation process:
1) We put on the timing belt 2) We tighten the bolt so that the roller does not dangle, but at the same time can rotate freely. 3) Tension the roller until the marks are aligned 4) Make the final tightening of the bolt
5) Make a couple of engine revolutions (without starting the engine), make sure that the marks have not moved, and with peace of mind close the timing cover.
To be completely sure that this video is exactly what you need, below you can watch a video that briefly shows how to install this video.
Replacing the timing belt on a Vortex Estina
The steps for replacing the timing belt on a Vortex Estina 1 6 with your own hands are provided in the following step-by-step instructions:
- Removing the terminal from the Vortex Estin battery. This is done in order to de-energize the machine mechanism for the period of work with its systems;
- Raising the vehicle engine using a jack;
- Removing the upper casing;
- Motor bracket flap;
- Loosening of the mechanism fastening rollers;
- Removing the crankshaft pulley. To do this, the right fender liner is first removed;
- Removing the tension roller;
- Removing the lower timing cover of the Vortex Estin;
- Setting marks that will later help return the mechanism to its original position. To do this, screw a bolt into the tail of the crankshaft clockwise so that the technical holes are located opposite each other. For convenience, you can mark the correct location of the elements using a soft, simple pencil;
- Removing the old Vortex Estin timing belt. If the coating on its inner part has crumbled and fallen into the lower part of the mechanism, this technical debris should be removed, since in the future it can cause significant harm to the machine;
- Checking the tension rollers and, if necessary, replacing these components;
- Installing a new belt and tensioning the unit on the gears of the vehicle mechanism;
- Rotate the first roller to the right. This is necessary to increase the tension of the new unit. The tape can be considered finally tensioned only if the roller pin coincides with the lower technical hole;
- Rotation of the second roller. It is important to take into account that the maximum tightening should not be allowed. Otherwise, the pressure on the tape will increase, and its embossed side will quickly wear off. In addition, if the tension is excessive, the risk of timing belt rupture increases during the movement of the Vortex Estin;
- Returning all considered units to their original position. In this case, you should focus on the pre-set marks.
After the final installation of the elements of the car’s gas distribution mechanism, the engine starts for 5-7 minutes. If there is no extraneous noise, shaking, and the engine starts smoothly, we can conclude that the procedure for replacing the timing belt on the Vortex Estina was completed successfully.
To see the full video on replacing the timing belt on a Cherry Fora, follow the available link.
To replace the belt on this car, you need to know that replacement involves changing the belt every 100 thousand km. mileage, in the video we can also observe the removal of the belt, which works as a gas distribution belt, and we see the bolt for which there is a place for attaching and fixing the crankshaft. The bolt is located in the place of the plug, where next to it there is a starter and a filter responsible for fuel. Learn all other operations using video instructions.
To replace the Cherry Fora timing belt, devices are used, such as: tension roller - 473H-1007060, costing an average price of six hundred eighty rubles; deflection roller - 481H-1007070BA, costing one thousand rubles; small bypass roller - 481H-1007071, priced at two hundred and thirty rubles; and the timing belt itself - 481H-1007073BA, at a rounding price of about five hundred thirty-five rubles.
The replacement takes place at home and does not require a trip to a car repair shop, because why entrust specialists to do the simplest things if we can make and carry out such repairs with our own hands, spending a minimum of time and effort!
When should you change the alternator belt?
The frequency of replacing the electric generator drive belt is indicated in the vehicle maintenance instructions. It should be remembered that the period on the same machine supplied to different markets may differ. This is due to different climatic conditions and dust levels in the air, which additionally destroy the material of the product.
For example, the Volvo company recommends making an initial replacement after 80 thousand km, and each subsequent change is performed after 60 thousand km. At the same time, on cars from the European market, the belt is changed every 180 thousand km. On VAZ cars, the product rarely lasts more than 30 thousand kilometers.
A typical sign of a stretched belt is a whistling sound that occurs when starting the engine or after driving through a puddle. The source of the sound is the strap material sliding along the surface of the pulley. Usually the whistle quickly disappears and appears again when starting the engine or after another puddle. In this case, the owner needs to check the belt tension and try to bring it to the standard.
Worn belt (right)
What affects wear?
Factors influencing the life of the drive belt:
- Product operating conditions. The ingress of dust, abrasives or chemicals will significantly reduce the life of the strap. Long-term use at low air temperatures has a negative effect on the material.
- Condition of pulleys. The appearance of beating or deformation leads to the destruction of the tracks and edges of the belt.
- Tension. If the tension is too low or too high, the belt will wear out at an accelerated rate.
- Belt release date. Rubber is susceptible to aging, so the strap may break down while in packaging in the warehouse. Violations of storage rules have an additional negative impact.
- Belt manufacturer. There are products made by small companies from low-quality materials. Such straps can break after several thousand kilometers.
We recommend: Do-it-yourself replacement of front brake pads on a Renault Duster
Signs of belt wear and product replacement are demonstrated in a video filmed by Vladimir Bazekin.
Free car inspection based on 37 parameters
Where to repair Chery Fora
Auto service Solntsevo
Address: JSC Moscow, Glavmosstroy str. 7a
Phone: +7
Metro: Borovskoye Shosse, Solntsevo, Govorovo
Opening hours: Mon–Sun: from 9:00 to 21:00
Car service Altufyevo
Address: North-Eastern Administrative District, Moscow, Ilimskaya st. vl.3Zh, building 3
Phone: +7(495) 256-00-55
Metro: Altufyevo, Bibirevo, Lianozovo
Opening hours: Mon–Sun: from 9:00 to 21:00
Auto service Volochaevsky
Address: SEAD Moscow, Volochaevskaya str. 12a
Phone: +7
Metro: Ploshchad Ilyich, Rimskaya, Kurskaya
Opening hours: Mon–Sun: from 9:00 to 21:00
Auto service Sokol
Address: Northern Administrative Okrug, Moscow, Ostryakova str., 3
Phone: +7
Metro: Sokol, Airport
Opening hours: Mon–Sun: from 9:00 to 21:00
Fili car service
Address: JSC Moscow, Tuchkovskaya str. 13, building 2
Phone: +7
Metro: Bagrationovskaya, Fili, Business Center
Opening hours: Mon–Sun: from 9:00 to 21:00
Car service Domodedovo
Address: Southern Administrative District, Moscow, Kashirskoye sh. d.67 p.14
Phone: +7
Metro: Domodedovskaya, Zyablikovo, Krasnogvardeyskaya
Opening hours: Mon–Sun: from 9:00 to 21:00
Car service Sh. Entuziastov
Address: Sh. Entuziastov 56с44
Phone: +7(495) 021-33-77
Metro: Perovo, Novogireevo, Sokolinaya Gora
Opening hours: Mon–Sun: from 9:00 to 20:00
