01/25/2022 7,217 Transmission
Author: Victor
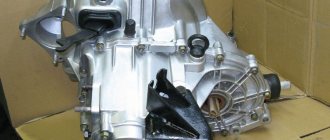
Any gear transmission makes noise during operation. Under normal conditions, its level is low and is almost completely absorbed by the walls of the gearbox housing. If the VAZ 2109 gearbox howls, then this indicates problems in its functioning.
[Hide]
Why does the box howl and make noise?
The main source of noise of varying tones in the VAZ 2109 gearbox is worn out or unadjusted components. Typically, such malfunctions occur on cars with high mileage.
Based on additional signs, you can roughly understand which nodes have failed. If the owner is unable to accurately identify the cause of the hum, it is better for him to contact a specialized car service center.
The main reasons why the gearbox on a VAZ 2109 rattles or makes noise are:
- Reduced lubrication level. If the amount of oil is insufficient or its condition is unsatisfactory, the gears and bearings begin to work without a lubricating film, which causes a high-frequency whine of the gearbox. A pair of gears and the fifth gear shaft, located at the maximum height from the lubricant level in the manual transmission housing, are especially susceptible to this phenomenon. When the amount of oil drops significantly, all speeds begin to howl. Sometimes the sound is present only when the box is cold and disappears as it warms up. This is a sign that the liquid is too thick and hardens at low temperatures. Very thin oil, on the other hand, will cause a loud whine as it warms up.
- Worn drive shaft bearings. This is one of the most common causes of rustling noise when the gearbox is operating. The gearbox makes noise when coasting or when the car is stationary and idling.
- Wear of gears in the box. If the gearbox hums in certain gears, then the cause should be sought in wear or chipping of the gear teeth.
- Faulty locking rings. These parts are installed on the lateral conical surfaces of the secondary shaft gears of the box. They have gaps and can rotate freely along with the breadcrumbs. When the ring wears out, cracks and deformations may appear on it, which is why gears begin to shift with a bang.
- Worn synchronizer clutch. If the synchronizer itself fails, a cracking sound appears when gears are engaged and spontaneous speed loss occurs. To eliminate this defect, it is necessary to replace parts.
- Incorrect clutch adjustment. If the setting of the mechanism does not correspond to the norm, then the disks do not turn off completely when the pedal is pressed to the bottom position. In this case, a crunching sound is observed during switching and a characteristic foreign smell is felt due to the burning of the disks.
- Worn release bearing. There is a rustling noise or rumble, but it disappears when the driver depresses the clutch pedal.
Noise additive in gearbox
As you can see, you can give an affirmative answer to the question whether the automatic transmission can hum. At the same time, as in any other unit, noise in an automatic transmission can appear for various reasons (wear, malfunctions, loss of properties of ATF transmission oil, etc.). It is also a common situation when noise appears in the automatic transmission after changing the oil. This is often due to the fact that unsuitable oils are used, errors were made during replacement, etc.
Owners often note that noise in the automatic transmission occurs in neutral and in parking; in some cases, noise in the automatic transmission appears when the car is stationary or in motion when the gear is engaged. It also happens that the problem manifests itself only under certain conditions and modes (for example, noise in the automatic transmission when engaging reverse gear or howling of the automatic transmission during acceleration).
In any case, the problem needs to be solved. Moreover, in the case of a manual transmission, unlike an automatic transmission, it is easier to determine the cause of the malfunction and also to eliminate the defect. If the release bearing of a VAZ 2114 is humming, the noise in the gearbox disappears when the clutch is pressed, the howling of the Lada Granta gearbox is noticed, specialists from any car service center know how to fix the problem and get rid of the noise and howling.
Moreover, the list of “childhood” diseases allows you to quickly find out why the gearbox on a Lada Granta or other car with a manual transmission is humming. At the same time, diagnosing a manual transmission actually does not take much time. The repair itself is also often limited to changing the oil and replacing the manual transmission clutch or, in the worst case, rebuilding the transmission and replacing worn parts.
When it comes to automatic transmissions, both on domestic and foreign cars, everything is much more complicated. Owners often ask why the gearbox hums on a Lada Granta automatic transmission, or the automatic transmission howls on a Nissan, Lexus, Audi or BMW. So, in this case, diagnosing the cause is difficult and expensive. It is for this reason that quite often owners of cars with automatic or manual transmission begin to look towards additives.
As is known, an additive in a manual transmission to reduce noise or an additive in the transmission oil of an automatic transmission in some cases can reduce or completely eliminate the appearance of extraneous sounds. In practice, manufacturers of such compounds promise normalization of unit operation, increased service life, softer and smoother operation of the automatic transmission, etc.
There are a large number of products from different manufacturers on the market, and among additives for automatic transmissions we can single out Liqui Moly and Xado. In the first case, the Liqui Moly ATF Additive is quite popular.
This additive in automatic transmissions has a positive effect on the oil, slows down its aging and oxidation, and also helps restore the elasticity of rubber and plastic seals. This property makes it possible to stop oil leaks through oil seals, gaskets and seals.
At the same time, intensive cleaning of the hydraulic unit channels occurs, a protective film is formed on the parts, which improves the operation of the box, reduces noise and eliminates extraneous sounds. According to the manufacturer, ATF Additive increases the service life of the automatic transmission.
This additive can be mixed with any ATF fluids, since the composition does not contain additives that can lead to the loss of properties of the base oil or lead to swelling of the rubber. In fact, the additive has the same components as oil, only in high concentration. The composition does not affect the coefficient of friction, that is, there is no risk of friction clutches slipping, etc.
You can also select XADO revitalizant (gel-revitalizant EX120) for automatic transmissions. This solution protects the box from wear and tear and is also a means of partial (restorative) repair. According to the manufacturer, the Hado automatic transmission additive protects surfaces and restores rubbing parts, which allows you to get rid of noise.
A special metal-ceramic coating is formed on the surfaces, and the geometry of the parts is restored. Revitalizant itself can be used in all types of automatic transmissions, added to any oil, since the additive does not enter into chemical reactions and does not cause changes in viscosity, friction, or other physical and chemical properties of ATF.
Troubleshooting
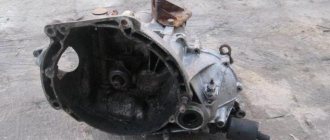
If the VAZ 2109 gearbox howls, then the simplest repair is to check the level and change the oil in the crankcase. To eliminate all other defects, it is necessary to remove the box from the car and completely disassemble it. To do this, you need a closed room, a large number of various tools and experience in repairing such units.
Lack of oil
The oil level is measured using a dipstick installed in the upper part of the gearbox housing. A volume located at any distance between the minimum and maximum marks on the probe rod is considered normal. On the oldest gearboxes that do not have an overdrive fifth gear, the amount of fluid is measured through a hole in the side, closed with a plug. The level should be at the bottom edge of this hole.
Dipstick for checking the oil level on the VAZ 2109 box
To maintain the normal condition of the oil, it should be changed after 75 thousand kilometers. When filling, use API GL-4 standard lubricants with a viscosity of 75W-90, 80W-85 or 80W-90. Some owners specially fill in thick oil of the TM-5 type, which reduces the noise of the box. If replacing the lubricant does not correct the situation and the mechanism continues to make noise, then the problem lies in worn-out gearbox parts.
Replacing the drive shaft bearing
Before replacing the bearings, the gearbox must be removed from the vehicle.
To remove the gearbox you must:
- Wash the wheel arches and the underside of the car in a pressure washer and place the car on a lift. Then you need to remove the protective sheet of the crankcase and engine.
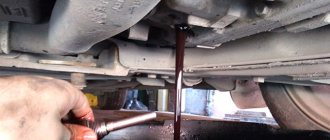
- Disconnect the battery from the on-board network and drain the oil from the gearbox housing.
- Unscrew the hub nuts of the front wheel drives and remove the wheels themselves.
- Disconnect the speed drive rod in the box and the ground wire going to the crankcase.
- Disconnect the plug from the reverse lamp switch.
- Remove the ball joints from the steering knuckle and remove the longitudinal brace from the vehicle.
- Unscrew the fastening of the lower cover on the clutch housing.
- Unscrew the fasteners and remove the wheel drive shafts.
- Unscrew the starter mounting bolts and remove it from the unit.
- Remove the gear shift link located on the top of the manual transmission.
- Unscrew the four nuts securing the gearbox housing to the flywheel housing.
- Remove the support with which the box is attached to the body side member. To do this, the power unit is slightly raised on a jack.
- Move the box away from the engine a few centimeters and remove the input shaft from the clutch basket. When removing the gearbox, you must make sure that the shaft does not rest on the clutch basket petals. Contact may damage the basket.
- Remove the gearbox from the engine compartment.
The procedure for removing the box from a VAZ 2109 is shown in the video from the author of AUTO REZ.
After completing the steps described above, you need to disassemble the gearbox and remove the input shaft.
To remove and replace worn bearings, follow the steps:
- Clamp the shaft in a vice with soft metal jaws or through wooden spacers.
- Remove the front and rear bearings from their seats using a screw bearing puller.
- Install the new parts into place by hammering them through a metal mandrel. This must be done carefully so as not to distort the bearing ring, as this will cause nicks in the seat.
Wear of gears in the box
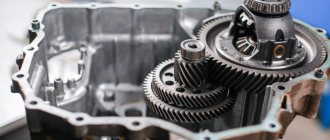
To perform the repair, you will need to remove the gearbox from the car according to the instructions described above and completely rebuild the gearbox. In this case, the condition of all parts of the mechanism should be assessed, since not only gears, but also other mechanisms can be worn out.
The sequence for disassembling the gearbox is as follows:
- Remove the clutch bracket and unscrew the six nuts securing the rear cover.
- Using light blows of a hammer, push the cover off the gasket and remove it. Remove any remaining sealant. Reusing such parts is undesirable because it does not ensure the tightness of the joint.
- Engage third or fourth gear and unscrew the bolt securing the fifth-speed shift fork. The bolt is located under the removed cover.
- Sliding the synchronizer along with the fork down, switch the gearbox to fifth speed. Check the position of the coupling splines, which should come into contact with the gear.
- Remove the clamps of the primary and secondary shafts, and then unscrew the fastening bolts.
- Pry the fifth speed synchronizer with a flat tool (for example, a screwdriver) and remove it from the shaft along with the fork. When removing the part, you must hold it with your hand so as not to lose the balls and springs that fix the coupling.
- Remove the blocking ring and fifth gear from the secondary shaft by prying it off with a screwdriver.
- Remove the needle bearing cage along with the thrust ring. Then remove the fifth gear from the drive shaft.
- Remove the four slotted screws that secure the shaft bearing plate. The screws are tightened with a high torque, so they can only be unscrewed with an impact tool.
- Remove the driven shaft needle bearing plate and bushing along with the thrust ring. Remove the bearing retaining rings installed in the grooves on the shafts.
- Unscrew the three gear shift lock plugs. After this, remove the balls and springs from the holes.
- Remove the two bolts that secure the box support bracket to the crankcase. Separate the gearbox and clutch housings, which are secured with twelve nuts. For this purpose, there are special grooves at the junction into which the awl of a flat-head screwdriver is inserted. Trying to insert a screwdriver into another joint is prohibited, as the mating surfaces will be damaged.
- Place the box on the plane of the removed fifth gear cover and unscrew the bolts securing the shift forks of the first two speeds in the gearbox. Lift the forks up and out of their seats. Using a similar procedure, remove the third and fourth speed forks. To remove the overdrive fork rod, turn it to the side to disengage the rod heads.
- Remove the retaining ring and remove the reverse gear fork along with the gear. Then you need to carefully pick up the drive and driven shafts and remove them from the box housing.
- Unscrew the three bolts securing the gear selector mechanism. Through a mandrel, press the roller bearing of the driven shaft along with the oil seal out of the crankcase.
The procedure for disassembling the box is described in detail on the video of the AUTO RES channel.
The drive shaft of the VAZ 2109 box has several gears, one of which is made in the body of the shaft, and the second has a high interference fit. Therefore, the input shaft gears cannot be replaced and are replaced with a completely new shaft. Maintenance of this part consists of replacing the bearings, which are removed with mounting tools or a puller. Only the secondary shaft of the box can be disassembled, and the parts should be marked or laid out in the order of removal. This method makes it easier to reassemble the unit.
Shaft disassembly sequence:
- Place the shaft removed from the box vertically in a vice. The part should be clamped through spacers or using soft metal linings on the jaws of a vice.
- Using two mounts or a puller, pull off the rear bearing. Then remove the washer installed under the bearing and remove the fourth speed gear by hand.
- Remove the needle bearing cage and remove the spacer ring.
- Using pry bars installed under the end of the third gear gear, pull off the synchronizer assembly for shifting the third and fourth speeds from the splines.
- Remove the 4th gear bushing and insert it and the needle bearing cage into the inside of the 4th gear in the same position as they were on the gearbox. Secure the parts together with a plastic tie or wire.
- When removing the synchronizer, the fourth gear locking ring is removed. These parts are tied together with a tie in the same position as they were installed on the unit.
- Remove the third gear retaining ring. Then you should dismantle the gear and bearing and tie them together with a tie.
- Below there will be thrust half-rings secured with a retaining ring, which should be removed.
- Under the rings there is a second gear gear, secured against axial movement by a ball installed in a hole on the shaft. Pull out the ball with a screwdriver and remove the gear, and then the needle bearing. Secure the gear and bearing with a tie.
- Remove the retaining ring securing the first and second speed synchronizer.
- Place the shaft against the end of the first gear gear and use a hammer to hit the end of the shaft to tighten the synchronizer assembly. To remove, you need to use a mallet and a spacer so as not to deform the shaft surface.
- Remove the synchronizer assembly with the second speed locking ring from the shaft.
- Remove the first gear and the last locking ring. The gear bearing remaining on the shaft has a locking connector that must be unfastened. After this, the separator is removed.
- Turn the shaft over and pull off the remaining bearing with a puller or a puller.
- Wash the parts in kerosene, troubleshoot and replace the components, and then reassemble the shaft in the reverse order.
Replacing locking rings
The steps to replace parts are as follows:
- Remove the box from the car and disassemble it according to the diagram above.
- Find the synchronizer mechanisms on the secondary shaft.
- Check by visual inspection for nicks, cracks and deformations of the rings. If there are any, install new parts.
- Reassemble the box and install it on the car.
- Check the operation of the gearbox; if the fault was a defect in the rings, the noise level of the gearbox will decrease.
In parallel with checking the condition of the rings, it is necessary to assess the wear of the synchronizer couplings.
Changing the synchronizer clutch
Work on replacing couplings is carried out on a disassembled box in the same way as changing blocking rings. After removing the clutch and hub assembly, it is necessary to disassemble this unit.
Parsing order:
- Mark the relative positions of the parts with an indelible marker.
- Remove the coupling from the hub. At the same time, it is important not to lose the small parts of the crackers with the retainers.
- Visually inspect the disassembled unit. There should be no nicks or chips on the parts. All damaged elements must be replaced.
- Align the coupling and hub in a position where the large grooves on the coupling are opposite the grooves on the hub.
- Lubricate the spring with grease (for example, Litol) and insert it into the hole in the lower part of the hub groove.
- Apply lubricant to the cracker and insert a ball into the outer part of the part.
- Gently compress the spring using pliers and insert a cracker onto it. In this case, the ball should fit into the groove on the coupling splines.
- Insert the spring into the hole in the cracker. The assembled units must be installed on the box shafts and the mechanism must be reassembled.
The video, made by user Sem, shows how you can quickly assemble a synchronizer.
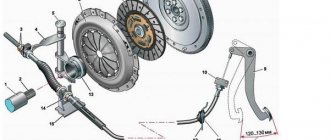
Clutch adjustment
To adjust the clutch, do the following:
- Measure the distance of the clutch pedal from the floor using a ruler. The distance is measured from the center of the pedal along the leading edge, resting the end of the ruler on the floor of the body.
- Press the pedal all the way down and measure the same distance. If the first measurement yielded a result within the range of 180-200 mm, and the second - 60-70 mm, then the pedal stroke will be 130-140 mm. This value is normal for the VAZ 2109 clutch. Otherwise, it needs to be adjusted.
- The adjustment is made by changing the length of the clutch cable and is performed under the hood of the car. To adjust, you need to tighten the adjusting nut and release the lock nut installed on the bracket.
- Rotating the adjuster nut clockwise increases the pedal stroke, tightening it counterclockwise decreases it.
- After setting the movement parameters of the mechanism within the limits recommended by the factory, you should tighten the lock nut and check the operation of the box and clutch while moving.
Measure the clutch pedal travel
Unscrew the nuts securing the cable
Perform cable adjustment
Replacing the release bearing
Work to replace the release bearing is carried out with the box removed.
The sequence of actions is as follows:
- Rotate the release bearing by hand to assess its condition. If it crunches and has play, then the part needs to be replaced.
- The bearing is secured to the shaft by a clamping locking element. It is necessary to remove the spring-loaded end of the clamp using a screwdriver and disengage it from the clutch that serves as the bearing housing.
- Remove the clutch with bearing.
- Pull back the pressure ring and remove the clutch from the release bearing.
- Install the new part in the reverse order. Before installation, you should check the softness of the bearing and the absence of play in it. During assembly, all parts are lubricated with engine oil, this makes the work process easier.
Automatic transmission hums at speed: what to do?
There may be a buzzing noise in the area of the gearbox when accelerating. As a rule, the automatic transmission hums at a certain speed limit, and then the hum only intensifies. A detailed diagnosis reveals that the place where the noise is generated is the rear part of the automatic transmission, where the connection to the driveshaft occurs. In this case, the system does not generate any errors. This is not yet a reason to panic, and the appearance of unpleasant sounds in this area is not evidence of the “death” of the gearbox. A possible cause is a broken transfer case front bearing (the bearing closest to the front driveshaft).
With such a malfunction, almost all bearings in the transfer case need to be replaced. For repairs, the box will have to be dismantled. The problem is that the transfer case is located in the same unit with the automatic transmission.
Repair procedure:
- dismantling and disassembling the transfer gear;
- accurate determination of the causes of the malfunction;
- bearing replacement;
- flushing the transfer case housing;
- reassembly;
- adding working fluid to the hydraulic transformer.
Price issue
The cost of repairing each box is determined by the number of worn parts.
When performing work in the service, the average cost will be:
- gearbox overhaul - from 2500 rubles;
- removal and installation of the unit - about 4,000 rubles;
- changing the oil in the box - up to 1000 rubles;
- installation of new bearings on the input shaft - approximately 5,000 rubles.
Service costs are approximate and may differ depending on the city, workshop location and general condition of the box. In most cases, it is more profitable to purchase and install a less worn unit than to rebuild an old one.
The howl of an automatic transmission, robot or variator
Automatic transmissions are normally quieter than manual transmissions. If the howl of a manual Niva or Lada Kalina transmission may be a normal condition of the transmission, then third-party sounds from the automatic transmission should alert the car owner. Diagnosing the causes of third-party sounds when operating automatic transmissions is quite difficult. Sometimes computer diagnostics can help identify the problem, but in most cases you have to remove and disassemble the transmission. Having learned the cost of this procedure, many continue to drive a car and drown out the howling with loud music. But this is wrong; with significant wear of all internal components, repairs will cost more than with minor problems. In addition, a faulty transmission can fail at any time.
The main reasons for howling automatic transmission:
- If there is little transmission fluid in the box, usually not only extraneous sounds appear, but also kicks when changing gears.
- If the automatic transmission starts to howl after repair, it may have been assembled incorrectly. Even a slight displacement of parts leads to the appearance of third-party sounds.
- If the axle shafts are poorly secured, play occurs, which leads to noise.
- The quality of the transmission fluid also affects the operation of the automatic transmission. If the oil is old, contains mechanical impurities, or a fluid that does not meet the manufacturer’s requirements is filled in, the box will begin to hum.
- Worn or damaged gears, bearings and other mechanical parts lead to the appearance of extraneous sounds.
An automatic transmission is a rather complex mechanism compared to a manual transmission, which is why it is more difficult to identify the cause of the howling. But even if you need to disassemble the transmission with troubleshooting, it is better to perform this procedure than to face a critical breakdown along the way.
Video “Consequences of bearing failure”
The consequences of the destruction of the secondary shaft bearing while driving are demonstrated in a video from user Sergey Tsapyuk.
Do you have any questions? Specialists and readers of the AUTODVIG website will help you ask a question
Was this article helpful?
Thank you for your opinion!
The article was useful. Please share the information with your friends.
Yes (80.00%)
No (20.00%)
X
Please write what is wrong and leave recommendations on the article
Cancel reply
Rate this article: ( 5 votes, average: 4.80 out of 5)
Discuss the article:
How to check the oil level in a cable transmission on a Liftback?
Dear. I had this problem. The 2nd gear crunched on the Grant Liftback. The car is out of warranty. Please advise what can be done?
Cable gearbox.
Another question - if you change the oil, is there a difference compared to the factory one?
Autoworld news:
Outlander has reached Russia
Official sales of Mitsubishi Outlander will begin on the Russian market at the end of May - beginning of June. The European debut of this newest SUV took place on March 4 at the 76th Geneva Motor Show. The prototype for it was the ASX “concept” and the serial Mitsubishi Airtrek, sold exclusively in the Land of the Rising Sun.
The Mitsubishi Outlander transmission provides permanent all-wheel drive to all wheels, and torque is distributed between the axles using a viscous coupling. The independent suspension of all wheels (McPherson type at the front, multi-link at the rear), despite the significant ground clearance, made it possible to achieve a truly car-like handling of the SUV and high stability in behavior on the road during high-speed driving.
In Russia, at first, only the model equipped with a 2-liter four-cylinder gasoline engine with an output of 136 hp/6000 rpm1, which is currently equipped with the Galant and Space Wagon, will be sold. This engine is mated to a five-speed manual gearbox. There are two versions of Outlander 2.0 to choose from. The price of the first, called Comfort, is $27,990. The second, richer version, called Sport, is priced at $29,790. The list of its equipment includes, among other things, climate control and side airbags. driver's seat with lumbar support. roof rails and 16-inch alloy wheels.
After some time, two more modifications of Outlander will appear in Europe, and then, perhaps, here too. The first, equipped with a 159-horsepower 2.4-liter M1VEC engine. has a top speed of 204 km/h. and acceleration to a standard hundred takes 9.9 seconds. The second modification, which will go on sale no earlier than a year, will also be capable of turning up the heat: it will be equipped with a 2-liter turbocharged engine. borrowed (albeit in a deformed form) from the “combat” Mitsubishi Lancer Evolution VIII. This model will go into production this year.
Our recommendations:
/catalogue/podshipniki/roliki-grm/ to the TRIALLI web portal. There are always premium auto parts here.
