A burnt-out headlight on a Hyundai Solaris does not mean that the entire unit needs to be replaced. It is enough to remove the Solaris headlight and replace the bulb and the function of the lighting device will be restored. The same is true for the rear lights of a car. Disassembling the optics itself does not require much effort or time. But you will have to tinker with dismantling the front bumper (otherwise you won’t be able to get to the headlight unit).
how to disassemble a solaris headlight
Sequence of actions when replacing headlights on a Hyundai Solaris
Hyundai Solaris is one of the most popular and best-selling models in the global automotive market. The outstanding characteristics of this car contribute to this universal recognition. These include, first of all, the design features and affordable cost of the Hyundai Solaris. This machine is ideal for use in urban environments. Dynamics and style, which are successfully combined in the Hyundai Solaris, make this car one of the most noticeable and recognizable on the roads in different countries of the world. In addition, it should be noted that there is a modern body with excellent aerodynamic characteristics. An important component of the attractive design of the Hyundai Solaris are the car's headlights. In this article we will talk in detail about how to remove headlights on a Solaris.
Replacing headlights
The need to remove the headlights on a Hyundai Solaris car arises in the case of replacement with new ones, tinting, polishing, tuning and repair.
After the process of removing and installing the headlight on the Hyundai Solaris, it is necessary to adjust the direction of the light beam.
A regular headlight is shown in the picture below.
The restyled headlight is somewhat different in appearance.
In order to remove the headlight on a Hyundai Solaris, you will need to remove the front bumper.
Unscrew the negative terminal of the battery.
Turn the turn signal lamp socket and remove it from the housing. Disconnect the connector by releasing the latches.
The headlight is secured with four bolts (two on top and two on the sides). Use 10 mm socket wrenches to unscrew them.
Disconnect the connector by pressing the latch.
Now we can remove the headlight of the Hyundai Solaris.
Place it on a soft cloth to avoid scratches.
Rotate the dirt boot.
Disconnect the wire block from the H4 lamp (low-high beam). Remove the spring retainer with your finger. We take out the lamp and place it on a clean surface without touching the glass.
Installation on the vehicle is carried out in reverse order.
How to disassemble a Solaris headlight
The Hyundai Solaris headlight is an electrical device, and therefore requires compliance with basic safety rules. Before you begin work on removing the Solaris headlight, do not forget to disconnect the battery. Disconnect the lamp unit connector by lightly pressing the latch (it is more convenient to do this with a small screwdriver). The headlight on the Solaris is attached to the body with several bolts; you need to unscrew them and carefully remove the headlight, having previously removed it from the technological grooves.
The dismantled Solaris headlight is transferred to the table and placed on a piece of soft cloth. It is more convenient to carry out further work on replacing lamps on a desktop. Remove the protective cover made of transparent material and take out the burnt out light bulb. Perform a similar procedure with the side lamps.
Headlights in Hyundai Solaris
The headlights in the Hyundai Solaris are made in an elegant style. It would be appropriate to say that truly high-quality car lighting equipment has a significant impact on the driving process, and is also the key to increased safety and preservation of the health and life of the driver and passengers.
The teardrop-shaped headlights are located at the corners of the Hyundai Solaris. In addition to its aggressive appearance, this placement makes it possible to effectively regulate the geometry of the light flux. By the way, the direction of the beam is controlled from inside the car using the dashboard.
The Hyundai Solaris has the possibility of not only standard adjustment, but also adjustment of the headlights depending on driving conditions and the number of people in the car. It is known that the presence of additional luggage or cargo makes the clearance between the bottom of the car and the road surface less. This factor must be taken into account when adjusting the headlights in the Hyundai Solaris. In addition, adjusting the lighting in such conditions will help reduce the likelihood of dazzling drivers of oncoming vehicles.
Mounting the front headlight in the Hyundai Solaris and its varieties
The front lighting fixtures on the Hyundai Solaris are fixed in four places and secured with three bolts and one mounting clip. The lower part of the headlight is equipped with special protrusions, which are used to securely attach it to the car body.
The turning and lighting lamps are located in a common compartment under a common cover, but the marker lamp is located separately and is fixed in a hole specially designed for this purpose. The placement and shape of the headlights in the Hyundai Solaris does not depend on the body and modification of the car and is always identical.
This feature greatly simplifies the choice of lighting equipment to replace with a Hyundai Solaris. The same headlights are available for both the hatchback and the sedan. It would be appropriate to say that all trim levels of this car are equipped with fog lights. The only exceptions are the classic version of the Hyundai Solaris and Optima.
A car's rear lights vary in shape and include side lamps, brake lights and turn signals. In addition, depending on the type of body, they can also be different. All three lighting fixtures are fixed using special bolts and mounting clips.
Headlight design: features
The headlight is fixed at 4 points and mounted with three bolts and one special fastening clip. At the bottom of the headlight there are protrusions provided for the grooves of the bracket, with the help of which they are firmly attached to the car body. There are three types of light bulbs in lighting fixtures.
Under one cover in a common compartment there are turning and lighting headlights, and the marker light is in a separate compartment and is screwed into another hole. Regardless of the body type of the Hyundai Solaris, the location and shape of the headlights remain unchanged.
This is not affected by vehicle modification. Therefore, when choosing a lighting device to replace a Solaris, you do not have to look for individual optics specifically for a hatchback or a sedan.
Fog lights are installed in all trim levels, except for the regular Optima and Classic. Each 27 W fog light is an excellent functional addition to a set of standard headlights.
To reduce vibrations, the fog lamp is attached to a special plastic plate; it completely prevents or reduces the level of vibration created while the car is moving. The headlight is designed in such a way that it can be directed in different directions using a regulator and change the direction of light. The headlight has a whole set of wires with connectors.
The rear headlights differ from the front ones in shape depending on the body type and have three lighting devices: dimensions, brake lights and turn signals. All three lamps are interconnected and secured with bolts and special fixing clips.
Reflective lights on Solaris also differ depending on the car body. The license plate light for the hatchback is mounted directly into the bumper, while for the sedan it is installed in the trunk lid. Recently, it has become possible to install headlights with lenses on a Hyundai Solaris car. This is a lighting device with a special collecting lens. Its advantages are as follows:
Features of installing PTF, front and rear lights on Hyundai Solaris
Hyundai Solaris is a popular subcompact car produced by Hyundai Motors in the Russian Federation. The package was developed as an adaptive version of the Hyundai Accent for the Russian climate. Production was launched in 2010, and two generations of cars have been built in sedan and hatchback bodies.
The four-door sedan and five-door hatchback were produced in the Russian Federation until 2017 and each received two updates to the interior, power unit and body. For all assembly options, only one block headlights with halogen standard lamps were installed.
Dismantling and installation of headlights
Reinstallation of the optics unit is associated with tuning options, replacement of the ceiling or lamp. The headlight of the Hyundai Solaris is located at the corners of the car and is made in an elegant drop shape. The quality of standard lights meets the driver’s needs 100%; thanks to their favorable location, it is possible to effectively adjust the geometry of the light beam. The light is controlled by switching sensors on the dashboard.
Manual configuration remains an important advantage. The headlight can be adjusted to specific operating conditions depending on the changed ground clearance. As the ground clearance decreases, the angle of illumination of the road changes. Manual adjustment allows you to obtain optimal illumination of the road and roadside in any conditions. Removal and installation of the front headlight in the sedan configuration is carried out in stages:
- Disconnect the negative terminal from the battery.
- Remove the front bumper.
- Rotate the turn signal socket and remove it from the housing.
- Release the latch and disconnect the connector.
- The headlight mounting location will open - unscrew the four bolts with a 10mm wrench.
- Release the latch.
- Remove the headlight unit.
- Rotate the dirt boot.
- Disconnect the wire block, press the lock and remove the lamp.
After the work has been completed - tuning, replacing a burnt-out lamp, installing optics are carried out in the reverse order.
The shape of the headlight unit in the restyled version of the Hyundai sedan and in the hatchback configuration differs from the first generation, the principle of dismantling remains the same.
There are two ways to remove the rear light on a Solaris:
- Remove the trim if large-scale repairs are being made to the adjacent part of the body.
- Open the pocket in the casing, through which access to the optics is provided.
To remove the taillight you will need a 10mm wrench and good eyesight. Dismantling is carried out step by step.
- Disconnect power from the battery.
- Remove the power plug from the headlight unit.
- Use a wrench to unscrew the nuts.
- Slowly pull the headlight towards you against the installed studs.
- Remove the seat from the piston that presses the block to the wing.
After repair, replacement, tuning, reassemble in the reverse order.
Create an account
How to remove the bumper and headlight of a Hyundai solaris
Install a new PY21W lamp in the reverse order of removal. After replacing the lamps and reinstalling the headlights, it is necessary to adjust the light. Removing the rear headlights Disconnect the minus terminal from the battery.
Remove the lower trunk trim panel. Disconnect the rear headlight connectors.
Unscrew the 3 nuts and remove the entire rear headlight unit. All lamps in the headlight unit are removed by twisting counterclockwise. If necessary, you can change the turn signal bulb, fog lights, reversing lights, side lights and brake lights. It is he who holds her. Unscrew the 10mm bolt connecting the bumper and fender.
Hold the top corner of the bumper and pull it towards you. Remove the bumper from its mountings.
Unscrew the 10mm bolt located under the headlight. Unscrew the two 10mm bolts located at the top of the headlight. Holding the edge of the bumper, remove the headlight.
When dismantling is necessary
Disassembly of optics and reinstallation of lamps or ceiling lamps is carried out in the following cases:
- Damage to the headlight surface. Large cracks occur after being hit by a stone thrown at speed from under the wheels of oncoming traffic. The part is being replaced.
- Natural surface wear. Small cracks appear on the headlight, which reduce the luminous flux by 20 - 50%. The optics are being polished and restored.
- The light bulb has burned out. The low and high beam in the Hyundai Solaris is provided by a standard 55/60 Volt halogen lamp. The part is being replaced.
- Tuning. Reinstallation of the standard light to an analogue one - xenon or LED. It is necessary to remove the Solaris headlight and improve the design.
Fog lights Hyundai Solaris
Hyundai solaris fog lights are included in the standard optics kit of any configuration, unlike DRLs, which are not included in the model range. The manufacturer installs single-pin H27W/2 lamps with an L-shaped base. The analogue is the GE-881 with a power of 21 W. Drivers have certain difficulties when choosing a replacement PTF, the reason is the shape of the base. The following models are suitable as an alternative:
- Narva 48054. Provides yellow, even light of increased power.
- PHILIPS H27W/2. A model close to xenon provides maximum beam range.
- KOITO WhiteBeam III. The model has a resource increased by 40% and provides a beam of maximum brightness.
Improving the light on Hyundai solaris
The manufacturer has provided a certain type of lamps, which is allowed for the Hyundai Solaris hatchback and sedan. Replacing lights with more powerful analogues should be carried out taking into account the recommendations of the factory.
The following lamps are installed in the front headlight:
- Low/high beam - H4 halogen lamp, power 55-60 W.
- Front turn signal - PY21W lamp, 21 W power.
- Side lighting - W5W, power 5 W.
Separately installed on the package:
- front fog lamp;
- additional brake signal lamp;
- license plate light.
The following lamps are installed in the rear headlight:
- Turn signal - class PY21W with a power of 21 W.
- Side lights and brake light - P21/5W.
- Fog lamp.
- Reverse.
The main and low beam lamps in the front headlight, front PTFs and tuning with LEDs in the rear unit are often modernized.
How to change a low beam bulb on a Hyundai Solaris: type of bulb and replacement video
When buying a fairly budget car, we by default agree that it needs to be modified and equipped. The rather good optics of the Hyundai Solaris were not matched by the best standard low/high beam lamps. The halogen lamp itself, in principle, shines quite well, but stock factory lamps often frustrate Solaris owners , especially during long night trips out of town.
Installation of bi-xenon headlights
The installation of bi-xenon headlight units helps to significantly improve road illumination. This type of lamp allows you to save battery capacity; the elements produce powerful white light with maximum beam length. Due to the presence of a dividing curtain, the direction of the light beam is adjusted according to the geometry. The bi-xenon headlight has the main elements in its design.
- Automatic switching to low/high beam.
- An additional lighting element is a side lamp.
When choosing lens optics, the following characteristics must be taken into account:
- Color temperature up to 5,000 is white light, close to daylight, allowed by traffic regulations for installation on cars.
- The xenon lamp must have a suitable base.
- The kit includes: bi-lens modules, decorative caps, a set of fasteners, a switch with a relay, and ignition units.
Xenon lights are connected to the vehicle's on-board electrical system through a xenon light ignition unit.
The procedure for replacing standard lights with bi-xenon lights goes through the following stages:
- Remove the headlights. Remove the cover by turning it counterclockwise.
- Remove the halogen low and high beam lamps and be sure to remove the size socket.
- Clean the headlight, remove the glass cover, and warm up the part.
- Install the lens module using fasteners and install seals.
- Install the diffuser and carry out initial adjustment.
- Determine the mounting locations for the ignition units. The module must be protected from moisture and dust.
- Secure the ignition blocks and secure the wires.
- Carry out wiring on the low beam relay.
- Mount the headlight and secure all optical elements.
- Adjust the luminous flux.
When connecting for the first time, the bi-xenon headlight may go out for 2-3 seconds; this is due to the warming up of the lamp, which received an impulse from the ignition unit.
Replacing the turn signal lamp
You can install a new lamp in the turn signal on Solaris yourself. The block is located on the car fender; for installation you will need a flat-head screwdriver and a 10mm wrench. Replacement is carried out in the following steps:
- Use a screwdriver to pry off the diffuser and pull out the block.
- Unplug the light bulb connector.
- Turn the socket counterclockwise.
- Pull out the electrical connector.
- Unclip the clip and pull out the light bulb.
- Replace the part with a similar one and reassemble the headlight in the reverse order.
The turn signal is considered one of the main elements of a car's lighting equipment, allowing for safe driving. For the absence of a lamp or an inoperative element, the driver faces a fine of 500 rubles.
Replacing rear lights (headlights) in Hyundai Solaris, photo and video instructions
Replacing the brake lamp Solaris hatchback The brake lamp is located in the lower part of the headlight.
Turn the amber lamp counterclockwise and remove the lamp from the socket. Install the new turn signal lamp in reverse order.
How to remove the taillight of a Hyundai Solaris?
We start disassembling the old taillight by removing the latch, pressing it a little to the side so that it comes out of the latch from below and lifting it up: The cartridges are pulled out easily, just turn them counterclockwise. We transfer everything to the new flashlight. We install the new headlight on the car body, pay attention to the photo below, there is a clip circled in red, first you need to put the headlight on it and then push it inside. We tighten and tighten the nuts.
Replacing rear lamps Solaris (hatchback)
Replacing rear lamps Hyundai Solaris
The rear left lamp uses a red PR21W single-filament fog lamp. The rear right lamp uses a W16W single-filament reversing lamp. Replacing the bulb is similar to replacing the bulb in a hatchback taillight.
To remove the rear light... ...press the lock of the wire block... ...and disconnect the block from the light connector.
Replacing the marker lamp
The headlight lamp in the Hyundai Solaris is located in the headlight unit in the front headlight and in the rear light. Due to the specific configuration and location of the unit, replacing dimensions requires skill and additional equipment.
The front headlight uses a W5W type lamp with a power of 5 W for the side lights. From the driver's side, access to the unit is open; you can replace the parking lamp in a few minutes. On the other hand, there is no open access; it is necessary to dismantle or move the fuse box. Replacing the size lamp is carried out in stages:
- Disconnect the terminals from the battery,
- Remove the plastic cover by turning it counterclockwise.
- Remove the cartridge with the size from the block.
- Remove the lamp from the socket by unclipping the latches.
- Install a new part and mount the unit in the reverse order.
Replacing the second size lamp, access to which is limited by the fuse block, is carried out in a similar way. The lamp is removed with a clamp if it is possible to leave the fuses in place. If access is extremely limited, you can dismantle the unit and carry out work.
Low and high beam lamps
Note
: – The following describes how to replace the low/high beam bulb in the right headlight. Replacing the lamp in the left headlight is performed in the same way. – To gain more convenient access to the low/high beam lamp in the left headlight unit, you can remove the cover of the relay and fuse mounting block in the engine compartment.
1. Determine the burnt out lamp. Then turn off the ignition and all electrical consumers.
2. Open the hood.
3. From the inside of the headlamp, remove the cover under which there is a low/high beam lamp and a side light lamp. To do this, turn it counterclockwise...
... and then we shoot.
4. Rocking from side to side, carefully disconnect the electrical connector from the low/high beam lamp.
Attention
: When disconnecting the electrical connector, do not pull on the wire harness, otherwise the wires may be damaged.
5. Press, release...
... and then fold the lamp retaining bracket aside.
6. Without twisting, remove the low/high beam lamp from the headlight housing. Dispose of the burnt-out lamp as waste.
7. Take a new lamp with similar characteristics (marking: H4) ...
Attention
: Do not touch the lamp bulb with your fingers, as the halogen lamp gets very hot and grease stains will cause the bulb to darken and, as a result, reduce the luminous flux. Handle the lamp by the bulb only with clean gloves or a clean cloth. If grease stains do appear on the lamp, remove them with alcohol.
... and insert it into the headlight housing like this...
... so that the recess on the lamp body is at the bottom.
8. Then secure the lamp with the fixing bracket in the reverse order...
... and connect the electrical connector to it all the way.
9. Reinstall the lamp cover and turn it clockwise until it stops.
Note
: After installation, make sure that the cover is securely fixed.
10. Close the hood.
How to remove a headlight on a Hyundai Solaris, photos and videos
How to remove the bumper and headlight of a Hyundai solaris
In most cases, the headlight requires repairs that cannot be done locally.
Place it on a soft cloth to avoid scratches. If the material was interesting or useful for you, publish it on your page on a social network: Also, before removing the headlight on a Hyundai Solaris, you need to partially dismantle the front bumper for...
This machine is ideal for use in urban environments.
I planned to install it the next day, I wanted to quickly see how they would look.
Small tuning of headlights on Solaris
By installing “eyelashes” made of durable plastic on the main optics of the car (additional tuning of the headlights without compromising the lighting qualities), you will emphasize the individuality and belonging to the category of female drivers. Solaris headlights - tinted with a special film. Using this tuning element, make sure that the headlight output complies with acceptable standards and safety regulations. Proper tinting does not interfere with the illumination of the roadway and serves as additional protection against small stones from oncoming cars. Theoretically, it helps to avoid blinding oncoming drivers with headlights.
LED “teardrops” are a recently emerged type of tuning for vehicle exterior lighting. LED strips are mounted in the corners of the headlights located closer to the radiator grille. They visually increase the boundaries of the optics, creating the illusion of a sparkling “tear”. Improve visibility in front of the car hood in the dark. LED strips are installed on Hyundai Solaris headlights inside or outside the lighting unit. Can be used as additional running lights.
Xenon headlights are installed on the car for better illumination in the dark. Bi-xenon optics must comply with accepted standards for the brightness of the luminous flux. The lighting characteristics can be improved within the technical capabilities of the vehicle recommended by the manufacturer. Good luck on the roads!
731
Replacing the headlight
Some car owners, when applying a protective film or while painting with tinting varnish, prefer to remove the front or rear lights of the Solaris. This allows you to carry out preparatory work as conveniently as possible and achieve the best result.
Removal procedure Before removing the headlight on a Solaris, disconnect the electrical connector that supplies power to the lamps. To do this, press the latch and pull the connector away from the headlight.
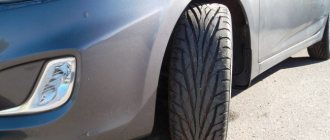
Next, turn the wheels right or left depending on which headlight you are removing. This will allow you to gain full access to the self-tapping bolt that connects the front bumper and fender.
How to Remove a Headlight on a Solaris
Hyundai Solaris how to remove a headlight (Hyundai Solaris 2013)
via YouTube Lens.
How to remove a headlight on a Solaris
A short video on how to remove the headlight on a Hyundai Solaris.
How to remove a Hyundai Solaris headlight
In this video we describe in detail how to remove the headlight on a Hyundai Solaris.
How to remove the headlight on a Hyundai Solaris 2.
Hyundai Solaris How to Remove the Front Bumper / Removing the Front Bumper Hyundai Solaris
Xiaomi 70Mai Dash Cam PRO New Top WiFi DVR – Xiaomi 70Mai +GPS – .
Headlight fogging. Disassembly and repair.
Foggy headlight of Hyundai Solaris. Disassembly. Search for the reason. Elimination of the cause and assembly.
How to remove the bumper on a Hyundai Solaris
We remove the front bumper for repairs.
How to remove the front bumper of a Hyundai Solaris
Step-by-step instructions and tips I'm on VKontakte.
Hyundai Solaris how to remove a headlight
Maybe it will help someone.
Is it possible to improve the light on Solaris? Remove the end cap from the headlight and look at the result!
Cooperation with TEST LAB: Second channel: Group.
How to remove the front bumper on a Hyundai Solaris
Easy bumper removal in a few minutes