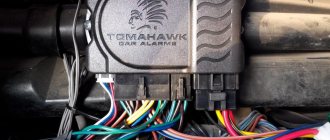
There are a lot of videos of the same type on YouTube on how to make footwell lights with your own hands, where the wires lead from the door limit switches or the ceiling lamp, but my laziness found a new and quick way to make footwell lights on a VAZ-2114. I may not be the discoverer of this method, but I have never seen anything like it anywhere. So, let's look at the contacts of BI BSK.
Contacts BI BSK VAZ 2114
In my car, the footwell lighting is implemented through an open door indicator, the signal of which comes to the BI BSK, so this method can be considered the fastest and simplest. Operating principle: when the driver's door is opened, the signal comes to pin 6, and when the other doors are opened, the signal comes to pin 7. If you look at the signal table (below), pins 6 and 7 are ground. To make the backlight quickly, you will have to “work around” the car electrician a little. We power the positive wire of our backlight from wherever it is convenient, even from the cigarette lighter, and connect the ground wire to pins 6 and 7 of the BI BSK chip. Everything is ready, all that remains is to power the LED strip to the connected wires. In the end, we spent about half a meter of wiring and saved a lot of time.
It is worth noting that in order for the footlights to work correctly, you will have to connect pins 6 and 7 to each other, this did not affect the operation of my car in any way, at least I personally did not notice any changes. You can also theoretically consider other conditions under which the foot lighting will work; if interested, read after the signal table.
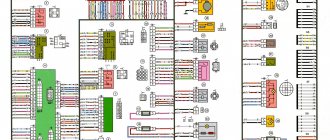
Signal table BI BSK VAZ 2114
Replacing the backlight
In analysis
To improve the quality of your dashboard lighting, it is advisable to install new LEDs in place of the old ones. They provide excellent illumination, consume minimal energy, and guarantee a high level of data reading.
- Buy a set of LED lamps, having previously calculated the number of devices needed for each sensor.
- After removing the block, install the resistors and lamps in specially designated places on the VAZ 2114 - in the sockets. To dismantle the cartridges, they are carefully unscrewed counterclockwise. New sockets are installed in their place and light bulbs are inserted. Respect the polarity and position the LED heads. They will have to be carefully ground off.
- Connect the power and check how the new backlight works.
- Reassemble step by step. Be sure to route the wiring to the board and carefully secure it to it. This way, the backlight components will not interfere with the reassembly process.
- Make sure the instrument panel arrows are positioned correctly. When trying to quickly complete a job, they often become deformed and bent.
- The backlight structure is fixed with screws.
- The power for the LEDs is connected to the power supply for the light bulbs, the arrows are put on and set to zero.
- Using the on-board computer, check the operation of each sensor and device. If the IDs are functioning correctly, return the instrument panel to its original condition. That is, assemble the entire assembly.
Loading …
Why the light in the cabin does not light (main reasons)
Car interior lighting is part of the electrical system, and therefore, in any case, it is worth looking for the problem in this part of the car. Of course, it is recommended to study, at least superficially, technical electrical diagrams in order to be at least a little up to date.
So, what do you need? A detailed diagram of the car's electrical components, a little ingenuity and a minimal set of tools. Let's look at places where the problem may be hiding:
- Bulb.
- Ceiling lamp.
- Fuse.
- Wiring.
We fix the lights and get acquainted with electrics
Since the main fault locations have been identified, you can safely move directly to methods for solving the problem. It is worth noting that with automotive electrics, not everything is so simple, but since this is a VAZ-2114, everything can be said very clearly here. Let's move on to methods for solving the problem.
Bulb
The first thing you need to check is the lighting lamp, since its burnout can cause the light to go out in the car interior.
In order to get it out you will have to remove the lamp cover. After this, you need to check whether there is a filament, and insert the lamp into the control device or simply connect it to the battery. If the lamp lights up, then it is not the cause of the malfunction.
Ceiling lamp
More than once, the cause of the malfunction was the lamp itself, where the contact group simply melted and closed, which caused a burnout or a blown fuse.
To diagnose it, you will need to remove it from the car and visually inspect it. It is also recommended to ring the contacts going from the lamp to the wiring.
Fuse and relay for VAZ-2114
The next reason is a blown interior lighting fuse. This part can burn out due to a short circuit, which for various reasons occurs in the on-board circuit. Often the short circuit is caused by a malfunction of the lampshade.
Wiring
Electrical wiring is every car enthusiast's nightmare. For some, everything is clear, but for others, it’s a “dark forest.” So, during diagnostic operations, it is necessary to ring the wires going from the lampshade to the power supply or button.
Car modifications 2114
VAZ-21140 . Modification with an 8-valve injection engine VAZ-2111, 1.5 liters and 77 horsepower. Serial production from 2003 to 2007
VAZ-21144 . Modification with an 8-valve VAZ-21114 engine, 1.6 liters and 81.6 horsepower. Years of serial production: 2007-2013.
VAZ-211440 . Another modification released in 2007, it was equipped with a VAZ-11183 engine with a volume of 1.6 liters and a power of 82 horsepower. The car was discontinued in 2013.
VAZ-211440-24 . Released in 2009, a modification with an injection 16-valve VAZ-21124 engine with a volume of 1.6 liters and a power of 89.1 horsepower. Discontinued in 2013.
VAZ-211440-26 . Modification with a 16-valve injection engine VAZ-21126, which complies with the Euro-3 environmental standard, with a volume of 1.6 liters and a power of 98 hp. The car was produced from 2010 to 2013.
Backlight doesn't work
In cases where the light in the interior of a VAZ 2114 does not turn on, drivers who do not understand the electrical equipment of the car and its repair immediately begin to go to the Internet and try to find some advice or a solution to the problem there. But, no matter how strange it may be, you can fix the interior lighting of a VAZ 2114 yourself, you only need a minimum of tools for this and a detailed action plan, which we will analyze today.
Initial check
It is better to start repairs by checking the functionality of a specific lamp - perhaps the light bulb has simply burned out and will simply need to be replaced. If the light in the interior of the VAZ 2114 does not go out or, on the contrary, does not turn on when the doors are opened, then you need to check the door switches for functionality, you need to see if the contacts are in order, if they have oxidized, then it is better to clean them and wipe them with alcohol.
There are also certain nuances if there are LEDs. Typically, drivers prefer to replace conventional lamps with LEDs as quickly as possible, this is due to the following factors:
- Cost-effective;
- Longer service life;
- Light brightness is much higher at low cost.
But when operating such lamps, it is necessary that the electrical circuit be fully taken into account, since for LED lamps it is important that the polarity be observed. So you need to check the plus and minus and if so, then turn the light bulb the other way and see if it lights up after that
In any case, it is better to remake the lampshade of the individual lighting of the VAZ 2114 for LED lamps so that it produces more brightness
So you need to check the plus and minus, and if so, turn the light bulb the other way and see if it lights up after that. In any case, it is better to convert the lampshade of the individual lighting of the VAZ 2114 to LED lamps so that it produces more brightness.
Also, on all light bulbs you need to check the voltage at the contacts and find out whether current is flowing there. If it is not there, then you will have to look for a broken wire somewhere in the wiring. This will require disassembling certain parts of the car, but there is no getting around it - if the interior lighting of the VAZ 2114 no longer works, then it needs to be repaired
The greatest attention still needs to be paid to the limit switches; often the problem with breaking the circuit lies precisely in them; a wire can easily break there, and you won’t even notice it
Interior of the car
The interior lighting is worth a separate discussion. The interior of the VAZ 2114 is illuminated using the following devices:
- Interior lighting;
- Individual light lamps;
- Instrument lighting on the control panel;
- Light in the glove compartment, cigarette lighter and separate bulbs for some buttons and switches.
The general light in the VAZ 2114 is located in the car interior and illuminates it. The engineers decided that it would be optimal to place it above the heads of the driver and front passenger, so it is simply built into the headliner and bolted there. Usually this lamp lights up when one of the doors is open, and goes out when it is closed. This is familiar to us from the classics, where a similar system was organized with light bulbs on the door pillars.
Interior lighting
Here the lamp lights up when the VAZ 2114 door limit switch, which stands on the racks and is pressed by the door itself, is triggered. There are also separate buttons for the passenger and driver to turn on this lamp if desired.
Solution
The stores offer several options for light sources for replacing lamps in the instrument cluster:
- traditional incandescent lamps,
- LED in a plastic socket,
- SMD LED is a more expensive and reliable option, a super-bright diode.
The choice will always depend on financial capabilities and lighting preferences.
The number of backlight and control lamps is up to 19 pieces. It varies slightly depending on the design of the instrument cluster and the modification of the vehicle. Many car owners choose LEDs due to lower energy consumption and longer service life. This backlight is brighter and gives an interesting bluish color instead of the standard green. But due to the design of the diode, the brightness control of the instrument illumination will not work, always turning it on at full power. On a long road trip at night, this can be distracting and irritating to the eyes. But in any case, the choice of light sources is yours.
What kind of light bulbs are there?
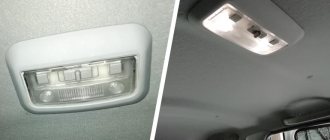
In the VAZ 2114 car, two lamps are responsible for interior lighting. One of them, also called the navigation one, is responsible for individual lighting and is located in the front part of the ceiling between the sun visors.
Individual interior lighting lamp for VAZ 2114
It uses an A12-4-1 (T4W) lamp with a power of 4 W.
Individual lighting lamp
The general interior lighting of the VAZ 2114 is also located on the ceiling, but a little deeper: between the pillars to illuminate the entire interior.
Lamp for general interior lighting of VAZ 2114
The manufacturer installed a 5 W AC12-5-1 (C5W) light bulb in it.
Lamp used in a general lighting lamp
Both bulbs are ordinary incandescent.
Checking and replacing lamps
Now it’s time to arm yourself with a tester (the simplest Chinese one will do) and start ringing the light bulbs. To do this, put the device in resistance measurement mode (for LED light bulbs, the tester must be put in diode testing mode), and the lamps are removed one by one and dialed.
A tester is necessary for the reason that some light bulbs do not always light up and it is visually impossible to determine their serviceability. We won’t drain brake fluid or fuel from a VAZ to check the low level indicators of one or the other. If it is reliably known which light bulbs are working (for example, the illumination of dial gauges is normal), then these lamps can be left alone.
Nevertheless, I would recommend changing them all, especially if the VAZ modification has incandescent light bulbs (and this is almost always the case). Since it is unknown how long the old ones will last, and disassembling the instrument panel again, say, in a week is irrational.
After installing the new lamps, we connect the shield, without installing it in place yet, and check what can be easily checked visually: turn on the ignition, handbrake, turn indicators, etc. If everything is in order, then the dashboard can be assembled.
Let's get started
First of all, we remove the decorative trim of the radio (since the dashboard and radio are connected to each other, you will have to disturb the music system too), which is held on by fasteners; here it is better to use a screwdriver, threading it under the trim.
The main condition of work is caution. You need to start detaching the cover from the bottom edge
When the bottom edge comes off, you need to pull it towards you a little.
Now detach the top edge. Further:
- Disconnect the wire directed to the cigarette lighter.
- In the same way as we removed the cover from the radio, we remove it from the dashboard. Above the left and right edges we find two self-tapping screws. They need to be unscrewed. We unscrew the screws located at the top and bottom.
- We remove the trim with a little effort (since it is also held on by fasteners, so the decorative plate will have to be rocked a little).
- We disconnect all the wires: from the alarm system, from the clock, from the headlights and other things.
- We remove the control panel itself, for which we unscrew the four screws on which it is held. In order not to damage the wires, it would be better to disconnect them on the one hand.
- Now the most important thing. We remove the sockets of the light bulbs that have stopped burning. To remove the cartridges, you need to turn them counterclockwise with a gentle movement. We replace the defective lamps with new ones, wrap them and install the entire structure in the reverse order of disassembly.
We fix the lights and get acquainted with electrics
Since the main fault locations have been identified, you can safely move directly to methods for solving the problem. It is worth noting that with automotive electrics, not everything is so simple, but since this is a VAZ-2114, everything can be said very clearly here. Let's move on to methods for solving the problem.
Bulb
The first thing that needs to be checked is the lighting lamp, since its burnout can cause the light to go out in the car interior.
In order to get it out you will have to remove the lamp cover. After this, you need to check whether there is a filament, and insert the lamp into the control device or simply connect it to the battery. If the lamp lights up, then it is not the cause of the malfunction.
Ceiling lamp
More than once, the cause of the malfunction was the lamp itself, where the contact group simply melted and closed, which caused a burnout or a blown fuse.
To diagnose it, you will need to remove it from the car and visually inspect it. It is also recommended to ring the contacts going from the lamp to the wiring.
Fuse and relay for VAZ-2114
Replacing the fuse can solve the problem.
The next cause is a blown interior lighting fuse. This part can burn out due to a short circuit, which for various reasons occurs in the on-board circuit. Often the short circuit is caused by a malfunction of the lampshade.
The interior lighting relay is marked with an arrow. Often the contacts burn out and prevent the light from turning on.
Wiring
Broken wiring may cause a malfunction
Electrical wiring is every car enthusiast's nightmare. For some, everything is clear, but for others, it’s a “dark forest.” So, during diagnostic operations, it is necessary to ring the wires going from the lampshade to the power supply or button.
conclusions
There are few reasons for the malfunction of the interior light in the VAZ-2114, and every novice car enthusiast will be able to determine the cause of the malfunction. It is worth remembering that if a car enthusiast is not sure that he can deal with the problem, then it is best to contact a car service center.
Didn't find the information you are looking for? on our forum.
We recommend reading:
Adjusting valves on VAZ 2101
Knock in the rear suspension, when driving over uneven surfaces, VAZ 2110
VAZ 2114 how to prepare for winter
VAZ 2106 revs drop when warming up
VAZ 2110 stalls while driving, 8-valve injector, possible causes and solutions
VAZ 2110 how to change a frog on a car, diagnostics and replacement
How to make a signal on a VAZ 2107
Which clutch is better to put on a VAZ 2115
Useful video
You can glean additional interesting information from the video below:
The electrical equipment system of the VAZ 2114 car includes a whole range of different lighting devices.
It's good when it's light in the cabin
Conventionally, they can be divided into the following groups:
- Headlight;
- Tail lights;
- Lighting in the cabin.
To make it easier for the driver to navigate the road at night, halogen low and high beam lamps are installed in front of the car in the headlight unit. Turn signal lamps are also installed in one unit with them, so that when repairing the car the entire unit can be removed. At the rear there is one block on each side, which includes brake lights, turn lamps and reverse lamps.
Installation of new equipment
Now let’s figure out how to install an LED lamp on a car; for this we will definitely need a VAZ 2114 interior lighting circuit. This is done in the following sequence:
- Remove the lampshade;
- Unscrew the base of the case;
- We connect the new lampshade;
- Screw the LED lamp into place.
First we need to remove the original lampshade and disconnect the wires from it, all the contacts, we also need to remove the diffuser. The housing is screwed to the roof sheathing with four self-tapping screws; they are simply unscrewed and the housing is removed. Next, you need to take a new case and connect all the plugs in accordance with the diagram to the contacts that go to the battery. The new housing is screwed in exactly the same way onto the same four self-tapping screws, and the lens is snapped into place.
In this simple way you can update your car interior and make the interior lighting of the VAZ 2114 more comfortable and convenient.
In theory
1. Turn on the footwell lights when the key is inserted into the ignition.
According to the signal table, when the key is inserted into the ignition switch, a voltage of 12V appears on the wire of pin 9. Accordingly, we toss the wire to pin 9 of the chip and get a positive wire for illumination, and we toss the ground wire where it is convenient. Done, now when we insert the key into the ignition, our foot lights come on. They pulled out the key and the light went out.
2. When the lamp is turned on, the foot lighting turns on.
According to the signal table, when the lamp is on, ground appears on pin 8 of the chip.
Accordingly, we connect the ground wire to pin 8, and the positive one is convenient. Ready! When the interior light is turned on, the footwell lights come on. Let's give a round of applause to those people who dismantled the plastic and the ceiling to make the lighting for the feet directly from the lampshade.
3. Foot lighting when the ignition is on.
According to the signal table, 12V appears on pin 13 when the ignition is on. Accordingly, we connect the positive wire for illuminating the legs to pin 13, and the ground is convenient. Everything is working.
Step-by-step instructions for replacing light bulbs in the dashboard of a VAZ-2114
- We release the decorative cover of the front panel. For this we need screwdrivers: a short Phillips and a flathead one. Lower the steering column to the lower position using the height adjustment lever to keep it out of the way. The photo shows the mounting locations for the casing:
- There are four screws on the bottom of the visor and above the steering column. Unscrew them with a short Phillips screwdriver.
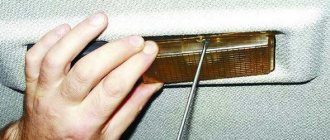
- Using a flathead screwdriver, pry off the decorative cap to the right of the row of switches. There is another fastening screw under it.
- Also, remove the handles from the heater switch and damper control sliders by pulling them towards you.
- If you have a car radio, you will also have to remove it. Unfortunately, you cannot do without complete dismantling. Arrows indicate locations for removal
- Pull the front panel cover towards you. He must move. You don’t have to remove it completely - there will be enough space to access the fastening screws on the sides of the instrument cluster. Carry out the actions carefully
- Unscrew the fastening screws with a long screwdriver. The combination will be released and you can tilt it towards yourself. Pull out the two blocks with wires. Don’t be afraid to mix them up - there is a color marking, and the asymmetrical shape of the connector will prevent you from connecting it incorrectly. The arrow indicates the location of the cartridge handle
- On the back cover of the instrument cluster there are cartridge handles. Arm yourself with small pliers. This will make it easier to unscrew them. To release the cartridge, half a turn counterclockwise is enough. You can safely take out all the cartridges - they are the same. Next, you can check the lamps with a tester and replace the burnt ones, or replace them all with LEDs at once. Try to ensure that they fit tightly in the cartridge, otherwise the contact will be unreliable.
- We reassemble in reverse order. We insert the cartridges into the seats so that the antennae fall into the grooves, carefully turn them with pliers until they stop. We connect both blocks to the connectors of the instrument cluster.
- Let's check if all the lamps are working:
- raise the handbrake and turn on the ignition: so let’s check the handbrake, generator, oil pressure and check lamps,
- turn on the hazard warning lights - check the warning lamp and direction indicator lamps,
- pull the headlight switch lever towards you - temporarily turn on the high beams, check the warning lamp,
- turn on the dimensions - see if the scales are evenly illuminated, and if the warning lamp, if any, is on.
If everything works correctly, we fix the instrument cluster and the front panel casing, and replace the heater switch handles and damper controls.
Check the brightness and functionality of all devices
Congratulations, now the instrument lighting and warning lights are working properly, and you will always be aware of what is happening with the car. The overall aesthetics of the front panel will also improve - the evenly lit front panel looks beautiful.
Tuning the ceiling
Such a pleasant and exciting thing for a car enthusiast as do-it-yourself tuning is also possible with a courtesy lamp. Instead of the usual one, a lampshade with a programmable LED lamp is installed. It has advanced features:
- selection of three brightness modes, this selection is made by switching the switch at intervals of one second, the last switching on is remembered;
- shutdown delay 6-8 seconds with smooth extinguishing of the lamp;
- automatic shutdown when the door is not closed or not tightly closed after 30 minutes.
The price for such a lamp is only about five hundred rubles, so the choice is obvious. The procedure for installing and connecting a lamp with a programmable LED lamp:
- the plastic diffuser of the standard lamp is removed;
- the wires are disconnected from the contacts of this device;
- the four self-tapping screws holding the light housing on the body ceiling are turned out and the body of the old device is removed;
- the LED illuminator is released from the plastic transparent diffuser cover;
- the electrical wiring is connected to the plugs of the LED illuminator in accordance with the diagram;
- the body of the new lamp is attached to the ceiling of the body in a regular place with self-tapping screws;
- The plastic diffuser is fixed on the body.
It should be noted that such a lighting device produces brighter light, which in the dark is a good help for all people who are in the car.
Lighting in the VAZ-2115 is one of the most important components of comfortable movement by car at night. If the interior light does not work, the driver faces a lot of inconvenience.
The light emitted by street lamps will not help you find the desired item in the glove compartment, therefore, it is best for the driver to take care in advance that all the light bulbs and other components of the car’s electrical equipment work stably and reliably. But what to do in a situation if the lighting fixtures in the interior of a VAZ-2115 for some reason refuse to fulfill their duties?
Lada 2115 2006, engine Gasoline 1.5 liter., 78 hp, Front drive, Manual — electronics
Only registered users can participate in discussions.
Greetings to all ! Tell me too. The light in the cabin, the fisheye and the trunk light do not work. The tidy is all in order. The door switches are in good working order. Pres and relays are intact. Tell me where to dig? Where to start searching? Auto VAZ 2115
move the chip as described below, it won’t help, remove the mounting block... oxidation.
My friend’s interior lamps did not work and, accordingly, the polite lighting did not work. We dug through everything. The reason was in the fuse box. When it was removed, everything was oxidized to the point of horror. We cleaned the block and everything worked.
I’ll try to take pictures, without light it’s not very good
Since the front is intact and the connector is in place, then most likely the track in the MB has burned out
move the sh9 connector in the mounting block under the panel, everything else works, the tidy for example?
Yes, the whole panel, Bordacek, the light in the trunk, it all works
The light in the trunk is powered by the dimensions, that's why it's on
Assembly
When you have made sure that all the light bulbs on the VAZ 2114 are working correctly, you can begin assembling the panel. To do this, all the backlight wires are brought out onto the board and carefully attached using a soldering iron. They should also be attached to the board in a certain sequence, otherwise the backlight may not work. If the wires are too long, they should be shortened so that they do not bend and do not fall into the grooves of the latches between the dashboard and the dashboard during installation. Otherwise, the wires will easily get damaged.
When connecting the pointer drive, also make sure that they are not deformed. Now, the instrument panel can be inserted back into the grooves and fixed with screws. The indicator arrows must be set with the ignition off, at the zero mark. Next, the last check: turn the ignition key, and if everything works, then the replacement procedure was completed correctly, and the new backlight will please the eye. Well, if something doesn’t work, then most likely you damaged the wires when installing the panel on the dashboard. In this case, disassemble everything again and check the integrity of the wires.
Where does car modernization begin?
The main stages of modernization here are as follows:
- Seat replacement.
- Re-upholstery of doors and roof with new upholstery.
- Installation of a more powerful lighting source.
- Change of dashboard.
- Modernization of small parts.
It’s easiest to implement the last point, because here everything depends on the cost of accessories. So, you can easily buy covers for the steering wheel and gear knob, new sun visors, armrests and floor mats. But the new upholstery will make more sense. It will not only add comfort to the VAZ 2114 car, but will also serve as thermal insulation.
Dashboard lamps
The dashboard provides the driver with a lot of useful information that allows him to monitor the condition of the car, the driving process, diagnose breakdowns in a timely manner and correct them. So, the panel light comes on for the following reasons:
- The battery is not charging.
- For one reason or another, the handbrake is stuck.
- Not enough fuel in the tank.
- The oil pressure has decreased (which indicates the need to urgently stop the engine to avoid more serious consequences).
- Excess water in the filter. To prevent water from entering the pump, which could lead to damage, you need to drain excess water from the filter.
- The fuel system is malfunctioning.
- There was a failure in the propulsion system and much more.
As you can see, the panel lamps allow you to determine what is wrong in the car; if the lamps themselves fail, then you can miss a very important breakdown, which can even lead to an accident
This is why it is so important not to delay replacement (lamps cannot be repaired)
Today, the car market offers a wide range of lamps for the control panel, ranging from the standard version, which is cheaper but also has average characteristics, to modernized versions that give the panel, and therefore the entire atmosphere of the car, a different, more expressive atmosphere.
Professionals also advise replacing standard lamps with LEDs, which largely decorate the panel. So, we list several of the currently most popular options suitable for the VAZ 2114.
- LED lamps Sho-Me SM-T5 (blue, white and red). Country of origin: Korea, price: 80 rubles. for a couple.
- High-brightness SMD LED module – 20 rubles.
- LED Sho-me SM-T5-cap-super (white) – 50 rub.
- Halogen lamps from Osram and Philips cost approximately 40-80 rubles apiece.
As you can see, prices for lamps are not high. It is worth noting that replacement takes very little time, which we will talk about later.
Do-it-yourself overexposure of buttons on a VAZ 2114
Replacing the standard button backlighting on a VAZ 2114 will require the preparation of certain tools, materials, as well as some time. To work you will need the following list of necessary things:
- soldering iron with a thin tip;
- solder;
- tweezers;
- small knife or flat screwdriver;
- LED elements of the desired color.
Which LEDs and in what quantities should I buy?
The buttons installed on the dashboard of the model in question come in old and new styles. In the first case, small light bulbs or LEDs are used as a backlight element, and in the second, boards with sealed SMD LEDs are used.
Bulbs, LEDs and SMD elements can be used as backlighting elements in buttons.
Each button is equipped with two LED elements: one is responsible for illuminating the button itself, and the second indicates the activation of a particular function. The exception is the low beam headlight button - it does not have a power indicator LED. Therefore, if you plan to replace the LEDs on all five buttons, you will need to purchase 9 backlight elements. The type of the latter can be determined only after disassembling the button. The old model requires 12 V LEDs with a diameter of 3 mm. The new sample uses elements marked 0805. When using standard LEDs, it is recommended to additionally install a resistor with a resistance of 500 Ohms to 1 kOhm along the power circuit (directly in the button), which will prevent the element from burning out.
To prevent the LED from burning out, it is recommended to install a resistor in series
How to remove buttons
To remove the buttons on the front console, do the following:
- Remove the negative terminal from the battery.
- We take out the plug of the on-board computer or the BC itself, if it is installed. To do this, just hook it with your finger and pull it towards you.
- We put our hand into the hole formed and feel the back of the buttons.
- Carefully press the buttons out.
- We remove the blocks with wires.
- Having completed the necessary actions with the buttons, install them in the reverse order.
Replacing the backlight of the front panel buttons
Since replacing LEDs on old and new button versions is somewhat different, each process should be considered separately.
Overexposure of old-style buttons
After removing the buttons from the instrument panel, perform the following sequence of actions:
- Pull the top of the button and remove the lid that is pressed.
- Insert a flathead screwdriver into the button and remove the inner part. You need to remove it carefully so as not to lose the springs.
- Use a multimeter to determine the polarity of the LEDs.
- We bend the leads and dismantle the LED element.
- We bend the leads of the new LEDs and insert them into the button body, observing the polarity, after which we shorten the leads with side cutters to the required length.
- Reassemble the button in reverse order.
Overexposure of new buttons
On modern buttons we change the LEDs this way:
- We disassemble the button, as in the previous paragraph.
- After opening we find a board with installed LEDs. We determine the polarity of the elements and solder them with a soldering iron with a thin tip.
- In their place, we carefully install new SMD LEDs of the desired glow color.
- We reassemble the button.
Video: overexposure of VAZ 2114 buttons
Modernization of the buttons for turning on the headlights and low beam
The buttons for turning on the headlights and low beam headlights are made as a single element. The absence of an LED indicating that the headlights are on low beam causes inconvenience to many motorists. This is due to the fact that it is often unclear whether the headlights work or not. To solve this problem, they resort to modernizing the button. In addition to the tools listed above, you will need a similar button from which the necessary parts will be removed. The finalization process itself consists of the following steps:
- Remove the button from the panel.
- Using a minus screwdriver, we pry up the keys, take them out and see that the LED is initially missing.
- We disassemble the button housing by pressing on the latches with a screwdriver. At this stage the buttons should be in the pressed position.
- We remove a couple of pins and contacts from the spare button, and then install them in the body of the element being modified.
- We take out the board with two LEDs from the spare button and replace it with the board with one LED element.
- Using a soldering iron, we connect the board to the new terminals.
- To supply power to the new contacts, we connect the contacts with copper wire according to the photo.
- Using a sharp knife or screwdriver, make a hole in the button cover.
- We assemble the part in the reverse order and install it in place.
In what ways can you achieve original license plate lighting?
Recently, there have been frequent cases when LEDs are inserted into the ceiling instead of conventional lamps. Such lighting is bright and attractive, making the car original and interesting.
It is important that the lighting has a color acceptable by GOST standards and that the numbers are readable
It can be installed on a VAZ 2114 car in two ways.
First way
Replace standard incandescent lamps with LED lamps (they have the same contacts as in factory products).
It is also important to choose the right light bulbs; too bright ones will quickly fail and take up too much energy. It’s also not worth installing very expensive products, because the backlight will become very noticeable, distracting drivers from the road process
Low quality light bulbs can have various defects and quickly fail. So we buy light bulbs from trusted representatives and use them economically.
Second way
Install LED strip. To do this, you will need resistors - 3 pieces and the same number of LED strips. Their colors are very diverse, but it is best to choose white or yellow tones.
If a motorist, in spite of everything, wants to replace the standard backlight with LED, the following steps must be followed:
- Solder a resistor to the positive end of the LED segments.
- Attach small wires to its end and the negative side.
- The result is a design with two contacts, which are powered by wires from the standard backlight.
To give the tape an original design, you need to take a piece of plexiglass and glue the strip onto it with silicone sealant. Next, we connect the wires of the tape to the contacts of the factory backlight lamps and make insulation.
At the next stage, we prepare the surface for installing the product:
- remove the lampshades;
- degrease the fastening side with solvent;
- after drying, apply sealant and glue the LED strip;
- We seal the tape along the edges and leave it until completely dry.
We check the operation of the design in action. If everything is functioning correctly, the job has been done effectively. In exactly the same way, you can illuminate the license plate around the edges, but this can lead to problems with the traffic police. Let's remember this!
LED lighting looks attractive both during the day and at night, making the car bright and original.
Order of Operations
Since the dashboard is interconnected with the music center, you will have to touch this system as well:
Remove the radio cover using a screwdriver, carefully threading the tool under the socket. First we pull it out from the bottom, then the top part of the lining. The electrical wires leading to the cigarette lighter must be disconnected. Now we find the screws on the dashboard and unscrew them. Remove the handles from the damper sliders and the heater switch by pulling them towards you. Now you need to remove the dashboard panel, it is held not only by screws, but also by other fasteners, so first you will have to loosen it a little. Now you need to disconnect the wiring from the panel: from the clock, from the alarm system, from the headlights and other devices. Note! Don't worry about wire tangles
There are color markings, and the shapes of the connectors will prevent incorrect connections.
Pull the panel towards you, but not completely. It is impossible to remove it completely, but it moves enough to provide access to the fasteners. We find 4 more screws on the control panel and unscrew them. On the back surface we find cartridges. It's easier to unscrew them with small pliers. Release the cartridge by turning it counterclockwise. Half a turn is enough. We do the same with the rest of the cartridges - they are all designed the same. We check the lamps with a tester and determine which ones are faulty. Or we change the entire combination, for example, to LEDs. We screw in the light bulbs tightly, remembering that they operate under conditions of vibration and shaking. We install all the cartridges in place. We use pliers again. Turn half clockwise until it stops. Now we connect the panel to the instrument connectors and check the functionality of all the light bulbs: from the ignition to the hazard warning lights. If everything works correctly, we fix the panel and perform the installation in the reverse order, before installing the radio cover.
For the procedure for replacing light bulbs in the dashboard of VAZ 2113, 2114 and 2115, watch this video.
Operating procedure
Replacing the backlight on a VAZ 2114 begins with purchasing a set of LED lamps in the color you need. On the instrument panel, there are several sensors and indicators that require a certain number of diodes to ensure their normal visibility for the driver, especially at night. Therefore, before buying a set of lamps, calculate the required number of LEDs for each device. For example, a brake sensor requires 3 bulbs.
Location of light bulbs on the dash
It is advisable to buy with a reserve, at least 5 - 10 lamps more. Since, during installation, you can damage one of the circuits and the LEDs will not work. This often happens to those who are doing this work for the first time.
You need to start work by removing the instrument panel, as well as turning off the resistance. Next, carefully remove the old backlight bulbs from the factory sockets. On the reverse side of the VAZ 2114 panel, there are special sockets designed for installing LED backlight bulbs.
After the old backlight is removed, carefully grind off the heads of the LED lamps to the required size. If this is the first time this work is being done, then you will most likely need spare diodes. Next, when the heads are prepared, they need to be installed on the instrument panel. Replacement of light bulbs must be carried out strictly according to the same polarity as in the standard version.
After the diodes are in place, they need to be secured. Do not under any circumstances use screws for this. Scotch tape is also not suitable for this type of thing. When choosing a fastening element, you need to assume that it will heat up a little. Silicone glue is ideal for this. It will not damage the surface of the panel, thanks to its soft consistency, and will securely secure the light bulbs in the sockets.
Now, you need to check the quality of the work done. To do this, without putting the panel in place, turn on the ignition and look at the result. If everything works as it should, then the replacement was made correctly. If there are any inconsistencies, then you most likely have violated the polarity of connecting the backlight bulbs on the VAZ 2114. To fix the problem, you will need to find the connection diagram and double-check whether all the bulbs are in their places. If, after turning on the ignition, the backlight does not light up at all, then you need to check the integrity of the wires. The wires installed on diode lamps are quite thin and can easily break under the insulation or even break completely. So, be careful when handling them.
Let's summarize
So, any car owner can replace the light bulbs in the dashboard if he wants to do something with his own hands.
The procedure takes about half an hour. While a trip to a car service center and talk about replacing the entire dashboard, which auto electricians will certainly offer, performing the service itself will take the driver much more time and effort. Welcome! The light bulbs in the instrument panel play an integral part; when it is dark in the car, the buttons should be illuminated at least somehow, and if the buttons are not backlit, then firstly it will not be very convenient in the dark, since the buttons simply will not be visible even in -secondly, the appearance of the panel will be more modest, you will agree that when the buttons light up, the panel looks much more interesting, but besides the buttons, there are other elements in the panel that are also illuminated, one of the most important such elements is the instrument cluster, there are also light bulbs inside it are present, thanks to them the entire instrument cluster is illuminated, all the indicators in it, you can see all this in more detail in the photo below, let's move on, all lamps have the ability to burn out and therefore it is not uncommon for button lamps or lamps that are in combinations are installed, after that at night the panel no longer looks as beautiful as it should, and if the lamps in the instrument cluster fail, such as the oil pressure lamp, for example, then in this case you will generally need to sound the alarm, because when not such essential panel indicators are working, operating the car is simply dangerous, and this is easy to understand, if we talk specifically about the oil pressure indicator, then it should light up when the key is turned to the start position and when starting the engine it turns off, if it does not turn on at all, then either the sensor is faulty, or the lamp itself is faulty, but as a rule, the lamp for such important indicators rarely fails, because they burn for a very short time.
Note! In this article, we will analyze all the lamps that are in the panel and explain how to replace them, for this you will need: A screwdriver, new lamps and time with patience, because such work is not done in two minutes (If we are talking about the instrument cluster), and much longer, since in this case the floor of the torpedo will still have to be disassembled; by the way, you may also need thin pliers, because in the instrument cluster there are several sockets with lamps, which are very difficult to reach (They are in the depths) and if your fingers are large, then There is no way you can remove the cartridge except pliers!
Where are the light bulbs located in the instrument panel? In cars of the Samara 2 family, there are quite a few light bulbs in the dashboard, but although in cars such as the VAZ 2110, Priors, and so on, there are no less of them, you already understand everything about the buttons and the instrument cluster, but in addition to these elements, light bulbs are still present in cigarette lighters and stoves, all these light bulbs can be found on the reverse side, for example, to find the stove lamp, you will need to remove the plastic antennae that are on the levers, then pry off the plastic itself and completely remove it from the dashboard, thereby you will get to the stove lamp , the situation is similar with the cigarette lighter, the lamp with the socket is in the back of it, but you won’t be able to get it, so to change the lamp, you will need to remove the side trim on the driver’s side and there you can find both the cigarette lighter socket and the lamp and replace them , we will talk about this in more detail in this article (It will be a little lower).
Repairing light in VAZ-2115
The first step is to make sure the light bulbs are working. Often the driver goes into the real jungle, looking for a breakdown when it is on the very surface. Using a screwdriver, unscrew the fastening elements of the lamp cover and remove the light bulb.
You need to make sure that there is a filament, or simply connect the lighting element to the battery. If the light comes on, you should proceed to the next stage of searching for the problem.
Very often, in cars of the VAZ family there is no light due to a breakdown of the lamp itself. There are often cases when the contacts inside the element melted, resulting in a short circuit. The lampshade can be easily removed using a screwdriver. It is possible to check its functionality by ringing the contacts. It is also recommended to conduct a thorough visual diagnosis, which very often provides answers to all the driver’s questions.
The consequence of a short circuit is the breakdown of the relay or fuse. It is enough to replace failed elements with new ones, after which the light in the VAZ-2115 interior will light up again. Breakdowns that occur in a car's electrical wiring are perhaps the most unpleasant and frightening malfunction for drivers. Not many people have the skill and experience to operate this car system. Therefore, if the reason for the lack of light lies precisely in the wiring, it is best to leave your “iron horse” in the experienced hands of an electrician. The difficulty in handling wiring is due to the fact that diagnostic operations involve ringing the wires from the power supply to the lamp or button.
- autovaz-2114.ru
- www.drive2.ru
- nadomkrat.ru
- avtooverview.ru
Lamp lamps for VAZ car interior lighting
Application on cars of the VAZ-2170, 2171, 2172 family and their modifications.
Application on cars of the VAZ-2170, 2171, 2172 Lada Priora, 2190, 2191 Lada Granta family and their models..
Application on cars of the VAZ-2102, 2104, 2110, 2111, 2112, 2113, 2114, 2115 Lada Samara 2..
Application on cars of the Daewoo Lanos family and their modifications. It is an analogue of 96236130.
Application on cars of the Daewoo Lanos family and their modifications.
Application on cars of the Daewoo Lanos family and their modifications. It is an analogue of 96236130.
Application on cars of the VAZ-1117, 1118, 1119 Lada Kalina, 2190, 2191 Lada Granta family and their modifications..
Application on cars of the VAZ-2104, 2105, 2107 family and their modifications.
Application on cars of the VAZ-2101, 2102, 2103, 2104, 2105, 2106, 2107, 2121 Niva, 21213, ..
Application on cars of the VAZ-2108, 2109, 21099 Lada Samara, 2113, 2114, 2115 Lada Samara family..
Application on cars of the VAZ-2108, 2109, 21099 Lada Samara, 2113, 2114, 2115 Lada Samara family..
Application on cars of the VAZ-2170, 2171, 2172 Lada Priora family and their modifications.
Application on cars of the VAZ-1117, 1118, 1119 Lada Kalina, 2190, 2191 Lada Granta family and their models..
Application on cars of the VAZ-2170, 2171, 2172 Lada Priora family and their modifications.
Application on cars of the VAZ-2170, 2171, 2172, Lada Priora family and their modifications.
Application on cars of the ZAZ-1102, 1103, 1104 Tavria, Slavuta family and their modifications.
Application on cars of the VAZ-2108, 2109, 21099 Lada Samara, 2113, 2114, 2115 Lada Samara family..
Application on cars of the VAZ-2170, 2171, 2172 Lada Priora, 2190, 2191 Lada Granta, 2192, ..
Application on cars of the VAZ-2170, 2171, 2172 Lada Priora, 2190, 2191 Lada Granta, 2192, ..
Application on cars of the VAZ-2170, 2171, 2172 Lada Priora, 2190, 2191 Lada Granta, 2192, ..
Buy lamps for VAZ cars
Cars are different. Some cars are one hundred percent equipped and they have good lamps for VAZ cars, others have light, but not as good as we would like, and still others are completely in trouble. Light benefits everyone to varying degrees. It depends on the time of day, duration of the trip and the purpose of using the car. If you are a taxi driver, then a lamp for a VAZ car may be useful to a greater extent only because of picky customers. Some are afraid to drive without light, some are afraid of you without light, and others are generally used to reading on the road. You can't please your customers! In general, you can’t help but think that it’s still worth buying lampshades for car lighting.
Select lampshades for VAZ cars
And you yourself, I think, have had occasion to be annoyed by the fact that it is difficult to find and see something in the cabin in the dark. And if you add to this insufficiently good eyesight... The cost of saving on your own health will be higher than for lampshades for a VAZ car. Lighting in the driver's cabin bothers owners of modern cars less often than owners of old budget-class cars. But sometimes the “native” car lighting is still not enough. Then the question arises about replacing lampshades for VAZ cars. The easiest way out is to change the light bulb. But this is not always enough.
Why change the backlighting of individual buttons on the VAZ 2114 dashboard
On the VAZ 2114, the illumination of the buttons for controlling the dimensions, low beam, front and rear fog lights, as well as the rear window heating is green from the factory. Over time, many owners get tired of this glow and there is a desire to replace it, make it non-standard. After making a decision about such modifications, you need to decide: do this work yourself or contact the service. Since the process of replacing button backlighting is not a complicated procedure, in most cases, car owners carry out such an upgrade with their own hands.
The standard green backlighting of the buttons gets boring over time.
Basic lighting
In a standard way, on the base model the issue of interior lighting on this car is resolved quite simply:
- interior lamp of VAZ 2114;
- individual interior lighting lamp;
- dashboard lighting.
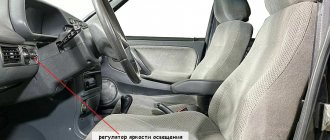
There is also lighting for the glove box and interior lighting of the VAZ 2114, which includes illumination lamps for the front ashtray, heater switches and levers, and the hydraulic corrector scale for the front lamps.
The interior lighting is a simple electrical device. Built into the upholstery in the middle, upper part of the body, above the heads of the driver and passengers. It should light up when the doors are opened and go out when they are closed, a simple electrical signal is supplied from limit switches installed on the door pillars. The interior has switches on the front and rear side pillars on each side for manually turning on the dome light.