Replacing the Priora generator 16 valves with your own hands video
VAZ car models usually do not present any difficulty with simple repairs or disassembly, they are inexpensive to service in almost any service center, and the basic configurations, if necessary, are suitable even for beginners. But if you need to replace a Priora 16 valve generator with air conditioning or power steering, dismantling it will be quite difficult due to the narrower space under the hood, and preparation is required.
Why, in fact, is it difficult to replace a generator on a Priora 16 valves?
The sixteen-valve version has a much narrower distance between the head and the radiator than the eight-valve version. If you remove the mounting bolts on a 16-valve generator, it will still not be possible to remove it - it will rest against the radiator. Because the free space under the hood will be occupied by a compressor or pump. Do not pull on the generator under any circumstances, this will damage the radiator. If something doesn't come off on its own, don't force it.
How to remove the generator
It is preferable to have a crane beam indoors; in extreme cases, you can use a jack on wheels, special for hanging the engine. You should proceed in the following way.
- Disconnect the battery terminals.
- Hang up the motor.
- Remove the drive belt.
- Loosen the hoses on the power steering or air conditioning.
- Remove the mountings from the generator.
- The generator can now be disconnected and powered up. First to the side, then up.
- When all wiring is disconnected, the generator can be removed.
Replacing the alternator belt on a Priora 16 valve is carried out in the reverse order, just install the new part following the instructions.
How to remove a generator on a Lada without air conditioning
If you do not have additional equipment installed, replacing the Priora 16 valve generator will be a little easier, since there will be more space under the hood.
- Remove the negative terminal from the battery.
- Remove the protection from the engine.
- Unscrew the nut on the belt tensioner (not completely, a maximum of four turns). Now you can turn it around by turning the screw a little. When it is loose enough, you can remove it.
- Remove the protective cap to later remove the terminal from the wiring harness. Now you can remove the wiring block.
- Remove the nut to remove the top mounting bolt, then do the same with the bottom mounting bolt.
- Remove the belt and then the entire generator.
Since in advanced configurations with air conditioning the belt on the generator is longer, then if it is necessary to replace it, you need to remember some subtleties. Especially if you feel that the quality of grip on the rollers has become much worse, then you will have to re-tension or change them. The first thing that indicates a problem is a whistle, a clear decrease in the battery charge level, even if it should be fully charged. New batteries can be ordered here: https://www.rimir.by/products/car/akkumulyatory-95/. In this case, first of all, you should look at the belt to see if it is elastic, if there are any third-party cracks on it.
Do-it-yourself removal and replacement of the Lada Priora alternator belt
Replacing the Priora 16 valve alternator belt should be done after 60 thousand kilometers, or once every two years.
How to change power steering
You will need an inspection hole and a wheel wrench.
- Loosen the nut to remove the adjusting bolt.
- Now you can move the generator away.
- Removing the right front wheel and its wheel arch liner will reveal the space in front of the old belt.
- From here it can be easily removed.
- You can install a new one. The main thing is to tighten it correctly and well.
How to tension a belt and check its tension
For Priora, in addition to the original ones, similar belts from foreign brands such as Contitech, Dayco, Gates, and Flennor are recommended.
- Loosen the roller nut; you will have to hold the cage with a wrench. By then rotating this key, the clip can be turned.
- Tighten the nut against the roller. Check the quality of tension only on the long section between the pulleys. If, when pressing on the belt in this place, it bends no more than 10 millimeters, the tension is appropriate.
- If your Lada has a hydraulic booster, you should tighten it a little more. If you don't pull it tight enough, it will whistle obviously, a defect that can be easily detected by ear. Then pull it a little tighter. If you hear not a whistle, but a hum, the belt, on the contrary, needs to be lowered.
On a Priora, in a regular service, changing just the belt can cost from 300 rubles (not counting consumables). If the generator is with rollers or mounted, then the price will increase significantly to one and a half thousand rubles. Do not forget the receipt for the services provided; the warranty for the work performed must be at least six months; if the belt deteriorates due to poor installation or tension, you must demand a replacement at the expense of the service.
WE OPEN ACCESS TO THE TIMING BELT
The location of these bolts is shown in the photo below:
FIG 6. Upper timing cover bolts
Then use the same key to unscrew the two bolts of the lower timing cover and remove the cover.
FIG 7. Bolts of the lower timing cover
Using a 17-point head, we turn the crankshaft toothed pulley until the marks are firmly in place according to Figure 4. You also need to check the alignment of the marks on the flywheel so that they are located as shown in Figure 3. The crankshaft must be turned clockwise.
And one more important point! It is the crankshaft that needs to rotate the entire timing mechanism. This cannot be done using the camshaft pulleys. To ensure that the camshaft marks do not get lost during operation, they must be secured to each other. This is done in different ways. I once saw a mechanic insert a socket head between the teeth of a pulley. You can also take a pin and two thick plates with holes. We put plates on the stud, nuts on both sides and insert this structure between the pulleys so that the plates rest against the teeth of the pulleys and tighten the nuts.
It looks something like this! Here, however, is an engine from another car:
FIG 8. Device for fixing camshafts
We have completed the preparatory work and it is time to proceed directly to replacing the Priora timing belt.
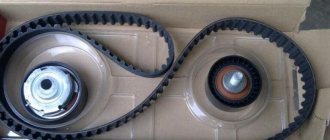
To remove the Priora timing belt, you first need to loosen its tension. To do this, use a 15mm wrench to unscrew the tension roller nut; the support roller must also be removed. Because when the timing belt is replaced, both rollers are also changed.
Then remove the timing belt and inspect it carefully
First of all, we pay attention to the presence of cracks, fraying of the edges of the belt, and, of course, we look at the condition of the teeth. There should be 137 of them, they should be round in shape
If you find at least one of these defects or the time has come for mileage in kilometers, then the Priora timing belt must be replaced with a new one. Next, you need to pay attention to the condition of the pump. Holding the toothed pulley of the pump, you need to tug it; if there is play in the pulley, then the pump must be replaced.
How to tighten the alternator belt on a Priora 16 valves
So, the belt should be tightened in some cases:
- If the battery is insufficiently charged, if the on-board network voltage decreases when the engine speed decreases
- When the belt whistles (when water gets on it or in damp weather)
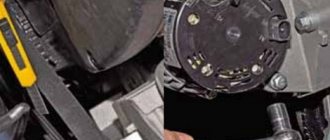
First of all, open the hood of the Priora and, using a 13mm wrench, loosen the upper bolt of the generator:
Now you need to set the optimal belt tension by tightening or unscrewing the tension bolt of the mechanism. The diagram below clearly shows where the generator needs to be moved to loosen the belt, and where to tighten it.
Now turn the adjusting bolt in the direction you need to adjust the belt.
When the optimal tension is achieved, it is necessary to tighten the upper bolt of the generator. Then we start the engine, turn on the maximum energy consumers, such as: high beams, heater, heated rear window. And if, when they are turned on simultaneously, the belt does not whistle and the engine speed does not drop, then we can assume that the belt is tensioned normally.
When you have dealt with this, you can tighten everything thoroughly and check it again. It is worth checking the tension periodically, as the belt tends to stretch.
1200 rub. for the photo report
We pay for photo reports on car repairs. Earnings from 10,000 rubles/month.
Write:
How to tension the alternator belt
Many car owners are interested in the question: how to tighten the alternator belt? After all, the battery charge level and the voltage in the car’s electrical network depend on this. Also, the condition of the belt itself, as well as the condition of the crankshaft bearings and the generator shaft, depend on how the generator belt is tensioned. Next, we will analyze in detail how to properly tension the alternator belt with a specific example.
How to get rid of a whistling alternator belt on a Lada Priora - step-by-step instructions
To carry out the manipulation, loosen the fastening bolts, then tighten the adjustment bolt a few turns, achieving optimal tension. A correctly tensioned drive should bend no more than 1 cm under hand pressure. If this cannot be achieved even with the bolt tightened to maximum, the belt should be replaced.
If the pulleys become oily, the drive should be removed and the inside should be wiped with alcohol or gasoline. Pulleys are cleaned in the same way. If the belt has been in an oily state for a long time, it is recommended to replace it, since fuels and lubricants destroy rubber. Also, current seals and gaskets must be changed.
If, as a result of diagnostics, it was revealed that the front bearing of the generator is whistling, it is replaced. To do this, remove the unit from the car, dismantle the front cover and, after removing the faulty bearing, press in a new one. This is also done when the pulley is skewed and the generator shaft is jammed.
Source
In what cases does a car need to be replaced?
In what cases is it necessary to check and change the belt on a Lada Priora 8 or 16 valves, which belt is better to use, how to tighten the tensioner correctly?
First, let's look at the main signs of wear:
- First of all, the check is carried out if the strap begins to whistle. The whistle usually appears when starting the engine, increasing the speed, or activating electrical equipment. Sometimes fixing the problem involves tightening the strap by tightening the tension roller. If the tension is normal, there is a possibility that one of the drives, for example, a compressor or generator unit, is jammed. Also, the whistling may be due to wear of the bearing elements of the Conder clutch; all worn bearings must be replaced.
- With the motor turned off, you should carefully inspect the device. If it is clear that the strap has lost its elasticity or has become damaged in the form of cracks, delamination or tears, this indicates that it will soon have to be replaced.
- Looseness may also be due to wear on the tension roller.
- The car begins to shake when the electrical equipment is activated. This problem happens very rarely and usually in such cases car owners have no idea what to do. Reduced traction and shaking can be caused by high loads on the car's electrical network.
- The low battery indicator began to light up on the dashboard, and you are sure that the battery itself is functioning normally and is fully charged. But keep in mind that this problem may also be associated with wear of the component parts of the generator set, for example, brushes or rotor (video author - Vladimir Z).
https://youtube.com/watch?v=5eDOX2gninQ
Principle of operation
When you turn the ignition on, current from the battery enters the field winding through the brush assembly, where a magnetic field appears. When the crankshaft rotates, the rotor goes into rotation. The magnetic field passes through the stator winding and an alternating voltage is generated at the output. Having reached a certain rotation speed, the excitation winding begins to be powered directly from the generator.
Basic faults
Why does the generator not charge the Lada Priora car? There may be several reasons:
- the diode bridge is damaged;
- the turns of the stator winding are closed;
- slip rings wear out;
- the pulley is damaged or worn out;
- the wires of the charging circuit are damaged;
- the bearing is destroyed or worn out;
- the voltage regulator is damaged;
- The current collecting brushes wear out.
In all of the above cases, repair of the Lada Priora generator will be required.
How to change the alternator belt on a Priora
Proper electrical equipment of any car begins with energy sources. And these are two interconnected and necessary components - a generator and a battery. They cannot live one without the other and a car without an electrical system is like without wheels. If the generator produces a current that is even slightly different from the rated one, the entire control system, led by the ECU, does not work correctly, if at all.
What happens if the alternator belt breaks?
Not only the voltage of the on-board network, but also the correct charging of the battery depends on the operation of the generator. As soon as the generator reduces the charging current, the battery will begin to discharge quickly, which will result in its rapid failure. with a normally functioning battery charging system, the source of electrical energy will last at least 6-7 years.
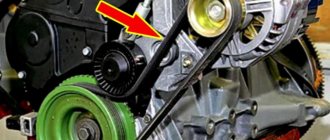
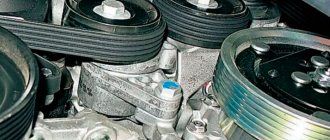
The generator will not rotate on its own, so you need to somehow set it in motion. For this purpose, a pulley is installed on the generator shaft; on VAZ 2110 Priora engines, a multi-jet pulley is installed. The pulley rotates using the generator belt, and the belt is driven from the pulley on the engine crankshaft. The belt also drives the air conditioning compressor if the vehicle has one, and can also drive the power steering pump if power steering is included.
Alternator belt dimensions
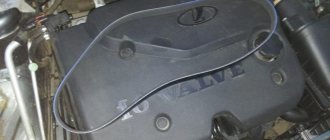
The length of the alternator belt on Priora depends on the vehicle configuration. Too many companies, companies and offices have begun to produce spare parts for Prioras, so the belt markings (2110-1041020) may be different. The main thing to know is that the length of the belt for the simplest configuration of the car is 742 mm, this is without power steering and air conditioning, 1115 mm is the length of a car belt with power steering, and the longest belt, 1125 mm, is installed on a Priora with air conditioning. The price of the belt should not exceed 720 rubles, but it cannot be cheaper than 500. This is a completely outright fake.
When to change the alternator belt
The timing of replacing the alternator belt on a Priora depends on what equipment is installed on the car, or simply, on how many mechanisms it has to drive. For cars with air conditioning, the average mileage of the drive belt is 45-50 thousand km. The factory recommends changing the belt no more often than after 60 thousand km, but it doesn’t know what quality of belts we buy. We don’t know either, so to avoid surprises, it’s better to change the belt earlier. Under normal operating conditions, as a rule, the branded belt is changed once every two years. But before you change the alternator belt on a Priora, you should make sure that it has already served its purpose.
Signs of belt wear
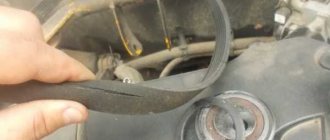
However, you should not pay much attention to the replacement schedule, but you should still be guided by signs of belt wear. They will speak eloquently about the need for replacement:. obvious signs of wear; mechanical damage and scuffing; characteristic whistling of the belt on the pulleys; lack of adjustment of the generator belt tensioner to the nominal deflection.
obvious signs of wear; mechanical damage and scuffing; characteristic whistling of the belt on the pulleys; lack of adjustment of the generator belt tensioner to the nominal deflection.
Under normal conditions and with a working belt, it should bend no more than 8-10 mm under a load of 10 kgf. Not everyone has experience measuring forces and not everyone carries a dynamometer in their trunk. To more or less accurately determine the belt tension on a Priora, you can use a kitchen or simple household steelyard. Its readings can be considered accurate for measuring the degree of tension of the alternator belt. When checking the condition of the belt, it is imperative to check the condition of the tension roller. If it has play or increased wear, you will have to buy a generator belt tension roller.
How to adjust belt tension on a Priora
To adjust the tension of the alternator belt, Priora sells a special key, although you can do without it. You can carefully insert two bolts of the appropriate size into the grooves on the regulator, insert a powerful screwdriver between them and thus replace the special key. But you need to adjust the tension carefully, since too much will quickly destroy the front bearing of the generator, and too little can cause the belt to slip along the pulley.
By the way, there are lubricants for generator belts that temporarily extend the life of the belt and restore the characteristics of the rubber. They also enhance the friction properties of the belt drive. Aerosol lubricant costs about 300 rubles, and there are quite a lot of companies that produce them.
Let's sum it up
The service life of the alternator belt on a Priora, as on any other car, is limited. For this reason, it is important to monitor his condition. In case of damage or wear, the belt must be replaced and then adjusted.
We also recommend reading the article on how to replace the Lada Kalina alternator belt tensioner. From this article you will learn when you need to change the tensioner, as well as how to replace the belt tensioner on Kalina with your own hands.
At the same time, on different versions of the Priora, when replacing the alternator belt, it is necessary to separately take into account the design features. The fact is that on models with and without air conditioning, the replacement will be slightly different, as discussed above.
Finally, we note that a correctly selected, installed and adjusted Priora generator belt will allow the generator to operate normally and charge the battery, and there will also be no problems or malfunctions in the operation of other equipment.
How to replace or tighten the alternator belt on a Priora - technology and features of belt replacement
Hello, dear motorists! Well, let's move on to specific cars and their lovers?
“PRIOROVODY” - this is what the owners of cars of one of the latest VAZ series called “Lada” - “Priora” call themselves.
Many people liked the stylish and modern car. The deep-rooted belief that domestic cars are worthless is gradually dispelling. The cars have indeed become more comfortable and attractive, and their technical equipment has improved significantly.
The differences between the Priora and previous modifications are noticeable immediately as soon as the hood is opened. The new owner of a brand new Lada will have to learn a lot all over again. Such a simple, at first glance, manipulation as replacing the alternator belt on a Priora will require considerable effort.
A distinctive feature of new car models is the ability to choose a car with additional equipment already included in the basic configuration. Thus, Priora can be equipped with power steering (power steering) or air conditioning.
Of course, driving such a machine becomes even more comfortable, but the price for comfort is a more complex design of the generator belt drive. The generator belt of a Priora with air conditioning or power steering is much longer, describes a different trajectory (alternator belt diagram), is serviced and changed according to completely different rules.
Tensioning the Priora generator belt - features
Checking the tension of the generator belt
Any car owner knows that sooner or later the moment will come when you have to tighten the Priora alternator belt. The belt drive is quite durable, but during operation the belt slightly stretches and the degree of adhesion of its surface to the planes of the pulleys and rollers decreases.
As soon as you hear that the alternator belt on the Priora is whistling, you need to immediately tighten it. This is not difficult to do. In order to tension the alternator belt on the Priora, you need to prepare an open-end or ring wrench 19 mm and a special double-open-end tension wrench for the roller.
It is easy to recognize - it is similar to the key that is used when replacing disks on an angle grinder. The alternator belt adjustment on the Priora is done as follows:
- holding the tension roller cage with a tension wrench, loosen the roller nut;
- by slightly rotating the tension wrench, we turn the eccentric ring of the tension roller of the Priora generator belt, increasing the belt tension;
- tighten the roller nut.
If you press on the belt at the longest gap between the pulleys, it should bend within 8-12 mm, but this rule applies only to the most modest configuration.
If the car is equipped with power steering or air conditioning, the belt describes a different trajectory, which leads to a decrease in the contact area of the belt surface with the pulleys.
To compensate for insufficient contact, you will have to tighten the alternator belt on the Priora a little more. If it is not possible to use the services of qualified specialists, then you can try to adjust the tension of the Priora generator belt, which is called “by ear”. If the tension is insufficient, the belt will slip and “whistle”, and if it is too tensioned, the generator bearings will begin to hum.
Replacing the Priora generator drive belt with a “surprise”
An experienced driver can replace the alternator belt on a car even with his eyes closed. The belt is quickly removed and installed on a machine that does not have additional equipment.
To do this, loosen the tension roller of the Priora generator belt, remove the old belt, put on a new one and tighten it. But if the car is equipped, for example, with power steering, you should be prepared for a very unpleasant discovery.
The additional pulley forced the designers to change the location of the generator, raising it up, and the hydraulic booster is located below. But the power steering pulley is located so low that I had to run the belt around the engine mount. In field conditions, it will no longer be possible to replace the belt, unless you happen to have a powerful bottle jack lying around in the trunk.
The algorithm for replacing the alternator belt on a Priora looks like this:
- the belt tension roller is weakened;
- the power steering pulley is unscrewed and removed (otherwise the engine mount bolt cannot be removed);
- the engine mount bolt is unscrewed and removed;
- using a jack, lift the engine until a gap is formed under the support sufficient to run the belt;
- The alternator belt is replaced and the entire structure is reassembled in the reverse order.
Step-by-step tensioning of the generator belt
Probably every car owner, especially those with experience, knows that during the operation of a Priora or another car model, the belt drive is subjected to a slight, but still stretching. This, in turn, reduces the degree of adhesion of this element to the rollers and pulleys. There is only one way out of this situation - to properly tension the belt drive.
You can make sure that the alternator belt needs tensioning by the peculiar whistle that is heard when the engine is activated.
Tensioning the belt drive is easy if the car owner performs the work in a certain sequence and prepares the following tool:
- two wrenches size 19 (socket and open-end);
- a wrench that is required to work with a car roller, used to replace the disk on a tool called an “grinder”;
- protective gloves if necessary.
Having prepared the necessary tools, you can begin to tension the alternator belt yourself:
- The fastening of the roller is loosened using a tension wrench, with which you need to hold the tension roller cage.
- When making rotational movements using a tension wrench, you need to carefully rotate the belt drive tension roller cage, thereby increasing the tension force of the belt.
- Having tightened the generator belt to the desired level, you should securely fix the previously loosened roller fastener.
A correctly tensioned belt drive should bend by about 10 mm with slight pressure between the pulleys, but this only applies to the simplest vehicle configuration. After all, if the Priora is equipped with a car air conditioner or power steering, then the belt drive should provide a different trajectory of movement, since the area of interaction between the pulleys and the belt should be slightly reduced. If upon visual inspection the compensation is not enough, you will have to repeat the tensioning process to tighten the belt a little more. Experienced drivers can determine the belt tension by ear. If the element whistles and slips after tensioning, then the tension will be insufficient, and if you overdo this process, the bearings will make a hum.
Why does the alternator belt whistle on a Priora when it’s cold?
On the Lada Priora, the alternator belt is closed. It is located in the enclosed space of the engine. And if there is no crankcase protection, it turns out that water gets on the belt, or wet weather. And it turns out that even a new, working one can whistle for a while, then the whistle stops. The new alternator belt whistles even in new cars; if it is open, it is enough to drive through a puddle. After 20-30 seconds the water dries and the problem is resolved.
Alternator belt and air conditioner Lada Priora
Many people do not know what an overrunning clutch is and what it is needed for. And modern Lada Priora generators are equipped with this particular coupling. The anchor of the generator itself is attached to it. In order for the belt to run smoothly, without jerking, the overrunning clutch is responsible for this.
Bearings, unfortunately, do not last forever and after 100-120 thousand km they begin to jam. And because of this, it can begin to “walk” to the right and left, that is, warp. Also, due to the tensioner wedge, it begins to “walk” not parallel on the pulleys. To prevent the generator belt from whistling, it is necessary to constantly check the pulley to see whether it is spinning or not spinning, and whether there are any distortions.
Working unit of the Lada Priora generator
The largest pulley is at the crankshaft, the smallest is at the generator. Over time, the pulley can become dirty. Dirt and stones get clogged into the grooves, causing wear and whistling of the alternator belt. Clean the grooves from dirt.
During operation it may become covered with various deposits. The store currently sells enough cleaning products. Just spray on your belt and it will stop whistling.
What to do if the alternator belt breaks
Anything can happen on the road, and we cannot exclude those moments when, for some reason, the generator drive breaks. If this happens, you can carry out a simple procedure to replace it with improvised means and go to a service station or auto store to purchase an original spare part.
A strong rope or women's tights folded into a narrow strip are suitable as a substitute for the drive.
- We lower the tensioner to the limit to facilitate installation of the temporary drive.
- We put a rope on all the rollers.
- We return the tensioner to its original position, checking the deflection of the rope (it should not be more than one centimeter).
On cars without power steering or air conditioning, the replacement method is slightly different:
- Loosen the top nut of the generator.
- We tighten the tension bolt to bring the generator closer to the engine.
- We install the rope.
- We unscrew the tension bolt, moving the electric generator away from the engine.
- Having achieved the required tension, tighten the upper fixing nut.
If this happens within the city, and the car has a good battery, you can immediately go to a repair shop or store. The battery charge lasts for 20-40 km, but to be sure of covering such a distance, you should turn off all electrical appliances.
How to tighten the alternator belt on a Priora that does not have an additional option
If a regular Priora does not have an additional air conditioner or power steering installed, then the generator drive belt is tightened by moving the unit itself on a movable lower mount. The generator belt tensioning system on such machines is designed in such a way that there is no need, as was the case on previous models, to displace the generator using a crowbar or pry bar. There is a special device here that allows you to perform this operation by rotating the adjusting screw with a wrench. To tighten the belt you only need two keys:
- 10mm ring wrench;
- wrench 13.
This is quite enough. According to the procedure, first of all it is necessary to turn off the power to the machine.
After disconnecting the negative terminal, you can begin adjustment. First of all, loosen the fixing nut 13 on the upper mount of the generator by one turn. After this, you need to loosen the nut of the lower mounting bolt by 1.5-2 turns. Well, after that, you can tighten the belt by rotating the long adjusting bolt clockwise with a 10mm socket head. During the tensioning process, you need to be careful not to tighten the belt too much. If the tension is strong, it puts too much load on the generator bearings when the engine is running, and quickly damages them. But we must take into account that modern dynamos installed on Priora are designed for a limited number of bearing replacements. They can be replaced 2 at most 3 times. Then the body needs to be changed. In this regard, the belt tension must be strictly defined. If you don’t have a special measuring device, you can check it by eye. You need to take the belt in a free area and turn it. It should rotate freely around its axis by 45 degrees, and with noticeable force by 90. This is a normal position. It is quite possible using a ruler as in the figure.
Tensioner pulley design
Thus, on most modern cars the roller is of the following design:
- ball bearing inside
- plastic cover with a working surface for the belt on top
- landing sleeve inside the roller
There are eccentric rollers, the adjustment of which is carried out by shifting the axis relative to the mounting bolt, and conventional ones. In the second option, the roller is mounted motionlessly on the tensioner bracket, and for adjustments the bracket itself is shifted relative to the internal combustion engine shaft.
Some cars use self-adjusting spring brackets, in which the number of turns and the diameter of the spring wire are designed for a specific force at the factory.
Since there is a bearing inside the structure, the roller is replaced when any of these parts (bearing race or plastic lining) wears out. In addition, when replacing a belt, it is also recommended to install a new roller/bearing set on the tensioner.
An example of the layout of two generators with one tensioner pulley for high-quality car audio
To ensure its recharging, the best option is to duplicate the generator, for which a second pulley is mounted on the crankshaft of the internal combustion engine. In this case, you have to service two rollers and a belt of the tension system.
Tension with adjuster bar
Securing the generator using a strip
This method is used for older cars (for example, “classic” VAZs). It is based on the fact that the generator is attached to the engine using a special arc-shaped strip, as well as a bolt and nut. By loosening the fastening, you can move the bar with the generator relative to the engine to the required distance, thereby adjusting the tension level.
Actions are performed according to the following algorithm:
- unscrew the fastening nut on the arc-shaped bar;
- Using a pry bar, we adjust the position (move) of the generator relative to the engine;
- tighten the nut, fixing the new position of the generator.
The procedure is simple, it can be repeated if you were unable to achieve the required level of tension the first time.
Rules for tensioning and replacing the alternator belt
Compared to the previous VAZ 2110 model, the Lada Priora has a number of significant differences. If before the procedure for tightening the belt was not too difficult, here you will have to make serious efforts. It's all about the availability of additional equipment. After all, Priora, even in the basic configuration, is equipped with power steering and can also have air conditioning, which significantly complicates such a seemingly simple procedure. On the other hand, driving with this equipment is much more comfortable. Therefore, replacement on a car without air conditioning is easier.
Features of belt tension
To tighten the alternator strap on the Lada Priora, you will need not only standard 19mm wrenches (socket and open-end), but also a special one. This is a double-opening tension wrench for adjusting the roller. The pulling process is as follows.
- Using a tension wrench, the tensioner roller cage is fixed, after which the fastening nut is loosened.
- The tension key rotates and thereby the eccentric race of the tensioner roller rotates, thus the belt begins to tension.
- After this, hold the tension wrench and fix the roller fastening nut.
If the car is not equipped with air conditioning and power steering, the belt should bend by a maximum of 12 mm. You should press on the longest section. With additional equipment, the belt is tightened more due to a different trajectory, resulting in a reduced contact area between the belt and pulleys.
Alternator belt tension
If the quality of adhesion of pulleys, rollers and the surface of the generator belt decreases, the tension should be increased. This procedure should also be carried out if the consumable has been used for more than 15-20 thousand km, but there is no damage (replacement is not required). If you open the hood and see a frayed tape, then immediately proceed to the replacement instructions, then you will still have to retighten it. To carry out the work, you will need a special key for the roller and standard keys for 19 and 17.
Process and result verification
- We clamp the clip with a wrench and loosen the roller fastening nut;
- Now we need to clamp the eccentric collar and start cranking. The rotation of the tool should be minimal - this will allow for better tension of the component;
As you can see, the process consists of only three steps, but the main stage is checking the tension on a Priora with air conditioning and power steering (or with these components separately). In this case, the tension should be stronger when compared with the basic version of the VAZ 2170 with 16 valves. In the longest section between the shaft and the pulleys, the material should bend by about 5-6 mm.
You can determine the result by the sound: when moving, you can hear slipping, the belt whistles - insufficient tension; from under the hood after adjustment you can hear the hum of the bearings - the component is overtightened, the holder needs to be loosened.
How to replace the Grant alternator belt
The replacement process is not simple and depends on the equipment of the car: whether there is a tensioner, air conditioning. In the latter case, you cannot do without a lift and dismantling the engine mount due to the air conditioning compressor clutch pulley.
For a Granta with air conditioning, for installation you will need to hang the wheel and remove one engine mount.
How to change a belt on a Grant 8 and 16 valve without air conditioning and tensioner
What you will need for work:
- a knife, if you just need to cut off an old part;
- crank or ratchet with head 13;
- long strong wire;
- flat screwdriver;
- partner – you can replace it yourself, but it’s easier with an assistant.
Step 1. Dismantling
The car is on a flat surface, neutral is engaged without the handbrake. Battery is disconnected.
If the old belt is not needed, we cut it in an accessible place and take it out.
If you need to save the old one, do everything up to step 3.
A replacement is needed with a length of 8223mm, six-wedge. Called 6RK 823. PHOTO: www.zr.ru
Step 2. Remove the generator mount
We approach the generator mount with head 13:
- we remove the lower bolt by 2-3 turns;
- Use it to completely unscrew the top bolt.
In this situation, we proceed to installation. PHOTO: www.zr.ru
Step 3. Raise the part
Scroll the generator up. The top mount becomes higher than the bracket to which it is screwed.
We press the part to the engine. We fix it with strong wire. For example, we hang it from the cylinder head bolt.
In this situation, we proceed to installation. PHOTO: www.zr.ruAt this stage, you can remove the old part if you did not cut it. We engage fifth gear and push the car back, squeezing the belt with a screwdriver from the generator drive pulley.
Step 4. Install a new one
We pull the new one onto the pulleys.
The installation takes place in the position of the generator when it is pressed against the engine. PHOTO: www.zr.ru
We engage fifth gear, push the car back, pressing the belt against pulley 1 in the picture. This is where a helper will come in handy.
As soon as we put it on, we work in reverse order:
- unplug the generator;
- press it into working position;
- return the upper mounting bolt and tighten the lower one.
Replacing the alternator belt on a Grant with air conditioning
It's more difficult here. Step by step:
- we drive the car onto a lift or overpass;
- remove the tensioner;
- take off the front right wheel;
- we support the internal combustion engine and dismantle the pillow;
- change the required part.
The whole problem is in points 5 (air conditioning compressor clutch) and 7 (right engine mount) - our belt passes through them (number 6). The rest: 1-drive of auxiliary devices, 2/3-tensioner, 4-generator. PHOTO: www.zr.ru
What you need
- new belt marked 6РК 995;
- spanners 8, 19;
- socket wrenches 8, 10;
- Torx keys T20, T27;
- ratchet with extension and heads E14, 17.
Step 1. Tensioner
The car is on a lift or overpass.
The front right wheel studs are loose.
Open the hood. Remove the terminals from the battery.
We find the tensioner, take out the spanners 19 and 8:
- 19 we put on the lead screw;
- 8 hold the locknut;
- we touch;
- Turn the lead screw clockwise to loosen the tension.
We remove the lock nut and loosen the tension. PHOTO taken from: www.zr.ru
We need keys 8, 10. Remove:
- central shield (numbers 1, 5, 7);
- right shield (number 2).
Step 3. Wheel
Remove the front right wheel. Using keys 8, Torx t20, t27, we dismantle the fender liner according to the diagram.
To work with the fender liner you need three different keys. Having removed it, we gain access to the engine support. PHOTO: www.zr.ru
Step 4: Engine Mount
Getting ready to remove the engine mount.
We securely support the engine under the crankcase - the support should take the weight of the internal combustion engine.
Using a wrench or ratchet with an E14 head, unscrew the screws securing the support to the engine.
Use head 17 to unscrew the screws securing the support to the body.
We remove the support. Make sure the weight of the engine is securely supported in the crankcase!!! PHOTO: www.zr.ru
Step 5. Dismantling and installation
We remove the belt from the pulleys and rollers and pull it out.
We install the new one in the reverse order.
Do not mix up the screws that secure the mount to the engine. The top one (included in the triangular part) is shorter than the bottom one! Confusion is dangerous for the further operation of the machine. PHOTO: www.zr.ru
The final tension can be adjusted by adjusting the tensioner.
How to tighten the timing belt on a VAZ 21126 engine
Before you start tensioning the belt, you should warm up the engine so that the coolant temperature is approximately 20-25°. It is at this temperature that the marks on the tension roller should coincide; if the coolant temperature is 80-90°, the mark will shift to the right by 5-6 mm towards the radiator. However, this is provided that you use the rollers that AvtoVAZ prescribed; if you buy something of your own, adjustment according to this scheme may not be suitable.
1. Align the marks on the camshaft pulleys with the marks on the rear timing belt cover. 2. Secure the pulleys using the tool shown above.
3. Align the crankshaft pulley mark with the mark on the oil pump cover, then turn the crankshaft in the shortest angular direction using a key set to “17”. 4. Tighten the bolt securing the automatic tensioner 3, which is indicated in Fig. 1, until it stops, then unscrew it 45º-90º using a key at “15”. 5. Place the timing belt on: the support roller, the crankshaft pulley, the camshaft pulleys, the water pump pulley and the automatic tensioner. 6. Install a special key for tensioning the timing belt in the grooves of the automatic tensioner support plate, then turn it counterclockwise until marks 1 and 2 coincide.
7. Then tighten bolt 3 securing the tensioner, with a bolt tightening torque of 23-36 N.m. (2.3-3.6 kgf.m.). 8. Remove the crankshaft locking device and turn the crankshaft two turns. If mark 1 deviates beyond mark 2, readjust the belt tension by first unscrewing the automatic tensioner mounting bolt by 45º-90º.
The tension roller should not move or deviate to the right or left, this will be evidence that the roller is working properly and is not overtightened, and the spring is functioning properly.
Symptoms of malfunction and their elimination
You can determine whether a replacement is needed or whether you can simply tighten the power steering belt with air conditioning on the Priora 16 valves only after inspecting this component. To do this, just open the hood and examine the belt; it is located next to the right front wheel. There are signs that indicate it's time to check the alternator belt: something whistling and squeaking from under the hood.
The reasons may be the following:
- Antifreeze, oil or other working fluids have come into contact with the generator pulley or belt.
- The belt is worn out - you can tell by its appearance.
- The tension has dropped - in this case, the component must be tightened.
- The bearing in the generator is worn out.
When the belt whistles in a Priora with 16 valves, it’s time to carry out diagnostics. If there are cracks, tears or other serious damage on its surface, then replacement is required. If the generator component with hydraulic booster and air conditioning looks normal, you should check its tension; the optimal level of deflection is 6-8 mm - you need to press the component in the middle between the generator and the pulleys.
Are there visible coolant or engine oil stains on the surface? If the contamination is not significant, they can be cleaned. If the liquid has penetrated into the material, cleaning will not bring any results; replacement is needed. If the component is well tensioned and no damage or stains are visible, then you should move on to checking the bearings. They may need to be changed.
Sometimes the generator consumable whistles due to the poor quality of the product. This is especially true for Chinese analogues, which are not of high quality. Such a belt whistles a lot already at the fifth thousand mileage, it is better to change it immediately. We recommend purchasing consumables designed for your model, in our case, for a Priora with a 16-valve engine.
B2vu82nv_inettools.net_rotate_image
Using a Phillips screwdriver, unscrew the self-tapping screw securing the shield to the fender liner and remove the shield.
Using a Phillips screwdriver, unscrew the self-tapping screw securing the shield to the fender liner and remove the shield.
Using a Phillips screwdriver, unscrew the self-tapping screw securing the shield to the fender liner and remove the shield.
We inspect the belt. There should be no cracks, tears, or detachments of rubber from the fabric base.
Generator malfunctions and ways to eliminate them
There aren't many problems. They come in two main varieties.
Type of faults
Signs
The generator and battery always work together. For the battery, the generator is the only autonomous power source, which allows it to remain as a backup power source for the on-board network when the generator is not working. In turn, by constantly recharging the battery, the generator makes it possible to start the engine at any time.
Generator malfunctions do not occur out of nowhere; there are usually preconditions for breakdowns. And the owner has the opportunity to correct the malfunction in a timely manner. Otherwise, the generator will need to be repaired on Priora.
Difficulty starting the engine
Problems with starting the propulsion system directly indicate problems with the generator. If it malfunctions, the battery experiences a constant lack of charge, which means it does not have enough power to rotate the engine flywheel through the starter. A discharged battery is the main result of a generator breakdown. A malfunction of this device can result not only from a lack of charge, but also, conversely, from overcharging. Such phenomena arise due to the failure of the relay regulator, i.e., current is generated in much larger volumes. This leads to boiling of the electrolyte in the battery banks and, as a consequence, to failure of the battery.
Snapshot1111
We tighten the belt until the cutout of the outer race coincides with the rectangular protrusion of its inner sleeve and tighten the roller mounting bolt to a torque of 34–41 Nm. Excessive belt tension reduces the service life of both the belt itself and the bearings of the coolant pump, tensioner and guide rollers. Insufficient belt tension leads to its premature failure and can cause irregular valve timing and, as a result, lead to contact of the pistons with the valves and expensive engine repairs.
We turn the crankshaft two turns until the marks on the camshaft sprockets align with the cutouts on the rear timing cover and check that the rectangular protrusion of the inner bushing of the tension roller coincides with the cutout of its outer race. If necessary, repeat adjusting the belt tension. If belt defects are detected or if there is a significant discrepancy between the position of the protrusion of the inner bushing of the tension roller and the cutout of its outer race (by more than half the width of the protrusion), the belt should be replaced. You should also change the belt if traces of engine oil are found on it (before installing a new belt, you need to eliminate the cause of oil getting on the belt), when replacing one of the rollers or the coolant pump.
The belt check was shown on a vehicle with air conditioning. If there is no air conditioning on the car, then the alternator drive belt should be removed, as shown in the article “Checking and replacing the Lada Priora alternator belt”.
Signs of tensioner failure
The following symptoms indicate poor adjustment or failure of the unit:
- whistling, increased noise, rustling from the generator unit (extraneous sounds are not necessarily associated with the tensioner, but may indicate its misadjustment or malfunction);
- hum and buzzing that occurs when the belt roller bearing of the Priora generator wears out;
- vibration of the roller and belt, indicating a worn bushing;
- too much belt deflection (more than 8 cm) or excessive tension (less than 0.6 cm) - if detected, adjustment must be made;
- the fastening bolt begins to heat up;
- backlash in the tension roller (this, like the hum, indicates a worn bearing);
- uneven wear and stretching of the belt on one side (as a rule, this sign indicates a bend in the tensioner bracket).
Why does the generator roller whistle and make noise?
The whistling noise may not be related to a malfunction. For example, sometimes the unit begins to make noise and hum in humid weather when moisture gets on it and the pulleys. After warming up and drying, the symptoms stop.
But if the car starts to whistle, squeak and rustle “when cold” and constantly, this may indicate:
- thickened tension roller lubricant or its deficiency;
- sagging or excessive belt tension, as well as its wear;
- slipping of the drive belt due to oil getting on the surface;
- Tension roller malfunction;
- misalignment of pulleys.
Replacing the alternator belt roller on a Priora. Photo source: https://www.drive2.ru/l/513749832809054967
The first thing to check is the tensioner eccentric roller and belt tension.
