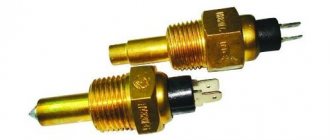
Coolant temperature indicator sensor as an element of the cooling system
The cooling system is a set and coordinated interaction of devices that supply coolant to hot areas and remove excess heat outside. It constantly maintains the optimal thermal conditions of the parts, adjusting the indicators through the control unit under different operating conditions of the motor.
Deviations in the direction of excessive cooling are also unacceptable. Under such conditions, the fuel mixture, interacting with the cold walls, condenses on them and flows into the crankcase, contaminating and diluting the oil. Low temperatures cause an increase in oil thickness, making it difficult to supply it to the cylinder, which again negatively affects the operation of the engine.
The coolant temperature sensor (CTS) is the informational and signaling part of such a system. With its help, data is transferred to the ECU about temperature changes during the heat exchange process. There, the operating parameters of the engine are determined and decisions are made to regulate it.
How to check the DTOZH using the example of a VAZ 2110
In general, the coolant temperature sensor on different VAZs is checked using the same methods and in the same sequence as described in the previous sections. Most often, sensors with article numbers 23.3828 and 405213, or its analogues – 423.3828, are installed on Ladas 2110, 2112, Priora, Kalina and others.
To carry out the test, you need to know what its resistance is at different temperatures:
- 15 °C - from 4,033 to 4,838 Ohms;
- 128 °C - from 76.7 to 85.1 Ohm;
— output voltage at 15 °C – from 92.1 to 93.3% of that supplied from the ECU;
— output voltage at 128 °C – from 18.1 to 19.7%.
Before dismantling the DTOZh for subsequent inspection or replacement with a new one from the cooling system, it is necessary to drain the antifreeze a little. This is done on a cooled engine to avoid injury and damage to engine parts or tools.
The sensor is unscrewed with a 19 mm wrench. To do this, unscrew it and remove it together with the sealing ring.
Measurements are carried out in steps of 10 °C from the boiling point to room temperature. The resistance values are recorded and finally checked against the table.
What is DTOZH
Modern sensors are thermistors, with a semiconductor whose resistance easily changes with temperature fluctuations. An increase in t entails an increase in the number of free electrons in the semiconductor material, which is the reason for the drop in resistance. Those. has an inversely proportional relationship, with a negative coefficient. The initial resistance corresponds to a voltage of 5V. As the engine heats up, the resistance drops to 0, and vice versa, when the engine is cold, it is maximum. Deviations from this parameter are recorded by the ECU.
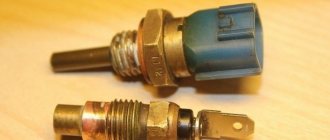
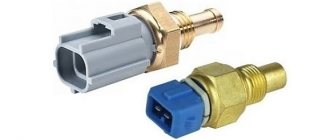
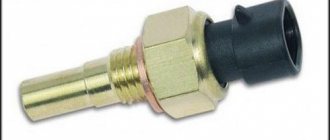
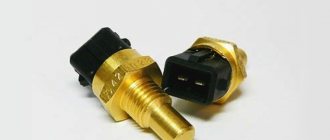
The semiconductor resistor is placed in a metal case with high thermal conductivity. There is also a threaded mount and an electrical connector for connecting to the on-board computer.
The device is miniature, built into the output line of the cylinder block, or rather, its head. It simply screws into a hole specially designated for it. In different car models, it may be located in or near the thermostat. The main thing is that there is contact with coolants.
To obtain the most accurate information about temperatures, an additional sensor is installed at the radiator outlet.
Temperature sensor for VAZ 2110
Sometimes on the highway you see the following picture: a passenger car is standing with the hood raised, steam is rising from the engine compartment, and a car enthusiast is running around the vehicle, sometimes the passengers of the car along with him. The situation is, in fact, quite banal in its essence. There can only be two reasons - the engine temperature sensor in the vehicle has failed, or the driver has overlooked a sharp increase in its temperature. As a result, the engine overheated, the coolant exceeded the boiling point and turned into steam, the driver opened the radiator cap to reduce the temperature, and steam began to escape under pressure through this hole. This is also fraught with the risk of getting burns if an inexperienced car enthusiast opens the radiator cap carelessly.
How to prevent the possibility of such a situation occurring? The first thing is to be careful while driving and observe the instrument readings, as well as monitor the condition of the VAZ 2110 temperature sensor so that it does not fail.
What is a temperature sensor
This electronic device is an ordinary thermistor, i.e. a resistor that changes its resistance parameters depending on the surrounding temperature. Such a temperature sensor for the VAZ 2110, the price of which is relatively low, is integrated into the pipe on the cylinder head through which the coolant flows.
The main purpose of the engine temperature sensor is to control the temperature regime of the vehicle's cooling system and, if the temperature parameters increase to critical values, to generate a command electrical impulse to start the ventilation cooling system. After all, the enrichment of the fuel mixture is directly related to the operating temperature of the power plant. The following logical chain can be traced - the lower the temperature range of the engine, the more enriched the fuel enters the injection system (carburetor) of the car.
Malfunctions of the temperature sensor "tens"
The temperature sensor is considered a fairly reliable element of the automotive system. The main defects include the following:
- loss of contact among components in the internal cavities of the product;
- defects in the wire insulation near the device with a freely hanging accelerator cable.
If the device fails to operate, there is an unauthorized switching on of the product on the engine, the temperature of which is not exceeded and, as a result, difficulties when starting the engine and increased fuel consumption.
What is the sensor for?
The sensor reads the temperature of the fluid in the cooling system and transmits this data to the ECU (electronic control unit). And based on this data, the on-board computer maintains the optimal temperature regime for the engine (which is about 80–90 degrees Celsius). That is, the ECU “understands” when it is necessary to slow down the fan and increase the engine temperature (when warming up), and when, on the contrary, it is necessary to reduce the temperature as quickly as possible and prevent the coolant from boiling. Thanks to this, the motor will definitely not jam, and the wear of its mechanical parts will be minimal (for example, if overheated, the same rings will quickly “burn out”).
Maintaining the correct temperature is also important for maintaining the correct viscosity of the engine oil. Only in this case will the motor be able to operate at full power, but without accelerated wear.
If the temperature sensor is faulty, then the ECU receives incorrect information. Accordingly, when the engine is cold, it can force the fan to turn on “full,” which will only complicate warming up the engine. Or vice versa: if it overheats, the fan will not work at all, which may result in engine failure without the possibility of further repair (if it jams, not only the cylinder block is damaged, but also the camshaft, crankshaft, and in some cases the flywheel).
How does DTOZh affect the operation of the internal combustion engine?
Based on the parameters supplied to the control device, the module performs the following functions:
- Enrichment of the air-fuel mixture or its depletion. If the controller detects that the temperature is too low, it will begin to increase the duration of the signal sent to the injectors, which helps to enrich the fuel mixture. In accordance with the normalization of the temperature regime, the fuel is gradually depleted, which prevents possible excessive consumption of gasoline and reduces the volume of exhaust gases. If the sensor breaks down, it can regularly lower the temperature in the engine, which will lead to fuel contamination and increased consumption.
- The control unit sets the ignition. It can be early or late. If the temperature increases, the control module adjusts the ignition timing to reduce exhaust toxicity.
- Thanks to DTOZH, proper recirculation of gases is performed during warming up. The recirculation valve closes tightly when the power unit warms up. If the car’s engine is still cold, then recirculation will cause fluctuations in idle speed and random engine stops.
- With the help of DTOZH, the control unit purges the filtration system, which traps fuel vapors. To achieve better machine controllability, the carbon filter element is not purged until the engine is completely warmed up.
- Locking of the gearbox torque converter when the internal combustion engine warms up. The control module should not limit the operation of the device until the machine warms up.
- The ECU controls the operation of the unit's cooling fan. Based on the temperature controller readings, the module activates and deactivates the ventilation device to correctly select the temperature of the unit. If the DTOZ gives incorrect impulses, there is a possibility of the motor overheating.
Replacement
The check showed that the sensor was to blame. Therefore, you have no choice but to replace it with a new one. For this:
- The coolant is drained. It is better to drain the maximum amount. Especially if the coolant has long been due for replacement;
- Disconnect the terminals from the battery;
- To make it more convenient to work, remove the air filter from its seat;
- Turn off the ignition and remove the sensor connector;
- Use a 19mm wrench to remove the sensor. The sealing ring must be removed along with it;
- A new seal ring is taken and a new, high-quality coolant sensor, suitable for the VAZ 2110 model, is mounted in place of the old one;
- The entire assembly process is performed in reverse order.
The coolant temperature sensor for the VAZ 2110 plays an important role. The owners of this model know very well that its failure is not a rare situation. The good news is that the replacement procedure is not complicated and can be carried out by any driver, even whose driving experience does not exceed several days.
As for the cost of self-repair, you only need to purchase a new O-ring and the sensor itself, of course. Today, a good quality device for a “ten” costs about 200 rubles. The tools are only the most standard ones, so you won’t have to buy anything or spend any extra money.
A professional will do the work at the auto repair shop, but the cost of the repair will be appropriate. Plus, many service stations use cunning moves, trying to force the car owner to perform a number of additional measures. Sometimes they are really useful, but sometimes they are just an attempt to get more money out of you.
Decide for yourself whether it’s worth taking the car to a service center to replace the TOZ sensor, or whether you can calmly complete the entire procedure yourself in an hour, but save a decent amount of money.
Where is the coolant temperature sensor located?
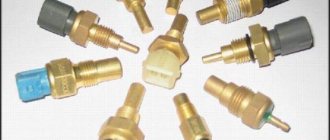
In 99% of cases, the sensor is installed on the exhaust pipe of the cylinder block. This is the place where the coolant “leaves” the engine (that is, it is at the highest possible temperature) and then enters the radiator. In some modern cars, 2 controllers are installed: on the outlet and inlet pipes (for more precise temperature control). The sensor itself is connected to a cable (of 2, less often - 3 wires).
Visually, the DTOZH looks like a plastic “plug”, with a metal thread and an additional contact pad at the end. It must be taken into account that the sensor is in direct contact with the coolant. Accordingly, if there are signs of engine overheating, then you should not pull it out (which is necessarily indicated in the technical instructions for the car).
Video: where is the temperature sensor located, how to replace the DTOZH
Sensor location on the engine
In order to check the coolant temperature sensor, you need to know where it is located. Naturally, this information will vary for cars of different brands and models. However, there are several typical signs by which you can find the place where the sensor is directly attached. So, in most cases it is located on the exhaust pipe of the cylinder head. Structurally, it has a metal thread, with which it is screwed into the corresponding hole. The main requirement in this case is to ensure direct contact between its sensitive element and the coolant. It is this contact that ensures the accuracy of the sensor readings.
Please note that some vehicles may be designed to have two temperature sensors installed. In this case, the first of them records the temperature of the coolant at the outlet of the engine (cylinders), and the second - at the outlet of the radiator. This approach makes it possible to more accurately monitor the condition of both the engine as a whole and its cooling system in particular. However, two sensors are usually installed on powerful and/or expensive cars, where this parameter is critically important, and the ECU contains special programs for engine operation. You can find additional information about the design of a particular car in the corresponding manual or technical documentation.
Causes of failure of the coolant temperature sensor
Structurally, the coolant sensor is quite simple, and accordingly, it rarely fails. Usually this happens simply due to its old age or mechanical damage. For example, corrosion of contacts and metal parts of the case may occur due to the fact that instead of antifreeze or antifreeze, ordinary water was poured into the cooling system (and even more so if this water is “hard”, that is, with a high content of metal salts). Also, the reasons for the failure of this device may be:
- Hull damage . This can be expressed in various aspects. Often, leaks of coolant are visible, which flows from the threads of the sensor or its housing. Also, the electrical contacts and/or the thermistor itself may be damaged, which will produce an incorrect signal.
- Oxidation of contacts . Sometimes situations arise when, under the influence of fumes or simply from old age, the contacts on the sensor oxidize, so the electrical signal does not pass through them.
- Damage to the chip . In some cases, due to mechanical damage, the so-called “chip” may fail, that is, a group of contacts that is connected to the coolant temperature sensor. Simply put, the wires at the base of the connector fray. According to statistics from reviews found on the Internet, this is one of the most common malfunctions that occurs with the sensor and the corresponding system.
- Lost electrical contact inside the sensor . In this case, unfortunately, repair is hardly possible, since usually its body is sealed and does not allow access to the insides of the DTOZH. Accordingly, in this case the sensor only needs to be replaced with a new one.
- Violation of wire insulation . In particular, we are talking about the power and signal wires that go to the sensor from the electronic control unit and back. The insulation can be damaged due to mechanical stress, abrasion, or even simply from old age, when it “peeles” in pieces. This is especially true for those machines that are operated in conditions of high humidity and sudden changes in ambient temperature.
If it is possible to simply clean the body/threads/contacts of the sensor, then to restore its normal operation it is enough to carry out the appropriate measures. However, if the housing is damaged and/or the internal thermistor is damaged, then repair is hardly possible. In this case, you just need to replace the sensor with a new one. Its price is low, and the replacement process is simple and will not take much time and effort even for novice car owners.
Main signs and characteristics of DTOZh malfunctions
The failure of the coolant temperature sensor can be judged by several signs. However, it is worth understanding that the typical manifestations listed below may also be the cause of other car engine defects. Therefore, to be sure, you need to conduct an additional check.
The main signs indicating a sensor malfunction:
- The Check Engine light came on on the dashboard. If you see this icon, scan the error code; it may indicate other problems.
- Fuel consumption has increased. Due to the fact that the electronic unit receives incorrect data from the sensor, it cannot correctly read it and determine the required command. Namely, how much fuel is needed to form a fuel mixture and maintain the optimal engine temperature.
- Unstable engine operation. This includes failures at idle, difficulties when starting the engine (more often in winter) or a complete stop at low speeds.
- The car stalls when the engine is warm. As soon as the antifreeze temperature reaches a certain point, the engine stops spontaneously. Regardless of what liquid was used in the system (good antifreeze or plain water).
- Unstable fan operation. There are several manifestations - sometimes it does not work at all, and in other cases it does not switch to emergency mode. Here it is important to additionally check the thermistor for serviceability.
- The car does not start easily when the engine is cold.
More often, such sensors are made with a non-separable housing, so if they are defective, they are replaced with new ones. This applies to cars of any manufacturer, both domestic and foreign.
Signs of a malfunctioning coolant temperature sensor
Coolant temperature meter test
Now that you have installed ECT on your vehicle, you are ready to test it.
- Disconnect the sensor electrical connector.
- Obtain engine surface heating values using an infrared thermometer or a suitable cooking thermometer. Measure the engine temperature at a location near the ECT.
Before we move on to the next step, let's digress here for a second:
Okay, at this point you may be wondering why you would need to measure engine heat to troubleshoot a faulty meter. The main reason is that you are trying to check two common potential faults here: the ECT sensor and the thermostat.
Operating temperature and causes of engine overheating
Under normal conditions, coolant circulation ensures a temperature of 86-90 °C. During hot periods, the indicator may lag, then after turning on the fan, the temperature stops at 94-108 °C. A frequent question from car enthusiasts: what is the temperature in winter when it’s cold? The first 10-15 kilometers the indicator may be below 80 °C, but after this point it should rise to 85-90 °C. These data are suitable for VAZ 2110 injector.
Also, the operating temperature depends on the type of firmware, fan speed and other features, so the normal value is 90-105 °C.
Now you know what the normal operating temperature of the VAZ 2110 is, so it’s time to study the reasons for its excess. If the “culprit” of the overestimated indicator is not the DTOZH, then the following actions should be taken:
- Check the outer part of the radiator for contamination.
- Replace the thermostat in the VAZ 2110 injector.
- Check the coolant level in the expansion tank; if it becomes low, add it to the required level.
- Adjust the ignition timing.
- Check that the fan is turned on.
How to determine a faulty DTOZH?
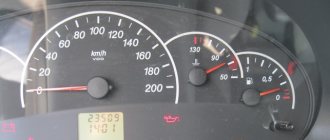
If the pointer functions correctly and the wiring is intact, plug the sensor back into the circuit, start the engine and warm it up as normal. If, at the same time, readings are stored on the pointer that do not correspond to normal values, or the pointer arrow has not even moved, then the problem lies precisely in the sensor. In this case, you simply need to replace it.
By the way, you can learn about the signs of a malfunctioning coolant temperature sensor by following this link. After reading this material, you will learn in more detail about methods for testing the sensor for functionality, as well as its role in the car engine.
Another way to check the temperature sensor
There is another way to check the sensor, your actions should be as follows. First of all, you need to disconnect the negative terminal from the car battery and drain the antifreeze from the engine so that the liquid does not spill after removing the sensor.
Next, you need to remove the sensor from the engine and test it with an ohmmeter. One contact must be attached to the sensor contact. The second terminal of the device must be closed to the DTOZH housing. The ohmmeter reading at normal temperature should be about 700-800 Ohms.
Try checking the sensor in other conditions, for example, by immersing it in hot (about 70-80 degrees) water: in this case, the resistance will be less. It's also worth testing it in cold water, where resistance will naturally increase. If the ohmmeter readings at given temperatures differ from normal values, or there is no decrease or increase in resistance when the sensor is heated and cooled, then this is the problem - it should be replaced. Otherwise, you need to look for a fault in the indicator or the wires going to it.
We recommend watching a useful video about checking the coolant temperature indicator and sensor. In this video you will learn where the pointer sensor is located, how to check it, and also determine what exactly is the problem in the pointer sensor itself or the instrument panel, be sure to watch:
Checking the serviceability of the DTOZH
The antifreeze temperature sensor is checked in two main ways: without removing it from the car or by removing it from its seat. The second method is also divided into two diagnostic options: with and without a thermometer.
If the sensor is not stuck to the thread, then it is quite easy to remove it with an open-end wrench of a suitable size. It is important to disconnect the contact connector before unscrewing. The next step is to check whether power is coming from the ECU to the sensor.
It’s quite easy to do this with a universal tester (multimeter):
- disconnect the connector from the sensor;
- switch the multimeter measurement mode to “20 V constant voltage”;
- attach the probes to the terminal contacts coming from the ECU.
Under normal conditions, the voltage should be 5 V. If this condition is met, then you can proceed to further testing of the sensor.
If you don’t have a multimeter on hand, the serviceability of the ECU and the wiring to it can be checked by simply removing the connector from the coolant temperature sensor while the engine is running, the radiator fan will automatically turn on. This will happen because the control unit will see an open circuit and go into emergency mode. If this does not happen, then either the ECU or the cooling fan is faulty.
Check without removing from the car
The most convenient way, because there is no need to dismantle and then install. The check is performed using a tester, by measuring readings on the sensor contacts.
To provide access to the contacts, you will need to disconnect the terminal block from the sensor. When performing work on a hot engine, be careful, because you can not only burn yourself, but also melt the case or probes of the multimeter.
The tester is then moved to the resistance measurement position and connected to the sensor output contacts. It is worth noting that for a cold engine the reading will be high, and for a hot engine it will be significantly lower.
For a general understanding of what values the sensor produces at different temperatures, as an example, below is the data for the VAZ-2110. The readings of other passenger cars will not be much different.
Sensor readings depending on temperature changes
| Liquid temperature, °C | Conductor resistance, Ohm | Liquid temperature, °C | Conductor resistance, Ohm |
| 5 | 7 280 | 45 | 1 188 |
| 10 | 5 670 | 50 | 973 |
| 15 | 4 450 | 60 | 667 |
| 20 | 3 520 | 70 | 467 |
| 25 | 2 796 | 80 | 332 |
| 30 | 2 238 | 90 | 241 |
| 40 | 1 459 | 100 | 177 |
It is worth noting that the sensor rarely breaks down; situations occur when it produces incorrect information. Therefore, you should compare the temperature readings on the dashboard with the data received from the coolant temperature sensor in accordance with the table. If the data differs, then it makes sense to remove the sensor and carry out further diagnostics.
Checking DTOZH with a thermometer
For such diagnostics, it is necessary to remove the sensor from its seat. As mentioned above, this can be done using a suitable wrench. At the same time, you can clean the sensor itself, remove plaque from the threads on the pipe and lubricate it, inspect the contacts for oxidation and, if necessary, remove them.
Then put water into an electric kettle or another container, but in this case you will have to use a boiler. In addition, to measure you need to take a multimeter and move its switch to the position for measuring conductor resistance.
The sensor head is lowered into the water, and the tester probes are connected to its contacts. A thermometer is also placed in the container with the sensor; for ease of measurement, an electronic one is preferable, but a mercury one is also possible.
Then, gradually increasing the temperature of the liquid, compare the readings of the sensor and the electronic thermometer in accordance with the table. For greater accuracy, it is better to record readings every 5 degrees. As a result, you will receive data that can be entered into a table. They can subsequently be compared with the information provided in the technical documentation for a specific car model. As a last resort, you can compare it with the table above.
During testing, small deviations from the values are allowed. Small errors may depend on various conditions and on the sensor itself. Often, even coolant temperature sensors of the same model have slight differences in readings under the same measurement conditions.
Checking without a thermometer
This method is not very different from the previous one, only here a thermometer is not used and readings are taken only once.
To check the sensor, immerse it in a container of water and bring it to a boil. Then connect the multimeter probes to the output contacts and see what it shows.
If the DTOZH is fully operational, then its resistance should be 177 Ohms. However, errors should be taken into account. In addition, the multimeter probes also have their own resistance, and the water temperature may be slightly below 100 degrees, and accordingly the resistance will be slightly higher.
Checking the coolant temperature sensor with a multimeter
- Using an ohmmeter or multimeter, measure the resistance value of the coolant temperature meter by connecting one of the meter leads to one of the terminals on the meter's electrical connector and the other lead to the other terminal on the ECT electrical connector.
On vehicles with older single wire meters, connect the meter leads to the connector terminal and the gauge body (ground) to obtain a reading.
- Check your vehicle's repair manual for the correct resistance value for your ECT. However, not all service manuals have this information.
Most meters of this type have a resistance value of 3000 ohms or more at about 55 °F (13 °C). You can try searching online for a table of resistance values for your specific ECT if you know the brand.
However, if you find resistance values for your specific ECT sensor, continue with these tests anyway; the meter's behavior and temperature readings can give you a clue about its operating condition.
- Record the resistance.
Now you are going to do another test
- This time, start the engine and let it idle.
- Place the transmission in neutral and set the parking brakes.
- Wait about a minute or two and measure the engine temperature and resistance of the meter as you did before.
- Write down this new pair of values.
- With the engine running, wait about one to two minutes and repeat this procedure again.
- Do another pair of readings after a minute or two again, always noting the meanings.
- Then turn off the engine.
Sensor operation
Before you familiarize yourself with the technology of how to check the idle speed sensor, oil pressure, temperature and other types of control devices, you need to consider the features of their operation.
The main devices of this type monitor the functioning of the motor and related systems. It is the engine that needs precise control of the operation of its elements and systems. Its failure entails the need for major repairs. To avoid large financial costs, it is recommended to check the functionality of the sensors.
Control devices are responsible for testing the heating level of the system and coolant. They provide measurement of the condition of various components during idling, in normal mode, etc. Every car owner should know how to check the temperature, air, oil pressure and other similar devices.
Replacing the coolant temperature sensor
You can only replace a failed DTOZ with a similar device.
Required Tools
To complete the task you will need:
- container for collecting waste liquid;
- wrench 19;
- sealant.
Step-by-step instruction
Dismantling and installing the controller is performed as follows:
- Some of the coolant must be drained from the radiator; this will be required to dismantle the sensor.
- Disconnect the connected wires from the device.
- The controller itself is disabled using a 19mm wrench.
- Run device diagnostics if necessary. If you are changing the device, then before installation it is necessary to treat its threads with sealant.
- Screw the new controller into place and connect the wiring to it.
- Fill the cooling system with previously drained antifreeze. Make sure that there is no refrigerant leaking through the unit.
Principle of operation
The sensor alloy changes conductivity at different temperatures. Resistance decreases as it increases, and increases as it decreases. Electrical parameters change, which is recorded by the circuit.
The microcontroller of the serviced device, based on the received data, taking into account the specifications of the detector, calculates the t° shifts. Then it sends a signal to the executive unit (relay, heater, cooling system) to act at a particular t° level.
Example: taking into account the described algorithm, the voltage is controlled at the input of the thermostat comparator, adjusted according to the temperature characteristic, and it undergoes changes.
The NTC sensor itself is not an electronic device, it only records. It is based on a nonlinear dependence of resistivity. resistor depending on the temperature of the environment. The operating scheme may be simpler: a simple output on a value display or a relay can react immediately.
Sensors are sensitive to electromagnetic radiation and fields, so they are shielded or mounted at a distance from the sources of such phenomena (power wires).
Recommendations for care and maintenance of sensors
- Strictly adhere to vehicle maintenance schedules;
- Buy parts with original catalog numbers. The exact data is indicated in the instruction manual for your technical device;
- Carry out preventative maintenance, install consumables and spare parts at certified service stations. Relevant while the car is under factory warranty. There are frequent cases of warranty cancellation due to third-party intervention.
- When the first signs of engine malfunction appear, contact a service station.
Checking the sensor operation
The method of how to check the temperature sensor is described in detail by the vehicle manufacturer. To carry out such work, you will need tools, a tester, a container of water, a stove, a thermometer with divisions up to 120 ºС, and a basin for antifreeze. First you need to turn off the radiator and drain the antifreeze from it. After this, the sensor is dismantled. The container with water must be placed on a gas or electric stove. The sensor must be lowered into the liquid. Its brass part should be completely immersed in water. The plastic should be on top.
Idle speed sensor
Drivers may be interested in how to check a car's idle speed sensor. This device is also responsible for ensuring stable engine operation. It only controls this process at idle. This sensor controls the amount of air that is supplied to the motor in this operating mode.
In this case, it is no longer the antifreeze liquid that is measured. The idle air supply system has certain components. It has a valve in the form of a conical needle. This element prevents air from entering the system. The needle is driven by a small motor that runs on electricity. The damper is set in motion when the motor is turned on. The needle can open or close the gap through which air enters the engine. Moreover, the diameter of this hole is also adjustable due to the special configuration of the damper.
Basic faults
If the sensor is working correctly, the needle moves smoothly, but if there is a problem, the movements will be sharp and jerky. With such work, not only can it be impossible to correctly assess the temperature position, but it can also cause damage to the engine and the entire system. Breakdowns can be different and happen in several places at once, but most often motorists encounter the following reasons:
- Thermostat failure.
- Malfunctions in the operation of the coolant temperature sensor.
- Malfunction of the indicator itself and the sensor needle.
- Short circuit in the electrical board.
These causes are arranged according to frequency of occurrence, so we advise you to make the same diagnosis. If it is possible to turn to a specialist for help, this will significantly reduce the time it takes to find and eliminate the cause.
Thermostat failure
The problem with the thermostat is the most common, and all because of the poor protection of this part. The fact is that it can break even on a new car. Some people talk about randomness, and others about the conditions of use. One way or another, it is worth understanding how this system works and how to check its serviceability.
Often such breakdowns occur at low temperatures, but can and will also occur in the opposite conditions (heat waves). When the car starts and the engine warms up, the sensor needle immediately jumps to the correct value, and then the thermostat opens. The coolant begins its movement through all components through the pipes, however, if the thermostat is broken, it shorts out and blocks further passage for the liquid. There are cases of complete closure of the thermostat valve, and there are cases of partial closure, but in both cases, prolonged operation of the engine will lead to overheating and the engine temperature sensor will jump.
To independently diagnose, you should check the thermal state of the supply pipes. In cases where the thermostat is stuck, the lower pipe will be colder than the top. This will prevent the coolant from making a large circle and the engine from starting to operate normally.
Coolant temperature sensor
The next most common breakdown is the coolant temperature sensor. Sometimes it may happen that a contact in it comes loose and data will not flow or will come with breaks in the circuit. Because of this, the needle will twitch, because for it the indicators jump sharply from the working value to zero. There is also a possibility that the sensor itself is broken and it simply cannot record data properly.
When each sensor is detected, you need to make sure that it is intact, as well as that the contacts are properly connected. To fix it, two people will be needed: one moves the contact, and the other monitors the arrow readings. If the arrow reacts to actions and starts jumping, then the problem is with this sensor.
Arrow and temperature sensor
In cases where the thermostat and the thermal sensor connection contact are in order, it is worth paying attention to the sensor indicator itself, there may be malfunctions in the integrity of these parts. In order to identify a breakdown, you need to have certain knowledge about the resistance and structure of this electrical mechanism
Because perhaps it is the poor condition of the sensor that makes the needle jump like crazy.
This knowledge can be studied independently on the Internet or in specialized books, where all operations and indicators are carefully described. But the best outcome, of course, would be to contact a specialist who already knows about all the intricacies of the sensor design.
Electrical board of instrument panel
If everything works well, but the temperature sensor still jumps, then all that remains is to disassemble the instrument panel and check the electrical board. If the soldering is broken or done poorly, it will lead to problems like this. If you plan to fix this problem yourself, we recommend taking a soldering iron with a thin rod and low power so as not to damage the board and adjacent parts.
It is also worth paying special attention to the output mass and resistors. And if you can’t do this kind of work yourself, then contact a specialist who will do it quickly and without errors.
Replacing the DTOZH and resetting the error
- Replacing the DTOZH is a simple procedure. You need to start dismantling it, after draining the liquid and disconnecting it from the battery. Clean the seat from dirt. Then screw the new device into its place. Add the missing antifreeze (preferably new one too) and connect the battery terminal.
- Delete the code from the ECU memory. For this:
— press and hold the mileage reset button;
— turn the ignition key;
— all positions are displayed on the LCD;
— press any button so that the version of the on-board computer program appears;
— the next press of the button will display all recorded and saved trouble codes. Among them, find No. 4. This is an error in the coolant temperature sensor;
— reset is carried out by pressing the mileage reset button for three seconds>;
- when the sensor is replaced, repeat the entire procedure again to check for the presence (or absence) of an error.
So, it became clear that careful attention to the car is the key to its long service. Do not fill with fuel or other consumables, including coolant, of poor quality. Clean and replace parts in a timely manner and regularly check their serviceability. Learn to recognize the symptoms of their dysfunction.
Operating principle and functions of the device
The design and operating principle of the temperature meter have changed little since its first use on a car. Due to modern materials used in the manufacture of the sensor, it has decreased in size, and the accuracy of the readings has increased. The device is a thermal variable resistor enclosed inside a metal case with a threaded tip . When heated, the thermoelement reduces the resistance of the electrical circuit, which allows the electronic control unit (otherwise known as the controller, ECU) to determine the temperature of the coolant.
The following functions depend on the operation of the temperature sensor:
- Traditionally, the coolant temperature indicator operates from meter signals.
- Timely activation of forced engine cooling fans when the antifreeze reaches the set temperature threshold (about 100 °C).
- Enriching the air-fuel mixture and increasing idle speed on a cold engine.
- While driving, the controller collects readings from all sensors and, on this basis, forms the ratio of fuel and air in the mixture. The temperature meter is also involved in this process.
The design of a modern car may provide for the installation of several heating meters responsible for certain functions. Their location varies:
- on the upper pipe leading from the cylinder block to the radiator;
- in the thermostat housing;
- in the cylinder head;
- directly into the radiator.
Checking the idle speed sensor
If the listed malfunctions appear, you need to consider how to check the idle speed sensor. It is located on the throttle valve. Her cable is attached next to it. Above the idle speed sensor is a throttle position control device. You need to turn off the ignition and dismantle the presented device. The sensor can be attached using adhesive or bolts. In the first case, you will need to dismantle the entire throttle assembly. The bolted connection will allow you to disconnect only the sensor.
Next, you need to connect the on-board network wires to the sensor. You need to place your finger on the conical needle. Next, the ignition is turned on. If after this you feel slight jolts of the needle, then the sensor is working. Otherwise, this structural element will be motionless. The sensor will need to be replaced.
