After purchasing a car, the owner wants to keep the car looking new for as long as possible. Every scratch and microcrack is like a real wound for the driver.
Covering the body with film is the most common and popular type of car tuning today, due to the low cost, efficiency and accessibility of this method for most car owners. A wide variety of PVC-based films of various types and colors provides ample opportunities to show your imagination and make your car truly exclusive and stand out from the stream of cars on the road. There is nothing complicated in the process of wrapping a car body, and if you wish, you can do this work yourself.
The procedure allows you to minimize damage to the body and also save on painting the vehicle. The material can be used in hard-to-reach places and on surfaces of different shapes. The film stretches perfectly and easily adheres to the car body. With its help, the car owner will be able to forget about chips and micro-scratches for a long time.
What tools and materials are needed to wrap a car with film? Calculation of the amount of film and its cost? Preparing a car for vinyl wrapping, as well as do-it-yourself methods for wrapping a car with film.
Let's start with the fact that the car owner can apply the film in two ways: on dry and wet surfaces. The choice is up to the driver, but it is better to rely on your own accuracy and speed.
We advise you to read our articles
Food and alcohol: a list of dangerous dishes for the driver
How to rent a car in a taxi and not “get money”
How to change a tire without a jack?
Lada XRAY Cross with CVT
To achieve a good result, you should work with an assistant. The pasting process involves following the following rules and recommendations:
Smooth the material from flat surfaces, working towards the edge. In order for the film to fit perfectly on bends and indentations, it is made elastic by heating it to a certain temperature. Do not stretch the material too much. If air is detected under the film, you should try to smooth the material using a squeegee.
Do-it-yourself car wrapping
Tools and materials for wrapping a car with film
Pasting a car dry or wet cannot be done without special materials and tools. To work successfully, the master will need:
car film;
dry, soft, lint-free cloth;
stationery knife and scissors;
a professional hairdryer, but you can also use a regular hairdryer;
plastic or felt squeegee;
sprayer with soap solution (surface treatment using clean water is difficult);
masking tape;
degreaser (white spirit works great).
If the film is very large, it is better to work with an assistant.
Maintenance of a car covered with vinyl film
Vinyl does not require serious care, but to extend its service life you should follow simple recommendations:
- You should not wash your car for the first seven days after wrapping it;
- For a week after applying the coating, do not drive at very high speeds or on bad roads;
- Wash the car with high-quality car shampoo and not very hot water;
- Do not use abrasive polishes or rough brushes to care for coated surfaces;
- Do not leave the car in the sun for a long time. Any film can burn out.
Which films are easier to glue?
On the auto goods market, the car owner can purchase cast or calendered film. It is believed that the first type is most suitable for vehicles, as it is perfectly applied to recesses and bends.
In addition to the type of film, the quality and technology of gluing depends on the method of application - dry or wet. The first method is considered difficult and the work should be done very quickly, since the film instantly sticks to the surface of the car, and errors cannot be eliminated. Despite this, the coating is applied in one go and lasts for a long time.
What is a protective film, what is it like and what is it needed for?
Based on the name, it becomes clear that such a film is designed to protect the car from damage. In addition, it performs a decorative function.
You can completely cover the car with protective film or some of its elements
Protective film for cars can be of several types:
- vinyl, has a reasonable price and a large selection, but does not protect the car very reliably. Its thickness is up to 90 microns;
- carbon - one of the types of vinyl film;
- Vinylography is a film on which drawings are printed;
- polyurethane, it is stronger than vinyl film, but does not retain its shape well and is not suitable for pasting spherical surfaces;
- anti-gravel - reliably protects the car from damage by sand and gravel. The thickness of the film is up to 200 microns, while the thickness of the paint coating is 130–150 microns.
Car wrapping with film
For small vehicles, it is recommended to purchase material whose width is at least 137 cm; for other cars, 152 cm will be enough. To cover the body of a sedan, the master will need about 17–19 m of film; for an SUV you will need at least 23–30 m; for station wagons and crossovers – 18–23 m.
We advise you to read our articles
Why is it dangerous to drive a car with an empty tank?
How much does a car cost you each year?
How to make the perfect summer washer (5 liters for 15 rubles)
Lada XRay Cross crash test
The cost of car film directly depends on the quality, manufacturer, material characteristics (color, gloss, etc.). If you decide to cover your car with film, it is important to remember about the manufacturers... Choose quality first - after all, this is the key to successful operation and durability. For example, 3D film with a service life of 5 years, a roll width of 152 cm and a length of 30 m is sold at a price of 450 rubles per meter. If the buyer wants to purchase 4 D film, the cost increases to 750 rubles. Anti-gravel films also have nuances, which you can find here - https://vinylrussia.ru/catalog/antigraviynaya_plenka/
Painting or pasting, which is more profitable?
Anti-gravel armored film will last for 5–10 years. It is thicker than the factory paint coating and reliably protects it from damage. If you completely cover a car with such a film, you will have to pay about 150–180 thousand rubles at the salon. If you protect individual areas, the cost will be less. It is very difficult to cover a car with polyurethane armored film yourself.
Vinyl film is thinner, and on complex elements where it stretches, its thickness decreases by another 30–40%. Its choice is wider, and pasting is easier than with polyurethane film. The cost of a complete car wrap will cost about 90–110 thousand rubles. The service life of vinyl film is less and is 3–5 years.
High-quality car painting also requires a lot of expense. Everything can be done correctly only at a specialized station, where there is a chamber with the ability to regulate the air temperature and equipment. The price starts from 120–130 thousand, it all depends on the materials used.
If you can cover a car with film yourself, you won’t be able to paint it with your own hands.
When preparing for painting, you will have to remove a lot of hanging elements, and this takes a lot of time. The thickness of the paint layer will be greater than that of the factory coating and is about 200–250 microns. The advantage of painting is that there is a thicker layer of varnish, so several abrasive polishes can be done.
You won’t be able to paint a car with high quality on your own. If you choose between painting and vinyl, the first option has a longer service life. If you cover some parts with vinyl film, it will cost less than painting them. If the entire body is covered with vinyl, the price is comparable to painting it. High-quality painting will last no less than the factory coating.
Video: which is more profitable, painting or covering with film?
Preparing a car for vinyl wrapping
For successful work, the surface of the car must be carefully prepared, namely: washed, cleaned and degreased. To wash the body, use a special shampoo or any detergent. Alcohol and solvent will help get rid of stains, insect marks and grains of sand stuck to the surface. A perfectly clean body can be obtained by polishing the car.
And finally, you can start marking the film. For the procedure you will need a stationery knife and scissors. Having applied the material to the surface, you need to mark the size line and make other necessary marks.
Tools, materials
To work you will need:
- a squeegee, with which the film is smoothed and air bubbles are expelled;
- a stationery knife, which will be convenient for trimming the remaining film;
- sprayer, commonly used for gardening and vegetable gardening. We need it to spray soap solution;
- hairdryer At temperatures above +20ºС, in the absence of a powerful hair dryer, even a household hair dryer will do;
- degreaser;
- a primer that enhances the adhesion of the adhesive layer;
- paper napkins. These are used when painting a car to remove dirt and degrease. In order for the coating to serve for a long time, not to swell and not come off the edges, the surface must be perfectly clean. If the car vinyl is not glued to a car that has recently left the walls of a car dealership, then we recommend buying clay for car bodies. It will help remove stubborn tar deposits, clean dirt from micropores and cracks in the car's paintwork. This will improve adhesion and extend the service life of the film;
- dry rags to remove residual moisture.
Carbon-look film or any other texture can be glued using a soap solution (wet method) or dry. Dry wrapping of a car provides more reliable adhesion of the adhesive layer and better adhesion on bends, but is not very suitable for work without experience. A wet surface is more forgiving of mistakes, since the film is easier to move and lift to remove air.
Which films are easier to glue?
If you have no experience working with car vinyl, which is quite likely if you are reading this article, we do not recommend choosing the cheapest films for your car. Due to their poor quality, they are difficult to paste, as they have poor elasticity and are often subject to shrinkage and swelling. Understanding of many things will come to you only directly when pasting with your own hands. Therefore, in order not to spoil the expensive material, we highly recommend buying a small piece of the cheapest training film. You can cover, for example, the plastic in the interior with carbon fiber, and only then move on to pasting complex car parts and large areas.
For beginners, we recommend choosing a material with channels on the inner layer. It is much easier to remove air bubbles from under such vinyl. Also, you should not practice on carbon-look films, unless you are gluing it to an inconspicuous small interior part. The rectangular structure of the image does not allow stretching of the material, stylized as carbon, as distortions are immediately visually noticeable. In this regard, ordinary car vinyl is much more forgiving of mistakes, and therefore the first experience of car wrapping has a greater chance of success.
Primer, soap solution, cutting
To prepare a soap solution you will need detergent and water. Proportion 1:10. The detergent will ensure comfortable application of the material. Car wrapping with vinyl film in car dealerships is done using a primer. The need to use it arises in hard-to-reach places where the material needs to be tensioned; along the edges of the part where the film is wrapped and in case the adhesive layer has received fingerprints from the master, deteriorating its properties.
Types and features of films
There are two types: vinyl, polyurethane. The protective properties of vinyl are due to their thickness, and that of polyurethane due to their abilities.
When purchasing vinyl material, pay attention to:
- adhesive composition on the surface of the back side of the vinyl;
- thickness in microns;
- width;
- strength, elasticity;
- possible service life.
The range of vinyl by type falls into several categories:
- Matte. The advantage is the adoption of fairly complex shapes. Service life up to 7 years.
- Glossy. Mainly used for reupholstering body parts.
- Mirrored. Prevents the formation of body rust. Available in two colors - gold, silver. Service life depends on the manufacturer.
- Carbon. Availability at different prices depends on the quality. Service life from 5 years.
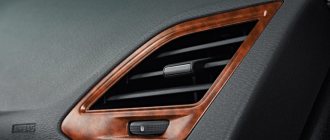
- Textured. Used to imitate various materials: wood, metal. The material is dense, service life exceeds 10 years.
There are several other options for vinyl film (chameleon, etc.), but they are expensive and very rarely used.
Durable polyurethane (up to 300 microns), protects the body from scratches and impacts. Capable of transmitting ultraviolet radiation, which is important when wrapping not the entire car (when the material is removed from a part of the body after a few years, the color of the entire car will be uniform). The price is more expensive than vinyl.
Technology of car wrapping with wet film
So, let's look at the procedure for wrapping a car using the wet method step by step:
Prepare the surface. In order for the material to be applied easily and, as a result, to look the same color as the car, it is necessary to clean the surface of the car by thoroughly polishing it, removing irregularities and degreasing it. Next, the body is dried with a soft, dry cloth.
Place the coating on the car body. It is recommended to start work with small areas that have the smallest bending radius of the surface. This is necessary so that the film stretches over the surface and does not shrink. At this stage, marks are made with tape, and the required film size is determined. Before pasting, the surface must be sprayed with a soap solution (detergent + water in a ratio of 1:10, respectively).
Heat the vinyl. The heating temperature should not be more than 60 degrees, otherwise it may cause damage or complete deformation of the film.
Start gluing the pieces. It is recommended to follow the principle of “one piece per body part”. If it is not possible to glue the film in one piece, it is better to slightly overlap one piece of material onto another in order to avoid the ingress of water and air in the future. You need to work with a squeegee from the middle to the edges, as when gluing wallpaper. The end of the hanging fabric should not stick together!
The procedure for wrapping a car is quite labor-intensive and painstaking. After completing the work, it is recommended to wait 10 days so that the material dries well and adheres firmly to the body coating. To do this, it is better to drive at low speed.
Paintwork damage repair
Vinyl material not only does not hide defects in the car body, but can also make them more noticeable (especially if it is a matte finish or carbon film). When choosing auto vinyl over painting a car, you must understand that the preparation must be no less thorough.
Particular attention should be paid to areas of corrosion, since the corrosion process will continue under the film, which will very quickly lead to peeling or swelling of the car vinyl.
If the car body is in satisfactory condition, it is often enough to hide large chips and deep scratches. If the damage is not too severe, you can do without puttying and priming. Otherwise you need:
- degrease the damaged area, clean with P120 abrasive. Corrosion areas must be treated with a rust converter and then primed with epoxy primer;
- fill the defect with universal putty;
- sand the putty first with abrasive P120, and then with finishing abrasive P320;
- prime the putty areas with acrylic primer;
- clean the soil with abrasive P320 at the initial stage and P600-P800 at the finishing stage.
We did not describe each of the processes, since we have already devoted separate articles to filling and priming your car.
Air removal, correct twists, carbon
To avoid problems and poor-quality film application, it is recommended to wait until the material cools down after applying it to the surface. Having discovered air under the film, you need to carefully pierce the bubble with the tip of the blade along the surface and run your finger along the pasted material. The flaw will not be noticeable. Bubbles of small diameter resolve on their own after some time.
Proper folding must be done while the vinyl is heating up. With the help of a professional hairdryer, the material is heated, stretched at the point of the fold and placed on the corner. The film must be stretched so that it covers the corners well. After completing the work, you should warm up the surface, wait until it cools down and only then cut off the excess material.
How to choose a film
Now there are many films of various colors and with all kinds of decorative effects. Materials can imitate carbon, be matte or mirror, have different designs and patterns, 3D or 4D images. You can order stickers with an individual design. Sometimes this is necessary for car branding, for example, for working in a taxi or any company.
Most car wrap films are made from vinyl. Good quality products are easy to apply and easy to remove. They have a long service life of at least five years. These are materials from the brands 3M, Arlon, Hexis, KPMF, Oracal and other American and European manufacturers. Their disadvantages are the relatively high cost and a large number of fakes. Therefore, you need to buy products from places with a good reputation.
Many adhesive materials from China and South Korea are short-lived and of low quality. They can successfully serve for a couple of years, or even less. Such stickers are difficult to remove from the surface and may leave marks and damage to the paintwork. Sometimes they do not stretch well when glued, tear and quickly begin to peel off. Chinese products can develop noticeable defects even with minor mechanical or chemical exposure, for example, after a regular delicate body wash. Their only advantage is their low price. But those who value the condition of their car and want it to have a beautiful appearance should not skimp on film and take the cheapest varieties. And what design to choose is a personal matter for everyone. But you should not buy materials with a strong mirror effect or imitating the colors of special vehicles. This is prohibited by traffic rules and unsafe.
How to remove vinyl film from a car
Like everything in our lives, vinyl film has an expiration date. To remove material from the surface of the car, you must follow these recommendations:
The car can be left in the sun or indoors where the temperature exceeds 20 degrees. Next, using a hairdryer, heat the surface to 70–80 degrees.
The coating is removed from the edge to the center at an acute angle.
If after completion of the procedure there are still areas with film on the surface, they are removed with alcohol or solvent.
The film removal procedure is quite simple, but at the same time painstaking and time-consuming. The work must be carried out carefully and without haste.
Body preparation
Before wrapping, the car body must be carefully prepared. To do this you need to do the following:
- Wash the car with car shampoo, dry well and wipe.
- Inspect the clean body for damage to the paintwork or difficult-to-remove contaminants. If there are bitumen stains or traces of foreign paint on the car, remains of wood buds and similar defects, remove them with special chemical cleaners or folk remedies. If there are chips, scratches and dents, it is advisable to repair these damages. True, in some cases it is allowed to apply film materials on unpainted putty or primer.
- Polish if the car is more than one year old. The film will adhere better to a polished body. And it will be easier to remove it.
What you need to know for self-gluing
Many car enthusiasts prefer not to contact a service to apply vinyl coating to a car, preferring to stick it on themselves. This allows you to avoid unnecessary financial expenses. In addition, in this case you can be sure that the gluing was done correctly and conscientiously.
When you have decided on the color and type of material, you need to calculate the amount that will be required to complete the job. Just in case, take a small reserve - it will be a shame if there is not enough film.
The coating is applied in a well-ventilated room with a temperature of at least 20 C. If this condition is neglected, the film will soon begin to peel off due to temperature deformations.
Before gluing the vinyl film, you need to properly prepare the car. You will need to wash it thoroughly and dry it. No scratches, chips, or areas of corrosion are allowed on the surface of the car body - otherwise these places will cause premature peeling of the vinyl. In order to properly glue the vinyl, the surface must first be thoroughly degreased. White spirit is used for this.
After all these operations, the car is ready for vinyl stickers - we can start working.
Removing vinyl film
It may be necessary to remove car vinyl if it is damaged, for example, after an accident, even a minor one. Sometimes stickers are intentionally damaged by vandals or otherwise damaged. The drawing may become boring or the owner of the car will stop working for a taxi or another company, and the logo on the body will become irrelevant. In such cases, the film should be removed. This can be done at a car service center or yourself. If the vinyl is removed correctly, there should be no traces left on the paintwork. To remove the film you will need the following tools:
- Plastic squeegee;
- Plastic scraper;
- Hairdryer - construction or household;
- Rags;
- Soap solution.
The film is removed like this:
- Heat the surface with the sticker with a hairdryer.
- Use a scraper to pry off the coating from one corner.
- While heating the material, tear it apart with a squeegee and remove it with your hands.
After removing the film, traces of glue and other defects may remain on the body. You can remove them with a soap solution or white spirit. Aggressive solvents are not recommended. Sometimes body polishing may be required.
Carbon film - what is it?
Carbon film is made on the basis of polyvinyl chloride (PVC) and visually and tactilely imitates carbon fiber, which is fashionable today. Because of its efficiency, it is very popular among motorists who are actively styling their iron horse.
Carbon film will make your car stand out on the road
Quality film is created through a process called calendering. It allows you to create a thin but durable material, with uniform thickness along the entire length. Thanks to this, there will be no seams on the car, which will bring its appearance even closer to the original carbon fiber. In addition to its prestigious appearance, the film has a number of other advantages.
- The coating combines both pleasant and useful properties. Carbon film will not only please your eyes, but will also protect your car from minor scratches, dust and stones flying from under the wheels.
- If the car already has minor damage, the film will hide them and smooth out the relief.
- The likelihood of corrosion will be significantly reduced, since the car is reliably protected from moisture.
- If you have purchased material of decent quality, it can easily survive both severe frosts and unbearable heat.
- The color of a high-quality film does not fade under the influence of direct sunlight and protects the original paintwork from fading.
When cleaning a car with film on your own from dirt, you should use soft sponges and special car shampoos for vinyl coverings.
The service life of the film with proper use can be from 5 to 10 years. But if carbon suddenly goes out of fashion during this time or your tastes change, you can remove the vinyl covering without any problems. To do this, you just need to heat it up. In this case, the paint layer will look exactly the same as before covering. This means that the wrapping process does not threaten the original appearance of your car.
Pasting instructions
Pasting the hood is a simple operation and can be done with your own hands. The algorithm is simple and consists of the following:
- The car hood is washed and degreased using a degreaser or ordinary white spirit, if it is not at hand. Particular attention is paid to those places where stones fell or where other damage occurred.
- in the case where the metal coating is affected by corrosion, such places need to be treated with an anti-corrosion compound.
- select the location for applying the material. To do this, you will need to place the film on the hood without tearing off the backing. As a result, using masking tape you can determine the boundaries of its gluing.
- Before you start gluing the film onto the surface, you will need to tear off the backing from it. Some varieties of the described protective material do not have. This circumstance must be clarified immediately so as not to spoil the expensive material through improper use.
- Next, you need to cover the entire surface of the hood with a previously prepared soap solution of soap or shampoo. It is worth noting that only a soap base makes it possible to correct the movement of the film over the surface. You can also use it to squeeze out the air bubbles underneath. The product is held on the surface of the hood using magnets.
- After the protective layer is laid out on the hood of the car, you need to turn on an industrial hair dryer and start heating the film with it. In places where there are protrusions or where there are stiffening ribs, it needs to be heated additionally, and the protective layer must be constantly pulled over itself so that it fits well.
- Upon completion of pasting, the entire surface of the hood must be dried with a hairdryer set at medium power level.
- At the final stage, the film will need to be leveled using a squeegee. To do this, it is smoothed out with it, and if bubbles appear, they are pierced and also smoothed out. The finished hood is dried within 10-15 minutes, and you will be able to fully use the car no earlier than 24 hours after the procedure is completed.
