In the VAZ 2114, the carburetor, used in AvtoVAZ cars before this model, was replaced by a more modern injector. If earlier the fuel supply could be adjusted manually by moving the valves, now an electronic system has begun to control the injection of gasoline, and in order to customize it you need to arm yourself with a computer and a programmer.
To carry out control using the ECU, it was necessary to install many sensors on the engine, increase the pressure in the fuel rail, and perform injection using injectors.
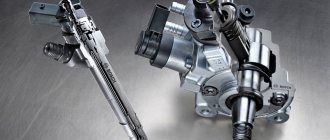
Injectors are solenoid valves that open a very small hole when the ECU sends a signal to it. Due to high pressure, fuel is injected through this hole. How much gasoline will be injected into the combustion chamber depends on the opening time, hole size and pressure. The time is calculated by the ECU in accordance with a program that takes into account the indicators of many sensors.
The maximum possible performance of VAZ 2114 injectors depends on the size of the hole; when tuning, they are replaced with more efficient ones, but do not forget about the pressure. It is created by the fuel pump, and is discharged from the fuel rail by the regulator into the “return”.
When installing powerful injectors on a VAZ 2114, it will most likely be necessary to improve the fuel pump so that it can maintain the required pressure and ensure normal operation of the injectors.
Injectors for the VAZ 2114 8 valves and 16 valves are installed one on each cylinder, that is, there are four in total. Fuel is injected not directly into the combustion chamber, but into the intake manifold, which also branches into four in front of it, where gasoline is mixed with air; for this, gasoline must be sprayed as much as possible before injection.
This allows the mixture to be formed separately for each engine cylinder, which improves the mixture performance.
Many people believe that the fuel injection system is complex in its design, but in fact it is not.
The entire fuel system for the VAZ 2114 consists of these elements:
- Gas tank.
- Coarse filter located in front of the fuel pump.
- Submersible fuel pump, which is located directly in the gas tank.
- Fuel line.
- Fine filter.
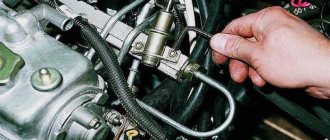
- Fuel rail.
- Injectors inject fuel from the rack into the intake manifold.
- Pressure regulator.
- Return fuel route.
From all this, the ECU controls the activation of the fuel pump and the opening/closing of the fuel injectors.
The main signs of injector malfunction on a VAZ-2114: check and signs of clogging
If, while driving, your car lost its dynamics, began to accelerate more slowly, and in general there were interruptions in its stable operation due to difficult starting and increased fuel consumption, one of the injectors installed on the engine may have failed. In this article we will tell you in detail how to check them, and what are the nuances in such work.
Step-by-step procedure for dismantling injectors
Despite the fact that many advise carrying out such work in the company of an assistant, it is difficult, but it is quite possible to do it alone, with your own hands.
- First of all, put the car on a flat surface and turn on the handbrake.
- We relieve the pressure in the fuel system: to do this, disconnect the terminal from the fuel pump and start the engine. When it has used up all the remaining gasoline, crank the engine with the starter a couple more times, thereby finally relieving the pressure in the fuel line.
Unscrew the gasoline supply pipes
Use a screwdriver to unscrew the bracket on which the fuel pipes are attached.
Removing the fuel rail
Removing the injector from the VAZ-2114 fuel rail
Depending on which of the injectors has failed, the replacement process is absolutely identical.
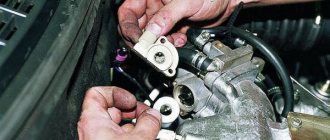
- When the injector is on the ramp, press the spring retainer and remove the block.
As a rule, nothing prevents you from removing the lock.
The bracket will come out of place if you pry it with a screwdriver.
There is a spark, but the engine does not start
If the starter turns, there is fuel in the tank, the pump delivers it, and the spark plug gives a spark - but the engine still does not start - you will have to turn to more specific units, since this situation is uncommon in the practice of owning a VAZ-2114.
First, you will need to check the injectors: this cannot be done in a garage; you will need to tow the car to a repair shop and clean them with ultrasound. If there is a breakdown on the road, you can easily diagnose faulty injectors - if the spark plugs are dry and not filled with gasoline, it means the injectors are not supplying fuel.
Another thing is that something incredible must happen for them to break in all four cylinders at the same time, and before that they did not force the engine to triple for some time.
Even less common are problems with insufficient pressure in the fuel system, caused by failures in various electronic sensors of injection VAZs. In addition to the pump, for some reason the throttle position sensor or mass air flow sensor may fail. The electronic injector control unit will simply not allow the engine to start if at least one of the sensors gives it an error when accessed.
Step-by-step procedure for checking injectors
When nothing interferes with the operation of the dismantled ramp, we reconnect the power supply and gasoline supply pipes to it. Don't forget about the negative terminal of the battery.
- When everything is connected and ready for testing, we fix the ramp with the injectors so that four measuring containers of the same volume can be placed under them. This is necessary to ensure that the measurements are made as accurately as possible.
- Next, it is best to ask an assistant to sit in the driver’s seat, and if this is not possible, secure the ramp motionless and start the engine yourself.
- While the starter is “spinning” the engine, make sure that the injectors work in the same rhythm and the fuel is sprayed evenly. When carrying out such diagnostics, it is very clearly visible which of the four injectors is “snotty” or does not work at all.
It is noticeable how one of the injectors works differently than the other.
The check ends some time after the injectors are turned off.
The latter should be given special attention if any of the pads does not work at all, because damage to the wiring becomes the reason for this. If damage is present, then it is necessary to replace the nozzle with a new one (see “more about choosing nozzles”).
Procedure for checking injector power supply
- First of all, disconnect all the pads from the injectors.
- Then, we connect two wires to the pre-working block, the other end of which we bring to the “non-working” injector.
- Next, turn on the ignition and if the injector starts working, this means it is necessary to replace the non-working element of the electrical circuit - the block, and if not, then only the injector needs to be replaced.
Resistance faults
- In order to diagnose the injector windings, you must disconnect the negative terminal from the battery and all injector power connectors.
- Next, we connect the multimeter probes to the injector contacts and measure their resistance.
Values are within normal limits.
As you can see for yourself, in order to check the condition of the injectors on a VAZ-2114 with your own hands, there is nothing difficult. You just need to carefully read our article and strictly follow the order of actions.
No ignition when turning the key
The second broad area of searching for the problem is the electrical system of the car, due to a malfunction in one of the components of which the VAZ-2114 does not start and does not respond at all to turning the key in the ignition switch. To begin with, just in case, it’s worth checking the functionality of the battery under the hood: many drivers, when starting a deep search for a breakdown, forget about such a banal reason for the lack of current.
You must carefully and calmly make sure that the ignition switch itself turns smoothly, without encountering obstacles or jamming, which in theory could lead to an unsuccessful engine start
Next, you should turn your attention to more specific components and assemblies, checking their serviceability one by one:
- Check the instructions for two relays - the starter and the ignition switch, which are located above the clutch pedal. You can evaluate their performance using the car manual, but usually they are simply replaced with ones that are known to be good for diagnostic purposes.
- A faulty starter, or more precisely, a solenoid relay: if it breaks down on the road, you can try tapping it lightly if it just jams. Having reached the overpass, you need to turn it manually - connect the body to zero on the battery, and the other contact to positive.
- If the starter actively begins to turn, the problem is not with it; if there is a current supply, but it does not turn, the brushes are broken. Lack of response will indicate a malfunction of the retractor relay, and a sharp and unpleasant sound will indicate a breakdown of the overrunning clutch in the starter.
The connection of the contacts itself also requires study, since it is likely that they have broken or oxidized due to moisture - they will need to be cleaned or re-twisted, and then insulated.
How to check injection nozzles without removing them from the engine
Malfunctions of the injector (nozzles) occur on both diesel and gasoline engines. In the design of the power supply system of an injection engine, the nozzle is an element that is responsible for injecting a sprayed portion of fuel into the combustion chamber under a certain pressure.
Precise dosing, tightness and timely operation of the injection nozzle ensure stable and proper operation of the engine in all operating modes. If the injector “flows” (passes excess fuel at a time when its supply is not required), the efficiency of fuel atomization decreases (the shape of the torch is disrupted) and other injector malfunctions occur, then the engine begins to smoke gray or black smoke, loses power, consumes a lot of fuel and etc.
Read in this article
Useful tips
Additionally, experts advise turning your attention, when all other options have already been excluded, to the timing belt - when replacing it, the technicians could have set the phases incorrectly.
In addition, a banal belt break or excessive rotation is likely.
Very exceptional situations include a skewed cylinder head (for example, due to overheating), impaired compression in the cylinders and misaligned rings.
One should not discount such a banal reason as low-quality fuel: in places far from cities, where there is nothing to choose from, cunning entrepreneurs can pour in a completely indecent mixture.
The engine will not start immediately from such gasoline, which will serve as an additional diagnostic sign, and there can only be one solution - drain the low-quality fuel and fill it with normal gasoline. In such situations, however, there is nowhere to take it from, so you will have to rely on a tow truck or compassionate motorists who will stop to help.
Which indicates possible problems with the injector
Let us immediately note that there can be many reasons for unstable engine operation, ranging from a clogged fuel filter, a broken fuel pump, a failed spark plug or a faulty coil, to loss of compression, problems with the timing belt, etc. Along with this, one of the main signs of injector malfunction is difficulty starting the engine, especially when cold, as well as gasoline or diesel consumption (depending on the engine type), which increases noticeably. It is also necessary to note the unstable operation of the internal combustion engine in idle mode, similar to the so-called “triple” of the engine.
When driving, it is possible that one or several symptoms may occur quite frequently:
- presence of jerks, very slow reactions when pressing the gas pedal;
- obvious failures and loss of dynamics when trying to accelerate sharply;
- the car may jerk while driving, when releasing the gas, and also after changing the load mode on the engine;
It must be added that such a malfunction must be corrected immediately, since problems with the injector negatively affect not only the service life of the engine and transmission, but also overall traffic safety. In a vehicle with faulty injectors, the driver may experience serious difficulties when overtaking, on steep hills, etc.
Self-check of injectors
Let's start with the fact that automobile injectors are divided into several types, of which two types have found widespread use at different times: mechanical injectors and electromagnetic (electromechanical) injectors.
Electromagnetic injectors are based on a special valve that opens and closes the injector to supply fuel under the influence of a control pulse from the engine ECU. Mechanical injectors open as a result of increased fuel pressure in the injector. Let us add that modern cars often have electromagnetic devices installed.
To check the injectors with your own hands without removing them from the car, you can use several methods. The simplest and most affordable way to quickly check injection nozzles without removing them from the car is to analyze the noise emitted by the engine during operation.
How to check the power supply to the injectors
This check is carried out if the injectors themselves are working, but any of the injectors do not work when the ignition is turned on.
- for diagnostics, the connector is disconnected from the injector, after which two wires need to be connected to the battery;
- the other ends of the wires are attached to the injector contacts;
- then you need to turn on the ignition and record the presence or absence of fuel leakage;
- if fuel flows, then this sign indicates problems in the electrical circuit;
Another diagnostic technique is to check the injector using a multimeter. This method allows you to measure the resistance on the injectors without removing them from the engine.
- Before starting work, you need to find out what impedance (resistance) the injectors installed on a particular vehicle have. The fact is that there are injection nozzles with both high and low resistance.
- The next step is to turn off the ignition and also reset the negative terminal from the battery.
- Next you will need to disconnect the electrical connector on the injector. To do this, you need to use a screwdriver with a thin tip, with which you need to unclip a special clip located on the block.
- After disconnecting the connector, switch the multimeter to the desired operating mode for measuring resistance (ohmmeter), connect the contacts of the multimeter to the corresponding contacts of the injector to measure impedance.
- The resistance between the outer and central contacts of a high-impedance injector should be between 11-12 and 15-17 ohms. If the car uses low resistance injectors, then the indicator should be from 2 to 5 Ohms.
If obvious deviations from acceptable standards are noticed, then the injector must be removed from the engine for detailed diagnostics. It is also possible to replace the injector with a known good one, after which the engine performance is assessed.
Checking the power
Let's say we are convinced that the mechanical sprayers are working properly. But now we also need to make sure that power is supplied to each of the elements. Let's look at the wiring of the injectors. There are five wires in the contact block: four are used to supply power, and one (most often pink) is ground. Disconnect the chip with contacts. We take a multimeter in our hands and set the upper limit to 250 ohms.
Then we measure the resistance of each of the four power supply wires of the injector. Normal value: 12 - 15 Ohms. Even while the power unit is operating, the injectors should vibrate slightly. This will be evidence that they are working properly. As for the resource, it is difficult to say anything specifically. Their service life depends largely on a number of factors. I even got 200 thousand.
Source
Comprehensive diagnostics of the operation of injectors on the ramp
For such a check, the fuel rail will need to be removed from the engine along with the injectors attached to it. After this, you need to connect all electrical contacts to the ramp and injectors if they were disconnected before removal. It is also necessary to return the negative terminal of the battery to its place.
- The ramp must be placed in the engine compartment so that a measuring container with a scale can be placed under each of the injectors.
- It is necessary to connect the fuel supply pipes to the ramp and additionally check the reliability of their fastening.
- The next step is to turn on the ignition, after which you need to crank the engine a little with the starter. This operation is best performed with an assistant.
- While an assistant rotates the engine, check the efficiency of all injectors. The fuel supply must be the same on all injectors.
- The final step will be to turn off the ignition and check the fuel level in the containers. The specified level must be equal in each container.
In addition to self-checking, you can use the injector diagnostic service at a car service center. This operation is performed on a special testing stand. Testing an injector on a bench allows you to accurately determine not only the efficiency of fuel supply, but also the shape of the torch during fuel spraying.
Diagnostics of removed injectors
- Activate the battery by connecting the negative terminal.
- Connect the fuel supply pipe and power supply block to the removed ramp.
- Install the ramp in such a way that equal containers can be placed under each nozzle.
- An assistant is needed to turn the starter. The containers will be filled with fuel and poorly functioning injectors or those that are completely out of order will be revealed as the containers are filled.
- It is better to immediately replace a nozzle that is not working with a new one; washing the old one will not eliminate the problem for a long time. The same goes for sealing gaskets and power supply terminals.
- If the block is faulty, the injector will not function.
When diagnosing yourself, do not forget about fire safety!
How to clean the injectors yourself without removing them from the engine
During the diagnostic process, a common cause of unstable engine operation is that the injection nozzles are clogged. There are several ways to clean injectors, among which mechanical, ultrasonic or cleaning using special chemical compounds can be used.
In some cases, pouring a special injector cleaner additive into the fuel tank is enough to normalize the operation of the entire system. It is also recommended to rev the engine to high speeds at certain intervals and accelerate the car to 110-130 km/h. on flat sections of the path. In this mode you need to drive 10-20 kilometers. Continuous operation of the injectors under load allows for so-called self-cleaning.
Cleaning the injector should be done as a preventive measure, and not after signs of malfunction appear. If the car is operated in city driving mode on fuel of questionable quality, then the interval of preventive measures should be reduced in relation to individual operating conditions.
When and why you need to remove fuel injectors from the engine. Removing injectors on gasoline and diesel engines: features of the dismantling process.
Cleaning a car injector without removing the injectors. Methods for cleaning injectors with removal on a cavitation stand. Ultrasonic and hydrodynamic cavitation.
Malfunctions of diesel injectors, checking and self-identification of problems. Cleaning diesel engine injector nozzles, regulating injection pressure.
Common diesel engine malfunctions and diagnostics of units of this type. Checking the fuel system of a diesel engine, useful tips.
Operating principle and distinctive features of gas injectors. Basic parameters when choosing nozzles for gas equipment 4. Which gas injectors are best to buy.
Features of operation and causes of malfunctions of diesel injectors. How to independently remove, troubleshoot, disassemble and repair diesel engine injectors.
Cleaning injectors at home
Cleaning injectors at home
- Several bottles of cleaning liquid for cleaning injectors or carburetor.
- 15-20 cm of rubber hose.
- A pair of metal clamps.
- 12 volt light bulb.
- Not fixed breaker (button).
- Connecting terminals in the amount of 4 pieces.
- Needle or pin.
- Keys that are used when dismantling injectors.
The operating procedure is as follows:
- Remove the nozzles and inspect each one very carefully. Where traces of fuel leakage are noticeable, replace with new ones.
- Remove the O-rings from the body and injectors.
- Place the nozzles in a container for a while and fill them with solvent or acetone so that only the nozzles are in the cleaning liquid.
- Use a piece of hose to connect the can and the nozzle inlet. Secure the hose with clamps. To drain the used liquid, you can use any convenient container.
- You will need a phone charger. Connect the positive end of the wire to the breaker (button), and fix the negative end to the injector contact. We sequentially power a 12-volt light bulb to the other contact of the breaker. We connect the wiring from the light bulb to the second terminal of the atomizer.
- Plug in the phone charger. By pressing the breaker button, the circuit is closed. The light should light up and the injector should open, as indicated by a click.
- Then feed the cleaning liquid from the can into this system.
- Close the breaker, the nozzle will open and the cleaning liquid will pour into the container provided for this purpose.
- Repeat this action several times and with all nozzles.
- The spray nozzle is cleaned of carbon deposits with a pin or needle.
- Having washed and cleaned, we sequentially reassemble everything in the reverse order.
Injectors on the VAZ 2114: faults and their elimination
In the VAZ 2114, the carburetor, used in AvtoVAZ cars before this model, was replaced by a more modern injector. If earlier the fuel supply could be adjusted manually by moving the valves, now an electronic system has begun to control the injection of gasoline, and in order to customize it you need to arm yourself with a computer and a programmer.
To carry out control using the ECU, it was necessary to install many sensors on the engine, increase the pressure in the fuel rail, and perform injection using injectors.
Injectors are solenoid valves that open a very small hole when the ECU sends a signal to it. Due to high pressure, fuel is injected through this hole. How much gasoline will be injected into the combustion chamber depends on the opening time, hole size and pressure. The time is calculated by the ECU in accordance with a program that takes into account the indicators of many sensors.
The maximum possible performance of VAZ 2114 injectors depends on the size of the hole; when tuning, they are replaced with more efficient ones, but do not forget about the pressure. It is created by the fuel pump, and is discharged from the fuel rail by the regulator into the “return”.
When installing powerful injectors on a VAZ 2114, it will most likely be necessary to improve the fuel pump so that it can maintain the required pressure and ensure normal operation of the injectors.
Injectors for the VAZ 2114 8 valves and 16 valves are installed one on each cylinder, that is, there are four in total. Fuel is injected not directly into the combustion chamber, but into the intake manifold, which also branches into four in front of it, where gasoline is mixed with air; for this, gasoline must be sprayed as much as possible before injection.
This allows the mixture to be formed separately for each engine cylinder, which improves the mixture performance.
Many people believe that the fuel injection system is complex in its design, but in fact it is not.
The entire fuel system for the VAZ 2114 consists of these elements:
- Gas tank.
- Coarse filter located in front of the fuel pump.
- Submersible fuel pump, which is located directly in the gas tank.
- Fuel line.
- Fine filter.
- Fuel rail.
- Injectors inject fuel from the rack into the intake manifold.
- Pressure regulator.
- Return fuel route.
From all this, the ECU controls the activation of the fuel pump and the opening/closing of the fuel injectors.
Failures in the fuel system
It’s worth noting right away that there is no point in considering major engine breakdowns, since the average driver will neither be able to diagnose nor repair them, so you should pay attention not to those faults that can be eliminated with your own hands or in a short time.
For example, if a VAZ-2114 does not start, it is worth checking its fuel system, and first of all, you need to take care of the following aspects:
- presence of fuel in the gas tank (the sensor may be wrong);
- the integrity of the gas pipelines running along the bottom of the car from the tank to the engine;
- serviceability of the coarse filter in the fuel tank;
- the serviceability of the fine filter in the tank below, near the spare wheel.
Of course, both the fuel pump itself and its relay can fail, which can partly be attributed to the car’s electrical network. You can determine the breakdown yourself by listening after turning the key in the ignition to the characteristic sound of fuel pumping - if there is none, the pump, relay or wiring is faulty.
Additionally, according to the instructions, you can connect a pressure gauge to the fuel network, measuring the fuel pressure in it: a reading below two and a half atmospheres will indicate an unlikely leak. In such a case, you will need to look for leaks in the tank and gas lines - for this it is better to drive the car into a pit.
Unlike the coarse filter, the mesh in the tank under the bottom of the VAZ-2114 may well become clogged and littered, so it is worth checking it first if other faults are excluded.
Malfunctions that injectors may have
Injectors are a fairly precise mechanism; they can open and close several times per second, while providing:
- lightning-fast opening;
- good fuel flow;
- fine atomization of gasoline for better mixing with air;
- tight and fast closing.
The life of injectors is highly dependent on the quality of gasoline and the frequency of replacement of fuel filters. Any, even the smallest debris can prevent them from fulfilling their purpose.
Over time, the injectors become clogged with deposits and the following problems may occur:
- The injectors do not open immediately when a signal is given, or if they do not open at all, they become jammed.
- Less gasoline may pass through a clogged hole than the ECU calculated, this will lead to a lean mixture.
- Debris can also interfere with the atomization of fuel, causing it to flow in a stream and not mix enough with the air.
- A loose closure means that more gasoline than necessary will enter the combustion chamber.
Such malfunctions in the fuel system can, in turn, lead to the following problems with the operation of the engine as a whole:
- misfires at idle;
- significant loss of power;
- unstable engine operation;
- increased fuel consumption;
- Difficulty starting the engine.
The reason for such changes in operation may be dirty or failed injectors. They very rarely become completely unusable and you can always try cleaning them before replacing VAZ 2114 injectors.
To increase the service life, it is recommended to clean the injectors of the VAZ 2114 every 40 thousand kilometers; the service life also greatly depends on the quality of the gasoline used.
Signs of injector failure
The injector's job is to supply fuel to the combustion chamber. Therefore, the main malfunction that can occur with it is clogging or its complete failure. Signs of malfunctioning injectors include the following factors:
- unstable engine operation at idle;
- significant increase in fuel consumption;
- problems with starting the engine, especially when cold;
- in some cases, a significant amount of black smoke may appear from the exhaust pipe (if a lot of fuel enters the combustion chamber through a leaking nozzle), and sometimes it is also accompanied by periodic loud pops from the muffler;
- loss of the dynamic qualities of the car, expressed in the fact that the car accelerates poorly, it lacks power, jerking is felt while driving even on a flat surface, including when releasing the gas and when the load on the engine changes.
These signs, of course, may indicate other problems with the car’s power unit, but if they occur, we advise you to check the injectors and, if necessary, repair or replace them.
Checking the serviceability of VAZ 2114 injectors
Before cleaning the injectors, you need to check their performance; there are several methods for this:
- With the engine running, touch the injectors with your hands; they should vibrate, but not from the operation of the internal combustion engine, but on their own. But this only speaks about the fact of their opening and closing; nothing can be said about the quality of their work using this method.
- You can also check the fact of operation by unscrewing the cap nuts with the motor running. At the same time, the engine speed should decrease; if this does not happen, then the injector is not working.
- You can check the quality of the injectors yourself only by removing them from the engine. So, after removal, you need to connect its contacts through a button to the battery, and supply some liquid under pressure to the input (a carb cleaner in a can will do). When you press the button, the nozzle should open and spray the liquid evenly, namely spray, and not just splash. If this does not happen, then the nozzle may be clogged, or there is not enough fluid pressure at the inlet. When the button is not pressed, the nozzle should not leak. This method also does not indicate the amount of deposits on the nozzle and the safety of its performance, although you can resort to measuring the volume of liquid sprayed, but the result will still not be accurate enough.
- Entrust the inspection to professionals at a special stand, where they will check the injector according to all parameters.
They are serviceable, but with problems with spraying and opening/closing, you can try to rinse them and, if there is no result, clean them.
Tags: no pull, jerking
Comments 26
I don't know if it will help. Due to the malfunction of two coils, two injectors did not spray. Those. the brain gives the command: no spark, no injector. I would start digging for errors in the ecu first.
I think I need to watch it anyway. Thank you
no, check them on the bench, if they work, then look at the wiring and the last option is a malfunction of the computer
No. The phase sensor could break down if two of the same injectors do not work. Or the braid itself to the injectors is acting up. And yes, a diagnostic computer costs 1000 rubles. Will save a lot of money and nerves)))
How come, a diagnostic computer costs 1000 rubles? where is it?
# I was a little mistaken in the price, it has gone up in price, but you can find it up to 1500. There are also more expensive ones, but the point is only in convenience and somewhat more advanced functionality. In Krasnodar, there seems to be a State dealer www.shtat.ru/gde_kupit/krasnodar/
No. The throttle is needed to pass air. And the Throttle Position Sensor (TPS) is needed to read the opening angle of the valve itself and, accordingly, to supply the correct amount of fuel. There seems to be some kind of sensor at the injectors. It is responsible for the alternating operation of the injectors. I even changed it... but I forgot what it is called. (
A faulty injector (nozzle) has a negative impact on the operation of the vehicle engine. The sooner the car owner finds out the cause of the malfunction, the sooner he will eliminate it, saving a significant amount of time, nerves and money. Listed below are signs of an injector malfunction that indicate the need for repair and maintenance work.
Cleaning injectors VAZ 2114
To clean the injectors, they need to be removed from the car, this is done as follows:
- From a vehicle with the engine not running, disconnect the battery terminal.
- Relieve pressure in the fuel rail. On the back there is a valve with a cap; by unscrewing it and pressing the valve with a thin screwdriver, you can release the pressure.
- For convenience, remove the air filter pipe.
- Disconnect both fuel pipes.
- Disconnect the connectors from the injectors.
- Unscrew the fuel rail.
- The injectors are removed along with the ramp; in order to disconnect them, you need to move the fixing washer and pull the nozzle.
After removal, you can begin cleaning yourself:
- Remove the O-rings from the injectors and soak for a short time in acetone or gasoline.
- After soaking, carefully clean the nozzles with a needle and remove any other external deposits.
- To clean the inside you will need carburetor cleaning fluid, a syringe, a tube that fits tightly in diameter to the injector inlet holes, and a button with wiring.
- Connect the injector through the button to the battery terminals, as you did when checking.
- Fill the syringe with liquid and connect it to the nozzle using a tube.
- Apply pressure with the syringe and press the button.
- Liquid should spray out of the nozzle.
- Repeat this procedure several times, constantly maintaining pressure with the syringe.
- After washing, it is better to immediately replace the fuel filters.
This method removes only surface deposits; for deep cleaning of VAZ 2114 injectors, send them for ultrasonic cleaning.
INJECTORS
The injectors on the VAZ 2114 are an electromagnetic device in which, when there is a pulse in the electrical component, the valve opens and atomized fuel is injected under pressure into the internal combustion engine cylinder. Depending on the magnitude of the pulse, the valve opens to a greater or lesser extent, thereby dosing the flow.
Model 2114 can be equipped with fuel injectors from different manufacturers, and accordingly, the cost of the injectors may also differ. Manufacturers and cost (price range in the Russian Federation):
- GM (1300 – 1400 rub.),
- BOSCH (1000 – 1200 rub.),
- SIEMENS (800 – 1400 rubles).
The VAZ 2114 (2115) is equipped with engines of 1.5 and 1.6 liters (8 and 16 valves), therefore the performance of the injectors must be selected depending on the type of engine. If you make the wrong choice, fuel consumption may increase or the internal combustion engine may lose power. Which injectors are better to install on a VAZ 2114? Here you should focus on the part markings. For example, BOSCH 0 280 158 502 is only suitable for a 1.5 l 8-valve engine. It’s hard to say anything about the manufacturer; the quality of all products is approximately the same.
SIGNS OF PROBLEM
There are certain signs of clogged injector nozzles:
- Difficulties in engine operation, jerking;
- High gas consumption;
- Unstable engine operation at idle speed.
And, if the injectors are leaking, the internal combustion engine may not start at all. To improve engine operation, you should clean the injectors on the VAZ 2114.
REMOVAL
Let's look at how to remove injectors on a VAZ 2114 (of course, everything is done with the engine not running, and it won’t hurt to disconnect the battery terminals). To do this we need a set of combination wrenches, a hexagon, screwdrivers and pliers:
- Relieve the pressure in the system. On the rear of the ramp there is a valve under the cap. We unscrew the cap and press the valve with a thin screwdriver or rod.
- Remove the air filter pipe;
- Disconnect the fuel lines (supply and return);
- Disconnect the electrical connectors from the injectors. The connectors are snap-on and easy to remove;
- We unscrew the two ramp mounting bolts (or a 10mm wrench or a hexagon):
- We dismantle the fuel rail.
We move the latch and take out the nozzle.
The injector is removed from the ramp very simply - you need to move the locking washer to the side and pull out the nozzle using a little force.
REPLACEMENT
Replacing injectors with the fuel rail removed is done simply - remove the old part, install the new one and secure it with a springy split washer. Then we install the fuel rail in place. Changing the nozzle is very simple.
EXAMINATION
Before cleaning, it won’t hurt to check the injectors on the VAZ 2114; it’s a good idea to first make sure they are not working. The check is carried out on a removed fuel rail; there is a special stand for this; many modern car repair shops are equipped with such stands.
You can check each individually removed injector by applying power to it and connecting a fuel tank to the inlet. When voltage is applied, the valve should operate and gasoline should spray out of the nozzle. But the test here is conditional; performance is almost impossible to determine.
Even more dubious is the idea with measuring cups, which is often described on resources on the Internet. Let's say all glasses are filled with the same amount of gasoline. How then did you determine the performance when simply cranking with the starter? After all, the engine operates at different speeds, and a faulty injector usually overflows gasoline depending on the voltage supplied to it. What if the electrical part is faulty?
CLEANING
Cleaning VAZ 2114 injectors is carried out mainly by removing parts, but you can try flushing the system with special fuel. The fuel supply hose is disconnected and a container with solvent is connected to the injector (a plastic “one and a half” can be used), pressure is created by an external electric pump. Remove the power connector from the “original” fuel pump. It is better if the injector cleaning (flushing) is carried out in a car service - doing such work with your own hands is quite troublesome, and it does not justify the money spent on it.
You can clean the injectors on a VAZ 2115 with your own hands with the fuel rail removed. A container with a special liquid for flushing carburetors is fitted to the fuel inlet of the injector, and power is supplied to the electrical connectors. When power is applied, the valve in the nozzle will work and it will spray this liquid. Do-it-yourself cleaning of VAZ 2114 injectors is also done.
Expensive foreign cars make sense - the parts on them are expensive. And at VAZ, the cost of flushing and lost time will be more expensive than buying new spare parts. In addition, the results of cleaning are not guaranteed to be positive.
How often do you need to change VAZ injectors and how can you determine the malfunction?
The fuel injector is the most important part in the design of every car. Not a single modern passenger car can do without it, including the cars of the Volzhsky Automobile Plant of the tenth family. Injectors (VAZ 2110-2114) are used to atomize fuel due to high pressure, which amounts to several atmospheres. In this article we will learn how to determine the malfunction of this spare part and how long it takes to replace and clean them.
Service life
Now, probably, every Russian motorist knows what “quality” fuel he puts into the tank. The gasoline that is sold at gas stations for 30 rubles per liter cannot be called pure. In any case, it will contain a certain percentage of sulfur and impurities, but exactly how much of it will be in gasoline depends on the integrity of the company. As practice shows, fuel injectors (VAZ 2112-2114) need thorough cleaning after 20-30 thousand kilometers. Therefore, they need to be cleaned at least once a year.
Of course, there is no need to wait until another 20 or 30 thousand kilometers are added to the meter needle (perhaps this spare part will last another 40 thousand), since their exact service life is always different. And in order to notice a malfunction in time, you need to know certain signs by which the car behaves strangely. These include the following factors:
- The engine suddenly stalls at idle.
- Average fuel consumption increases by 10-30 percent.
- The machine cannot produce the power it developed before.
- The speed of the car either increases or decreases.
- Exhausts have become more polluted.
If you notice at least one of these signs, it means that the injectors on your VAZ need cleaning. However, before starting work, it is necessary to diagnose the car and only after that (if necessary) clean it. Why "if necessary"? The fact is that not only VAZ injectors, but a number of other units and components can show similar signs. Therefore, there is no need to do anything ahead of time.
As for diagnostics, of course, it needs to be carried out at a service center. But you don’t have to clean VAZ injectors there - you can do this process yourself. If you give your iron friend a few hours of free time, you can save about 1.5 thousand rubles.
What changes after the injectors are cleaned?
In this case, VAZ will get rid of all the problems that overtook it before the repair. After this process, you will notice that the car begins to consume less gasoline, the engine no longer stalls, the speed does not jump, and the power will increase significantly. In winter, the engine will start more smoothly, and the acceleration speed may also increase. It should also be remembered that the effectiveness of cleaning directly depends on the degree of contamination - the more accumulations there were on the injectors, the more problems with the operation of the gasoline engine will be eliminated at the output.
Injectors for VAZ 2114
On VAZ cars, carburetor engines were replaced by inverter engines. Unlike the previous generation of engines, now the fuel supply to the combustion chamber is carried out not by one unit - the carburetor, but by an entire system. Car enthusiasts call it an injector.
In such an engine, it will no longer be possible to manually regulate fuel consumption or engine idle speed. An injector is a complex system that is controlled by special electronics. It receives and analyzes data from a large number of sensors, and then regulates the fuel supply to the engine.
VAZ 2114 is equipped with an injection engine. You can see a “check engine” sign on the dashboard. If this signal comes on, you need to diagnose the vehicle's operation in order to maintain the serviceability of all components. However, if, in addition to the burning icon, other symptoms of deteriorated vehicle performance are recorded, then you need to check the VAZ 2114 injectors.
Signs of injector failure
If misfires occur at idle, if the engine becomes unstable, and fuel consumption increases significantly, if the car accelerates slowly, you need to diagnose the injectors. An injector is an electromechanical atomization system that supplies fuel to the combustion chamber. If the nozzle is dirty or faulty, it must be replaced or cleaned at all costs - repair is useless.
During engine operation, various deposits remain in the elements of the car’s fuel system, namely injectors, fuel frame, and intake valves. The main reason for the deteriorating performance of nozzles and the fuel system is, first of all, their contamination. One of the main causes of pollution is the presence of heavy fractions in fuel. Deposits accumulate especially intensively immediately after the engine has stopped.
At this point, the injector body is heated by the engine, and the fuel does not cool the atomizer. Lighter fractions in the working area of the nozzle will simply evaporate, and heavier fractions will accumulate in the form of deposits and thereby reduce the cross-section of the channel. Deposits 5 microns thick can change the channel capacity by a quarter. If the fuel spray holes become dirty, this will impair the creation of the air/fuel mixture.
Since the gasoline sold at domestic gas stations does not always meet modern standards, the injectors do not last even 100 thousand km. The cost of a new VAZ part is about 500 rubles. Although many car enthusiasts argue that it is worth buying imported components.
Signs of clogged injectors
You may be interested in: ZMZ-406 cooling system: operating principle
There are several symptoms that clearly indicate that the nozzles are clogged and need to be cleaned:
- Misfire when the engine is idling.
- Unstable motor operation.
- The car accelerates more slowly than usual. The dynamics do not improve even when the accelerator pedal is fully pressed.
As you understand, injectors are precisely those elements that supply the fuel mixture to the manifold under a certain pressure. And their work directly determines how the engine and all its other systems will function. There is no need to change injectors, unless, of course, their windings are burnt out. As a rule, simple cleaning helps in most cases.
How to extend the life of the sprayer?
To begin with, if the car's mileage is low, you can try using various fuel additives. Buying them is not a problem; they are sold at gas stations and stores. They are inexpensive. This method can be used, but regularity is important here. So, replacing injectors on a VAZ will not be needed any time soon. But not all car enthusiasts prefer to use chemicals, believing that the use of additives can lead to even more widespread clogging of the injector.
Cleaning the injectors on the VAZ 2114 is recommended every 40 thousand km. These services are provided in many service stations. Cleaning there is carried out on stands using ultrasound. Some argue that it is not very effective at the price they charge for it. Many car enthusiasts prefer to clean the injectors themselves. It is not difficult. Some people check the operation of nozzles and injectors on stands, but purchasing a stand to check it a couple of times a year is wasteful.
You can check the injectors and injector in a simpler way. If you suspect that the injectors are not working properly, you need to start the car and let the engine idle and run at high speeds. Next, you need to unscrew the caps on the injectors and then check their serviceability.
Useful video
You can glean additional interesting information from the video below:
- Useful information about the pump in the VAZ 2114: replacement, device, purpose
- VAZ 2114 engine: modifications, characteristics and tuning
- VAZ 2114 crankshaft pulley: change it yourself
Hello! Problem on VAZ 2114 2004 8kl. injector example: in the cold at -5-10 in the evening the engine started as in the summer before, the car sat overnight the temperature dropped to -15-20 and did not start, the battery is 2 years old, I changed the spark plugs weeks ago and at -20 it does not start at all, it’s worth it change the temperature, it will start in the summer. Thank you.
Ultrasound or chemicals for cleaning the injector?
So, it was decided that the injectors and injector needed to be cleaned. Which method should I choose? Common methods are washing the injector without removing the injectors or cleaning the injector on an ultrasonic bench. The cleaning efficiency of the second method is several orders of magnitude higher, but in this case, except for the nozzles, nothing else is cleaned. For VAZ cars, sometimes cleaning is not the right solution. It is much easier and cheaper to simply replace the injectors.
Today, simple single-circuit installations are used for washing and cleaning. These are containers in which the solvent is located. The unit is placed next to the machine. A hose is connected to the inlet of the fuel rail to inject the product into the system. The cleaner, which acts as both a cleaning agent and a fuel, is supplied to the system by a compressor.
But there is a drawback: this method does not allow the cleaning fluid to pass through the pressure regulator and shut-off valve. This is ineffective and does not flush out the fuel system. Double-circuit stands are much more efficient, since the cleaning liquid passes through all fuel systems. As for ultrasound, it began to be used back in 1985. A bath for such cleaning is a container with a cleaner. An ultrasonic emitter is installed at the bottom of this bath.
The disadvantage is that you only need to clean the injector nozzle. And modern sprayers cannot be cleaned using ultrasound. And this process is quite labor-intensive.
It is preferable to use imported solvents as a cleaner for injectors and injectors. They are of high quality. These are, for example, injector cleaning products such as the German Liqui Moly, the Belgian Winns or the American Hi-Gear. Domestic products were also tested, but neither “Toilet duckling” nor “Moidodyr” were suitable for these purposes.
Cleaning VAZ injectors
To clean the nozzles, you need to disconnect the minus on the car battery, then remove the protective cover and air filter. The pipeline must be unscrewed from the pump and nozzle and the brackets removed. Next, using a spanner, you need to twist the injectors and the washer. Don't forget to remove the electrical connectors and slide the ramp clamp and the frame itself. This sequence of actions must be done for all 4 sprayers.
Before cleaning the injectors, you first need to carefully examine them. If signs of leakage are noticeable, they will need to be replaced. Next you need to remove the seals from the body and injector nozzle. Finished parts should be temporarily soaked in acetone or solvent. At this time, you can start cleaning the ramp and valve cover.
As practice shows, the ramp can be cleaned perfectly with a vacuum cleaner. Now let's move on to cleaning. You can see coke around the nozzles, it needs to be removed. Next, using a needle or pin, you need to clean the surface near the nozzle. The outside of the nozzle is now completely clean.
To clean it from the inside, you need electrical tape, a carburetor cleaner, a tube and a syringe. The product must be supplied under pressure through the tube. This action must be repeated several times for each nozzle. Then all that remains is to dry everything well, install new seals and put the structure back together.
Troubleshooting an injector with a multimeter
- Remove the negative terminal from the battery.
- Remove all connectors from the injectors.
- Connect the multimeter probes to the injector contacts.
- 11-15 Ohms on the multimeter indicate that the injector is working, and if it is more or less, it needs to be replaced.
The reason for the loss of injector performance is most often foreign impurities in the fuel. The quality of Russian gasoline is not at a high level and the sprayers do not work as expected. Repairing them is not effective due to the design features. Therefore, replacing all injectors and sealing gaskets is the only alternative option.
