Methods
For most drivers, mud flaps are rubber flaps that are installed behind the wheels near the bottom of the front fender and rear bumper. If we are talking about a car body, then a mudguard is usually called a metal casing that connects the spar, the engine shield and the wings in the nose (the shock-absorbing strut cup is part of the mudguard). In the rear part there is a mudguard - the wheel well of the body. The protection of these body elements will be discussed.
The car owner has only 2 ways to protect wheel arches:
- installation of fender liners. The plastic casing is attached to the wings and the internal cavity of the mudguards;
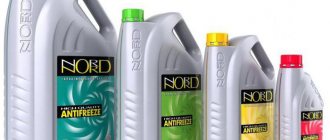
- liquid protection. The arch is treated with a special anti-gravel material based on bitumen and anti-corrosion components. For application, use a special gun that sprays a liquid mass, or a brush. After drying, a dense, damping surface is formed on the body, which has noise and vibration insulation properties.
Sound insulation deserves special attention. Due to vibrations from driving over uneven surfaces and the rolling noise of tires, the cavities of the mudguards are quite vibration- and noise-laden areas. Water, dirt and large stones flying from under the wheels, hitting the metal part of the body, resonate, which leads to the transfer of noise into the car interior. Good noise insulation protection of the wheel arches significantly increases the level of comfort.
Which is better
If we consider plastic fender liners and liquid protection separately, it is difficult to choose the best method. If there are factory places for attaching protection, as well as corresponding plastic products, it is better to give preference to fender liners. They are more durable in use. To install rubber mud flaps, you will not need to drill into the body, which is a huge advantage.
If there are no standard places for fastening in the wings, and the owner does not want to bother installing lockers without screws, then it is better to choose liquid sound insulation. In terms of the level of transmitted noise, these methods of protection are approximately the same, but the disadvantage of liquid fender liners is their fragility. Constant impacts of stones, dirt, moisture, temperature changes and vibrations of the body lead to delamination of the material. As practice shows, even high-quality processing must be repeated every 2-3 years.
The best way is combined protection with preliminary sound insulation. After applying noise and vibration insulation, the cavity is treated with liquid mastic. And only then the fender liner is installed.
Selection of lockers, mastic, sound insulation
Guidelines when choosing fender liners:
- thickness. Products that are too thin are damaged faster and are more susceptible to deformation in the hot season;
- elasticity. Lockers are made of ABS or PP plastic. The latter option is more elastic and therefore often more durable. But even with the same labeling, you can feel the difference between manufacturers. You should not buy products that are too hard, as the material will become completely hard in the cold, which can cause cracking;
- presence of stiffeners;
- holes for standard fasteners, if provided.
The choice of manufacturers is huge (API, ASAM, SA, FLORIMEX, GORDON, KLOKKERHOLM, POLCAR, SAT and many others). You need to identify manufacturers offering fender liners for your car model, and then ask about the operating experience of other car owners. One of the main factors, which, unfortunately, can only be checked during installation, is the coincidence of the body moldings with the shape of the fender liner. This will allow protection without distortion and tightly close all cavities.
Mastic, soundproofing materials
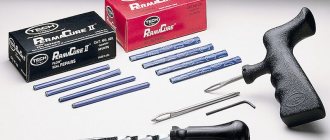
Previously, we have already considered the application of liquid sound insulation, on top of which lockers can be installed. To form liquid fender liners, you can use Dinitrol 479. As a pre-treatment before installing the lockers, you can use anti-corrosion mastic with a noise-absorbing effect from APP, Terotex, Schwarz or other manufacturers.
The following are used as sheet insulation:
- base layer of vibration-absorbing composition with a thickness of 2 mm;
- soundproofing material.
There are now a huge variety of material models, as well as manufacturers (Shumoff, STP, Vikar, etc.). Therefore, when choosing, you should focus on the price, as well as the thickness of the final coating. The noise-insulating “sandwich” should not interfere with the installation of lockers. It is advisable to buy material with an adhesive layer based on mastic rather than water-soluble adhesives.
Replacement procedure
So, the need to replace the wheel arch liners on your car has been determined. You also managed to correctly select a set of new arched elements. You can start replacing.
You will need to purchase:
- Set of fender liners for front and rear wheels;
- Body 90 type product. This is a bituminous material with anti-gravel and anti-corrosion properties. It is applied with a simple brush or spray;
- Degreaser;
- Brushes;
- Self-tapping screws.
We replace the fender liner:
Try to wash the car thoroughly, paying special attention to the fender liners. It is better to start dismantling work from the rear arches. Loosen the wheel bolts, jack up the desired wheel, and remove it. There is no need to remove the spring, brake disc or boot. But wrapping them in protective film or simple bags is a completely unnecessary undertaking. Now use a brush and water to wash away any remaining dirt that you could not get rid of during the car wash process. Let the car dry thoroughly. Now soak a rag in degreaser and treat the arches
There is no point in sparing the remedy. Again, wait until the product dries. Apply a coat of Body 910. You may have to change brushes as one is unlikely to be enough for you. The bitumen-based product must dry. Now attach the fender liner, press it as tightly as possible to the wheel arch. This must be done in order to mark the screws. Having made the markings, you can proceed directly to installing new arched protective elements. Use a screwdriver if possible. Working with a simple screwdriver is quite difficult, but possible. Apply a little more bitumen-based product to the resulting seams. Now you can remove the bags and films from the units, put the wheel in place, lower the jack and proceed to the next one. Using a similar method, the wheel arch liners of each of the four wheels are changed. It is better to enlist the support of a friend, since some steps are extremely difficult to complete on your own. First of all, this concerns applying markings to the fender liners. There you will have to carefully, evenly and tightly press the fender liner, plus at the same time work with a marker. Two hands are clearly not enough here.
Lockers for Lada Granta
The procedure for replacing fender liners is not complicated, but it requires a fairly large amount of free time.
It is worth adding that the factory front fender liners do not completely cover the wheel arches, but they cover the area under the front bumper better than their analogues.
Therefore, it is better to give preference to the originals. Although some analogues from other manufacturers have their advantages
Here, take into account your own judgments on this matter.
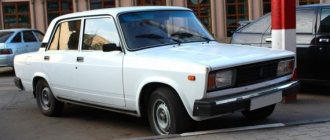
Domestic VAZ cars have always been distinguished by reliable and durable bodies. The designers, knowing the specifics of operating conditions, tried to prepare as much as possible all components of the car for long-term and uninterrupted operation. With the development of technology, new materials have appeared that have made cars lighter. But such innovations had a negative impact on the strength of body parts.
One of the VAZ 2114 spare parts that most often suffers from various types of mechanical damage is the front wing of the car. Problems may arise as a result of:
- traffic accident;
- unsuccessful parking;
- simple wear of the part itself.
Therefore, it will be useful for owners of such car models to know how to remove and replace the front fender of their vehicle.
Preparation, sound insulation
Protecting the arches begins with washing the inside of the mudguard and thoroughly drying it. Then the entire surface is degreased. Option for good sound insulation of wheel arches:
- A vibration-absorbing layer is glued onto the entire surface of the mudguard, covered by the locker you purchased (for example, Shumoff L3 or M3. It needs to be heated before pasting). The sheets are rolled tightly with a metal roller. In this case, the standard anti-gravel coating does not need to be removed;
- Mastic is applied on top with a brush or spray. If desired, you can put it in 2-3 layers, but at the same time, allow 10-15 minutes of drying between layers. at a temperature of +20ºС;
- plastic lockers are covered with noise-absorbing material (for example, Shumoff Germeton A15). Also at this stage, soundproofing sheets based on foam rubber can be used (as an option - Shumoff Comfort 6).
Correct installation of lockers
Many cars have factory mounting locations for fender liners. Special plastic “bugs” are used as fastening elements. The use of self-tapping screws is permissible when attaching lockers to plastic elements (decorative threshold trim, bumpers). If processed correctly, self-tapping screws can be used as fasteners at the bottom of the internal cavity of the mudguard.
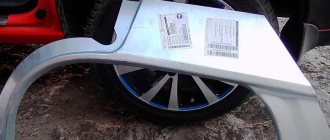
Never use self-tapping screws to attach the fender liner to the edge of the wing. Moisture is trapped between the plastic casing and the wing. In the place where the metal is exposed, rusting will inevitably begin, which, moving upward, will destroy the paintwork.
When you can't do without self-tapping screws
If another installation method is not possible or if holes have already been drilled in the wing before you, the metal must be protected. If there are no traces of rye in the area where the paintwork is damaged, prime the area with epoxy primer and paint it with acrylic paint from a spray can. Rusted areas must first be cleaned and treated with a rust converter. After drying, treat the inner cavity of the wing and the edge adjacent to the fender liner with anti-corrosion mastic (for example, Movilya). Also soak the self-tapping screw in mastic before screwing it in.
Useful solutions
Often, protecting wheel arches with fender liners can only do harm. Vibrations from a poorly secured product damage the paintwork in the plane of contact with the wing. There are two ways to deal with this:
- The edge of the locker is trimmed, and a special seal is put on it. The soft rubber coating fits tightly to the wing and does not scratch the paint;
- use of body sealant. It is applied where the plastic adheres to the body. Promotes waterproofing, which is important for both paintwork and laminated sound insulation. The sealant not only performs a waterproofing function, but also acts as an additional fastener. After drying, it remains elastic and therefore does not crack.
At any time of the year, the wheel arches of a car are exposed to aggressive external factors that gradually destroy the metal. In winter they are affected by moisture, dirt and salt, which is sprinkled on the road surface; in summer - sand and small stones. Many car manufacturers coat wheel arches with special compounds or install various protective elements, but, as experience shows, they cannot completely protect the metal. The only effective way to protect this part of the car body is plastic fender liners, which car owners install themselves or at car repair shops.
Is it worth paying money to a technician to install fender liners? In fact, such work does not require special skills and knowledge and can be done by any motorist with minimal experience working with simple tools.
Fastening elements
Reliability of fixation will depend on the quality of the fender liners and fasteners
What are liquid fender liners? selection criteria and installation features
It is important that they are not afraid of deformation
Clips
Clips can be used to attach not only the fender liners, but also the trim. The photo shows a Renault Logan mounting clip. A plastic body part may also be called a spring clip. The fender liner mounting clips are fixed by expanding the cut part during installation.
Latches
When installing fender liners without self-tapping screws, elements for rigid types of fender liners are used - S-shaped brackets or “clothespins”. They provide a less “traumatic” fastening for the body and do not require drilling. This technique is used by foreign manufacturers. The installation method is not rigid, so the product may wobble a little. For this reason, it is recommended to cover the arches with anti-corrosion mastic.
Self-tapping screws
It is recommended to use galvanized self-tapping screws. They will last longer because they can resist corrosion. A hole is drilled in the metal. The screws are installed on the sealant.
Pistons
The piston is a universal fastener. It is securely attached in the cap area and in the hole. Even when the piston does not reach the end, it still remains firmly fixed. The pistons for fasteners have dimensions of 19.9 × 13.3 × 6.8 mm.
Bolt nut
This type of fastener belongs to threaded fasteners and has good strength properties. The bolt + nut will directly interact with the metal surface. It is recommended to treat it with Movil or a similar fatty composition. The principle of fixation is similar to a regular nut that is screwed onto a screw.
What you need for work
To perform this work, first of all you will need the fender liners themselves. These parts are made for a specific car model and are not difficult to find on the auto parts market. Today, the most common fender liners are made from the following materials:
- Fiberglass;
- ABC plastic;
- Polyethylene.
A few years ago it was possible to purchase shaped products made of aluminum and zinc-coated steel, but today they are practically not found. These days, the most favorable price-quality ratio is considered to be polyethylene fender liners - they are durable, elastic and easy to repair in the same way as plastic bumpers. In addition to the fender liners themselves, we will need metal screws with a press washer and any anti-corrosion compound, for example the popular and inexpensive Movil. It is best to use galvanized self-tapping screws, which will last an order of magnitude longer than regular ones. Also, for installation, it is optional to stock up on regular silicone sealant.
Nuances of choice
- The fender liners are attached to the car's wings using self-tapping screws. Depending on the kit, either standard holes will fit, or you will have to make new ones. Therefore, it is important to check whether you will have to drill the body, or you will get by with a little blood.
- Versatility. Let’s say right away that there are no universal fender liners, so you should look specifically for fender liners for the VAZ 2114. Moreover, any other VAZ fender liners will not be suitable for your specific model. Well, unless you are going to cut something there, file it, and so on.
- Arched structures are made of high quality polyethylene. This is due to the fact that this material is practically unaffected by aggressive environments and chemical components. Plus, polyethylene is plastic, durable, and does not crack under low temperatures.
- If you choose the right and high-quality fender liners, you definitely won’t have any problems installing them. Installation does not require the use of any special tools. And the procedure itself takes a little time. It is not at all necessary to be a professional in the field of car repair.
Fixed fender liner
We make preparations
It is most convenient to install the fender liners when the car is on a lift and there is full access to the wheel arches. But it is not always possible to use such equipment, so a regular jack will do just fine. The sequence of preparatory work is as follows:
- The wheels are removed;
- Wheel arches are cleaned of dust using brushes. If possible, it is worth treating the surface with compressed air to remove even the smallest contaminants;
- If pockets of corrosion are found on the metal, they must be thoroughly cleaned and coated with Movil;
- The fender liners are being tried on - the plastic elements must fit perfectly into the wheel arches;
- If the “trying on” showed some discrepancies in shape, then they can be corrected by heating the polyethylene with a hair dryer;
If all of the above points are met, then the plastic fender liners will take their place perfectly and the wheels will not touch them even in the sharpest turns.
Sequencing
We will assume that all preparatory work (wheel removal, washing, anti-corrosion treatment) has been completed. The plastic fender liner purchased in the store needs to be modified - you need to cut off the horizontal side edge, which is located near the outer side of the arch, leaving a side 7 mm wide. This side, that is, the remaining part of the protruding edge, is “recessed” into the profile slot. The lower rear part of the fender liner is tucked under the bumper. So, from this part of the part the edge is cut off completely (a 7 mm wide edge is not needed here).
Rear plastic fender liners after installation
You can install the rear fender liners by following these steps:
- The plastic shield that protects the bumper from dirt is dismantled, and the screws that secure the bumper to the arch are also unscrewed;
- The rubber profile is placed on the fender liner along its entire length, starting from the lower front corner;
- The fender liner is installed in its rightful place, tucking the metal side of the arch into the slot, and the rear part of the fender liner goes into the gap between the bumper and the surface of the arch;
- At the installation points of the self-tapping screws that secured the bumper, the fender liner needs to be drilled with an awl;
- The bumper mount is restored;
- The shield is being installed.
At the final stage, it is recommended to push the plastic inside the arch with your hands, drill a hole near the corner of the fender liner and screw a self-tapping screw into it. And to protect the metal from rust, you can use silicone sealant.
We insulate the wheel arches to reduce noise in the cabin
There are literally dozens of options for soundproofing wheel arches. Many use traditional methods with the installation of insulation of various shapes and options, others prefer more modern solutions. In any case, you should remember about the effectiveness and durability of the chosen sound insulation method. You can choose to spray special chemical compounds on the fender liner, which will be done for you in a specialized center. You can also use the ideas of liquid sound insulation in the form of various resinous compounds applied to the metal in a thick layer. However, the most popular solution is this method of soundproofing car arches:
- in a car store or on the market, a search is made for the optimal materials for sound insulation specifically for your car or universal ones;
- the material in this case is a foil and fairly thin seal that should cover all metal surfaces above the wheel;
- the material is mounted on mastic, as well as on special glue or other fasteners, which also reduces the possibility of corrosion;
- sound insulation can be single-layer or multi-layer; often the effectiveness of all work performed depends on the number of layers of material;
- the sound insulator is mounted with the foil side to the wheel, this helps to reflect sound and reduces unpleasant noise effects in the car interior;
- A plastic fender is mounted on top of the insulation layer - this is a prerequisite for maintaining the durability of the insulation layer and the efficiency of its operation.
The process of installing sound insulation on fender liners is quite simple, so you can complete all the tasks yourself. Many sellers offer ready-made plastic fender liners with a layer of sound insulation and insulation applied. This is a completely adequate solution, but its effectiveness is somewhat lower than when carrying out high-quality insulation using special materials. You can use a variety of solutions to get the desired result. The main task is to ensure reliable protection of the body from the spread of corrosion. This is one of the first tasks when performing any work related to the installation of additional materials or devices. Therefore, it is recommended that work be carried out by specialists.
Selection and installation of fender liners on the front and rear wheel arches
The front wheel arches are somewhat easier to install plastic wheel arches. The fact is that there are many possibilities for conveniently securing the protection without screws. Firstly, the fender liner is inserted into the grooves and, provided the quality of protection is normal, may not be fixed at all by additional fasteners. Secondly, there is often a fairly large plane of the front bumper, which allows you to tighten the screws without the risk of corrosion. You can also mount the fender liner to the mudguard and tighten two self-tapping screws in the area of the pillar inside the wheel arch - the metal is well protected there and is rarely attacked by corrosion. Rear fender liners are much more difficult to install:
- first you need to try on the fender liners themselves in order to cut out unnecessary parts, if any, in the plastic protection;
- then you should prepare the surface, thoroughly clean the metal under the arch and examine it for the presence of corrosion;
- all problems should be eliminated immediately and preserved in mastic and other anti-corrosion materials;
- Next comes the direct installation of the fender liner, which is an important part of the process for preserving the metal parts of the arch;
- you should screw the screw into the plastic bumper, but refrain from screwing into the metal parts of the body;
- if there are special clips for mounting fender liners, you can use them, otherwise, installation should be carried out using a minimum number of fasteners;
- a good and correctly installed fender liner will not fall off during operation, even when installed with a small number of screws.
Preparation for wing replacement and necessary tools
First you need to prepare the car itself. To do this, he should drive the VAZ 2114 into a technical pit or overpass. If this is not possible, then it will be enough to simply lift it with a jack on the side from which the wing will be replaced and securely fix it in this position. Next, you need to remove the wheel and remove all interfering parts. These include:
- front bumper;
- facing linings;
- thresholds;
- wheel arch liners
Before removing the bumper, you need to disconnect the contacts of the fog lights. To do this, simply remove the terminal with “minus” polarity from the battery. Such a simple procedure will significantly reduce the risk of damage to all vehicle electronics, saving the owner from unnecessary financial costs.
To perform the removal and replacement procedure you will need:
- screwdriver;
- pliers;
- set of spanners;
- set of wrenches;
- anti-corrosion compound (may not be useful).
What happens if you don't put fender liners on your car?
There are a number of negative factors that can arise if there are no fender liners on a car. We've already talked about some of the disadvantages, but now it's worth collecting them all into one list of specific disadvantages. There are many opinions about plastic fender liners, including among experts. Many will say that this part is not needed at all and is a big drawback of a modern car. Others will say that without the use of high-quality fender liners, your car will not be able to drive on our roads for even a year, remembering the salts on winter asphalt and various bitumen mixtures. The main reasons why many motorists install fender liners on their vehicles are the following:
- a significant reduction in the risk of corrosion on the wheel arches, which significantly increases the reliability of the vehicle and its durability;
- reducing noise in the car interior from the arches, which is especially important at high speeds when traveling on the highway or when operating the car on difficult roads;
- there is significantly less risk of chipping the paint or protective layer of the body when driving on gravel and sand, certain protection of metal parts from destruction;
- addition to the appearance of the car - without fender liners the car looks unfinished, some details and voids are visible that spoil the appearance;
- When washing a car, it will be much more difficult to pour water into places where it is not needed, this will significantly increase the operating comfort of the car.
Less important advantages of using modern versions of fender liners are also mentioned. You can recall the special anti-noise compounds that are applied to the wheel arches only when installing fender liners. The use of modern fender liners with various installation options and convenient operation will improve the quality of use of your car and extend the potential life of the vehicle in order to save money on repair and restoration work. There are dozens of ways to install fender liners; their choice and purchase also turn out to be different for each buyer. Therefore, choose the options that are convenient for you, but do not leave your car without this protection option. We offer a short video on how to install fender liners on one of the popular cars:
Alternative options
It is up to the owner to decide whether to install fender liners or not, and why it is needed in this or that case. The plastic arch protection installed on some foreign cars sometimes looks more impressive than the option we reviewed. In particular, an external edging (plastic strip) can be used, under which the edge of the fender liner extends. It is usually not possible to ensure a hermetically sealed contact between the outer overlay and the surface of the paintwork, and you can see what the consequences of all this are.
External edging of wheel arches used on foreign cars
Some owners decide not to complicate their lives by installing additional plastic parts, instead treating the bottom and arches with an anti-corrosion compound. Of course, in order to protect metal from rust for at least several years, the coating must be strong enough. This is why bitumen-based mixtures are usually used to treat metal surfaces. Perhaps, from a reliability point of view, this option looks even better than using lockers. At the same time, the wheel arch liners can be removed at any time, but the same cannot be said about bitumen-based coatings.
We deliberately do not provide a list of companies producing plastic body kits for Kalina and Kalina-2. Different brands are popular in different regions. The rear plastic fender liners designed for Kalina-1 are suitable for our purposes. Happy tuning!
Let's sum it up
Today, motorists are bombarded with constant advertising related to various methods of car protection, which are not always quite effective. It should be remembered that there is a basic set of protection against the spread of corrosion, and this is what you should use in your car. Anything that turns out to be excessive will ultimately just cost you money and significantly increase the overall cost of running the car. Fender liners are necessary and have not become the subject of popular advertising because they are quite cheap.
Otherwise, various methods of reducing sound effects when driving, the mythical insulation of wheel arches and other important manifestations of various methods of equipping a car with additional advantages end without results. You should not waste a lot of money on methods of improving a car that do not work and do not provide any results or practical benefits. Choose high-quality fender liners, install them using good fasteners and enjoy a pleasant ride. Have you installed wheel arch liners on your car?