Troubleshooting
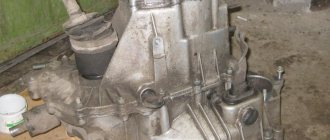
If the VAZ 2109 gearbox howls, then the simplest repair is to check the level and change the oil in the crankcase. To eliminate all other defects, it is necessary to remove the box from the car and completely disassemble it. To do this, you need a closed room, a large number of various tools and experience in repairing such units.
Lack of oil
The oil level is measured using a dipstick installed in the upper part of the gearbox housing. A volume located at any distance between the minimum and maximum marks on the probe rod is considered normal. On the oldest gearboxes that do not have an overdrive fifth gear, the amount of fluid is measured through a hole in the side, closed with a plug. The level should be at the bottom edge of this hole.
Dipstick for checking the oil level on the VAZ 2109 box
To maintain the normal condition of the oil, it should be changed after 75 thousand kilometers. When filling, use API GL-4 standard lubricants with a viscosity of 75W-90, 80W-85 or 80W-90. Some owners specially fill in thick oil of the TM-5 type, which reduces the noise of the box. If replacing the lubricant does not correct the situation and the mechanism continues to make noise, then the problem lies in worn-out gearbox parts.
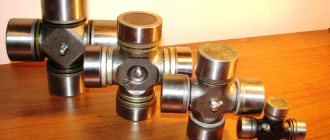
Replacing the drive shaft bearing
Before replacing the bearings, the gearbox must be removed from the vehicle.
To remove the gearbox you must:
The procedure for removing the box from a VAZ 2109 is shown in the video from the author of AUTO REZ.
After completing the steps described above, you need to disassemble the gearbox and remove the input shaft.
To remove and replace worn bearings, follow the steps:
Wear of gears in the box
To perform the repair, you will need to remove the gearbox from the car according to the instructions described above and completely rebuild the gearbox. In this case, the condition of all parts of the mechanism should be assessed, since not only gears, but also other mechanisms can be worn out.
The sequence for disassembling the gearbox is as follows:
The procedure for disassembling the box is described in detail on the video of the AUTO RES channel.
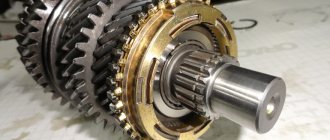
The drive shaft of the VAZ 2109 box has several gears, one of which is made in the body of the shaft, and the second has a high interference fit. Therefore, the input shaft gears cannot be replaced and are replaced with a completely new shaft. Maintenance of this part consists of replacing the bearings, which are removed with mounting tools or a puller. Only the secondary shaft of the box can be disassembled, and the parts should be marked or laid out in the order of removal. This method makes it easier to reassemble the unit.
Shaft disassembly sequence:
Changing the synchronizer clutch
Work on replacing couplings is carried out on a disassembled box in the same way as changing blocking rings. After removing the clutch and hub assembly, it is necessary to disassemble this unit.
The video, made by user Sem, shows how you can quickly assemble a synchronizer.
Clutch adjustment
To adjust the clutch, do the following:
Measure the clutch pedal travel Unscrew the nuts securing the cable Adjust the cable
Device
The design of the VAZ-2114 transmission assumes the presence of the following elements:
- Box gears.
- Shafts. There are several of them. These are primary, secondary and intermediate.
- Synchronizers.
- Reverse gear. It consists of an additional gear and shaft.
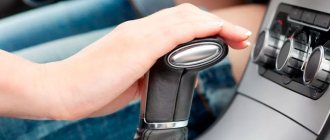
- Gear shift lever.
- Transmission housing.
- Drain and filler hole for oil.
- Dipstick and breather.
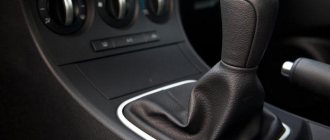
The gear shift pattern is located on the lever.
As you can see, everything is quite simple and clear. By the way, the first generations of Samara used 4-speed gearboxes. But now they are rarely seen. So, let's take a closer look at the design of the VAZ-2114 Samara-2 gearbox. All main transmission components are contained in the crankcase. It is securely attached to the car engine. It also contains oil. When the gears operate, the gearbox teeth become very hot. Without lubrication, their service life is significantly reduced. Therefore, the crankcase contains from two to four liters of oil, depending on the type of car. For the VAZ-2114 gearbox, it is recommended to use 3.3 liters of gear lubricant. So, let's continue to study the device. As for the shafts, during operation of the unit they rotate in bearings and have a set of five gears with different gear ratios. To ensure that each gear is engaged clearly and smoothly, synchronizers are provided. They smooth out the shock from rotating gears when turning on a certain speed. Gear shifting is performed by the gearshift lever connected to the rocker. It is fed directly into the box. Also in the design of the transmission there is a locking device that prevents spontaneous switching off of the gear and a locking mechanism. It prevents several speeds in the box from turning on at once.
Second gear of VAZ 2114 fails for reasons
Content
Any gearbox has a complex structure with many interconnected parts, and the failure of even one part immediately affects the performance of the gearbox as a whole.
So often the cause of a gearbox malfunction is such a breakdown as one of the speeds being knocked out.
In this article, we will look at the main reasons for the question of why transmissions fail.
In order to make it easier to understand the reason for knocking out a certain speed, you need to briefly consider the principle of operation of the gearbox.
How does a manual transmission work?
A conventional manual gearbox consists of 3 shafts. These are the primary, intermediate and secondary shafts. The secondary shaft is located coaxially with the primary shaft, inside which there is a bearing into which the end of the secondary shaft fits, allowing it to rotate independently of the primary.
The intermediate shaft is a single unit with gears cast on it. It has a rigid connection through a gear to the input shaft, which causes it to rotate along with the gears of the gears.
When the gearshift knob is in neutral and the clutch pedal is not depressed, the input and intermediate shafts rotate.
On the secondary shaft of the gearbox there are gear blocks, 1st and 2nd, as well as 3rd and 4th, 5th gear and reverse gear are usually located in the rear compartment of the gearbox housing.
The blocks, in turn, consist of a hub, a gearshift clutch and 2 synchronizers. The hub has splines inside, the same as on the secondary shaft, thanks to which it can move forward or backward, depending on the gear engaged.
The couplings have a groove on top where the gear shift fork is installed. The fork itself is rigidly mounted on a slider, which is mechanically connected to the gear shift knob. The slider has three recesses into which a spring-loaded ball fits to fix the slider either in the neutral position or in the position of one of the speeds for which it is responsible.
As mentioned above, the secondary shaft also contains gears 1.2.3 and 4, which are in constant engagement with the gears on the intermediate shaft. The gears have a loose fit on the output shaft and rotate around the shaft without engaging with it.
When any of the speeds is turned on, the hub with the clutch on it moves along the shaft splines towards a freely rotating gear, for example, 1st gear and, thanks to the synchronizer, blocks it, forcing the secondary shaft to rotate.
The secondary shaft is rigidly connected to the drive to the drive wheels; this can be a cardan on a rear-wheel drive car, or a CV joint in a front-wheel drive version. The rotation of the shaft is transmitted to the drive, which in turn drives the drive wheels, causing the car to move.
Reasons for speed loss:
• Wear or breakage of the synchronizer blocking ring;
• Worn shift fork;
• Loosening of the gearbox fastening to the clutch housing;
• Wear on the clutch or gear teeth of one of the gears;
• Loosening the secondary shaft shank nut;
• Wear of the blocking nuts of the sliders or grooves in the body of the slider;
Failure of the VAZ 2109 second gear synchronizer
The synchronizer is subject to natural wear and tear during operation. The first signs of synchronizer wear are recognized when the corresponding gear is engaged. For example, on a VAZ 2109 car, the most common gearbox malfunction is the failure of the second gear synchronizer.
When the gear is engaged, a characteristic crunch or crackling sound appears, and only after this the gear can be put into operation. This is due to the fact that the operation of the synchronizer is disrupted, and it is no longer able to equalize the rotation speeds of the shafts and gears, and therefore their wear increases. If you continue to operate the car with a faulty synchronizer, the second speed will simply stop turning on.
Repair of VAZ 2114 gearbox
According to the source of this article, provaz2114.ru, the most reliable method of keeping the mechanism in good condition is prevention of malfunctions (systematic maintenance) and proper operation. But even so, situations are possible that require prompt repairs. When the gearbox cannot be repaired, information becomes relevant about how much a new VAZ 2114 gearbox costs? Estimated price in stores is 16 thousand rubles, used: 4000-10000 rubles. When the gear knob is loose on a VAZ 2114, it is possible that the solution to the problem is to install a new one. The VAZ 2114 gearbox linkage also needs to be replaced.
Instructions for removing, disassembling and assembling the VAZ 2114 gearbox
Removing the gearbox is required when troubleshooting parts and the mechanism of the gearbox itself; when replacing the clutch.
Repair work may require one business day, so the instructions below must be started in the morning. Hiring a partner with experience in this type of repair will reduce time costs and improve the quality of repairs.
Preparation
The preparation process consists of the following steps:
- to warm up the oil to be drained, we drive a vehicle for a distance of 5 km;
- we install the vehicle on an inspection ditch (pit) or drive it onto an overpass;
- We put the car on the handbrake;
- raise the hood;
- fix the raised hood;
- we install the hoist, or use improvised means, or a special device, which is a crossbar to support the engine in a suspended position.
Removing and disassembling the gearbox. Procedure for cleaning gearbox parts
We perform the following steps sequentially:
- We remove the terminals.
- We remove the battery.
- We remove the battery to the side.
- We unscrew the three bolts that secure the crankcase protection.
- We remove the protection.
- If the model is before 2003, then remove the oil level dipstick.
- Using a 17 key, unscrew the plug (plug) of the drain hole.
- Place a five-liter container under the drain hole.
- Drain the existing oil from the gearbox into a container.
- We are waiting for the oil to be completely removed from the gearbox.
- We unscrew the two locking nuts of the starter protective jacket, located below in relation to the pit, and one locking nut on top of the starter.
- Remove the protective jacket of the engine starter.
- Disconnect the power wires to the engine starter.
- We remove the engine starter from below, that is, by descending into the pit.
- Remove the clutch cable.
- Compress the spring holding the block.
- From below, disconnect the block with the wires of the speed sensor under the hood.
- Disconnect the reverse sensor wire connector.
- We unscrew the bolts under the hood connecting the ignition module bracket to the gearbox housing.
- Disconnect the torque rod bracket.
- Loosen the gear shift rod clamps.
- We remove it by pulling the torque rod from the hinge intended for changing gears.
- We take out the gear shift rod.
- Unscrew the fastening bolts to the steering knuckle of the left ball joint.
- We carry out dismantling by disconnecting the lower mounting of the gearbox to the engine (sometimes it is enough to loosen the tightening).
- Unscrew the bots.
- Removing the transmission housing
- We unscrew the bot from the lower left part of the gearbox.
- Using a board, we hang the motor.
- We remove the fixation of the left and rear (attachment to the body) engine mount by unscrewing the corresponding nuts.
- We unscrew the pair of bots that secure the rear engine mount to the transmission, holding the nuts against spinning with a second wrench.
- We dismantle the support.
- We insert a screwdriver into the hole between the engine cylinder block and the clutch housing.
- Using an inserted screwdriver, we move the box along the guides so that the rear part of its body passes over the backlight extension, and the input shaft is disconnected from the clutch.
- We remove the gearbox unit from under the car.
- We clean the gearbox parts, removing deposits with a brush.
- We clean the holes and slots from dirt.
- We wash and blow off the parts and bearings with a stream of compressed air.
- We examine the details of the gearbox.
- If necessary, we replace worn or damaged parts.
- We carry out the assembly, focusing on the procedure indicated above.
Box removal process
Removing the VAZ 2114 box is quite simple, although there are some peculiarities, so it is still advisable to have an experienced partner next to you for the first time.
Tools
- a set of keys;
- Screwdriver Set;
- WD-40 fluid in case you can’t unscrew some part;
Rust converter WD-40
container for draining old transmission oil; new oil (if the replacement was carried out a long time ago); rags; board.
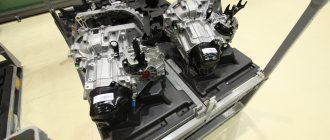
Gearbox VAZ 2114 disassembled
Stages
Since you will have to work under the car, it is better to place the VAZ 2114 car on a pit or overpass; a car lift would be a good solution, otherwise you will have to resort to jacks.
First you need to remove the terminals and remove the battery. Drain the oil from the gearbox into a prepared container by unscrewing the drain plug. We remove the starter. Remove the clutch cable. We disconnect the block with wires from the speed sensor, after compressing the spring. We unscrew the bolt attaching the ignition bracket to the gearbox. Then unscrew the remaining bolts. Under the car we find and disconnect the block of wires leading to the reverse sensor. Unscrew the bolts securing the linkage bracket to the gearbox. Having first loosened the gear shift rod clamp, we pull it out, pushing it back. Dismantling the wheel drives
You can leave the right one. In order for the gearbox to be removed without any complications, unscrew the bolts with which the left ball joint is attached to the steering knuckle. We disconnect the lower mount of the gearbox to the engine - sometimes you can get by by simply loosening the tightening of the bracket. After unscrewing the bolts, remove the transmission housing cover. Unscrew the bolt on the left of the gearbox. We carefully and carefully hang the engine using a board or other device. At the bottom of the car, unscrew the nut securing the left motor mount. We unscrew the two nuts with which the rear motor mount is attached to the body. We unscrew the two bolts with which the rear engine support is attached to the transmission (the second key is used to keep the nuts from turning), and remove the support. We move the box along the guides. This completes the process of removing the box; after completing all the necessary tasks, assembly occurs in the reverse order. When you put the box in place, do not forget to adjust the clutch and fill it with new oil.
Latest comments:
- Igor: I don’t have a fitting, the throttle is electronic, what should I do?
- Denis: Hello everyone. On the ventilators, what should the wires be attached to?
- Vova: I did everything as in the picture, except I didn’t install a new cigarette lighter.
- Mukhtar: Guys, salamaleikum to everyone, I have this problem: arrows on the panel and I have
- Vitaly: Hello, I have a VAZ 2115. I recently encountered the following problem:
Rear
As for the latter, its gear ratio is 3.53. Reverse speed ensures that the transmission shaft rotates in the opposite direction. To do this, it needs an additional shaft with a separate gear. As a result, the number of gear pairs changes to an odd number, and the torque changes its direction. Also, this transmission does not have a synchronizer - it will not be possible to turn it on at speed. The VAZ-2114 gearbox has a gear with an equal gear ratio, which is 0.941. This is fourth speed. Thus, the transmission output shaft rotates with the same force as the secondary one. That is, the angular speed of rotation of the two elements is the same. Motorists call it “straight”.
Device
To understand the essence of repairing, disassembling and assembling a gearbox, first of all you need to get acquainted with its structure. In the case of the VAZ 2109, the box structure is as follows:
- On the input shaft there is a block of drive gears that are in constant mesh with the driven gears of the gears when moving forward;
- The second shaft has driven gears with needle bearings. There is also a pair of synchronizers located there;
- The secondary shaft is created together with the drive gear of the main transmission;
- The driven gear of the main gear is attached to the flange of the two-pinion differential box;
- Differential bearings are always mounted with interference, which is adjusted by selecting rings of different thicknesses.
Checkpoint diagram
Gearbox synchronizer, care, operation
A device such as a synchronizer should be accepted with gratitude. Of course, there is nothing complicated about changing gears using a double squeeze; it is still used on some construction equipment, where, due to operating conditions, the use of a synchronizer is excluded. But its introduction into the design of a passenger car, including the VAZ 2109, made it significantly easier to drive, which made the car more affordable.
How unpleasant it can sometimes be to realize that the operation of the box has been disrupted. You understand this when gear shifting begins to grind or other defects appear. Most often, external signs of malfunction or severe wear of synchronizer parts, including for the VAZ 2109, may be:
- noise during gearbox operation;
- Difficulty shifting gears;
- self-switching off gears.
Of course, the appearance of such defects may be due to other reasons, but most often it is the synchronizer, failure or wear of its parts, that leads to such phenomena. This is true for any car, and the VAZ 2109 too.
In principle, when the correct speed is selected, the correct gear is used, maintenance is carried out in a timely manner and the correct oil is used, then the gearbox and synchronizer last a long time, which is also true for the VAZ 2109.
A device such as a synchronizer allows you to change gears in a gearbox in a short time without noise or rattle, ensures the safety of gears and extends the life of the manual transmission.
What else is worth reading
What types of gearboxes are there?
Operating principle of the gearbox
Changing the gearbox oil
Hydromechanical transmission
VAZ 2109 chassis
What are synchronizers made of?
Most often, synchronizers are made of brass or steel. Metal rings are formed either by forging or using a powerful press. In this case, the gear rims can be coated with a protective coating of molybdenum, iron, and copper. In modern gearboxes there are synchronizers covered with a layer of carbon fiber. The purpose of the coating is to reduce noise and provide high friction when in contact with the gear. Carbon coated rings offer excellent performance, but are quite expensive to produce, so such parts are only found in the transmissions of high-end sports cars.
Gearbox synchronizer 2110, device
Synchronizers are installed in passenger cars at all gearboxes. They work on a specific principle - equalizing speed using friction. When the difference between the speed of the gears and the shaft is large, the frictional force must reach a slightly higher level to synchronize their actions. This phenomenon is observed when the highest gears are engaged.
The main element of the synchronizer is the hub, where internal and external splines are provided. Internal splines are used to engage the secondary shaft and, at the same time, there is a possibility of axial movement of the shaft in different directions. The lower splines thus engage with the engagement clutch, which ensures rigid coupling of the gears and the gearbox shaft. From the outside, the engagement clutch is connected to the PP plug.
In addition, the gearbox synchronizer includes a blocking ring, which is necessary to ensure good synchronization and to prevent the clutch from closing when equalizing speeds. Inside the ring there is a conical surface that is designed to exchange actions with the friction cone of the gears. And to create conditions for blocking the engagement clutch, splines are installed on the outside of this retaining ring.
Purpose of the synchronizer
General view of the synchronizer
All gears of modern passenger car gearboxes, including reverse gear, are equipped with a synchronizer. Its purpose is as follows: to ensure equalization of the rotation speed of the shaft and gear, which is a prerequisite for shock-free gear shifting.
The synchronizer not only ensures smooth gear shifting, but also helps reduce noise levels. Thanks to the element, the degree of physical wear of the mechanical parts of the box is reduced, which, in turn, affects the service life of the entire gearbox.
In addition, the synchronizer simplified the principle of gear shifting, making it more convenient for the driver. Before the advent of this mechanism, gear shifting occurred by double squeezing the clutch and shifting the gearbox to neutral.
POSSIBLE FAULTS
Despite the imperfect operation, the VAZ 2114 gearbox, when used correctly, is distinguished by good endurance and durability. If you do not hesitate to prevent and promptly eliminate breakdowns, repairing it is not expensive. Let's consider the main gearbox malfunctions that the owner of the fourteenth may encounter:
- Lack of speed fixation when switching. If the speeds are out of whack, the cause is most likely worn teeth on the gears and clutch. Accelerated wear of these parts is caused by incorrect gear shifting and non-compliance with the speed limit. The problem is resolved by replacing the gears.
- The gear shift lever is tight. The reasons are mechanical damage to the teeth of the lever fixing on the hinge or wear of the reaction rod; it’s also a good idea to check the integrity of the plastic parts of the gearbox drive;
- The VAZ 2114 gearbox is humming. Most often, the gearbox is humming in neutral gear. First of all, you need to check and, if necessary, add oil (in general, the box may hum due to the use of low-quality lubricants). If the oil is normal, the problem is wear of the bearing on the input shaft, which can only be determined through diagnostics or by disassembling the gearbox;
- Crunching sound when changing speed. Here it is necessary to change the worn out synchronizer, and it must be changed immediately after the problem has been discovered, because if you tighten it, the gear unit will completely fly off;
- Knock. The gearbox on a VAZ 2114 can knock both under load and without it, and in any gear. The cause of the knocking noise is a damaged drive gear of the problematic transmission.
One of the key factors for the trouble-free operation of gearbox number fourteen is the use of high-quality lubricants. The most suitable option is GL-4 mineral oil. It is not cheap, but it does its job at 5+; when using mineral oil, VAZ gearbox repairs are usually required extremely rarely.
Most VAZ 2114 owners agree that the best gearbox oil is 75W90. It is distinguished by greater fluidity than typical gearbox oils, due to which the lubricant better gets into those places of the gearbox, the lubrication of which is provided exclusively by splashing. Good options for 75W90 are Hypoid-Getriebeoil TDL and Liqui Moly Vollsynthetisches Getriebeoil (GL-5).
Removal and installation of gearbox VAZ 2114, VAZ 2115, VAZ 2113, Lada Samara 2
Removing the gearbox.
Place the vehicle on a lift or inspection ditch. Raise the engine hood and lock it in this position. Removal work carried out from inside the engine compartment of the Lada Samara 2:
– disconnect the wires from the battery, from the starter traction relay; – disconnect the ground wire from the clutch housing; – disconnect the lower part of the VAZ 2113 clutch cable as described in subsection. "Clutch"; – unscrew the two upper bolts securing the clutch housing to the engine block and the two upper nuts securing the starter, attach a bracket for lifting the power unit to the left stud of the engine exhaust manifold;
Installing a cross member to support the power unit: 1 – cross member 67.7820.9514
– install cross member 67.7820.9514 on the drain gutters to support the engine and hook it onto the bracket installed on the exhaust manifold stud. If there is no cross member, hang the power unit with a hoist. Removal work carried out from below the car: – remove the engine mudguard and the lower cover of the clutch housing; – drain the oil from the VAZ 2114 gearbox; – disconnect the wires from the reverse light switch;
Mounting the gearbox on the car: 1 – engine; 2 – bracket for fastening the power unit; 3 – suspension arm extension bracket; 4 – stretching; 5 – gearbox; 6 – wheel drive shaft; 7 – suspension arm; 8 – anti-roll bar; 9 – rear support of the power unit; 10 – clamp; 11 – gear shift lever drive rod; 12 – internal hinge housing
– loosen clamp 10 (Fig. 3.11) and disconnect rod 11 from the hinge of the gear selection rod of Lada Samara 2; – unscrew the nut of the stud securing the gearbox to the VAZ 2115 engine; – disconnect the ball joints of the suspension arms from the steering knuckles; – using a puller 67.7801.9524 or sharply hitting the body 12 of the internal joint with a hammer through a drift, knock out one hinge from the side gear, then fix the side gear with a technological mandrel or plug used when transporting the differential (otherwise the unfixed side gear may fall into the gearbox housing) ; then knock out the second hinge; – move the wheel drive shafts to the sides;
NOTE If it is difficult to separate the wheel drive from the side gear on the car, remove the gearbox assembly with the wheel drive and on a workbench, using the same puller, press the hinge out of the side gear.
– unscrew on the left side the three nuts of the studs securing the gearbox to bracket 2 of the power unit suspension, and then the nut from the bolt securing the bracket itself. Having removed the bracket from the gearbox studs, remove the suspension bracket 2 from the body spar eyelets; – unscrew the bolts securing the rear support 9 of the power unit suspension; – unscrew the lower nut securing the starter and remove it; – install a special stand with a hydraulic lift under the gearbox; – slightly lower the engine by extending the support rod of the cross member or lowering the hoist, unscrew the lower bolt securing the crankcase to the engine block and move the gearbox assembly with the clutch housing away from the engine to separate the gearbox shaft and the driven clutch disc; – remove the VAZ 2113 gearbox.
What are the possible malfunctions with the gearbox synchronizer?
Many people confuse synchronizer malfunctions with clutch malfunctions. Therefore, before you mess with the operation of your gearbox, make sure that the clutch assembly is in perfect order. As a rule, if the problem is still in the gearbox, then it can have 3 different signs and causes:
- If you hear extraneous noises or crunching noises during the operation of the gearbox, this may indicate deformation of the blocking rings;
- Often there is such a problem as shifting gears, or “knocking out gears,” as motorists like to say. The reason for this may be wear of the synchronizer gear, or a malfunction of the clutch;
- Finally, if the gears are difficult to engage, the entire synchronizer mechanism needs to be replaced.
Replacing the synchronizer is carried out only on a removed gearbox, so the process is very lengthy and difficult. In order not to create even bigger problems, it is better to seek help from specialists, since the gearbox is a very technically complex unit.
We hope that we were able to show you how important the gearbox synchronizer is on cars. The service life of the entire box depends on its correct operation.
Synchronizer design and how it works
If a car enthusiast has already imagined a complex mechanism, then we hasten to assure him that the synchronizer is designed quite simply and does not include either electrical or hydraulic components. When studying it, one can draw an analogy with some other auto mechanisms that solve the problem of discrepancy between the rotation speeds of various elements. Its main features are speed and incredible mechanical strength. So, the synchronizer includes the following elements:
- Hubs with so-called breadcrumbs;
- Locking rings;
- Engagement clutch;
- A gear having a friction cone.
The basis of the mechanism is a hub with special external and internal splines. Internal splines allow the hub to have a permanent connection with the transmission shaft. External splines are responsible for connecting the coupling to the hub. The hub has 3 grooves, spaced 120 degrees apart. Spring-loaded crackers are inserted into the grooves, which are responsible for fixing the coupling in the neutral position. The neutral position is called one in which the synchronizer is not yet turned on.
Another important element of the synchronizer is the clutch. It is needed in order to ensure a sufficiently rigid connection between the gearbox shaft and its gears. The clutch is located on the hub, and on its outer side it is connected to the gearbox fork. The locking ring, located almost here, is designed to synchronize the rotation speed - in this it is helped by the friction force, which prevents the clutch from closing in cases where the speed of rotation of the shaft and gear is not the same. Here it is also worth talking about double synchronizers, which have a specific design. In the most common and simplest synchronizers, the inner part of the ring has a conical shape. In a double synchronizer, in addition to this ring, there are a couple of additional rings - outer and inner. The surface of the gear is not conical, because synchronization is provided by additional rings.
Now it’s time to understand the operation of the gearbox synchronizer. If it is not engaged in operation, the clutch occupies the middle position, while the gears can rotate freely on the shaft. No torque is transmitted. As soon as the driver begins to select a gear, the unit fork moves the clutch along the splines to the gear, and it, in turn, moves the locking ring - the crackers act on it. Immediately after this, the ring rotates in the other direction, and the coupling splines engage with the gear ring as they move forward. Thanks to this, the primary and secondary shafts have a fairly rigid connection and their rotation speeds are synchronized. As you can see, there are quite a few stages of operation of the synchronizer, but in reality it starts working very quickly - much less than a second.
Transmission synchronizer operation
What such a device is, the composition of the synchronizer and the principle of its operation will help you understand the figure. We will not consider the purpose and number of small parts included in the synchronizer; it is enough that they are shown in the figure, but we will try to understand how everything works. This is just interesting, all cars use the same principle by which the synchronizer works, including the VAZ 2109.
Thus, it can be noted that the synchronizer device includes:
- hub 1;
- coupling 2;
- locking ring 3;
- crackers 4;
- wire rings 5.
At the moment of gear shifting, clutch 2 moves towards the desired gear.
On the conical part of the gear, due to the different angular velocities of the gear and clutch, a friction force appears between them, due to which the locking ring 3 rotates until it stops. When the teeth of the locking ring and the clutch are opposite, the movement of the clutch will stop. The speeds are equalized, and the friction force that initially displaced the locking ring disappears, and it returns to its original position, and clutch 2 passes through the teeth of the locking ring and is connected to the ring of the engaged gear. Thanks to the crackers, the coupling is rigidly connected to the shaft, which means that the gear is engaged and the synchronizer has completed the entire procedure, ensuring silent engagement of the gear.
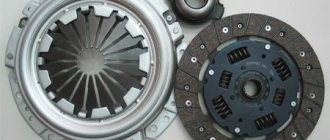
Basic faults
The clutch is an essential part of a car using a manual transmission.
In addition to knowledge about the operation of the clutch, it is important to have an understanding of malfunctions
The most common of them:
- The clutch does not disengage completely. Air entering the release drive creates the feeling of a sinking pedal, as a result of which the driver cannot completely disengage the clutch;
- the clutch does not engage. Common cause: cable break;
- The clutch pedal refuses to return to its original position. Cause: the return spring has failed or is disconnected;
- loud noise when disengaging the clutch. The noise indicates wear of the release bearing;
- The clutch is not fully engaged. There are many reasons: wear of the drive disk linings, faulty springs, small pedal travel.
POSSIBLE FAULTS
Despite the imperfect operation, the VAZ 2114 gearbox, when used correctly, is distinguished by good endurance and durability. If you do not hesitate to prevent and promptly eliminate breakdowns, repairing it is not expensive. Let's consider the main gearbox malfunctions that the owner of the fourteenth may encounter:
- Lack of speed fixation when switching. If the speeds are out of whack, the cause is most likely worn teeth on the gears and clutch. Accelerated wear of these parts is caused by incorrect gear shifting and non-compliance with the speed limit. The problem is resolved by replacing the gears.
- The gear shift lever is tight. The reasons are mechanical damage to the teeth of the lever fixing on the hinge or wear of the reaction rod; it’s also a good idea to check the integrity of the plastic parts of the gearbox drive;
- The VAZ 2114 gearbox is humming. Most often, the gearbox is humming in neutral gear. First of all, you need to check and, if necessary, add oil (in general, the box may hum due to the use of low-quality lubricants). If the oil is normal, the problem is wear of the bearing on the input shaft, which can only be determined through diagnostics or by disassembling the gearbox;
- Crunching sound when changing speed. Here it is necessary to change the worn out synchronizer, and it must be changed immediately after the problem has been discovered, because if you tighten it, the gear unit will completely fly off;
- Knock. The gearbox on a VAZ 2114 can knock both under load and without it, and in any gear. The cause of the knocking noise is a damaged drive gear of the problematic transmission.
One of the key factors for the trouble-free operation of gearbox number fourteen is the use of high-quality lubricants. The most suitable option is GL-4 mineral oil. It is not cheap, but it does its job at 5+; when using mineral oil, VAZ gearbox repairs are usually required extremely rarely.
Most VAZ 2114 owners agree that the best gearbox oil is 75W90. It is distinguished by greater fluidity than typical gearbox oils, due to which the lubricant better gets into those places of the gearbox, the lubrication of which is provided exclusively by splashing. Good options for 75W90 are Hypoid-Getriebeoil TDL and Liqui Moly Vollsynthetisches Getriebeoil (GL-5).