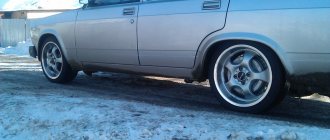
4*100 instead of 4*98
There will also be diameter care! How will it get up? Either repress the hub onto a hub with a 4*100 drill, or buy other discs.
You know, I usually change the wheels on a car myself and a couple of times I forgot to tighten the nuts. While driving, I immediately felt a strange noise - I tightened the nuts and that’s it. After all, a bolt or nut does not immediately unscrew and therefore it is not entirely clear how to drive, what would not feel any extraneous noise when driving. If the wheels fall off while driving, then as a rule, if one or two stud bolts burst (they are simply overtightened) and the rest break without bearing the stress. In Russia there is no culture of installing wheels. A torque wrench is exotic. In In Germany, during certain maintenance, they simply stupidly change the bolts, regardless of the degree of wear. You should have seen the condition of the bolts on cars from Russia, and even pull them with a pipe wrench or a gun at maximum power.
READ How to install a juicer on a manual meat grinder
I don’t argue. In Russia we have everything in one place. I described the real moments of using these bolts on Russian cars. And about aluminum nuts in general: at one time I wanted to buy ENKEI RS 05 and RAYS aluminum nuts for them, I visited all my tire shops city, so they looked at me like I was crazy - how can the nuts be aluminum?
Source
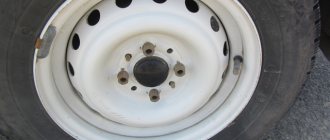
What is a bolt pattern?
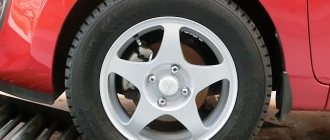
4 bolt holes are 4
- The first number “4” indicated in the parameters indicates the number of holes located on the hub, intended for screwing wheel bolts into them.
- The second number “98” indicates the diameter in millimeters of the circle in which those same mounting bolts are located.
Thus, it is not at all difficult to calculate that the bolts are located at a distance of 69.3 mm from each other.
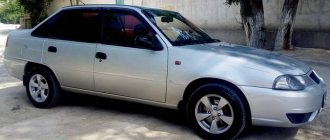
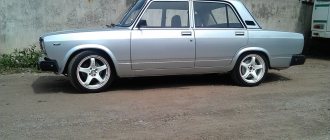
Wheels from Logan (bolt pattern 4*100)
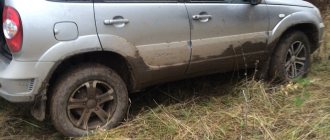
Based on safety requirements, wheels with such a bolt pattern cannot be installed on a VAZ-2112. But, some drivers install such discs using spacers or eccentric bolts
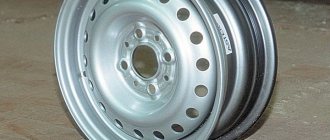
Bolts with eccentric allow you to install discs with a 4*100 bolt pattern on a 4*98 hub
This is on their conscience, as other drivers may suffer.
Will 4x98 wheels fit 4x100?
The trailer we purchased has a standard AvtoVAZ 4x98 hub. There was a need to put larger wheels on it, 15″ to be precise. But as it turned out, stamping 4x98 R15 is a huge rarity! After searching the Internet, I realized that there are options to install Japanese wheels with 4x100 drill bits on 4x98 hubs. People who know, please tell me: are 4x100 wheels on a 4x98 hub worth it, is it realistic, what needs to be changed, what are the pitfalls?
— Bolts with eccentric. Cheap, I don't know if it's reliable. People are driving. — Order adapter plates with the required bolt pattern from a turner. — Find 4*98 disks. In theory, from Fiat and Alfa Romeo, the previous models had the same bolt pattern.
Eccentrics approx. But I heard somewhere on the Internet that they get up like this, without modification... And Fiat and Alfa are extremely rare guests in the Siberian regions))))) Finding wheels is unrealistic.
on the drome for several weeks already they have been selling wheels from alpha of two types p15 and p16 casting true =) a friend put 15th stamps from Aveo on the nine - it was great, but it’s hard to turn =)
Casting is not an option unfortunately. We need stampings for the caps
And I think the third question is reliability. This is a TRAILER, without brakes and an engine, which means no dynamic load on the wheels. So I want to find out... If this is how they put it on cars and drive them, then the trailer shouldn’t even care.
Well, some people actually drill holes in the disks and don’t bother.
About the bolt pattern of VAZ wheel rims (4x98 and 4x100)
Rating 4.5 out of 5. Votes: 46
| What is the bolt pattern on the VAZ 2110? 4x98. It often happens that you get wheels with a 4x100 bolt pattern from a foreign car for almost nothing. Do you know if it is possible to install 4x100 wheels on a VAZ? What is the best way to install them, and is it safe? |
First, let's figure out what the bolt pattern of VAZ 4x98 and 4x100 wheels means.
- 4 is the number of bolt holes.
- 98 and 100 are the diameter of the circle in mm on which they are located.
If you do the math, the distance between the bolts with a bolt pattern of 4x98 will be 69.3mm, and with a bolt pattern of 4x100 - 70.7mm. That is, the difference is 1.4mm. There are errors everywhere, including in the bolt pattern, but the difference is 1.4mm. does not allow ideal installation of wheels with a 4×100 bolt pattern on a VAZ. The simplest method is to simply tighten the disk onto regular extended bolts, or even just 3 bolts instead of 4. This method is not safe, so it is better to avoid it. A more popular way to install 4x100 wheels on a VAZ is to use bolts with an eccentric or with an offset center. Sets of such non-standard bolts can be easily found in online stores.
The third option is to use studs, for example from the cylinder head of a VAZ 2108, which are screwed into the hubs, and the disk itself is tightened with nuts, for example, from a Niva (see also Installing studs). It is also possible to use spacers that you can make yourself. Or buy ready-made ones. It is worth considering that the width of the spacer must be at least 20mm, therefore the wheel offset will increase by the same amount. As an option, use discs with a short offset to compensate for the offset of the spacers. If you have a lathe, you can make 4x100 holes in the disc hub. Thus, it becomes possible to install optionally 4x98 or 4x100 disks. If discs are installed incorrectly on a VAZ with a 4×100 bolt pattern, vibrations may appear at speed, and during sharp braking, death may occur, so before installation, think about safety first!
By the way, do you know what tires and wheels are suitable for the VAZ 2110?
| How did you install 4x100 wheels on the VAZ? |
- Che-guevaro logbook from Drive2 website
Interesting site? Share with your friends
What do you need to know about installation?
The optimal radius, corresponding to the technical characteristics of the car and allowing it not to lose speed, is supplied under the code R14. In the factory format these may be R13 wheels, but drivers are not too fond of them.
Once the purchase has been made, you can begin installation. This can be done either independently or with the help of employees of any service station.
It should be noted that this process does not carry any pitfalls, so you can try to install the disks on your own. This process is completely identical for 2114, 2115 and many other models. If the work is being done for the first time, or the driver does not have sufficient skills, it is imperative to enlist the support of a professional! The safety of not only the driver himself, but also other road users depends on what tires are used and whether the wheels are installed correctly.
During the work process, it is important to consider that the tires must perfectly match the size of the wheel!
The car owner definitely doesn’t need this! In addition, the selected tires must be of high quality in order to cover the 40,000 km declared by the manufacturer with the disc. If there is an urgent need, you can choose cheaper tires for the summer. With careful driving, it can last quite a long time and will not make the owner doubt the correctness of his choice. However, summer quickly passes, and the tires will have to be changed again.
In order not to purchase several sets at once, you can choose the all-season option.
What's inside the cabin
Replacing the power unit will also require replacing the interior wiring.
Many owners combine this process with replacing the instrument panel with a modern one:
- the “high” panel from the VAZ 21099 fits without modification;
- The “LUX” panel from the VAZ 2114 model is suitable with minor modifications.
Tip: there are a lot of videos on the Internet that describe in detail the process of finalizing the panel. Read them all carefully before starting work on your car.
Is it possible to install larger wheels according to the 2022 traffic regulations?
The short answer is no. There is a strict ban on parts of a size beyond those established by the car factory. This provision is regulated by paragraph 5.4 of the Traffic Rules.
Theoretically, you can install the wrong wheels and not drive the car anymore. It will be prohibited to operate the vehicle, since it is impossible to travel with larger tires.
The traffic rules only talk about tire sizes. But there is one “but”: the height of the tire depends on the radius of the part. It is impossible to combine wheels larger than the recommended size with regular tires.
The specified paragraph of the traffic rules (5.4) provides for the configuration of the car model available to the motorist. The owner of a basic Kia Rio with 15-inch tires can still put 16-inch wheels on the car. This is allowed because some car models have 16-inch radii. Exceeding this limit will already entail administrative consequences.
RE-EQUIPING A CAR ON YOUR OWN: IS IT POSSIBLE?
From the above description it is clear that the VAZ 2107 can be equipped with any engine from 14 VAZ models. This can be done without any special modifications, except that some difficulties may arise with the RPD. However, this power unit is compact and there is enough space in the engine compartment for it. Another thing is that it is quite difficult to find and there are big problems with spare parts.
Tuning enthusiasts are not limited to such simple options and prefer more complex tasks. It is considered especially chic for such car owners to replace the standard engine with a powerful engine from a foreign car. Theoretically, there is nothing technically impossible about this and it can be done subject to certain conditions. In the matter of selecting a suitable power unit, it is advisable to consult with specialists and study successful experience.
SELECTION CRITERIA When deciding to re-equip a car, a number of important points should be taken into account. The list of requirements that the engine for the VAZ 2107 must satisfy is as follows:
- Compliance with the standard power unit in terms of overall dimensions and weight characteristics.
- Possibility of docking with vehicle transmission units.
- Compatibility of the power plant with other vehicle systems.
The closest technical characteristics to the power unit of the “seven” are the products of such companies as Nissan and Fiat. Their motors can be used with minimal modifications.
You can purchase a suitable engine at a disassembly site for relatively little money. Before installing it on your VAZ 2107, it makes sense to diagnose it and, if necessary, make major repairs. Practice shows that replacement of some parts: oil seals, belts and other components is mandatory. Doing this by car is more difficult and troublesome.
Basic drive functions
The wheels of a passenger car perform a number of important tasks:
- rubber gasket around the perimeter;
- provide a rigid structure for the total weight of the vehicle;
- transmission of torque to the wheel.
Based on these functions, a car enthusiast can formulate requirements for disks, as well as their technical characteristics. Any product on wheels must be dimensionally balanced, durable and safe. Only after this can you proceed to drilling wheels on VAZ cars.
Corrosion protection
For reliable operation of the chassis, everything is important: the bolt pattern, the dimensions of all components, the alignment/camber settings, and even the protection of the arches from corrosion. It is the arches that are more susceptible to adverse factors than other parts of the body - from ordinary moisture during rain to reagents on winter roads
To ensure reliable protection of the arches, it is best to install lockers (fender liners) on the VAZ 2110. Such protection will cost much less than subsequent repairs of rusted arches
It is important to choose the correct size of the lockers and ensure their tight fit in the area of the arches
We hope that by completing all the repair work yourself, you will provide your VAZ 2110 with many years of trouble-free service on the road.
Features of wheel sizes for the most popular VAZ models
Among several dozen VAZ modifications, the most popular models over the entire 50 years were only 2 of them, as can be judged by the number of copies sold. The wheel sizes for these cars had the following parameters, which varied depending on the year of manufacture, technical equipment and equipment of the car:
VAZ is the latest modification of the “classic”, produced on the plant’s conveyors for 30 years: from 1982 to 2012. During this time, it never changed its appearance, and the disc bolt pattern was the same - 4x98 with a central hole diameter of 58.6 mm.
If in 1982 the plant produced models with tire dimensions ranging from 5J to 5.5J, then at the end of production the concern increased the permissible size to 6J.
The radius of the wheels invariably varied from R13 to R15, which made it possible to alternate them by season, periodically changing the side profile of the tire, or immediately use all-season tires with a diameter of R14.
The VAZ 2107 tire size invariably consisted of only 3 main parameters - 175/70/R13, 185/60/R14 and 185/55/R15. The last of the listed parameters was actively in demand among lovers of fast driving on smooth city roads.
If we look at the concern’s earlier cars, we can see that the wheelbase of the Zhiguli has remained virtually unchanged for more than 40 years. This leads to moral backwardness of the technical equipment of the plant's products. At the same time, the lack of new developments greatly reduces both the speed of release from the assembly line and the cost of engineering equipment, which leads to a very attractive retail price for the vehicle.
VAZ 2114. Produced in a smaller range - from 2001 to 2013. The car was just a restyled modification of the classic “nine”. The legacy of the outdated model did not affect the high popularity of this Lada, and all the wheels that were installed on hubs in the basic version had the same traditional bolt pattern 4x98, DIA 58.6 mm.
European standard bolt pattern 4x100 for Lada X-Ray
Like the bolt pattern of the VAZ 2114, the width of the wheel rims was not much different from the “seven” and fluctuated between 5J – 6J for the entire production period. As for radius, the concern has completely eliminated the 15-inch diameter from the factory equipment, without prohibiting drivers from installing this parameter as an option. The bolt pattern of VAZ 2114 wheels in the current size also made it possible to install standard 4x100 wheels in accordance with the sizes usual for Europe.
Not a single Lada model has ever looked aggressive; the hallmark of the product was practicality and reliability in operation. The concern did not use extreme overhang indicators, and the wheels were always hidden under the body arches. The average ET limit values for both VAZ 2107 and 2114 were ET25...35 mm, and deviations from this characteristic obligated drivers to install additional mudguards on the side parts of the body and change the design of the hubs, making them more durable to avoid deformations.
Syverlovka and bolt pattern of VAZ wheels
Wheel bolt pattern on VAZ 2107
The design of the seven involves drilling 4x98 wheels, where the number 4 indicates the number of bolts, and 98 indicates the diameter of the holes on the disc structure.
Many foreign cars use a bolt pattern with similar parameters – 4×100. In the first situation, the distance between the centering bolts is 69.3 mm, and in the second case - 70.7 mm. The error is 1.4 mm and does not allow for tight fixation of a non-standard disc.
In addition, installing a car disk with non-standard parameters can lead to deformation of elements, namely mounting holes and bolts.
There are other methods for attaching 100x4 rims to the seven. For example, you can use extended bolts, adapter rings, studs and eccentrics. However, these parts can ultimately complicate or impair the mounting of the wheel product.
Therefore, it is recommended to install standard car wheels and tires so as not to lead to wheel imbalance and vibration while driving.
Wheels on the VAZ 2107 are equipped with 13-inch stamped wheels or analogues with identical parameters. Tires have dimensions 175/70/R13.
| Bus parameters | Disc sizes | Bolt pattern | Width | Departure | Center hole |
| 175/70/R13 | 13” | 4×98 | 5.0J | ET 29 | DIA 60.1 |
The nominal pressure in “seven” tires directly depends on the tire sizes:
175/70/R13 – 1.9 rear, 1.6 front wheels;
165/80/R13 – 2.0 rear, 1.7 front.
Wheel bolt pattern on model 2106
For a six, the wheel bolt pattern is 4×98. As for the factory dimensions of the disks, then:
- standard width is 5.0J,
- centering hole 58.5 mm,
- departure ET
Tire size for the six is 175/70/R13.
Panel From Priora V VAZ 2110
Salon from Priora in VAZ 2110
You can diversify the interior of your car in various ways, and one of them is to install an interior from Lada Priora. It is not necessary to install the entire Priora interior in a VAZ 2110. You can also focus on its individual elements (ceiling, plastic, etc.).
The old interior of the VAZ 2110 is already quite boring, I want to somehow refresh the interior. Of course, you can install various interior parts from a foreign car (for example, seats, armrest, sunroof, etc.), but this requires a lot of time and desire to tinker, tinker, and adjust. I want to change dozens of interiors without effort. just take and install new plastic, seats, tunnel, ceiling or panel..
Then you should pay attention to the interior from Priora. Almost all interior parts of the Priora fit the VAZ 2110-12 without significant modifications (except for wiring).
Let's take a closer look at each detail of the interior:
About the bolt pattern of VAZ wheel rims (4x98 and 4x100)
Rating 4.5 out of 5. Votes: 46
| What is the bolt pattern on the VAZ 2110? 4x98. It often happens that you get wheels with a 4x100 bolt pattern from a foreign car for almost nothing. Do you know if it is possible to install 4x100 wheels on a VAZ? What is the best way to install them, and is it safe? |
By the way, do you know what tires and wheels are suitable for the VAZ 2110?
- Che-guevaro logbook from Drive2 website
Interesting site? Share with your friends
More factory ones - how's that?
There are certain recommended parameters that car owners must adhere to. All of the options offered by the manufacturer have passed special tests. This means that it is the recommended wheels that will allow the car to improve its performance with minimal negative consequences.
As an example, we can look at a specific situation. Let's assume that a car enthusiast purchased a vehicle with 15-inch wheels. Moreover, the same car model with a different configuration has parameters of 17 inches. Consequently, a motorist can safely install wheels with any of the proposed indicators on his vehicle.
However, it is important before installing wheels of a different configuration to carefully study all the recommendations in the documents for your own vehicle. The papers must contain information about which tires and wheels cannot be installed
“Do not” means that conversion to a non-recommended size will result in degraded performance.
As a conclusion, we can say that “larger than factory” wheels are any model whose size exceeds all recommended ones. However, even changing parameters as part of the advice of suppliers leads to changes in the characteristics of the car.
It must be remembered that the wheel is not a complete part. It consists of tires and wheels that are not used separately. Therefore, it is difficult to talk about increasing the size of the wheel unambiguously. Sometimes enlarging the disks does not lead to a change in the diameter of the entire wheel.
How to determine bolt pattern
Each make and model of car has individual bolt pattern parameters. There are special tables for this, based on which you can select disks.
If it is not possible to use tables, or if your car is not included in them, you can determine the bolt pattern yourself. To do this, we count the number of holes for mounting the disk. The first parameter is there. Determining the diameter of the circle on which the holes are located is a little more difficult.
For disks with 3 holes, measure the distance between the walls of adjacent holes and multiply it by 1.155. The result obtained will be the desired diameter.
Theory
So number 4 is the number of bolt holes. And the second number is the diameter in mm of the circle in which they are located. It is easy to calculate that the distance at which the bolt is from the bolt, with a spread of 98, will be 69.3 mm.
This value is the same for all wheels installed on the VAZ 2110. But in foreign cars, most of which have a bolt pattern of 100, one bolt is located at a distance of 70.7 mm from the other.
The difference is 1.4 mm, and this will no longer allow ideal installation of wheels with a 4x100 bolt pattern on a VAZ 2110.
Difference between bolt pattern 4*98 and 4*100
Preparing for adjustment
Most often, the VAZ 2110 camber and alignment are installed at a service station, but you can do it yourself. First of all, check whether there is play in the bearings and whether the steering is loose. At the same time, check the diameter and absence of deformation of the disks, air pressure in the tires, and tread wear.
VAZ 2110 front suspension assembly diagram
Naturally, if a wheel is loose, action will need to be taken, and one with improper tread wear may need to be replaced. Wheels standing on the ground need to be pulled relative to the vertical. If you find any play, have a helper apply the brake and check the play again.
If it disappears, the bearing needs to be replaced. If after this the size of the play not only does not disappear, but only decreases slightly, the suspension needs to be checked, repaired, and sometimes replaced.
Front wheel hub diagram
After this, hang the wheel and check the play again. It is possible that the play has disappeared, but the wheel turns jerkily or is simply difficult, then you need to slightly expand the diameter of the bearing installation site.
If you hear a grinding noise, the bearing needs to be replaced.
Self-adjustment
Next, you need to stand on a flat surface and load the machine, as recommended by the manufacturer. That is, about 320 kg in the cabin, and 40 kg in the trunk.
The first adjustment is to set the tilt angles of the steering axis. The second is collapse, the third is convergence.
In this case, the camber angle in the loaded state should be 0 ° 30 '+ - 30'. The toe should be within 0°15'+ -10' and the angles of attack should be 0°20'+ -30'.
Remember that camber and other wheel adjustments are necessary in all cases when you in any way interfere with the operation of the front suspension of the VAZ 2110.
Wheel alignment
After replacing wheel rims, the dimensions and bolt patterns of which differ from those provided for by the design of the VAZ 2110, it is necessary to make all the necessary adjustments in order to ensure reliable protection of the entire chassis, as well as tires and arches.
Correct alignment angles are required for each front wheel. There are three parameters that require correct installation: wheel toe, caster angles of the steering axles, and camber angles of each wheel.
Wheel installation options
The rules by which the parameters of the front wheel are set are as follows:
- You won't go far if everything hangs out the way it wants, and the car is pulled to the side when it should be going straight. To ensure the stability of each front wheel, they are installed strictly at the required angles to the body and suspension elements. This is called the longitudinal inclination angles of the turning axis. Installation dimensions are indicated in the instruction manual;
- Camber is the angle between the plane in which the wheel rotates and the vertical. The camber bolt helps install it (it secures the telescopic strut and steering knuckle). If the camber is installed incorrectly, the car “steals” and the tire tread wears out more on one side;
Wheel installation options
What are the changes?
We are talking about a list of conditions on the basis of which a car cannot be registered with the traffic police. If previously the main requirements were the coincidence of the VIN numbers on the body and units, where such a number was stamped during registration of the car, and those indicated in the documents, today they are checked with the numbers of the engine, body, frame and cabin included in the documents.
This list of conditions is contained in Article 20 of the Federal Law on Vehicle Registration and literally prescribes the following in its official interpretation:
It is prohibited to carry out registration actions: if the registration data or design of the vehicle does not correspond to the information specified in the documents identifying the vehicle, with the exception of registration and other data of the vehicle subject to change (entered into the document identifying the vehicle) on the basis of the submitted documents;
Thus, the engine for 2022 is not a numbered unit, but when registering a car, the engine number must be checked against those indicated in the documents.
Will 4x100 wheels fit on a VAZ?
Messages: 3966 Registered: 06 Feb 2006, 00:00 From: Tyumen Experience: since June 1997 Awards: 1
| Rating: 4,969 |
| Reputation: +3 |
Thanked: 1 time Thanked: 4 times
Post by sodium » 24 Oct 2009, 21:50
Psion, don't get angry. Just because you left for 2 years doesn’t mean that someone else will leave too. This is not an axiom, this is your and only your practice. So it's lucky that nothing happened. Or maybe something has already happened, but you don’t know about it yet.
Nobody says that there will definitely be a jamb. We are talking about the fact that when installing non-standard disks, there is a possibility of an unfavorable outcome. And it's big.
I personally do not recommend installing them, just because it SHOULD NOT be this way.
Messages: 24 Registered: Mar 30, 2009, 00:00 Awards: 1
| Rating: 24 |
| Reputation: 0 |
Post by Black72 » Oct 24, 2009 10:23 pm
Messages: 1103 Registered: October 20, 2006, 00:00 From: 86 region - 72 region - 23 region (Sochi) Awards: 1
| Rating: 1,253 |
| Reputation: +1 |
Thanked: 1 time Thanked: 1 time
Post by Alex25 » 25 Oct 2009, 08:13
Messages: 1237 Registered: Nov 28, 2008, 00:00 Experience: 2005 Car: Maxima 3.0 Awards: 1
| Rating: 2,487 |
| Reputation: +3 |
Thanked: 6 times Thanked: 19 times
Message TAXI » 25 Oct 2009, 09:23
Messages: 263 Registered: Dec 23, 2007, 00:00 Car: bmw116 Awards: 1
| Rating: 281 |
| Reputation: 0 |
Post by ilyason » Oct 25, 2009, 10:07 am
Messages: 2064 Registered: October 25, 2009, 00:00 From: Tyumen Experience: 07.1994 Car: Nexia Awards: 1
| Rating: 7,714 |
| Reputation: +11 |
Thanked: 75 times Thanked: 91 times
Post by Scorpio » Oct 25, 2009, 01:10 pm
Messages: 1103 Registered: October 20, 2006, 00:00 From: 86 region - 72 region - 23 region (Sochi) Awards: 1
Instructions for installing a new panel
If you want to replace a low tidy with a more advanced, high one, then in any case you will have to change the entire center console.
Removal and installation instructions look like this:
- First, you need to turn off the power to the on-board network; to do this, disconnect the battery, remove the steering wheel, as well as the steering column switches and the ignition switch. You will also need to disconnect the ignition relay.
- Next, unscrew the two bolts that secure the control panel visor and remove it.
- Now you need to compress the spring and remove the shield itself from the center console. Disconnect all wires and connectors connected to the dash, including the speedometer cable, the econometer hose, and the odometer cable. After this, the tidy can be moved to the side.
- Then remove the regulator from the hydrocorrector of the optics light, the tidy light switch knob, as well as the interior heater and fan regulators. To do this, pull the controls towards you.
- After this, unscrew the two bolts securing the center panel trim on the sides; the trim itself can be moved towards you. Then you need to disconnect the connectors.
- Now the key in the lock should be turned to position “0”, this will disable the anti-theft system. A connector with wires is connected to the lock itself; it must be disconnected. Next, unscrew the two nuts and two bolts, after which you can remove the steering column pipe with the switch.
- Remove the choke handle located under the instrument panel. Pull it towards you so that you can feel the pull. You need to unscrew the two bolts that secure the damper guide rod, after which the choke can be removed.
- Now you can unscrew four more screws that secure the heater control panel in the car. Unscrew the bolts located on the side of the shield on both sides. Also unscrew the lower console mounting bolts with nuts that secure the control panel lighting switch and the optics hydraulic corrector. To do this you will need a 22mm socket wrench, it must be high.
- After completing these steps, you need to unscrew the bolt that secures the center console in the glove compartment. Then all you have to do is unscrew one bolt at a time on each side securing the center console. The console itself can then be dismantled.
- As for installing a new high panel with tidy, this process does not present any particular difficulties. All dimensions at the mounting points on the body are the same, but this procedure also has its own characteristics. To install your new console, you will need the appropriate wiring harness. If you use an existing harness, then you will need to rearrange the terminals in it, taking into account the connection diagram. In addition, it will be necessary to change the cables leading to the heater to longer ones, the same applies to the speedometer cable. If you are installing a new console, you will also need other roof pillar side trims, these must be installed before you install the console. Since the new dashboard will not use a flow meter, the tube from it will need to be plugged. In addition, the signal to the tachometer will need to be supplied from wire K on the coil, which is connected to the speed sensor cable bracket.
- Immediately before installation, you should reassemble the new console, and wrap the connection points of the blowers with electrical tape and, preferably, glue them with foam rubber or anti-creaking agent. It is also necessary to change the foam rubber of the heater, since the old one will no longer be able to perform its functions. Also make sure that the choke can close completely and remember that the cable from the new speedometer should be installed before you install the console. The assembly procedure begins with laying a new wiring harness and connecting all connectors. Before you finally assemble everything, turn on the dashboard and check how all the indicators and gauges work. After this, the console can be put back in place.
Source
How to make the necessary calculations
Acceptable tire sizes for 14-inch wheels: 175/65 R14 and 185/60 R14. Moreover, the second option is preferable.
However, the diameter of the wheel can be calculated very simply if you know how the characteristics of the rubber are deciphered. Let's do this for the VAZ 2109.
Let's take a standard 175/70 R13 wheel. 175 – tire width in millimeters; 70 – height of the rubber profile as a percentage of the width, that is, in our case 175 x 0.70 = 122.5 mm
Disc diameter 13 inches = 13 x 25.4 = 330 mm.
The total wheel diameter is the sum of the rim diameter and two profile heights. Total 330 + 122.5 x 2 = 575 mm.
Having made calculations in a similar way, we get the following figures for comparison:
- 175/70 R13 – 575 mm;
- 175/65 R14 – 583 mm;
- 185/60 R14 – 577 mm.
We see that the last option is the most suitable. It is also 10 mm wider, which will provide us with a shorter braking distance due to the increased contact patch with the road, better handling, and resistance to tire bending in corners at high speeds due to the reduced profile height. But at the same time, a wide tire is more prone to hydroplaning at high speeds than a tire with the same parameters, but narrower. Also, impacts from driving through road potholes will be more strongly transmitted to the body of a car with wheels of low profile height.
Table for selecting suitable wheels
To confirm your words, data on permissible wheel rim sizes can be found in the factory instruction manual.
Wheels with a larger radius, for example with a diameter of 15 inches, are also suitable for the Samara, but they are not recommended by the factory, so there may be problems with passing the technical inspection. For such wheels, you should choose tires with a dimension of 185/55 R15. With a stretch, 195/50 R15 will also work, but it’s better to play it safe and try it on if your friends have similar ones. In this case, the wheel may “rub” due to the tire being too wide.
Acceptable sizes of tires and wheels for the VAZ 2109 Lada Samara
Useful video
You can glean additional interesting information from the video below:
In all modifications of the VAZ 2110, the bolt pattern in the factory configuration is 4x98. “Dozens” rolled off the assembly lines with stamped wheel disks - diameter R13, as well as with cast ones - diameter R14.
The wheels were fitted with tires measuring 175/70 R13 or 175/65 R14. However, if the sizes of wheels and tires are relatively clear values, then what a bolt pattern is is a big mystery to many.
Wheel parameters and bolt pattern for VAZ 2110, 2111, 2112
Types of rims
Having figured out what the bolt pattern of VAZ 2114 discs is and how to compensate for it when using discs with a different type of drilling, let’s now talk about the discs themselves.
Currently, you can find 3 main varieties of them on sale, namely:
- steel wheels;
- alloy wheels;
- forged wheels.
Steel wheels come as a standard factory option on all VAZ cars. They are characterized by low cost and, at the same time, good reliability and durability. In addition, in the event of an accident they are deformed without destruction, which in most cases allows them to be straightened and used again.
Cast wheels are made from aluminum alloys and due to this, as well as the overall complexity of their production, cost significantly more. At the same time, they are distinguished by a variety of shapes and options, due to which they are in high demand among those who like to tune their car (another important advantage is their low weight compared to stamped steel wheels).
About the bolt pattern of VAZ wheel rims (4x98 and 4x100)
Rating 4.5 out of 5. Votes: 46
| What is the bolt pattern on the VAZ 2110? 4x98. It often happens that you get wheels with a 4x100 bolt pattern from a foreign car for almost nothing. Do you know if it is possible to install 4x100 wheels on a VAZ? What is the best way to install them, and is it safe? |
First, let's figure out what the bolt pattern of VAZ 4x98 and 4x100 wheels means.
- 4 is the number of bolt holes.
- 98 and 100 are the diameter of the circle in mm on which they are located.
If you do the math, the distance between the bolts with a bolt pattern of 4x98 will be 69.3mm, and with a bolt pattern of 4x100 - 70.7mm. That is, the difference is 1.4mm. There are errors everywhere, including in the bolt pattern, but the difference is 1.4mm. does not allow ideal installation of wheels with a 4×100 bolt pattern on a VAZ. The simplest method is to simply tighten the disk onto regular extended bolts, or even just 3 bolts instead of 4. This method is not safe, so it is better to avoid it. A more popular way to install 4x100 wheels on a VAZ is to use bolts with an eccentric or with an offset center. Sets of such non-standard bolts can be easily found in online stores.
The third option is to use studs, for example from the cylinder head of a VAZ 2108, which are screwed into the hubs, and the disk itself is tightened with nuts, for example, from a Niva (see also Installing studs). It is also possible to use spacers that you can make yourself. Or buy ready-made ones. It is worth considering that the width of the spacer must be at least 20mm, therefore the wheel offset will increase by the same amount. As an option, use discs with a short offset to compensate for the offset of the spacers. If you have a lathe, you can make 4x100 holes in the disc hub. Thus, it becomes possible to install optionally 4x98 or 4x100 disks. If discs are installed incorrectly on a VAZ with a 4×100 bolt pattern, vibrations may appear at speed, and during sharp braking, death may occur, so before installation, think about safety first!
By the way, do you know what tires and wheels are suitable for the VAZ 2110?
| How did you install 4x100 wheels on the VAZ? |
- Che-guevaro logbook from Drive2 website
Interesting site? Share with your friends
Inner side of the disc
People like to tune these two parameters (diameter and width). Most often, they strive by all means to increase the seat diameter and width of the disk. At the same time, the tire, in order to fit in the wheel arch, becomes low-profile, which warms the soul of many. But at the same time, we should not forget about GOST for the depth of potholes on our roads - there is such a document! A hole up to 5 cm deep and with a sharp edge has a right to exist. And no one will be punished if you damage your car in it. Now imagine what will happen to low-profile tires in such a pit, even a “GOST” one. For example, with standard rims on Hyundai cars with a diameter of 15 and 16 inches, owners manage to install... 18-inch ones on Solaris! For example, with a tire measuring 215/35 R18, this solution provides only 75 mm of clearance between the tire seating surface and the road. Such a tire will most likely suffer (the bead may be punctured) even in a “permitted” hole.
However, there is an alternative approach. The bottom line is to try to install wheels of the minimum size, just so that they do not cling to the brake mechanisms, and “catch up” with the diameter with a high-profile tire. Among the advantages of this method, we should note the softness of the ride and the lower price of small-diameter tires. For example, the design of the Hyundai Solaris chassis (and the Kia Rio platform) allows the use of 14-inch wheels. And with a tire measuring 195/70 R14, you get quite normal wheels - a little higher (less than 3%) than the original ones, measuring 185/65 R15. But the softness of the ride becomes like that of a Renault Logan.
Peculiarities
The American style requires constant operation of the side lights; for this purpose, orange bulbs are installed in the turn signals. At the same time, while driving, one of the constantly burning lamps begins to blink, indicating the driver’s intentions. They make the car really look different. Additional lighting improves visibility on the road and also makes the car more visible. They attract owners of VAZ-2109, 2107, 2114, 2110.
Some drivers are misled by orange lights, which causes them to misjudge the situation on the road. Back in 2006, a standard for lighting devices for cars was introduced into the traffic rules. Therefore, road inspectors have the right to fine a person whose devices do not meet the standards. Employees of the regulatory authority do not always punish for this, but by law they can bring the driver to administrative responsibility.
Requirements for the operation of side lights are described in Art. 12.5 of the Code of Administrative Offenses, therefore it is better to make American women white, not yellow. Violation of the rules may result in confiscation of the lighting device, a fine of up to 2,500 rubles, and deprivation of a driver’s license for up to 12 months.
Priora wiring in VAZ 2110
The biggest problem is that the wiring on the Priora is multiplex, it is not at all similar to the wiring on the VAZ 2110, and the same on the Euro. Only the plugs are different!
Because All connectors on the Priora differ from the connectors on the VAZ 2110. Then you can:
Change the wiring of the VAZ 2110 to wiring from the Priora. Leave the VAZ 2110 wiring and change only the pads from the Priora. In the first case, you will need all the Priora wiring (under the hood, inside the cabin).
In this case, the most difficult moment is to merge the rear old part of the wiring with the wiring from the Priora.
Thus, the process is complicated by replacing all the wiring, but is made easier by the fact that all the pads do not need to be soldered.
In any case, you will have to study literature from Priora and VAZ 2110 for a long time.
The only connector that will fit is the connector connecting the interior wiring and the injection wiring (only for VAZ 2110 with 1.6 internal combustion engine)
The mounting block will also have to be replaced with the Priorovsky one, because it doesn't look like a decimal at all.
Because In the Priora, air flow control is automatic, then if necessary, you need to install an electric drive in the heater.
The Priors now have an electrical package control unit (2170-3763040). It is responsible for all electrics (ESP, central locking, interior light, built-in alarm, turn relay, etc.) and combines the functions of an anti-theft system, immobilizer and hazard warning lights.
Installing it in the top ten will require additional investment and time, so it is usually not installed in the VAZ 2110.
The price of the electrical package control unit is about 3000 rubles.
Some of the Priora's wiring comes with the panel, and some must be purchased separately.
The price of wiring the Priora separately is about 1500 rubles.
How to install a Europanel on a VAZ 2109
Task: install a Europanel on a VAZ 2109 carburetor
What is needed for this:
1.Euro-torpedo 2. Instrument panel 3. Wiring under the torpedo 4. Fuse block 2114 (it has 9 relays)
2114-3722010-60, as in the picture
5) Speed sensor (since there used to be a cable)—the sensor needs to be taken “6 pulse turn”
6) Steering column 2114 (with adjustment) 7) Wires that will come from the speed sensor 8) Cables from the VAZ 2114 stove, because old short ones 9) A pair of 4-pin relays 10) Current control 11) Ignition switch with 14k
Disassembly And so you removed the top, first we take out all the rubbish, rubbish, etc. from the car, then we climb under the column, we see the bolts for the column, you can remove it (I removed it because I made a Shumka of the whole muzzle, and there is more room without it)
So we removed everything, we climb to the CY (mounting block), pull out all the pads from it, open the hood, also pull out all the pads from the CY and immediately put the new CY, all the pads (the things that were in the CY) back in their places. At the same moment, a beep will sound and the fan will start working, this can be solved, but first, so as not to heat your head, pull out the jumpers from the CY that stand in place of the fan relay and the signal.
We turn it on - there is no reaction, but on the tidy a couple of lamps work like a “handbrake” brick, etc. It’s all about the chip under the relay (4 contacts) there are 4 wires, 2 power (thick) 2 minuses (thin)
We need to connect the POWER wires to each other (these are blue-red and red) It should start. If not, then you have mixed up the chips, there are two of them on top of the other, you need to install a relay so that the heater turns, etc., work. (Or the wiring is not the same as mine) That is, we put a 4-pin relay on a chip with 4 wires
Everything should work. So the car starts, the heater turns the feet, etc., and all the buttons should work (hazard lights, heated glass)
Wiring, devices
The temperature on your dashboard should work, if not then you did something wrong or look at the diagrams (there will be some at the end) everything worked for me. So this list is what didn't show me at all, or didn't work properly
1) FLS (fuel level sensor) 2) Brake fluid sensor 3) Fan operation 4) Speed sensor 5) Tachometer 6) Horn
1) FLS (fuel level sensor) Take the red block that is inserted into the dashboard, find 4 pins there (pins in the photo below),
we cut it off and extend it to the pink wire on the block W/X9, depending on who you are, Ш9 pin 6, connect it and everything works.
2) Brake fluid sensor Here you only need to connect the black wire (at the barrel where the sensor is) to positive, instead of negative, we connect this black wire to (+) from the reverse sensor. The pictures show which wires.
black it to + to the back move black which goes to the brake
3) Fan operation I made the fan work regardless of the ignition position We will need - 4-pin relay - Wires: “+” battery to the relay - Relay block - Also a 20A fuse as in the photo According to the diagram, everything is simple)
We need a speed sensor “6 improtation” 2114, I have 3 wires coming out of it 1(+) 2(Signal) 3(-)
So 3. minus the ground on the body) 2. we connect this signal to the tidy (red block number 5 as marked in the picture) 1. plus to constant plus
5) Tachometer We simply connect the brown wire directly from the coil (ignition bobbin) to the white block in the device to cell 3, cell 2 is also a tachometer but it is low-voltage for the brain (counting cells according to the normal scheme)
6) Sound signal, just take a 4-pin relay and insert it instead of a jumper)
Result : installation of the Europanel on the VAZ 2109 carburetor is completed.
Installation of sound signals from Volga on VAZ 2108
Many VAZ 2108 owners are not satisfied with the sound of their car’s standard horn. An excellent replacement for the standard one
What options are there?
In order to choose the right wheels for a VAZ 2115, you will need a certain amount of attention and skill
It is important that all components fit perfectly together. Then the likelihood that the selected model will last a long time automatically increases
Conventionally, all types of disks can be divided into several categories:
The first of them are included in the basic package and have excellent technical characteristics. Steel wheels are inexpensive, but nevertheless reliable and durable. They can be chosen by a driver who values comfort and ride quality, but does not accept any excesses.
In turn, alloy wheels on the VAZ 2114 are made of light alloy materials that contain aluminum. Externally, they noticeably outperform factory equivalents, without losing in technical terms. The only disadvantage of alloy wheels is their price, which differs from steel wheels by more than two times. However, a good quality characteristic will more than justify the financial costs.
Forged wheels are classified as exclusive with excellent technical characteristics. For forging, aluminum alloys are used, which are first exposed to a press. After the configuration of the part is formed, high-precision metal-cutting machines bring it to the required shape.
The hardness of such discs is approximately 2.5 times higher than normal! That is why it is more advisable to install them on a racing car, and not on those that move around the city. Forged wheels look very stylish, but is their high price justified in ordinary use?
Of course, the right to choose the tire size, their appearance, etc. is entirely provided to the driver. In this matter, it would be useful to listen to a specialist who will select the best option based on the conditions in which the car will be operated.
What's on the dashboard
Standard tidy 2114 includes the following elements:
- coolant temperature indicator;
- tachometer;
- left turn indicator;
- right turn indicator;
- speedometer;
- fuel level;
- fuel reserve light;
- side light bulb;
- brake system light;
- high beam headlight bulb;
- button to reset current readings;
- odometer;
- hazard warning lamp;
- "check engine" light;
- watch;
- battery charge light;
- parking brake light;
- oil light;
- reserve.
Each of these electronic elements is connected to the corresponding contact on the common panel. Which one, and to which one exactly – we’ll look at it below.
What kind of drilling on a VAZ-2114: photo and video
Beauty, of course, requires sacrifice, but it’s still not worth going beyond the boundaries of healthy logic. When choosing wheels for a VAZ-2114, you need to be guided not only and not so much by the design of casting or stamping, but also by the dimensions in the first place. Compliance of the factory seating dimensions with the dimensions of the new wheels will guarantee safe operation of the vehicle.
What kind of drilling is on the VAZ-2114
One of the main parameters that you should pay attention to when replacing standard wheels on a VAZ-2114 car is the dimensions, location and diameters of the mounting holes, PCD, pitch circle diameter, or in simple terms, drilling or bolt pattern
Bolt pattern on a VAZ-2114 wheel
Bolt pattern - this characteristic is expressed in two numbers and indicates the distance between the centers of the mounting holes and their number.
Drilling for all VAZ cars (except Oka and Niva) - 4x98, four holes, the centers of which are located at a distance of 98 mm from each other.
However, this is a simplified designation for the user. The disc manufacturer is required to take into account both the diameter of the holes, their number, the distance between their centers, and the diameter along which the centers of the holes are located. Such a designation would complicate the selection of disks by the user, so knowing drilling in the “number of holes/distance between them” format is considered sufficient.
A few more wheel parameters
The drill bit can be measured using the spare wheel. In all SAMARA drilling 4*98
There are several more parameters that relate to the original VAZ-2114 rims - the width of the stock rim is 5.0J, the offset of the ET45 rim, the diameter of the centering hole at the hub is 58.5.
How to install a 4x100 disk on a VAZ-2114
Most older foreign cars have a 4x100 drill. This makes it possible to diversify the choice of disks almost indefinitely. However, we must take into account that simply installing, without modifications, 4x100 wheels on a 4x98 seat will not lead to anything good. The fact is that the tolerance in the manufacture of the disk does not exceed 0.7-1 mm. That is, it is theoretically possible to put on a disk with a 4x100 fit, but this will lead to the fact that only one bolt out of four will fit exactly on the cone. The remaining fasteners simply will not tighten all the way and, as a result, the disk will sit with a distortion that is almost impossible to check by eye.
Disc with bolt pattern 4*100
The disc will not fit with its mating plane to the hub, and this will lead to the fact that it will have a runout.
Systematic runout can not only lead to the fact that the only bolt that is tightened correctly will quickly become loose, but also to instant wear of the wheel bearing, and the remaining bolts will loosen on their own. There is a way out of this situation.
Disc runout leads to rapid wear of the wheel bearing
To install a disc with a 4*100 bolt pattern, you need to either install a spacer or install studs with nuts instead of bolts.
A less reliable option is to install bolts with an offset head. A not entirely correct option is to install studs, for example, from the cylinder head and nuts from Niva, but the studs are not designed for torsional force, so the most reliable option would be to install spacers. You can carve them yourself or buy them ready-made.
But here you need to take into account several nuances:
- The width of the spacer must be at least 20 mm, since only in this case we will ensure proper thread strength.
- In this case, the offset of the disk will increase by the same 20 mm, which must be taken into account when selecting a disk.
- In this case, the disc must be selected with a minimum offset in order to remove the load from the hub and somehow compensate for the difference in offset.
Using offset eccentric bolts class=”aligncenter” width=”500″ height=”375″|fcw3qayjh5a| src=»https://max-vps.ru/wp-content/uploads/d/1/0/d101bbd9ce45f3d879a2a2df8886d810.jpeg» class=»aligncenter» width=»500″ height=»375″[/img]Install wheels spacers
Installing studs with eccentric nut
Video about installing spacers to change drilling on a VAZ-2114
Conclusion
Be careful when replacing disks with non-standard ones and remember that the most killer appearance can never replace safety, especially at high speeds. Have a successful and safe journey everyone!
In all modifications of the VAZ 2110, the bolt pattern in the factory configuration is 4x98. “Dozens” rolled off the assembly lines with stamped wheel disks - diameter R13, as well as with cast ones - diameter R14.
The wheels were fitted with tires measuring 175/70 R13 or 175/65 R14. However, if the sizes of wheels and tires are relatively clear values, then what a bolt pattern is is a big mystery to many.
Wheel parameters and bolt pattern for VAZ 2110, 2111, 2112
Disk parameters 2114
Bolt pattern (also known as disk drilling, also known as pitch circle diameter) is a value that shows the number of mounting holes in the disk, as well as the linear distance between them. It is indicated, respectively, by two numbers. The standard wheel bolt pattern for the VAZ 2114 is 4*98. This means that the disk has 4 mounting holes for bolts, and the distance between the centers of these holes is 98 mm.
It is worth noting that such drilling is standard not only for the 14th model, but also for all other cars produced by AvtoVAZ, with the exception of the Oka and Niva.
In addition to the bolt pattern, there are a number of other important parameters of the disk that can be useful when choosing non-original spare parts. These include: the width, which is designated as 5.0J, the offset of the disc, marked as ET45, and the diameter of the hub centering hole, equal to 58.5 mm. The mounting bolts have an M12 thread with a pitch of 1.25 mm.
conclusions
On the VAZ-2114, many motorists practice installing alternative engine options to increase power and other quality indicators. This modification, as practice shows, requires more time, effort and finance, and is therefore considered not economically feasible. Thus, experts and experienced motorists recommend tuning the standard engine.
Tuning is not just about changing the appearance of a car, as many people think. In fact, revisions often concern the technical component. Someone makes changes to the exhaust system, changes elements of the factory engine.
But there is a more drastic, expensive and interesting option - change the engine. With the new engine you get different technical characteristics, increased power, increased maximum speed, better acceleration.
And what's under your hood? Replacing an engine is a fairly serious step that requires you to think through every stage, from choosing a new engine to the consequences that such work can result in.
What engine can be installed on a VAZ 2115
To some extent, at the beginning I thought that it was possible to meet the purchase of an engine plus small costs for labor and spare parts.
How wrong I was, like probably 95% of those starting their journey to remodeling a car. While Bodraya 015 sits in Mikhail’s garage and is slowly building up muscle mass, visitors to the garage are looking at it and naturally some have thoughts about introducing such an internal combustion engine into their car.
But as practice shows, not everyone adequately assesses their financial capabilities, which is why such alterations can drag on for a long time.
Mikhail, having already had several projects under his belt with replacing the internal combustion engine with an imported one, claims that the cost of replacing the engine with a more powerful one, even if it was installed on this car from the factory, can be safely multiplied by two based on the initial cost of the unit itself.
That is, if the internal combustion engine itself costs 40 thousand, then installing it and related spare parts, as well as servicing the internal combustion engine on your own will cost 80 thousand rubles, and if you entrust this matter to another person, it will easily exceed 120.
So what do we have:
— ICE + manual transmission + related spare parts (flow meter, pump, dashboard, manual transmission poker, drive, engine cushions and more) from 60,000 rubles.
We got a freebie for 43 thousand rubles. with the condition that everything was brought home to us.
Immediately returning to Mikhail’s practice, it turns out that when buying spare parts in different places, there is a large overpayment only for delivery. Plus, sellers are often ready to raise the price for every small plug and wiring.
— Engine overhaul RUB 6,000.
Many people make the mistake of buying a contract vehicle. It’s used, so it’s a big lottery; even with a low mileage engine, it often needs maintenance, at least a belt, or at most a complete overhaul.
We ended up having to replace the liners, seals and gaskets. Fortunately, the pump and all the bearings were recently changed, and besides, all the work on the car from which the internal combustion engine was removed was carried out at our friends’ service station.
- Iron for overcooking and strengthening 2000 rubles. Square pipes, round pipes, sheet metal.
- Crabs and crabfish 1500 rub.
- Radiator with improved characteristics RUB 4,000. There will be a separate post about it.
- Exhaust pipes, corrugation, thermal tape, mufflers, fasteners RUB 12,000. This takes into account that Mikhail undertakes to make the resonator and muffler himself.
- New hoses, pipes and other small items RUB 3,000.
Here is the minimum list of costs, not including labor costs. Even if you do the work yourself, sometimes you have to turn to other people for help, which entails certain costs.
The total budget for replacing an internal combustion engine with an “imported” one starts from 72,000 rubles. If you resort to installation services, the price starts from 150,000 rubles. But remember, what is missing here is the brakes, and this should be an integral part of increasing the power of your car.
I would like to clarify the choice of engine for installation:
- Definitely Toyota. In our area, this is the most common car brand for which it is easiest to find spare parts. Quite reliable and repairable.
- Maximum volume at maximum power. The choice of front-wheel drive is not great. 2 liters of milk and 200 hp.
- No turbocharging, though.