The fan is designed to create an artificial air flow directed at the engine radiator in order to cool the liquid circulating in it. When the car is moving at high speed, there is, of course, no particular need for it, but at low speeds, and also when the car is idle with the engine running, you cannot do without it.
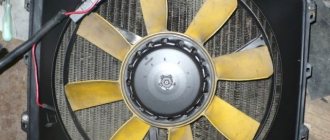
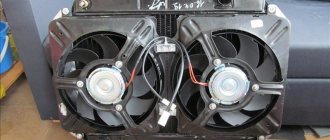
The radiator fan is turned on by a signal from the electronic control unit based on data received from the temperature sensor, which is triggered when the coolant heats up to 103-1050C. In a VAZ 2114 car, the fan is located in the engine compartment on the back side of the radiator.
Causes of malfunctions
The fan may not turn on for the following reasons:
- the fan drive (electric motor) is faulty;
- fuse is blown;
- the relay has failed;
- broken electrical wiring;
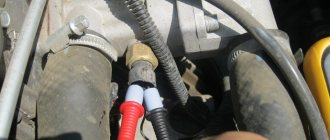
- lack of contact in the temperature sensor connector;
- The temperature sensor is faulty.
Search for reasons
Diagnosis of a fan malfunction should begin with the fan itself. To do this, disconnect the connector on the fan and connect it, observing the polarity, directly to the battery terminals. If it turns on, it means the drive is working, the reason needs to be looked for further. If the fan does not work, this is the reason. But let's take things in order.
The fan did not turn on. We check the integrity of the wiring and the condition of the contacts on the sensor. If everything is in order, we move on to the fuse and fan relay. They are located under the hood on the left side closer to the driver, in the mounting block.
Fuse F4 is 20A, double, for the sound signal and the cooling fan (it is very easy to check; if there is no sound signal and the fan does not work, then most likely it is the culprit).
You can check the fuse with an ordinary autotester. With relays the situation is more complicated. To make sure that this is not the case, it is better to get a one hundred percent working relay somewhere and temporarily install it in the socket for testing. If the fan does not work even with it, we go to the sensor.
If the sensor is de-energized, the controller must start the fan in emergency mode for constant blowing. Disconnect the connector from it and turn on the ignition. Turning on the fan will indicate that the sensor has failed and requires replacement.
When is it necessary to change a fan?
If the cause is still in the fan itself, you can try to repair it. The problem is usually the brushes or bearings. But it also happens that the electric motor fails due to a short circuit or break in the windings. In such cases, it is better not to experiment and replace the entire drive.
It is strictly forbidden to operate a vehicle with a non-working cooling fan. Overheating of the coolant will inevitably lead to the destruction of rubber pipes and hoses, as well as cylinder head gaskets and valve covers. In addition, high engine temperature can cause destruction of the piston group elements.
How much does a cooling fan cost on a VAZ 2114
You can buy a new cooling fan for a VAZ 2114 for 1500-2500 rubles. Replacing this part at a service station will cost 300-400 rubles. But you don’t have to spend money on this. Dismantling the old fan and installing a new one at home will take no more than 30 minutes.
Maintenance of the electrical wiring system in Lada Samara
In a car with an injection or carburetor engine, maintenance of electrical wiring consists of protecting and repairing it. The electrical equipment in the car will last a long time, and it will only have to be repaired as a last resort if you carefully ensure that no moisture gets into the wiring system, and that high-voltage wires are not tangled and are located as far as possible from the hot parts of the engine. The VAZ 2115 electrical diagram will help with this.
You need to pay special attention to the condition of the contacts and connectors; if necessary, they should be cleaned of dirt and dust. Burnt out sections of wiring should not be replaced; it is much better to replace the entire wire. The VAZ 2115 wiring diagram will become a visual aid and will help you carry out minor repairs yourself or even completely replace the electrical wiring in the car. The VAZ 2115 diagram is clear and intuitive to the user; its especially important details are highlighted in color or a different font.
Without a diagram of the location of electrical components in a machine with 8 valves, it is impossible to repair or replace the main relay or other unit.
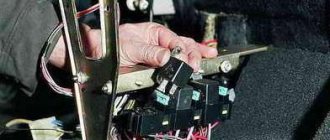
Often the cooling fan does not turn off due to a failed fan relay. It is installed in an additional mounting block “four”. This block is located near the front passenger's feet and is covered with a decorative trim.
Replacement
- socket wrench 10;
- socket wrench 8;
- screwdriver with a Phillips bit.
- We park the car on a flat surface and immobilize it with the parking brake.
- Open the hood and disconnect the negative terminal.
- Using a 10mm wrench, unscrew the fastenings of the air filter housing.
- Using a screwdriver, loosen the air duct clamp on the air flow sensor and remove the corrugation.
- We unscrew the screws securing the cover of the air filter housing and remove the filter element.
- Using a size 8 wrench, unscrew the air intake mount and remove it.
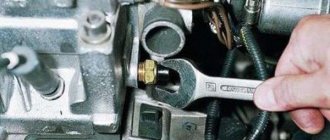
- Using a 10mm wrench, then an 8mm wrench, unscrew the nuts securing the fan casing around the perimeter (6 pieces in total).
- Disconnect the wire block on the fan connector.
- Carefully remove the fan casing along with the drive.
- Using a 10mm wrench, unscrew the 3 bolts holding the electric motor to the casing.
- We put a new one in its place.
- We install the structure in place, fix it, and connect the connector.
- We carry out further installation in the reverse order.
Operating principle
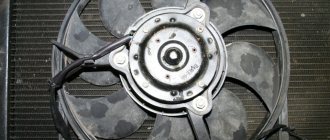
A fan is a device that allows you to increase the efficiency of a cooling radiator. The radiator takes heat from the engine and releases it into the air. This process is accelerated by blowing through the blades of an electric fan.
The coolant flows through a closed, sealed system. Its task is to remove excess heat from overheated engine parts. Hot antifreeze flows into the radiator, is cooled here and returns back. While in the radiator, the coolant passes through a system of thin tubes. The incoming air flow while the car is moving helps to quickly remove excess heat from the engine compartment.
But when the car is stuck in traffic or idling, the air flow stops cooling it. In this case, the cooling system may not cope with its task. An electric radiator fan is designed to create air flow artificially. The temperature for turning on the fan on a VAZ 2114 is 85 degrees Celsius.
Having received a signal that the permissible temperature value has been exceeded, the sensor starts the device’s operating mechanism. An artificial air flow is created that removes heat from the radiator. The mechanism operates until the temperature level drops to an optimal state.
The thermal switch then receives a signal that the normal temperature has been reached and turns off the fan.
The device consists of four plastic blades that are mounted on the EDF shaft. A special controller regulates the automatic operating mode. The thermostat is equipped with a solid filler that is sensitive to temperature changes.
There are main and additional valves. When the temperature reaches 85 degrees Celsius, the main valve opens.
Why doesn't it work
There are several reasons why the propeller may not turn on when the temperature situation requires it:
- The electric motor of the fan, that is, the drive, has failed;
- The fuse broke and burned out;
- Relay failed;
- The wiring is broken;
- The sensor connectors have lost contact;
- The sensor has failed.
Finding the fault
Problem search area
Explanation
The connector on the propeller is disconnected and connected directly to the battery. If the fan starts working, everything is fine with the drive. If the propeller still does not spin, the problem is in the electric motor.
Wiring and contacts
If the propeller does not work, you must check the condition of the wiring and make sure that the sensor contacts are working properly
You can find these two elements in the engine compartment on the left, closer to the driver, inside the mounting block. The fan is supplied with a fuse designated F4 with a rated current of 20A. The test can be performed by pressing the horn button. Why? Yes, because it is also connected to this fuse. Or check with a tester
It is located in the same place as the fuse. For an effective test, it is best to take a relay that you are 100% sure is working, install it in place of the old one and check
To test the sensor, disconnect power from it. If it works, the propeller will start working in emergency mode, that is, it will blow constantly. Disconnect the connector and turn on the ignition. If the propeller spins, then the sensor is broken. Need replacement
When to change
If the fan itself is the cause of all the problems, it is not necessary to change it, since in some cases it can be repaired. Failures are often associated with bearings or brushes.
If the cause of the breakdown is the failure of the electric motor due to a broken wiring or short circuit, it is not worth the risk of repairing it. It is easier and better to replace the entire drive.
Checking for open circuit
If you drive a car that does not have a cooling propeller, this will lead to overheating of the coolant and destruction of pipes, rubber elements, gaskets of the main cylinder block and valve covers. It is not far from destroying the components of the piston group.
Fuse
Operating a vehicle with a broken fan is strictly prohibited.
Price issue
Before starting to solve the problem of a radiator propeller not working, it is important for many people to learn about the cost of components and labor.
A new element today will cost approximately 1.5-2.5 thousand rubles, depending on the model and region. The cost of replacement at a service station will be from 400 rubles and more. Although it is not necessary to spend money on this, since replacing it yourself will take you no more than half an hour. Yes, and there is nothing particularly complicated here.
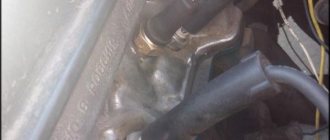
temperature sensor
Where is the fan relay located?
It is located in an additional block.
4 – electric fan relay;
5 – electric fuel pump;
6 – ignition relay.
Relays and fuses may have a different order. Therefore, you need to focus on the color of the wires. The main relay is always located at the bottom. Find the relay that has a thin pink wire with a black stripe coming from it. It comes from the main relay through pin 85. Be careful! Do not confuse this with the red thin wire, which also has a black stripe and extends from the controller. And find a thick white wire with a black stripe (pin 87). This is where the cooling fan relay is located. There is always a fuse next to it. It is an element of the chain.
Cooling fan diagnostics
If signals appear on the dashboard indicating that the permissible temperature level in the cooling system has been exceeded, this may indicate that the fan on the VAZ 2114 is not working. The main symptom of the malfunction is that the mechanism does not start even with a significant increase in temperature. It is urgent to turn off the engine to prevent its elements from overheating.
The engine should not be operated with a faulty electric cooling fan. This may damage the cylinder head.
If the cooling fan on a VAZ 2114 does not work, the following malfunctions may be the cause of the breakdown:
- The fan switch sensor on a VAZ 2114 has failed.
- Lack of contact at the sensor connector.
- The wiring has broken.
- Electric fan relay faulty.
- The fuse has blown.
- Damage to the device's electric motor drive.
Unplug the device. Connect it to the battery terminal. Maintaining polarity. If a direct connection to an energy source starts the electric motor, then the drive is working. There may be problems with the wiring, the fuse, or the temperature sensor.
Now it’s time to diagnose the fuse. You don't even have to open the plastic box to do this. If the relay malfunctions, the horn stops working at the same time as the fan. Therefore, if you notice the loss of the sound signal, it means that the fuse has definitely blown. You can find it in the engine compartment in a small plastic box. We release the cover, pressed by two latches, take out the burnt fuse with tweezers and replace it with a new one.
But diagnosing a relay is quite difficult. Especially for those who are exclusively “you” with auto electrics. To check functionality, the easiest way is to find a working relay and temporarily install it. If, after installing a new device, the fan begins to work properly, then it is time to replace the old one.
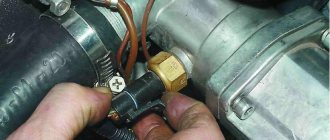
To diagnose the temperature sensor that supplies a signal to the radiator, you need to disconnect the connector from the sensor and start the ignition. The emergency mode will start, in which the electric fan will start blowing. If the fan starts late when the connector is disconnected, the sensor is most likely faulty. Replacing it will take no more than five minutes. You just need to unscrew two bolts using a Phillips screwdriver and install a new device in its place.
Diagram of low beam, high beam, rear fog lamps
- Headlights;
- Mounting block;
- Headlight switch;
- Ignition switch;
- External lighting switch (fragment);
- Fog lamps in the interior rear lights;
- Fog light switch with turn-on indicator lamp;
- Headlight high beam indicator lamp in the instrument cluster; K8 - High beam headlight relay; K9 - Relay for low beam headlights; A - The order of conditional numbering of plugs in the headlight block; B - to power supplies
How to make a replacement
If you are convinced that the cause of the malfunction lies in the fan motor, then the easiest way to carry out repairs is to completely replace the device. In this case, there is no point in spending money on a new casing. It will be cheaper to just buy a new electric motor.
Necessary tool
No special tool is needed. The work is carried out simply using 8 and 10 socket wrenches and a Phillips screwdriver.
Step-by-step algorithm of work
You can replace the cooling fan motor without removing the radiator.
- Disconnect the connector and device wiring harness from the casing.
- Unscrew the mounting bolts using a 10mm wrench.
- Unscrew the lower fastening nut.
- Using a 10 mm socket wrench, unscrew the mounting nut from the radiator.
- Using a size 8 socket wrench, unscrew the two pressure plate nuts.
- Remove the plate.
- Remove the electric fan along with the casing.
- Let's start dismantling the electric motor. Using a 10 mm wrench, unscrew the three mounting nuts and remove the engine along with the blades.
- Using a screwdriver, pry up the lock washer.
- And take it off.
- Remove the impeller.
- Put the impeller on the new motor. Make sure that the shaft pin fits into the impeller groove.
- Reassemble in reverse order.
Front harness diagram for VAZ 2114 injector
The VAZ ignition module consists of a two-spark coil and is of the block type. The interior of the VAZ car has become more comfortable, a new, more convenient and advanced instrument panel has appeared, which has a more streamlined and ergonomic shape, backlit push-button switches and indicator lamps, etc. In the instrument panel wiring harness, the second ends of the white wires are brought together into one point, which is connected to the switch lighting of devices except for the white wire, from plug “4” of block “X2” of mounting block 28 to block 83 of the on-board control system indication.
The fuel supply is considered distributional, because gasoline is injected into each cylinder using a specific injector. The first coil supplies an impulse to the 1st and 4th cylinders, and the second - to the 2nd and 3rd cylinders.
Connecting the adsorber valve to the injection system controller also provided another additional element.
Good luck on the roads! Injector connection diagram It is quite difficult to describe in words the pinout of the wires connecting the injector to the ignition system, so you should pay attention to the diagram below.
Based on the location of the rod, the volume of air that enters through the calibration hole will also change. It is possible to connect fog lights.
We discard the wires leading to the sensor. We spread the ignition wires