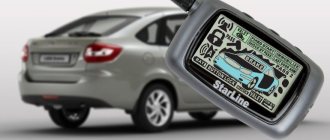
What the standard alarm system of Kalina 1 can do
Lada Kalina has been produced since 2004, but already then standard security systems began to be installed on it. The main components of this alarm are:
- Control block;
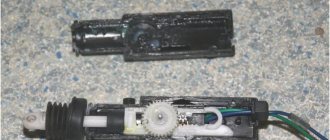
- actuators in the form of door drives and a horn;
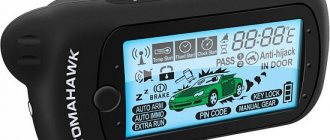
- radio key;
- standard immobilizer.
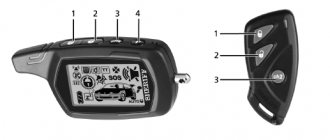
The main way to get into the car is to use the key. It has three buttons - these are:
- arming;
- disarming;
- unlocking the trunk.
By pressing one of the buttons, the car owner controls the security system. When arming, all doors and trunk are locked. The system goes into security mode. When the door is opened, the car notifies the car owner with audible horn signals about penetration.
Also, the doors will not close if the limit switch of one of the doors is faulty or the door is not closed. In security mode, the car cannot be started. The system will sound alarms.
The key fob has a trunk release button. By holding it down or pressing it twice in a row, you can unlock the trunk without disarming it, for example, to load luggage. If the trunk is not opened within 20 seconds, the system will again go into security mode.
Disadvantages of the standard system:
- lack of autostart;
- short range;
- lack of shock and tilt sensor.
The last point can be corrected, since the standard alarm makes it possible to install shock or tilt sensors. All other shortcomings can be easily eliminated by installing a full-fledged car alarm.
Two configurations and two schemes
In the “Norma” version, if it has a central locking system, you can use two control wires. Ground is supplied to one of them if it is necessary to open the locks, and to the second one - if it is necessary to close them. The period of connection to ground should take 0.7 seconds, and most alarms have such a setting.
If we talk about the “Lux” configuration, then the control wires will not help us. The relay contacts integrated into the alarm will have to be connected to the breaks in the power cords. Despite all the complexity, there were no complaints about this scheme, and we will look at it right now.
The “luxury” option is the most difficult
First, you need to make sure that the central locking system in the frame is really connected according to the “Lux” scheme. The control key located on the door must be a trigger (non-latching). If you have this particular version of the car, you will have to tinker. It will be necessary to extend 4 power cables to the signaling unit. These cords, in turn, must go from the break point of the two standard wires (yellow-white and yellow-black). Find them in the bundle under the threshold.
It doesn’t matter what kind of alarm system is supplied with 2 relays, one of which is triggered for closing, the second – for unlocking the locks. Power cables drawn from the break points are connected to the relay contacts.
The part of the yellow-white wire that goes to the actuators is connected to the common contact. Another relay contact (normally closed) is connected to the 2nd half of the cable. A similar method is used to connect to the yellow-black wire, but here an opening relay is used, not a locking one. Any of the normally open contacts receives power.
All power wiring is supplied with power through a fuse.
In our case, the rating “15 Amperes” is used. Specifically, before installation, it is necessary to call the pair of wires that are oriented to the actuators. The probe should show a value of 1.2 - 1.3 Ohms. And of course, when performing installation work, you first need to remove the negative terminal from the battery. Be careful!
What kind of alarm can be installed on Kalina
The 1st generation Lada Kalina was not equipped with a CAN bus, which means that any alarm system that uses analog signals for operation can be installed in it. It is best to give preference to systems with feedback and autostart.
Among the manufacturers, the following can be noted:
- Starline;
- Scher-Khan;
- Pharaoh;
- Sheriff;
- Pandora.
These alarms are characterized by more stable operation, increased reliability and have representative offices in many cities, which simplifies the installation process and technical support during the warranty period.
Main features
Some advantages of purchasing this vehicle include:
- Relatively low price.
- Practicality when used for domestic purposes.
- Inexpensive maintenance.
- Inexpensive repairs, as well as an unlimited number of spare and inexpensive parts.
How to set the alarm on Lada Kalina 1 yourself
To install a security system on Lada Kalina, you need to take the following steps:
- Carefully study the installation instructions and diagram.
- Study the installation map for the VAZ-2117 car.
- Connect to the desired points in the car.
- Correctly install all alarm elements in the car.
Each stage should be considered separately, as there are many nuances in them.
Connection points for Lada Kalina
The most basic instructions for installing an alarm are connection points. Without this information, it is very difficult to install a security system in the car. The essence of installing the system is to connect the alarm wires to the points indicated in the table below:
| What is he responsible for? | Wire color and polarity | Where to look |
| Central locking - unlocking | Pink-black (minus) | Under the plastic sill trim on the driver's side |
| Central locking - locking | Pink-white (minus) | Under the plastic sill trim on the driver's side |
| Door switch | White-blue (minus) | Under the plastic sill trim on the driver's side |
| Direction indicators | Blue-black and blue (plus) | Under the plastic sill trim on the driver's side |
| Driver's door switch | Red-blue (minus) | Under the plastic sill trim on the driver's side |
| Generator | Brown-white (plus) | Instrument wiring harness |
| Handbrake signal | Brown-blue (minus) | Instrument wiring harness |
| Starter | Red (plus) | Egnition lock |
| Ignition | Blue-black (plus) | Egnition lock |
| +12 V | Brown (plus) | Egnition lock |
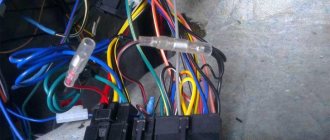
Using connection points, you need to wind the wires so that they go in a group to the places where they should be connected.
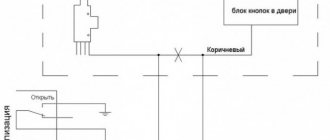
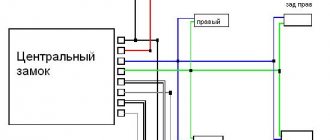
Please note that the central locking is controlled by minus, which means you need to use the appropriate signaling circuit. It's in the instructions. As an example, there is a diagram from the Starline A92 alarm system:
What you need to know about installation
Installation begins with disassembling the car interior. It is necessary to disassemble those parts behind which the connection or installation of any alarm element will be carried out. In the case of the Lada Kalina, you need to disassemble:
- dashboard;
- driver's door pillar;
- steering column;
- driver's threshold.
Having disassembled everything, a decision is made about where the unit will be mounted, and after that, the alarm wires are wound into bundles that go to different places in the car. Equally important is to correctly place the main elements:
| Element | Where to hide |
| Antenna | Installed on the windshield of the car. This is necessary to improve the signaling range. Under no circumstances should you glue the antenna onto silk-screen printing, as it contains metal particles that impair the performance of the radio device. |
| Light-emitting diode | Mounted on the driver's door pillar. To do this, you need to drill the stand and put an LED in the resulting hole. |
| Shock and tilt sensor | There can be two sensors. In any case, they need to be installed on metal parts of the machine. As a rule, they are glued with double-sided tape and reinforced with metal screws or plastic ties. |
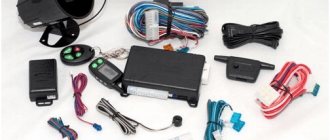
| Autorun block | Attached to the main unit. The block can be built into the alarm system. |
| Alarm block | It needs to be hidden away. As a rule, it is mounted behind the instrument panel and secured to the wiring harnesses using zip ties. Installation on metal parts is allowed, but provided that a shock sensor is built into the unit. |
| VALET button | This is the service alarm button. Its task is to program functions and emergency shutdown of the system if the key fob is lost. The button must be installed in a hidden but accessible place. |
| temperature sensor | Attached to the heater pipe. |
| Siren | Installed in the engine compartment. |
An equally important part of the auto-start alarm system on Kalina is the immobilizer bypass. It allows you to start the car from the key fob without using a regular key. You only need the chip that is in the spare key.
The chip is hidden inside the crawler's antenna, and its receiving ring is wound around the ignition switch. When starting, the system will use the chip from the crawler and does not reduce the efficiency of the standard immobilizer.
Setting up basic functions
After installing the alarm, it needs to be configured. This is done in programming mode. How to use it and how to enter is described in the instructions for the alarm. This is done differently for different models.
Popular customizable features include:
- Autostart duration.
- Duration of the door closing pulse (for window closers).
- "Polite lighting." Necessary for delaying door arming in order to prevent false alarms when the lamp is not turned off. After all, on Kalina the lamp turns off 30 seconds after the doors are closed.
It is imperative to configure the shock sensor. There are two screws on it. One regulates the 1st level sensor - light impact, and the second regulates the 2nd level sensor - strong impact. By tightening the screws, you can adjust the sensitivity.
It is allowed to check the settings on hard parts of the body - the front door pillars - and only with blows of the palm or fist.
Recommendations for both cases
First of all, we note that when connecting the relay to the power wiring, you cannot make the control pulse too long. Setting the value for more than a second can burn out the actuators. Here we were talking about programming, and now let's talk about the electrical part. As you know, before installation you need to open the hood and disconnect the negative terminal.
Negative terminal, battery
This advice should not be ignored in any case.
As for installation, it will be better if the power wire taps are carried out by an auto electrician. With signal wiring, everything is simpler, but the rules will be the same in each case:
- Do not let the cord touch the insulation to metal parts. If contact occurs, additional protection is used. For example, a heat-resistant tube placed over electrical tape is suitable;
- It is better to connect any power cables using twisting. Each twisting point is carefully isolated.
- The cross-section of wires carrying significant current must be sufficient so that the conductor does not heat up. This is how you can protect yourself from unforeseen consequences.
The last tip concerns power wiring. And the ability to twist is a whole art.
Twisting two stranded wires
You cannot learn this art in one day.
When connecting any equipment, you should strive to make as few changes as possible to the standard wiring.
There must be an opportunity to do the following: return everything as it was. Sometimes it happens that one or more signaling parameters do not take a value that is suitable for the car. And then, the alarm system is changed or they refuse to use it altogether. This needs to be taken into account.
Substitutes
| vendor code | Price, rub.) | vendor code | Price, rub.) |
| ABS 17342 | from 1300 | METELLI 23-0411 | from 1350 |
| BOSCH 0 986 479 346 | —/— | LPR L1052V | from 1400 |
| BREMBO 09.8903.14 | from 1500 | TRW DF4107 | —/— |
| FERODO DDF1147 | —/— | BREMBO 09.8903.75 | —/— |
| VAZ (R13) ventilated LUCAS DF4108 | —/— | TRW 2110-3501070 | —/— |
| 2110-3501070/71 | —/— | —/— |
Substitutes
| vendor code | Price, rub.) | vendor code | Price, rub.) |
| Lightweight brake drum made of cast iron Pilenga 6224 | from 1600 | Fenox TO2108O3 | from 1700 |
| LPR 7D0271 (diameter 200 mm, height 50 mm.) | from 1800 | TRW DB4307 | —/— |
| Brembo 14707910 | —/— | Bosch 0986477146 | —/— |
| ATE 24.0220-0020.1 | —/— | BREMBO 14.7079.10 | —/— |
| TRW DB4171 | —/— | TRW DB4187 | —/— |
Original articles
Front brake discs (catalog numbers)
:
- 21100-3501070-01 (8450055308) — Front brake disc R13
- 21100-3501070-02 (8450055309) — Front brake disc R13 (“Auto-Real” LLC, Miass)
- 21120-3501070-00 (8450102989) — Front brake disc R14
- 21120-3501070-01 (8450056449) — Front brake disc R14
- 21120-3501070-02 (8450056450) — Front brake disc R14 (“Auto-Real” LLC, Miass)
- 11186-3501070-00 — Front brake disc R15 Kalina Sport, Granta Sport
- 21905350107077 — Front brake disc R15 painted “Lada-Sport” LLC, Togliatti
Rear brake discs
:
- 11196-3502070-00 — Rear brake disc R14 Kalina Sport, Granta Sport
Kits
:
- 21100350107088 — Set of brake discs R13 in LADA SPORT packaging (“Auto-Real” LLC, Miass)
- 21120350107088 — Set of brake discs R14 in LADA SPORT packaging (“Auto-Real” LLC, Miass)
Tormoza_Kalina zr9–14_1
We undertook to prepare the editorial VAZ-21927 for participation in amateur circuit racing. Let's try to find a balance and build a car that can not only show decent results in lap time trials, but also drive with pleasure every day - after all, reliable brakes, a powerful engine and good handling will not hurt on public roads.
First of all, of course, the brakes. Moreover, the front ones: during intense deceleration, a significant part of the car’s weight is distributed forward, so it is they who bear the main burden of converting kinetic energy into thermal energy. How can we evaluate how much better the mechanisms we have chosen compare to the standard ones? We decided to use a complex parameter - we will record the time of passage of the Smolensk Ring. After all, the more effective the brakes, the longer you can keep the gas open and hit the brake pedal closer to the entrance to the turn. Let's look not only at the peak deceleration values, but also at the stability of the brakes: how many laps can the tuning mechanisms withstand without stopping?
Before the start of the tests, Kalina was prepared: the engine oil was changed and Motul-RBF660 brake fluid with a boiling point of 325 °C was added - this is used in racing cars. True, for the winter it will have to be replaced with a regular one: it is too hygroscopic.
Which brake discs for Lada Granta, Kalina, Priora are better to choose?
Brake discs are replaced when their thickness becomes less than permissible (17.8 mm). Replacement is also carried out if they are damaged (cracked), unevenly worn, or when they are a source of runout. Let's figure out which brake discs are best to buy for the Lada Granta, Kalina and Priora family of cars
