Preparing a part for body repair is one of the most critical processes. It is grinding that largely influences how well the vehicle will be painted. In this regard, many car enthusiasts have a question about how to properly sand the putty on a car. This is exactly what we will talk about in this article.
Process Features
Before deciding which sandpaper to use to clean the putty on a car, you should understand that sanding is a rather labor-intensive task; during the work, it is important to do everything so that only a thin layer of putty remains, so leveling will have to be done several times in a row. As a result of cleaning, almost 90% of the putty will be eliminated.
It is important to do everything very carefully and seriously. You may not enjoy sanding, but without the proper diligence, quality body work will not be achieved. Before you begin sanding, prepare all the necessary materials and room.
Video review of how to properly sand putty on a car:
Video - How to prepare and putty the surface
First of all, it is necessary to properly clean the surface that will later need to be painted. For this, use special solvents that will easily degrease the desired area. After this, you need to clean it properly. Under no circumstances apply putty to a glossy surface. To clean it, use a grinding machine, and in hard-to-reach places you can use sandpaper of the appropriate model. If there is corrosion on the body, then before applying putty, it must be carefully treated using a converter.
When the surface is completely ready (cleaned and dried), you can proceed directly to puttying. To do this, dilute the coarse-grained material and apply it to the defective area using a spatula. If the dent is too deep, try not to straighten the area right away. The material can be applied in layers at intervals of 15 minutes. However, it should be borne in mind that for each layer it will be necessary to prepare a new portion of putty, since after 5 minutes it will completely harden.
If you were unable to give the material the required shape while it was frozen. Let it set well and dry completely. Only after this can you begin sanding and applying new layers. The fact is that leveling putty that has not completely hardened can only worsen the situation and then everything will have to start all over again. Try to always take this point into account, since the service life of the paintwork material on the car body will depend on it. The better the putty holds, the longer the paint will last.
The thickness of the layer can vary greatly depending on the brand of putty. Some manufacturers allow a thickness of 1 to 2 millimeters, while others can apply a layer of 10 mm. However, a layer that is too thick does not contradict the requirements, but does not guarantee a sufficiently long service life of the coating. The thinnest layer is formed by liquid putties, as they are applied by spraying.
Preparatory work
If you are interested in what kind of sandpaper to sand putty on a car, then, first, think about where you will perform all the necessary work. It is important to note here that such activities should be carried out in a well-ventilated area, as many small dust particles will get into the air.
Even if you think there is no dust, this is not true. Dirt will be especially noticeable at night when the lights are on.
To get rid of the bulk of dust, it is recommended to periodically vacuum during work. It is also worth considering personal protective equipment. First of all, we are talking about a respirator and gloves.
How to putty with your own hands?
First, it is necessary to evaluate the quality of the surface after straightening work. The optimal thickness of putty is no thicker than 2-3 mm (depending on the recommendations of the manufacturer). If it is necessary to apply a thicker layer, you need to straighten a certain area of the body more carefully. In layers of putty that are too thick, internal stresses can occur, leading to various problems. Some craftsmen apply thicker layers, but they use other types of putty. Before starting work, you should consult with a specialist regarding your specific case.
Preparatory work
To prepare the surface, proceed as follows:
- wash the surface;
- degrease with a solvent; we clean and sand the surface with coarse sandpaper of 80, 150 or 180 grit;
- We treat traces of rust with a special converter.
After the work done, you should get a matte surface. You cannot apply putty over gloss.
Tools and materials
In addition to putty, you will need the following things:
- gloves for painting work;
- solvent or anti-silicone degreaser;
- developing powder;
- plywood for mixing putty with hardener;
- respirator;
- spatulas;
- grinding block;
- sandpaper;
- sandpaper plane;
- gray tape for metallic body color and maroon for regular color;
- sponge for developing powder.
Sequence of work
To apply the first layers, it is better to use coarse putty, especially if you need to hide serious defects. After removing the mixture from the can, it should be mixed with a hardener. The composition can be applied within a few minutes, and then it will begin to harden. Thus, you cannot knead large portions at once. To better fill the scratch with putty, you need to give it a semicircular shape.
Apply the putty using a suitable sized spatula. Alternating spatulas should achieve an even layer. Make sure that the putty completely fills the dents and scratches.
The spatula must be held at an angle of 30-40 degrees to the surface of the part. Apply 1 to 3 layers until the surface is equal to the surface level of the entire section of the part. Each layer should be applied only after the previous one has dried. When the putty begins to protrude a little, the material should be allowed to dry and begin sanding. When using accelerated drying, proceed according to the manufacturer's instructions.
Grinding
Depending on the situation, you can use one of the sanding methods:
- Manual. Using a plane or block with sandpaper attached.
- Mechanical. Using a grinding machine with abrasive wheels.
You need to start with a coarse grit sandpaper - 80, and then use a finer grit as you level the surface.
When using a block, it must be held parallel to the ground and rubbed crosswise diagonally. This applies if the part cannot be dismantled.
We must level the surface so thoroughly that there are no sinkholes, dents or potholes left.
If necessary, apply an additional layer of putty and repeat sanding. Please note that putty sands much faster than metal.
How to sand a car before painting
So, the preparatory work has been completed, now you should begin choosing materials for grinding. As a rule, silicon carbide or aluminum oxide plays the role of an abrasive for body work.
The question of which sandpaper to rub putty on a car consists, first of all, of choosing materials with a certain concentration of particles . The more there are, the faster the grinding procedure will occur. On the other hand, this same parameter also affects the uniformity of scratches that occur during work.
Pay attention to the number that refers to a specific material. As it decreases, the size of the abrasive increases.
Choice of putty
One of the important factors before the putty itself is the choice of material. Depending on the reason for the putty, the types of putty will vary. If you plan to carry out repair work yourself, you should consult with a specialist in the store or watch a video on choosing the appropriate material.
Depending on the nature of the damage, the putty can be used for deep or small dents. Depending on this, it will “sit” on the surface differently.
For a deep dent, you will need two types of putty:
- first for deep sealing of the damaged surface;
- then for finishing.
Although there is a universal type suitable for work at the start and finish. You should carefully choose putty and give preference to well-known manufacturers, since after painting, poor-quality material may move away from the surface of the car.
Sanding materials with mesh backing
At the same time, using abrasive paper is not the only option for how to properly sand putty on a car. In addition, there are also special mesh devices. They are made from high-strength polyamide or nylon material, which is joined with cross fibers. Abrasive elements (aluminum oxide) are attached to them.
Such materials are excellent for any type of sanding. They are characterized by increased stability, and even if water is used, the devices will not fly off during operation.
Although there is less abrasive material on the meshes, it is used with maximum efficiency. Dust does not stick to the surface of the material. Thanks to this, it can be easily removed with a vacuum cleaner.
Among the advantages of the sanding mesh are:
- high productivity;
- increase in work efficiency up to 40%;
- no contamination of the material;
- simplicity of work, since the surface being processed is sanded as evenly as possible.
DIY car body putty
Puttying any car is a very complex and at the same time very important process. The future shape of the car will depend on it. Car puttying is necessary in cases where the car has been in an accident, is covered with rust or requires painting. No driver is immune from all this, so everyone should be able to apply putty correctly. This article will provide detailed instructions on how to putty a car with your own hands. We will tell you about the types of putties and teach you how to apply them correctly.
Putty is essentially the largest layer of coating on a car. It gives the body shape to a certain extent and protects it from the effects of corrosion. Incorrectly applied putty can quickly strip the body of its paintwork and expose it to corrosion.
Most popular sizes
When answering how to clean putty on a machine, you should also worry about choosing an abrasive with suitable parameters. Among the most common options it is worth highlighting:
- P36-P60. Suitable for preparatory work. With the help of these grinding wheels, you can quickly remove a large ball of putty, including putty with fiberglass. They can also be used to remove areas of corrosion and seams that occur after welding. But here you need to act very carefully so as not to remove excess;
- P80-P100. Medium abrasive is used to smooth out rough scratches and level the surface. Grinding wheels of this type are often used to prepare the surface for applying putty;
- P100-P120. Suitable for removing scratches from coarser abrasives;
- P120-P180. Designed to prepare the surface for priming;
- P180-P220. Suitable for cleaning the finishing putty before painting a car;
- P220-P320. A very delicate abrasive. It can be used by hand, without a sander. The goal is to achieve an almost perfectly flat surface;
- P400-P800. Final preparation of the surface before painting;
- Suitable for wet sanding of paintwork before painting;
- P1200-P1500. The material is used for sanding paint to remove defects before polishing;
- R2000. Suitable for finishing work before polishing.
How to dilute and apply putty correctly
After preparing the surface, it must be completely dry, only then can you begin to apply the material. Usually two-component universal putties are used. They are kneaded in strict accordance with the instructions on the packaging, and the life span of the finished mixture is extremely short, so kneading is done in small quantities.
The putty is applied using a spatula, and the first layer does not have to be perfect, since in rare cases it is the last one. The rough layer is dried until completely dry. The drying time must be indicated on the putty packaging, and further processing can be started only after the material has completely hardened. Then the layer is sanded and the next one is applied.
Features of manual grinding
This solution is suitable in the absence of special equipment. In addition, hand sanding is necessary when working in hard-to-reach areas. In the course of such activities, a number of features should be adhered to:
- using a long block you can smooth out defects that cannot be felt even after touching with your hand;
- using a block, make passes crosswise, up and down and back and forth five times in each direction. You should not sand one place, otherwise this will lead to the appearance of indentations;
- Use only clean sanding paper. Its operation is suitable until you feel that the material is being cut;
- It is important to gradually switch from coarser abrasives to fine ones (40-60 at a time, for example, from 120 to 180). As a result, you will save your time and effort;
It will also be interesting: Tuning VAZ 2104: basic ideas for tuning
- Apply masking tape to the adjacent panel to protect it from unintentional damage;
- no need to wait for the putty to completely harden. Within 5-10 minutes after its application, you can begin sanding work. If you use medium abrasives, you need to wait for the surface to completely harden;
- Keep in mind that in modern cars the body can be very thin, due to which the metal will bend during work. Take this fact into account to avoid removing too large a ball of putty;
- For rounded surfaces, elastic bars can be used.
Application of automotive putty
Before puttying, the dent must be straightened so that the thickness of the putty does not exceed 5–6 mm. Never putty on an unstraightened dent, as when the metal is recessed, the adjacent area will rise and after sanding the irregularities will remain.
To prepare for applying putty, you need to use sanding paper with a gradation of P80 - P120. You need to clean 2-3 cm beyond the repair area. The edges of the area where the putty will be applied must be smoothed. The area around the prepared area should be treated with P180-P220 abrasive.
It is better that the ambient temperature is 20–25 degrees Celsius. The metal on which the putty will be applied will always have a temperature lower by 10–15 degrees. If the metal is too cold, the putty will dry on the outside much faster. Thus, condensation and unevaporated solvent may remain under the putty, which will cause adhesion problems and bubbling. If it is not possible to heat the room well enough during the cold season, then it is better to heat the metal before applying putty. This will prevent the formation of condensation and allow the putty to dry normally, throughout its entire depth.
After opening a new jar, if resin is visible on top of it, then it must be mixed with all the putty. The putty and hardener must be mixed on a non-porous surface. The stirring sheet can be made of glass, plexiglass, or other smooth material. So, the remaining material will be easily cleaned off.
Usually the putty is mixed with 2% hardener. A narrow strip across it will be enough (see photo). At low temperatures, the amount of hardener can be increased, but up to a certain limit. Too much hardener can cause excessive offgassing of the reaction, which will cause porosity, increasing the risk of pigment from the hardener affecting the primer and paint applied over the surface. A large amount of hardener can cause the putty to become brittle and also complicate the sanding process.
It is better to stir with a spatula, without circular movements, periodically stretching the putty, simulating the application process. This will minimize the appearance of air bubbles in it.
Poor mixing can cause poor adhesion, too slow curing, stickiness after curing, porosity.
You can read more about applying putty to a car body here.
Time during which the putty must be applied after mixing with the hardener
Application times are based on the correct amount of hardener and may vary from manufacturer to manufacturer. It is advisable to apply most putties within 4-5 minutes after mixing with the hardener.
How to sand putty on a car using a sander
The use of special equipment will be especially relevant in the initial stages, when you need to remove large balls of putty. Finishing work is done by hand. At the same time, when working with equipment, you should adhere to the following rules:
- Avoid high speeds, this will make it easier to control the process. In addition, high speeds can lead to overheating of the device;
- Do not press hard on the equipment, otherwise the grinding efficiency will decrease;
- using a soft substrate you can reduce the level of pressure on the surface, which will allow you to process the body more efficiently;
- when working with a grinder, the risks will not be as large as with manual grinding;
- Under no circumstances should the machine be stopped in one place; it should be constantly moved. Movements should be smooth, without sudden jerks. New passages should overlap the previous ones by 50% of the length;
- You should not sand with one edge of the sole, especially when using a coarse abrasive. It is important that the angle is as small as possible.
Preparation for puttying
Instructions on how to properly putty a car so that the paint on it does not crack include the following preparatory measures:
Car washing is carried out using water and regular car shampoo. During washing, all contaminants are thoroughly washed off from the damaged surface.
Wash your car thoroughly before applying putty.
- Before you putty the car yourself, treat it with a degreaser. As a rule, when washing and wiping you will be able to assess the scope of work and identify other minor defects in the body.
- Proceed with grinding, the purpose of which is to level the surface and remove excess paint and rust from it. Cleaning the desired area is done with a grinder or sandpaper. To begin with, the car is treated with coarse-grained sandpaper, and then with fine-grained sandpaper. A car surface prepared in this way serves as an excellent base for applying primer and paint. Although the desired area will need to be sanded down to bare metal, don't go overboard trying to achieve a shiny surface - it won't be needed at this stage.
Preparatory measures ensure more than 50% success when working with putty. In turn, applying the composition with your own hands, according to technology, on a maximally sanded and degreased body, regardless of the quality of the primer or paint, can provide them with more durable adhesion.
A few additional tips
Finally, I would like to say a few more tips that will help you when sanding before painting:
- The primer is sanded dry because it is porous and will absorb water. Paint and hard-to-reach places are sanded with water, but then the surface should be dried very thoroughly (alternatively, infrared equipment should be used);
- When processing paintwork, it is better to turn on medium speed. A soft backing will also come in handy to help make sanding more even;
- For hard-to-reach places and edges, you can use a special Scotch-Brite abrasive. Along with it, you should resort to matting paste. These elements do not remove defects, but only increase the dullness of the surface;
- before starting work, it is important to clean the body from dust and dirt;
- Don't forget to prepare a sanding block. Its role can be played by a block of rubber, as well as a foam squeegee. If you hold the sandpaper in your hands, the marks will be uneven;
- When using water, do not resort to soap. Otherwise, it may be absorbed into the soil, causing the subsequent layer of paint to be uneven.
Primer is the final stage of car preparation
At this stage, the surface is once again wiped from dust, after which it is completely sanded with fine-grained sandpaper (1200) to a smooth matte state. To make sanding easier, the sanding cloth can be placed on a small wooden block.
Next, you need to make sure that the areas that are not to be painted are sealed, strictly taking into account all their boundaries and contours. The wheels of the car are also wrapped with film.
Video - how to properly prepare a car for painting:
After the next wiping, a primary layer of primer is applied to the entire surface of the car with a regular brush. If no defects appear on the body, then after 3-4 hours you can safely apply a secondary layer. If defects “surface” in some areas, then they need to be eliminated using the method described above.
The primer is the foundation for any paintwork, a kind of connecting link between it and the base metal of the body, and serves as additional anti-corrosion protection. Therefore, opinions such as “priming is not necessary” are erroneous and unfounded. The reliability and durability of the paintwork depends on the quality of the primer.
What is the result?
So, the grinding process is the most important task during painting work. If everything is done correctly, the paintwork will adhere well and retain its attractive appearance.
You may also be interested in: What can you use instead of car shampoo: DIY car shampoo recipes
We hope our set of rules will help you choose the appropriate abrasive, as well as carry out high-quality sanding of the putty before applying paint to your vehicle.
Video advice on what sandpaper to use to sand putty on a car:
Kinds
All automotive putty offered on the market is divided into:
- fiberglass;
- rough;
- finishing;
- liquid;
- universal.
The putty is selected based on the planned work and the nature of the damage to the car body. Only with the help of a good and correctly selected mixture can you achieve the desired result.
Auto putty is a finishing material presented in the form of powder or finished paste. The powder is diluted in the required proportions, while the paste is completely ready for use. The putty mixture is required for finishing the damaged surface of the car followed by applying a paint layer.
We recommend: Electric trunk lid: DIY installation
To put it simply, you need to putty your car in case of damage, chips and scratches that disrupt the attractive appearance of the car and potentially threaten the gradual spread of corrosion.
Putty is used to repair both metal and plastic parts. But not every putty is suitable for certain tasks. It is important to understand which mixture to choose, what its features and advantages over competitors are.
We choose wisely, taking into account key factors and with an emphasis on achieving optimal quality of body repair. To choose the composition, you need to study each type of putty.
Rough
Coarse putty is used for large damage to the body.
Coarse putty is used for major damage to the body. It is also coarse-grained. Suitable for complex work when it comes to serious body damage and defects:
- dents;
- holes;
- deformations, etc.
It is distinguished by the inclusion of a special filler made of metal shavings. This guarantees a better connection and increased strength of the treated area.
The most popular coarse putties are mixtures based on aluminum filler. They are heat-resistant, ductile, elastic and easy to sand after drying.
Due to its characteristics, rough automotive putty guarantees the smoothing of even large damage. If we talk about manufacturers, the leaders include Solid and Mixon.
Never make too large batches of coarse putty as it hardens quickly. Approximately 4 - 7 minutes after mixing the components, the composition will no longer be applied to the body. Therefore, prepare the mixture based on how much putty you actually have time to use.
The rough type of composition interacts with almost all other types of auto putties. The coarse-grained type is used for rough work, and then thinner putty mixtures are applied.
Fiberglass
Fiberglass putties are widely used in body repairs.
The key advantages of fiberglass car putty are high strength and long service life. The main role in this is played by the fiberglass itself, which is part of the composition.
After processing the body, the mixture acquires solid-fraction properties. Essentially, when applied and dried, you get a layer of fiberglass.
An important aspect in favor of fiberglass is the ease of processing and sanding. You will be able to give the surface the desired shape and a high degree of smoothness.
Fiberglass has become widespread in body repair, where it is necessary to seal through holes, holes and other similar consequences from corrosion.
After drying, the composition crystallizes, which makes the processing process somewhat more complicated. The work will take a lot of time, but the result will be completely worth it.
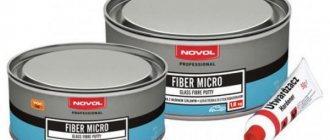
Among the leaders in the production of fiberglass car putties, it is worth highlighting the companies Fiber and Novol.
They have several features in terms of application:
- Fiberglass compounds can be applied without problems to treated, clean metal and even to an old paint layer.
- The main condition for obtaining a high-quality processing result is preliminary degreasing of the surface. Just not with gasoline, but with a good special solvent.
- Fiberglass putties consist of a main component and a hardener. Before use, the main part is thoroughly mixed, since sediment from solid fractions may appear during storage. Light fractions rise upward.
- Make sure the mixture is uniform in color and consistency before use. You can store it outdoors for no more than 10 minutes. Therefore, try to keep it with the lid closed. Otherwise, the mixture will harden and will be unsuitable for further body repairs.
- The most important thing in the correct preparation of fiberglass putty is maintaining the proportions. The main mass accounts for 3% of the hardener. That is, 1 kg of base requires 30 g of hardener.
- When the proportions are selected, the components must be thoroughly mixed until smooth and applied to the prepared surface. The drying speed is affected by the characteristics of the mixture itself, as well as the air temperature.
We recommend: Lancer throttle body: possible breakdowns and repair algorithm
Finishing
Finishing putties are used for minor damage
This putty is used mainly in cases where minor damage and unevenness need to be corrected. It often works together with a coarse mixture and is used after rough repairs.
Finishing compositions are based on fine-grained components. They can be used independently when it is necessary to treat scratches or chips that have occurred on the metal surfaces of the car.
Most often, finishing compositions are relevant for final processing. Mixtures are divided into two categories:
- Fine;
- Nitro.
They are equally effective at repairing small damage. They are easy to process and sand. The main task of finishing putty is to prepare the repaired surface for painting.
Advantages include excellent adhesion, filling capacity, elasticity and resistance to temperature changes.
It is important to mix this putty correctly in order to reveal the full positive qualities of the composition. The mixture is applied in a layer of up to 3 millimeters to a pre-treated and prepared surface.
For 100 parts of base there are 2 - 3 parts of hardener. That is, here we are talking about 3%! of the total mass. Calculations are easy to make when choosing proportions.
It is important to quickly and thoroughly mix the ingredients until a homogeneous mass is obtained. Finishing putties harden quickly, so you should not prepare large portions at once.
The drying speed depends on the characteristics of the mixture and environmental conditions, but usually takes no more than 30 minutes. After drying, it is treated with fine-grained sandpaper, which allows you to fully prepare the body for painting.
Liquid
Liquid putties are distinguished by high processing speed
This is a new name in the world of automotive putties. They are distinguished by a light fraction and are applied using a special gun.
The features of the composition make it possible to treat not only minor damage, but also large areas of the car body. The advantages include high processing speed. But their hardening speed is lower when compared with similar compositions. It takes 2 hours or more to dry.
If you decide to choose a liquid type of putty mixture for your car, do not forget about the need to purchase a special tool. No special skills are required to process the body. The mixture is filled into the container of the gun and applied to the surface by spraying.
When the putty has hardened, it needs to be sanded and further paint and varnish activities can begin.
Universal
Universal putty is used for quick body repairs
As the name suggests, the key benefit is versatility. Such mixtures combine the properties and advantages of fine-grained and coarse-grained compositions.
They are mainly used for quick body repairs when the car owner does not have time for thorough processing. The compositions are strong, quite elastic and provide a smooth treated surface.
Putty is used by analogy with other types of compositions for body repair. Proportions are observed according to the manufacturer's instructions.