A classic security system with a high communication range - up to 2000 m. Provides stable communication over a long distance even in conditions of interference in the city.
Effective protection of the radio channel from intelligent hacking, even using the latest generation technical equipment.
Designed for vehicles with a CAN bus. It has a wide range of service functions, including auto-start with three security lines.
PIT-STOP – this function helps during short stops. You can leave the car with the engine running without the key in the ignition and arm it.
SLAVE mode allows you to use the car’s standard key fob to control the model’s security functions. Intelligent turbo timer. The driver call sensor, activated from outside the vehicle, is an alternative to a mobile phone for calling the driver. And at the same time the ability to arm and disarm without a key fob
ATTENTION! This model has been discontinued, but the consulting support of hotline specialists on its operation remains valid. You can also contact certified technical centers regarding the repair of this system.
ACTIVE SECURITYMAGIC CODE™ PRO 2 – protection of radio signals from intelligent hacking. Separate buttons for arming and disarming the security mode. Key fob synchronization. Additional confirmation code for disarming. Hidden security (possibility of transmitting alarm signals only to the key fob), arming/disarming without siren signals. Security mode without siren signals. Protection against unauthorized recording of additional key fobs. PANIC or JackStop™ mode. PIN code is a personal code for disarming the system, protects against the most common method of theft (through theft of keys and key fobs). The function can be turned on or off at the owner's request. | |
COMFORT OF OPERATIONAutomatic engine start for cars with automatic or manual transmission using a timer (every 2, 4, 8 or 24 hours); by command from the key fob; by command from an external device; taking into account temperature (-15; -25; +60 °C); according to the car battery discharge is below 11.5 V. “Turbo timer” function – supports engine operation from 1 to 4 minutes. “Hands-free” function for automatic disarming/arming when approaching/removing. Ability to operate in SLAVE mode (system control via the car’s standard key fob) when connected to the CAN data bus. Security with the engine running. | |
PROFITABLEMonitoring engine operation using an on-board voltage level sensor, a generator sensor, and a tachometer signal sensor. The system will be useful in cold weather when it is necessary to warm up the car interior before a trip. In hot weather, the system will help cool the interior. Manufacturer's warranty – 5 years. Works confidently in a metropolis, where there is a high level of radio interference, and in open areas. Tests in harsh climatic conditions confirmed correct operation in the temperature range from -85 Cº to +50 Cº. Programming the system taking into account the individual wishes of the owner at the installation center. Consultations and assistance in implementing functionality by calling the technical support service. |
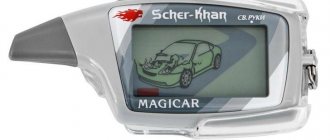
Alarm system Scher-Khan Magicar 9
"Signalka" for the Sherkhan Magikar 9 car has a feedback function, thanks to which the consumer has the opportunity to monitor the vehicle.
Equipment
Description of parts included in the package:
- service user manual;
- microprocessor car alarm control unit;
- a communicator with a display that provides a feedback option;
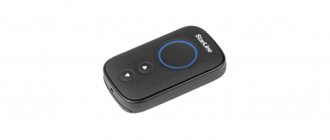
- spare remote control without screen and notification function;
- shock and sensitivity sensor with cable and connector for connection;
- controller for calling the car owner from the passenger compartment;
- transceiver module;
- temperature sensor, based on the readings of which the engine will turn on;
- car powertrain locking relay with connector and wire;
- siren;
- limit switch for installation on the hood or tailgate;
- three six-pin connectors with wires and safety elements;
- 11-pin block for connection to the control unit;
- six-wire cable for connecting the transceiver module;
- 2-wire electrical circuit for connecting additional channels;
- four-wire cable designed to connect to a digital interface;
- double-sided tape for attaching the car owner's call sensor and transceiver module.
The alarm package includes one limit switch for the hood or trunk; the remaining devices for door locks must be purchased separately before installation.
Scope of delivery Sherkhan Magikar 9
Specifications
Properties this model has:
- using an additional password to disable security;
- notifying the user with three types of alarm signals - from the siren, from the optical devices of the car, as well as from the key fob;
- the ability to protect against illegal linking of other communicators;
- data transfer between devices is carried out via a frequency channel at 433 MHz;
- the security mode can be controlled automatically in accordance with signals received from the controllers;
- to protect elements of the anti-theft system, safety devices, diode components, transistors, varistors, resistors are used;
- The security system is powered from an electrical network with a voltage of 9–18 volts;
- the amount of current consumed by the control module in protection mode is from 30 to 40 mA;
- microprocessor unit weight - 280 g;
- all functions can be performed at air temperatures from –40 to +85 degrees;
- The main communicator uses AAA power supplies, the additional one uses CR2025;
- the average service life of the batteries in the main console is approximately four months, in the additional one - up to three years;
- The signal is transmitted over a distance of up to 2 km.
A special feature of the Sherkhan Magikar 9 alarm system is the presence of a special Magic Code Pro2 encoding to protect transmitted impulses. The developers have introduced a new encoding algorithm, thanks to which the speed of data encryption and decryption has increased.
Main functions
Options that the anti-theft system has:
- Security mode when the power unit is running.
- The “Turbo” function allows you to maintain the operation of the car engine and reduces the rapid wear of turbocharged engines. It can be configured to operate for a certain period of time: from 1 to 4 minutes.
- Hands-free option. Using it, the consumer can configure automatic activation and disabling of the security mode.
- Panic function. It allows you to trigger an alarm with audio and visual accompaniment on command.
- "Pit stop". This function makes it possible to activate the security mode on a car with the engine running if the key is not in the ignition switch.
- The “Slave” function allows you to use the alarm using the key fob from the standard central locking.
- Hidden protection. When this option is enabled, when the alarm mode is triggered, information about this will only be sent to the owner’s communicator. The siren does not turn on.
- Remote start of a car engine based on time or temperature. The user can also start the power unit by sending a command from the communicator.
- The alarm system has a personal password intended for emergency disabling of the security mode.
- Option to delay turning off the lighting in the car interior.
- Monitoring engine start based on readings from the generator, tachometer or battery.
- Two-step protection mode disabling.
- Option to automatically open and close door locks when the ignition is turned off and on.
An overview of some of the functions of the anti-theft system is given in the video filmed by the AvtoGSM channel.
Advantages and disadvantages
Advantages of the security system:
- Feedback. Implementation of this option is possible only if the communicator is located within the operating radius of the system. The key fob display displays information about the security status, activated protective zones, air temperature, and time.
- Reliable protection of the protected object from hacking. The model implements proprietary technologies that prevent the possibility of interception of transmitted codes.
- Great functionality. Many useful options allow the user to customize the operation of the anti-theft system according to their needs.
- The service documentation includes a detailed installation guide for the system; it will allow you to correctly install and configure the device in accordance with the requirements.
Disadvantages specific to this model:
- According to reviews from car owners, the “Slave” option is useless. If the turbo timer is working, the engine remains running, the buttons on the door handles will not function. Accordingly, it will not be possible to lock the locks. The consumer will have to use the remote control to close it.
- Large communicator size for control. This drawback is usually noted by consumers who are accustomed to using tag keys.
- To enable the turbo timer function or auto-start the engine, you will need to first activate the parking brake.
Advantages and disadvantages
According to reviews, the following advantages can be identified:
- Availability of two-way communication. Thanks to this, the car owner can always know what condition the car is in. But only taking into account the fact that the remote control is within the range of the “signal”. The device shows whether the security mode is activated and which zones of the anti-theft system were activated if the siren was activated.
- Remote motor start option. Particularly relevant in the winter season or if the driver is in a hurry.
- Effective vehicle protection. Technologies that are used to protect code from interception make it possible to ensure reliable security of the machine.
- Extensive functionality that allows you to customize the anti-theft installation to suit your needs and requirements.
- A detailed installation and use manual will allow the car owner to independently install the system and configure it.
An overview of the system from user Pavel Korshunov is presented in the video.
Flaws:
- Consumers note that the “Slave” mode is actually useless. When the turbo timer is operating, the car remains running; in this case, the buttons on the door handles do not work. This means that closing the machine is impossible. The car owner needs to lock the vehicle using the remote control.
- The system control panel is large in size. If you are accustomed to a tag key and the fact that to open the car you do not need to perform any actions, but only approach it, then you will not like the large Sherkhan keychain.
- To activate the turbo timer option or automatic engine start, the handbrake must be activated in advance in the car. Some consumers consider this a disadvantage. Although, this is a feature of the option.
How to install a Scher-Khan Magicar 9 alarm system?
To begin installing the Sherkhan Magikar 9 alarm system, you must:
- prepare tools and supplies;
- unpack the device;
- print connection diagrams.
Installation Tools and Materials
Before installation you will need to prepare:
- Screwdriver Set;
- set of wrenches;
- stationery knife;
- soldering iron with solder;
- heat shrink tubes;
- insulating tape;
- plastic clamps.
Connection diagram
The first part of the wiring diagram for Scher-Khan Magicar 9
Second part of the Scher-Khan Magicar 9 connection map
Safety precautions
Safe installation rules:
- The system is connected when the on-board network is de-energized, so the battery must first be disconnected. If this is not done, you can provoke a short circuit and failure of not only the alarm elements, but also the electronic devices of the car.
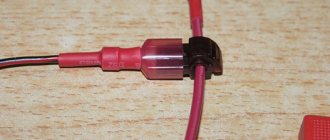
- When connecting contacts, you cannot use the twisting method. The connection must be made by soldering using solder.
- Places where wires are extended must be protected with heat-shrinkable tubing.
- Cables must not be laid where moving body parts are installed.
- After laying the cable, it is necessary to additionally wrap it with electrical tape, this will prevent their rapid wear.
- All electrical alarm circuits must be protected with safety devices.
Step by step guide
Algorithm of actions:
- The microprocessor module is being installed; for its location it is necessary to choose the most hidden place. The best option would be to mount the device behind the instrument cluster or center console; screwdrivers and wrenches are used to disassemble it. When installing, the module can be wrapped with foam rubber to prevent vibrations from negatively affecting it. The unit must be positioned with the connector facing down to prevent moisture from entering by dripping down the wires; plastic ties are used to secure it.
- The siren is placed under the hood of the car in the most hidden place. It should not be installed near the intake manifold or hot engine parts, otherwise the siren will melt. The horn of the device should be directed downward to prevent moisture from collecting inside.
- The temperature controller is installed on the cooling system pipe under the hood of the car. You can select any hose to which the thermostat is connected. The sensor must be fixed.
- The shock and sensitivity controller is installed inside the car, preferably in its central part. Installation is carried out on a flat surface, or alternatively on the partition between the engine compartment and the passenger compartment. Rubber and plastic gaskets cannot be used, as this will disrupt the sensitivity parameter of the device, and the siren will sound for no reason.
- A transceiver module is installed on the inner surface of the windshield or rear window. It should not be placed next to metal products or electronic devices; the distance between them must be at least 50 mm. The glass surface is first cleaned and degreased. The quality of the signal depends on the installation height of the transceiver module: the higher, the better.
- The system status LED lamp is installed on the dashboard in the windshield area. This element must be positioned so that its work can be seen from the street.
- A limit switch is placed on the hood; to place it, you must select the driest place. If additional switches are installed on the doors and trunk, then the decorative trim must be removed. The wires from these devices must be routed into the cabin.
- After installing all components, they are connected in accordance with the electrical diagram.
The “2012SHERKHAN” channel spoke in detail about the installation procedure for the Sherkhan Magikar 9 anti-theft system with a digital CAN interface.
Specifications
The Scher-Khan Magicar 9 car alarm has the following technical characteristics:
- data encoding method is interactive;
- user notification - sound, light, text;
- protection against binding of third-party key fobs - present;
- frequency of the channel through which signals are transmitted and received - 433 MHz;
- the method of controlling the security mode is automatic (processing signals coming from sensors);
- type of microprocessor module power source - vehicle on-board network with a voltage of 9-18 V;
- the amount of current consumed by the alarm system in security mode is no more than 40 mA;
- head unit weight - 280 g;
- temperature range at which the system operates correctly is -40…+85 °C;
- the type of batteries for the main key fob is AAA batteries, the auxiliary communicator is CR2025;
- battery life in the control panel with display is 120 days, in the auxiliary pager - 3 years;
- range of action of the main key fob when transmitting signals - 800 m;
- range of the communicator when receiving messages - 2000 m;
- The range of action of the spare key fob is 20 m.
User manual
After installing all components, the functions are configured. A working power source must be installed in the communicator. To do this, open the back cover of the device and insert the battery into the free compartment.
Modes
Guide for managing different alarm modes:
- The first button of the key fob is used to activate the security function, lock the door locks, and block the starter device. When an alarm is triggered, using this key will turn off the siren.
- The second button on the remote control is used to turn off the protection; press it briefly. The starter mechanism will unlock and the doors will open.
- The third button of the communicator is designed to turn on the display backlight mode. The pressure should be short.
- The fourth button is used to monitor the status of the car alarm.
- By holding down the first key on the key fob for two seconds, you can enable the “Panic” option.
- To remotely activate and turn off the car’s engine, the second key is used, only you need to hold it down for two seconds. This action will allow you to intercept the ignition when the Pit Stop mode is turned on.
- To control the first additional channel, use the fourth button; it must be pressed for 2 seconds.
- Pressing the third key for 2 seconds will open the luggage compartment of the car.
- Pressing the first and second buttons simultaneously will enable or disable alarms on command. After the “click”, the corresponding indicator will appear on the display.
- Activation and deactivation of the service mode is done by simultaneously pressing the first and third buttons.
- To temporarily disable the sensitivity sensor, you need to simultaneously “click” on the first and fourth keys. Turning on the controller is done in the same way. After switching off, the corresponding indicator will appear on the display.
- Simultaneously pressing the second and third keys will enter the control mode for additional channel 2.
- “Clicking” on the second and fourth buttons will disable and enable the timer function, which is used for autorun.
- To lock the buttons on the key fob, press the third and fourth keys. Disabling the function is done in the same way.
- To enter the menu for programming the functions of the communicator, you will need the first and third buttons; they must be held down.
- By pressing keys 2 and 3 at the same time, you can turn on “Hands Free”.
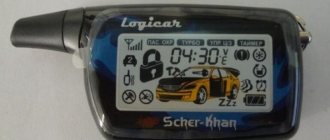
Key fob buttons Sherkhan Magikar 9
Setting up the key fob
Programming of all parameters of the Scher-Khan Magicar 9 alarm is performed only after binding the communicator.
To configure, perform the following steps:
- The car's ignition is turned on, but the engine must be turned off. The car owner call button on the transceiver body is pressed for 2 seconds, while the side lights of the car will blink.
- Within the next five seconds, the call button is pressed again. If a PIN code is not required to enter the binding mode, the car's turning lights will blink twice. If there is a password, the optics will blink once.
- If a PIN code is used, you must enter its value. Once entered correctly, the car's headlights will blink twice.
- After five seconds, the alarm status light will flash blue. This indicates the readiness of the anti-theft complex for binding.
- Within the next five seconds, you must press the first button on the communicator. If the device is successfully paired, the car's side lights will blink once. These steps are repeated for the spare remote control.
- To exit the setup menu, you must not take any action for 4 seconds.
Programming functions using a key fob
The procedure for setting options is as follows:
- The first and third keys of the communicator are pressed simultaneously. The “Pt o9” indicator should appear on the device screen, the key fob will play one signal.
- After entering the settings menu, the required function is selected. To change the clock settings, press the first button; to change the minutes, press the second.
- To enter the alarm settings menu, use the fourth key. Parameters are changed using the first and second buttons. Enabling or disabling this function is done with the fourth key.
- The next time you click on button 4, the communicator will enter the menu for turning off and on the function of calling the owner of the car. An icon in the form of a telephone handset will appear on the device display. To enable or disable the option, use the first button.
- By pressing the fourth key again, you can go to the menu for activating and disabling the communicator’s vibration mode. Once selected, the device screen will display the corresponding indicator and information about the status of the function. To turn it off or on, use button 1.
- The next press of the fourth key will allow you to enter the engine temperature display mode. Depending on the setting, information will be displayed in degrees Fahrenheit or Celsius.
- To change the current time display format, use the fourth button. An icon corresponding to the format being used will appear on the device screen. To change it, use key 1.
- The next “click” on the fourth button will enable or disable the battery charge saving mode. An indicator in the form of a battery should appear on the key fob screen, indicating the status of the function. The first button is used to change settings.
- After adjusting all parameters, you must exit the function programming menu. To do this, you need to simultaneously press the first and third keys on the key fob.
User Viktor Tokarev spoke about the features of the Sherkhan Magikar 9 firmware.
Setting up autorun
The consumer has the opportunity to start the engine remotely, provided that the contacts in the ignition switch have been correctly connected. Before setting this function, you must move the transmission lever to the neutral position (or parking mode for automatic transmission). You should also adjust the parameters of electrical equipment - climate system, electric mirrors, etc. To remotely start the power unit on command, you need to hold down the second button of the communicator for two seconds.
Autorun by timer
Enabling and disabling this option is done by simultaneously pressing the second and fourth keys. If the function is activated, an indicator with the inscription “Timer” will appear on the key fob screen.
The setup procedure is as follows:
- Enter the options programming mode; to do this, press buttons 1 and 3. They must be held for two seconds.
- Then the start time is set. The first button changes the hours, and the second button changes the minutes.
- To leave the setup menu, you need to hold down the first and third buttons for two seconds.
How to disable autorun?
If the motor was started by command, then similar actions are performed to turn off the unit - the second button is pressed for two seconds. To turn off the timer start, press keys 2 and 4 at the same time.
For what reasons might autorun not work?
If there are malfunctions in the system and the function does not work, you can find out about this by holding down the second button on the remote control for two seconds. An indicator with an error code will be displayed on the communicator screen, decoding which you can find out the cause of the problem. If the car starts unsuccessfully, the siren should sound three times.
Reasons why the car engine does not start:
| Error code | Description of the problem |
| 01 | The power unit has already started, the light alarm will work once |
| 02 | The ignition is on in the car, the lights should blink twice |
| 03 | One of the door locks is open. The light alarm will sound three times. |
| 04 | The luggage compartment or hood is not locked. The car's headlights should blink four times. |
| 05 | The user has not completed the start reservation procedure for the manual transmission. The car's headlights will flash five times. |
| 06 | The handbrake lever is disengaged. The hazard warning lights will blink 6 times. |
| 07 | The brake pedal is depressed. If there is no one in the cabin, the problem may be that the sensor is not working properly. Seven lights will sound. |
| 08 | The power unit does not start due to a malfunction. The hazard alarm will sound 8 times. There can be many reasons:
|
Trying to program the alarm
According to the instructions, there are two tables of customizable options. It will be easy to access each of them. The programming itself is easy to perform using both the main and additional key fobs:
Entering the programming mode is done as follows:
- Press the 1+4 or 2+4 keys for 2 seconds (select the first or second table);
- Short presses on button 4 select the option number;
- After the signal sounds, select a value by pressing the corresponding key (from 1 to 4).
What both tables look like is shown below.
Let's immediately look at the table of service options:
In addition to everything discussed above, during installation you can choose which version of the CAN program is installed in the ECU:
The choice is made by installing jumpers. A table with car models, where the corresponding numbers are indicated, is printed on the body of the main module.
Full instructions are here https://yadi.sk/i/Qb1RjmszGwN3hA
Possible alarm malfunctions
Problems that may occur in the operation of the Sherhan system:
- The system does not work due to a faulty key fob. The remote control may fail as a result of a low battery, in which case the power source must be replaced. A related symptom of this problem will be a decrease in the range of the remote control, as well as a lack of response to commands. Perhaps the reason is damage to the communicator, dirt or moisture getting inside. To solve the problem, you will need to disassemble the device and check the board - clean it and, if necessary, restore the operation of the buttons and contacts.
- The alarm does not work due to incorrect installation or damaged wires. All elements of the security complex must be located in accordance with the specified requirements. If you place the transceiver module near electronic equipment, signal reception will be minimal. It is necessary to check the integrity of all wires and replace damaged electrical circuits if necessary.
- An alarm going off for no reason may be due to an incorrect sensitivity setting of the shock controller. You need to change this parameter using special adjustments on the device body. It is necessary to make sure that the regulator is installed correctly and securely fixed in place.
- Incorrect operation of the system due to a malfunction of the control unit. A detailed check of all the pads that connect the module, as well as the contact elements, is required. Oxidized connectors must be cleaned, and damaged ones must be replaced. If the problem is the effect of moisture on the unit, then the device must be dried.
- The engine is blocked randomly and may not be unlocked. This problem is usually caused by a conflict between the standard immobilizer and the alarm blocker. To eliminate the problem, you need to either disable the immo or additionally install a bypass module.
Not programmable: reasons
The remote control began to work incorrectly. You decided to reprogram it yourself. Before doing this, do a few simple steps.
- Find the instructions for the anti-theft system installed on your car.
- Study the procedure carefully.
- If there is no documentation, then try to find information on the Internet.
You have done all the steps according to the instruction manual, but the key fob does not work. It is not possible to flash the pager due to:
- damage to the communicator;
- random activation of the “Jack” mode;
- control module failure.
Video
The AvtoGSM channel showed how the Sherkhan Magikar 9 anti-theft complex functions after installation.
Do you have any questions? Specialists and readers of the AUTODVIG website will help you ask a question
Was this article helpful?
Thank you for your opinion!
The article was useful. Please share the information with your friends.
Yes (66.67%)
No (33.33%)
X
Please write what is wrong and leave recommendations on the article
Cancel reply
Rate this article: ( 3 votes, average: 4.67 out of 5)
Discuss the article:
Activating autorun from the remote control
You can configure the engine to start using the following instructions.
- On the key fob with auto start, press key 2 for two seconds. The car will be armed and the engine will start.
- The switch screen will display a “smoke” symbol and an engine operation timer. Therefore, the first thing you need to do is adjust the duration of its warm-up.
- Enter the menu by pressing buttons 1 and 4 simultaneously. The engine can be started according to the following scheme: work 5 minutes - button 1, 15 minutes. – 2.25 min. – 3.45 min. - 4.
- Stop the motor - long press key 2.
Basic malfunctions that can cause problems with remote engine starting
If autorun does not work, an error will appear on the display, which can be deciphered using the table below.
For example, if the car is not set to autostart because the door is open, Er 03 will be displayed on the display.
Alarm Sherkhan 9, the operating instructions for which will be given below, is a full-fledged anti-theft complex. The system is equipped with an expanded set of functions that facilitate control and protect the car from theft. There is an automatic engine start that helps prepare the vehicle for the trip.