Many car owners sooner or later experience a significant increase in oil consumption. They say this - the engine burns oil. The reasons for this phenomenon are various. From the article you will learn why oil consumption increases, how to establish the reasons and not bring the matter to capital (overhaul of the engine).
Where does the oil disappear in a working engine?
A car with a working engine (new or after capitalization) eats oil in small quantities - 20-40 grams per thousand kilometers. When the car operates in difficult conditions (frequent acceleration or driving uphill, driving at an altitude of over 2 thousand meters), then engine oil consumption increases to 100-200 grams per 1000 kilometers. If the engine consumes oil in glasses and liters, it means that something is definitely wrong with it. The main reason for oil consumption: evaporation due to high temperature.
Violation of the ignition timing or fuel injection (diesel engines), as well as changes in the composition of the air-fuel mixture lead to an increase in temperature in the combustion chambers, detonation and other negative consequences. All this affects oil consumption and can lead to the need for major repairs or capital investments.
Why does oil consumption increase?
To understand why the engine began to eat oil, you need to understand what factors lead to excess consumption of lubricant and how they affect the condition of the engine. Oil consumption increases:
Crankshaft oil seal leak
- motor overheating;
- use of inappropriate oil viscosity;
- wear of valve stem seals and rings;
- malfunction of the valve or channels of the crankcase ventilation system;
- poor tightening, drying out, cracking or wear of gaskets, seals and cuffs;
- breakdown or burnout of the cylinder head gasket (cylinder head).
Consequences of engine overheating
Overheating of the engine leads to damage to the oil seals and the appearance of scoring on the cylinder walls. If the overheating was minor and short-lived (the coolant did not boil), then in most cases the motor tolerates 1-2 such overheatings without consequences. After mild but frequent overheating, the caps compress the valve worse and some of the oil gets into the intake manifold. If the engine boils, it is necessary to drive the car away for repairs, otherwise capital damage cannot be avoided.
Using oil of inappropriate viscosity
Caps, seals and cuffs also deteriorate due to the addition of incorrectly selected additives to the oil. Why this happens, read the article “Engine oil additives.” Engines developed in the 60-80s of the twentieth century are designed to work with viscous mineral oil, so the use of liquid synthetics will lead to leaks. In addition, an engine designed for mineral oil smokes if liquid synthetic is poured into it. More modern engines are initially designed for synthetics, so filling with mineral oil will lead to deterioration of lubrication, the appearance of scuffing on the surface of the cylinders and rings, large amounts of oil getting into the combustion chamber and repairs after 50-100 thousand kilometers. The same thing happens if you use the appropriate type of oil, but the wrong viscosity.
Features of proper engine running-in
Let's start with the fact that you should not confuse the concepts of overhaul and engine overhaul. Overhauling involves only certain narrow operations (for example, replacing valve stem seals, piston rings, valves, gaskets, seals, etc.).
A major overhaul means that a complete disassembly, washing, troubleshooting and replacement of all worn-out elements is carried out, as well as adjustment to factory parameters. The list of operations usually includes grinding the crankshaft, replacing pistons and piston rings, boring/lining the block, installing new main and connecting rod bearings, and much more.
Such repairs are expensive and are performed exclusively by specialized specialists. As a result, the owner receives a completely restored engine, which in most respects is close to a new unit.
It becomes clear that both in the case of new and “overhauled” internal combustion engines, the break-in rules will be very similar. The fact is that the installation of new and also restored parts after grinding and surface treatment also requires mandatory grinding in of all elements for normal and smooth operation of the unit under loads.
Exhaust color determination
This operation must be done by two people. One press on the gas pedal or the drive/throttle handle/injection pump raises the engine speed to 2-3 thousand. The second one looks to see if the engine is smoking. On diesel engines, when you press the gas pedal sharply, black smoke may appear, which disappears after lowering the engine speed. Gray or bluish smoke, which intensifies as the engine speed increases, indicates that oil has entered the cylinders through caps, rings or a broken gasket, so they need to be replaced. If the exhaust is clear, the caps, rings and gasket are fine.
Finding leaks
A car with severe leaks leaves oil stains on the asphalt and requires urgent repairs. Weak leaks only appear when the engine is running under load, so they leave no traces on the ground. There should be no traces of oil on the surface of a fully functional motor. If you find a greasy wet or damp spot, then there is a leak in that place. To clarify, you need to start the engine and leave it idling to warm up to operating temperature, and then inspect the suspicious area again.
To avoid carbon monoxide poisoning, this must be done outside the garage, in the open air.
If it does not become wet, you need to gradually, within a minute, raise the speed to maximum and carefully observe the suspicious area. If this does not help detect the leak, you will have to drive the car 10-20 kilometers, accelerating sharply from time to time. In this mode, the pressure in the combustion chamber is much higher than usual, therefore the amount of gases breaking into the crankcase is noticeably greater. If after such a check the suspicious place gets more wet, the problem is a malfunction of the crankcase ventilation system and poor tightening or damage to the gasket.
Checking the crankcase ventilation system
To do this, unscrew the fastening clamps and remove the PCV valve, then blow it with lips or a compressor. If it is working properly, then the air will flow only in one direction with little effort. After this, you need to remove and blow out all the hoses, then check the pipes. One of them may be clogged with dirt or sediment.
Adjust crankcase ventilation
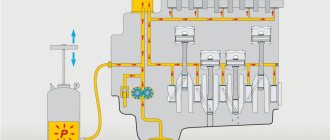
The crankcase ventilation system removes gases that have broken through the piston-cylinder seal into the suction path. This allows you to keep the pressure in the engine crankcase approximately equal to atmospheric pressure.
But crankcase gases carry with them tiny droplets of oil. The oil separator is designed to combat this. And on many engines there is a valve that regulates the pressure of crankcase gases. If the oil separator is clogged, it is no longer able to perform its function - and now all the oil flies into the intake manifold, covering it and the intake valves, and also forming carbon deposits in the cylinders. A stuck crankcase ventilation system valve stops regulating pressure. Which often leads to oil entering the cylinder inlet in unacceptable quantities.
Oil separators and valves can be replaced or flushed and cleaned, depending on the design.
A popular alternative is to install an additional oil sump into the cut of the standard crankcase ventilation tube. This can be recommended if, even if the standard oil separator and valve are in working order, the oil carryover by crankcase gases is still very large.
Pouring oil collected in a sump back into the engine is a dubious idea, but using an oil sump allows you to at least save the intake tract, cylinders and spark plugs from excess oil, which turns into carbon deposits.
Why, after repairing the engine, does it consume oil?
The first and main reason is the absence of a so-called “mirror” on the cylinder walls. Overhaul involves processing (and possibly boring) cylinder head liners. After which the so-called honing. Microscopic scratches are applied to the walls in a certain order. During the running-in process, these risks are polished, ensuring perfect tightness (and as a result, good compression).
However, honing is the reason why oil consumption increased after engine overhaul. Possible incorrect orientation of the rings, or other errors by repairmen. But most often the reason is in the honing. Usually after 1000-2000 km the problem disappears. If oil consumption has not decreased after engine overhaul and running-in, it is necessary to remove the cylinder head and measure the liners for geometry.
Another possibility is a problem with the valves. Valve seals and poor-quality processing of the neck can also contribute to this.
Many car owners, not understanding why the engine is burning oil after repairs, immediately try to repeat the investment. And sometimes it’s enough just to check the gaskets and seals for leaks.
What to do if oil consumption increases after an engine overhaul?
After a major overhaul, lubricant consumption may increase sharply, topping up may be required every 500 kilometers, and the smoke from the pipe will increase sharply. Why is this happening?
Firstly, because the “mirror” on the cylinder walls disappears. During overhauls, sleeves are often bored and scratches are applied to their walls. And during gradual running-in, they are polished, a surface appears - a mirror, which improves the tightness.
Applying small scratches - honing - is responsible for increased oil consumption. The second most common reasons: various errors during repairs in the service. For example, the rings are not oriented correctly. However, the most common cause is honing, so you should start sounding the alarm only if after 1000 km the problem has not improved in any way and the pipe continues to smoke. As a rule, after running in 2,000 kilometers, the problem disappears by itself. But if running in does not help, you need to remove the cylinder head and measure the liners, checking their geometry.
The third probable cause is valves. Problems with them can lead to increased oil consumption due to poor journal processing.
The main rule is not to rush your horses and not to rush to re-major disassembly of the engine before it is fully run-in. Many minor defects will be removed by themselves if used correctly. The only thing is that you need to regularly check the seals and gaskets for leaks.
Changing the oil after engine overhaul
Lubricants are changed more often than usual during break-in. And, of course, along with the filter. Metal shavings and wear debris are bound by oil and must be removed from the engine crankcase. Since repeated oil changes after engine overhaul are expensive, I want to save money on the manufacturer. You can use the recommended brands, or limit yourself to the tolerances established by the car manufacturer. The main thing is not to experiment with viscosity .
There are also special break-in oils. They contain special additives that wash out wear products and do not clog oil channels. But the repair instructions for your car prescribe certain brands of repair oils. And they must be strictly adhered to.
Running in the engine after overhaul - VAZ and other cars
Before you start running in, you need to perform a number of simple but necessary steps.
If you previously deviated from the advice of manufacturers and used cheaper oil , then during break-in you should return to those recommended specifically for your car brand. It is important to check that oil enters the engine components within 3-5 seconds, since “oil starvation” is unacceptable. It is important to check the oil pressure level at idle speed; it varies depending on the type of engine between 0.5 - 1.0 atm.
- Preliminary work
- first, we wash and blow out the intercooler;
- then we replace the air filter, or at least the oil in it;
- change oil and fuel filters;
- We change the oil in the engine and check its level;
- pay attention to the coolant ;
- refuel the vehicle sufficiently;
- adjust the injectors, fuel pump, regulator;
- remove air from the fuel system. (we check the lambda probe)
What kind of oil should I fill in after an engine overhaul for normal operation?
It must be remembered that upon completion of the repair, some characteristics of the power unit change. If professionals recommended using oil of a different viscosity on a worn-out engine, then the “rebuilt” engine should operate with the established parameters.
There are two opposing positions. Worn oil seals and gaskets leak liquid oil, so many services suggest increasing the viscosity. And vice versa - there is an opinion that thick lubricant does not pass through clogged oil lines. After the overhaul and completion of the break-in cycle, you need to return to the factory lubricant table for your car.
If your car has been out of production for a long time (this is a common thing in the case of major repairs), it can be difficult to find oil with the approval specified in the operating instructions. For example, Ford stops supporting cars that are more than 15 years old. In such cases, lubricants are selected only by viscosity, and professionals will help you choose a manufacturer.
Home page » Useful » For what reasons does the engine consume oil, what to do
What kind of oil should I fill in after a major overhaul?
After repairs, the engine should be filled with the recommended brand of oil, although various special break-in aids are offered. There are two approaches to selecting the characteristics of the lubricant after the capital:
- Increase the viscosity slightly after repairs, because worn engine gaskets or seals can leak liquid oil.
- Reduce viscosity because thick grease can get stuck in clogged oil lines.
However, after 2000 kilometers of running-in, it is worth returning to the viscosity preset by the manufacturer at which the car was previously operated.
However, immediately after repairs and filling with lubricant, an emergency light may come on, indicating that the oil pressure is too low after a major overhaul. Why is this happening?
Oil starvation and blinking indicator appear due to lack of lubrication in the engine. And if there are no obvious leaks that are easy to notice in the car or even visually under it, it is worth assessing the viscosity of the liquid. If the viscosity is too low, the oil is fluid and the required pressure is not achieved. Hence the blinking of the indicator not immediately, but after the engine warms up - from the high temperature the oil becomes more liquid and fluid, again reducing the pressure.
The indicator will flash if antifreeze or antifreeze gets into the lubricant; this not only dilutes the oil, but can lead to foaming, which will enter the pump.
Everything you need to know about the causes of oil consumption and how to fix it
Typically, engine oil consumption is considered an indicator of its technical condition. Negotiations about buying a used car often begin with the question of oil consumption. In fact, increased oil consumption does not always indicate serious problems with the engine, just as the absence of this consumption cannot guarantee the ideal condition of the engine.
What is high oil consumption?
To begin with, a rhetorical question: is a liter of oil per thousand km a lot or a little? Everything is individual, for V6 or V8 engines this is almost within the norm, for in-line small cars this is definitely a lot. You must understand that any engine, even a completely new one, consumes oil. Actually, the engine oil simply burns away in the cylinders, remaining on their walls. This is the purpose of oils - to cover all internal surfaces with a film and prevent dry friction. And this film burns in the chamber along with the fuel mixture.
Question Oil consumption - what is it? only how much oil is burned in your engine and whether you need to do something about it. The experience of many owners of used cars shows that even in a fairly worn-out engine, in most cases it is more profitable to simply add oil than to do a major overhaul.
We should probably start with this. In fact, there are slightly more reasons for increased oil consumption than, in the language of service station “specialists,” simply a “dead” engine. The engine oil can burn excessively, or it can also simply leak. And diagnosing the real cause of increased oil consumption in most engines is actually quite difficult.
For what reasons does the engine consume oil, what to do
Almost every driver faces the problem of burning oil in the engine. This situation can be caused by many reasons. Only after diagnosing the engine can the cause of the high consumption be determined.
If the engine is new or has undergone a major overhaul, then the norm is a consumption of 20-40 grams per thousand kilometers. If the conditions in which the car is operated are difficult (mountainous terrain, sudden and frequent acceleration), then the consumption can reach 100 - 200 grams per thousand. But when oil consumption is measured in large quantities, you can be sure that something is wrong with the engine.
Violation of the tightness of sealing joints in the form of oil seals or gaskets
The appearance of oil from under the valve covers or cylinder head gasket. Where oil leaks, it mixes with dust and forms a characteristic coating. There can be several reasons for a leak:
- Failure of the gasket itself, since the product is rubber. The repair is not difficult, but requires care when tightening the bolts.
- The appearance of oil under the gaskets is caused by an increase in pressure in the engine lubrication system. There may be four reasons here:
- The first and most important is the failure of the oil pump pressure reducing valve, which maintains the pressure within certain limits. It can only be repaired by replacing this device.
- Second, use very viscous oil. Do not skimp on oil; fill in the oil specified in the service book by the car manufacturer.
- Third, clogged oil channels (for worn engines). Occurs when using various flushing liquids of dubious purpose (meaning “decarbonization”).
- Fourth, a violation of crankcase ventilation, in which gases accumulate under the valve cover and oil pressure begins to increase, oil appears in the air filter. Cause: The separator screen is clogged and needs to be cleaned.
- The appearance of oil leakage from under the seals. There are three reasons for this malfunction:
- First, the oil seal simply wore out over time.
- Second, the pressure in the car’s lubrication system is increased.
- The third option is the hardest. The rotating parts of the power unit wear out in the form of bearings, rings, half rings, etc. In this case, the alignment of the units is disrupted and the parts become distorted. There is no need to replace the oil seals in case of this malfunction; this will only give a temporary effect. The intervention of an engine repair specialist will be required.
For what reasons does the engine eat more oil than it should?
To understand why the engine began to consume more oil, you need to study the factors leading to this situation.
Engine overheating
One of the reasons for increased engine oil consumption is too high a temperature in the cylinders. This happens when the ignition timing is broken; if we are talking about a diesel engine, then the fuel is injected at the wrong time. If you use gasoline that is not intended for a particular engine, the temperature will also become too high due to detonation.
If the engine overheats, the oil seals are damaged and scuff marks appear on the cylinder walls. Often one incident of overheating is not enough to cause damage. Of course, if this did not last long and the coolant was not brought to a boil.
Usually, even a couple of such cases pass without harm to the motor. But with several overheats, the material of the caps becomes rough. The required contact between them and the valves is not ensured. The result is that oil appears in the intake manifold. Then it enters the cylinders, and smoke can be seen in the exhaust gases.
Using oils that are not suitable for viscosity
Cuffs may lose their original properties if incorrectly selected additives are used. Oil consumption will also be increased in the case when, instead of the one provided for a particular car, the first available one is filled.
It’s good if it matches the required viscosity, or the parameters are close to it. If this is not the case, then increased consumption cannot be avoided.
Engines that were developed in the 80s were designed to operate with viscous mineral water; as a result, thinner synthetic compounds cause leaks.
Among other things, a unit designed for mineral oil begins to smoke when filled with synthetic oil. Modern engines run on synthetics, and the use of mineral compounds will lead to oil getting into the combustion chamber and repairs even after a relatively short mileage.
Wear of rings, valve stem seals
The next reason for increased oil consumption is wear of the piston rings or oil seals, or both. In such cases, the oil ends up in the combustion chamber, as evidenced by the smoke in the exhaust gases.
Oil seals are special oil seals in the engine. They are made from special materials that can withstand elevated temperatures. Due to severe wear, the oil seal loses its original properties.
Wear of these parts occurs due to the high mileage of the car. That is, they simply wear out. They are also damaged when the engine overheats. The reason is the wrong choice of oil type or the discrepancy between its viscosity and the required level.
Oil additives have a negative effect on rings and caps if they are not selected correctly. In addition, the reasons include too high crankshaft speeds, repeated cold starts of the engine, and regular operation of the engine at maximum power.
The easiest way to eliminate the cause is to replace the valve stem seals. This operation does not require significant costs. To replace it, you must remove the cylinder head. This cause of oil burning can be corrected at minimal cost. Replacing piston rings is more difficult. Almost complete disassembly of the engine is required.
Drying of cuffs and seals
The bolts securing the engine parts need to be tightened from time to time. Under the influence of temperatures and incorrectly selected additives, the gaskets begin to shrink.
Oil leakage from the engine crankcase can also occur when the seals wear out. Seals and seals wear out over time. Gaskets may not provide a good seal due to loose bolts holding the trim parts to the engine.
How to properly break in an engine
- You should not drive at low or too high speeds; it is better not to overload the engine while the parts are “grinding in.”
- Do not drive continuously at the same speed; you should change gears, accelerate and brake slowly.
- Do not transport Welton trailers or semi-trailers and do not load the trunk full with heavy loads.
- Do not brake sharply, especially with the engine, only gently start and slow down.
In short, minimize the load on the engine during its operation, but try to use it in all modes. Warm up before driving, but do not idle idle (idling is considered a difficult mode for engines).
Why is engine break-in necessary?
The engine break-in process is an important period. The way it went largely determines the further course of operation and the ability of the power unit to work for about 150-250 thousand. km without major repairs. During the initial period of operation, the following processes occur in the engine:
- intensive grinding of the moving elements of the cylinder-piston group occurs;
- various roughnesses of the valve mechanism are smoothed out;
- scale particles and casting flakes that were not removed from the engine elements during the manufacturing process are washed out;
- Bearings, oil seals, turbine, gears, timing chain (if equipped) are run in.
Previously, according to manufacturers' recommendations, changing the oil after engine break-in was mandatory; now, as a rule, it is not. Is this related to the introduction of advanced metal processing processes and the use of robotics in the assembly of the power unit?
Rather, it is a matter of marketing policy, which boils down to limiting the service life of any product and the need to purchase a new one almost immediately after the end of the warranty period.
This version is confirmed by numerous cases where foreign car engines have less than 100 thousand km operating time before overhaul or replacement.
High fuel consumption of VAZ 2108, 2109, 21099, 2105, 2107 cars
Let's consider the reasons for the high fuel consumption on VAZ 2108, 21081, 21083, 2109, 21093, 21099, 2105, 2107 cars and similar ones with carburetors 2108, 21081, 21083 Solex 2105, 2107 Ozone.
In this article we list those that are directly related to one or another carburetor malfunction. Other reasons not related to it are set out in the article “Causes of increased fuel consumption not related to the carburetor.” Indirect signs accompanying high fuel consumption are black carbon deposits on the spark plugs, pops or shots in the muffler, increased engine idle speed, black exhaust from the muffler, or exhaust with a persistent smell of gasoline, etc.
The page “Fuel consumption of VAZ cars with carburetor engines” provides examples of fuel consumption for various models of VAZ cars. Compare whether your consumption fits into the given standards. Perhaps the seemingly high fuel consumption actually falls within the standards set by the factory. If it doesn’t fit, then here is a list of possible reasons for this behavior of your car.
Reasons for high fuel consumption on VAZ 2108, 2109, 21099, 2105, 2107, etc.
— The carburetor air damper is not fully open
When a warm car engine is running, the air damper in the carburetor must be completely open and positioned strictly vertically. In this case, the “choke” handle must be recessed all the way. This applies to both carburetors 2105, 2107 “Ozone” and carburetors 2108 “Solex”.
Fully open air dampers of carburetors 2108, 21081, 21083 Solex, 2105, 2107 Ozone
If the air damper is not fully open, with the choke handle fully recessed, then there is a malfunction. In this case, the volume of air entering the fuel mixture decreases, and the proportion of gasoline increases. The fuel mixture enters the engine cylinders over-enriched, and fuel consumption increases.
The air dampers of carburetors 2108, 21081, 21083 Solex and 2105, 2107 Ozone are not fully open due to their drive being incorrectly adjusted
Sometimes some car owners, having a worn-out engine in their car, try to revive its former throttle response, deliberately set the carburetor choke to some extent, thus forcibly enriching the fuel mixture and slightly resuscitating the engine’s former capabilities. But again, this is fraught with an increase in fuel consumption significantly. The same trick can be done when the engine is running poorly at idle or even completely absent. If this problem is detected, adjust the air damper actuator:
— The idle air system fuel nozzle holder or solenoid valve is not tightened tightly
The fuel mixture, in this case, enters the idle system, bypassing the idle fuel jet (inserted into the jet holder or into the solenoid valve - depending on the carburetor model), since it turns out to be loosely pressed to its seat. As a result, a large volume of additional fuel enters the cylinders not only at idle, but also in all operating modes of the car engine. The more you press the gas pedal, the more the vacuum in the carburetor chambers increases and the more excess fuel is sucked into the engine cylinders through the idle system.
Solenoid valves for carburetors 2108, 21081, 21083 Solex, 2105, 2107 Ozone
In such a situation, on carburetors with a holder (plug), you should check the tightness of this very holder. Do not overtighten to avoid deformation of the idle fuel jet or its seat. The tightening should be minimal, but at the same time not allowing the holder to spontaneously unscrew due to vibration when the engine is running.
On a carburetor with a solenoid valve, we check its performance. With the engine running, remove the plug of the wire going to it from its output. The engine should stall. We put the wire on - we hear a click. If everything is as described, the valve is working properly, it shuts off the fuel supply, there is no need to turn it further. If the engine does not stall after removing the wire, turn the solenoid valve housing slightly clockwise. We remove the wire again. Doesn't it stall? Turn the valve a little more. And so on until we achieve what we need.
