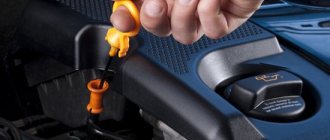
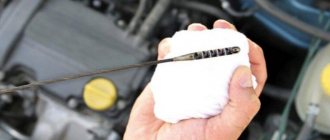
Emulsion in the engine, as well as on the oil filler cap, may appear for two reasons. The most harmless, white emulsion can occur when the engine is not warmed up, when moisture from it, evaporating when warmed up, settles on the inner surface of the oil cap. But the second reason for emulsion in engine oil is much more serious - it means antifreeze gets into the oil. Why this happened, what the dangers are and how to get rid of the emulsion, read below.
An emulsion in the oil system that is not worth worrying about occurs only on the cap and neck, rarely on the top of the dipstick, in the off-season and in cool weather during short trips. If it’s hot outside, or “mayonnaise” has formed on the valve cover and is noticeable inside the internal combustion engine, or the control dipstick is completely in such an emulsion, it’s worth looking for the reasons.
It is not difficult to notice this condition of the oil - it is enough to check the oil level often, and not just when the oil light comes on! Other signs of emulsion in the engine, such as increased temperature, will not be needed.
Causes of emulsion in the engine
The main reason why an emulsion forms in the engine and on the inner surface of the oil filler cap is moisture getting into the oil. The more it is, the more severe the consequences. He can get there for two reasons:
- in the form of evaporating condensate from the internal walls of the engine;
- due to depressurization of the oil system or cooling system.
Table of reasons for the appearance of emulsion and methods for eliminating it.
| Why does an emulsion form? | Causes of failure | Testing and elimination methods |
| Evaporation of condensate on a hot engine | Insufficient warming up of the engine to operating temperature | After starting, especially in winter, before leaving, warm up the engine to a temperature of +90°C |
| Stopping a still slightly warmed-up engine when an emulsion forms | Drive a car with a warm engine for 10…15 kilometers or more | |
| Antifreeze getting into the oil | Blown head gasket | Replacing the gasket, tightening the bolts in the correct sequence and with the required torque |
| Violation of cylinder head geometry | Crimping, milling, grinding of cylinder head | |
| Burnt heat exchanger gasket | Replacing the oil cooler gasket | |
| Damage to the cylinder block | Repair or replacement of the unit | |
| Corrosion of sleeves | Boring sleeves or replacing them with new ones | |
| Incorrect connection of the cooling system | System audit, connection according to the diagram |
Condensation from the air
When it is just condensation in the engine, the emulsion usually forms only on the cap and the edges of the engine filler neck. There should be no beige foam in the oil itself. Such an emulsion is formed due to a temperature difference when moisture, evaporating, settles on the neck cover, and during intensive engine operation mixes with oil droplets. If the trip is short (up to 10 minutes), then it will not have time to disappear. You can drive with condensation in the engine without fear. This condensate evaporates 15 minutes after the engine warms up to operating temperature. If the car is constantly used for short trips, then the emulsion will be on the lid almost constantly.
Antifreeze went into the oil
When a yellow or brown emulsion is not just on the oil cap or the edges of the neck, but is visible inside the engine, then it’s worth disassembling the engine and looking for the cause, it shouldn’t be like this. You can't drive with this oil mixture for long!
Reasons for the formation of emulsion in the engine
Traces of emulsion on the surface of the oil filler cap
- burnout of the cylinder head gasket;
- violation of the geometry of the cylinder head housing;
- breakdown of the heat exchanger, puncture of its gasket;
- damage to the engine cylinder block (usually some kind of microcrack);
- corrosion of liners in the engine, or their mechanical damage (wear);
- Incorrect connection of the cooling system to the throttle valve.
In VAZ cars of “classic” models, among other things, the problem can arise due to crumbling plugs located on the cylinder head. For example, on the engine of a VAZ-2101 there are three of these plugs - two on the outer surface of the head, and one on the outside.
Recommendations for preventing the formation of condensate-type emulsions
To prevent the formation of a condensate-type emulsion, you must follow some recommendations:
It is forbidden to warm up the car for too long after a long period of parking. The optimal engine operating time is 5-10 minutes. It is also not recommended to start right away. You need to start driving at gentle speeds, otherwise the rise in engine temperature will be sharp and lead to unpleasant consequences.
It is advisable not to travel short distances unless absolutely necessary in winter. The fact is that the engine will not be able to warm up well, and it will need to work under load.
It is worth traveling long distances from time to time. Even if condensation has already formed, it will have time to “evaporate” during a long trip.
Ultimately, it is worth trying the use of emulsifiers and insulating the motor. Perhaps these methods will seem effective.
It must be remembered that to get rid of the emulsion caused by condensation, the engine is not flushed. The procedure is necessary only when antifreeze gets into the oil.
Consequences of emulsion in the engine
The formation of a foam emulsion in oil can lead to the following consequences:
- oil characteristics change;
- engine parts are poorly lubricated (in particular, main and connecting rod bearings, valves, cylinder walls, piston group), which leads to a decrease in their service life and the service life of the entire engine;
- Engine power decreases.
If the emulsion in the engine is formed not in the oil system, but in the cooling system, this can lead to the following consequences:
- frequent overheating of the engine, boiling of the coolant;
- the emulsion clogs pipes and hoses to a critical level when antifreeze circulation is impossible;
- reduction in the service life of the engine and its individual parts.
Therefore, when an emulsion is formed in individual parts of the engine, there is no need to “turn a blind eye” to this. Instead, you need to find out as quickly as possible why it forms and take repair measures.
Danger to vehicle condition
A small volume of emulsion resulting from natural processes of moisture condensation does not cause harm to the engine. After a run of 30-40 km, foreign impurities evaporate, the vapors are pumped out through the crankcase ventilation hose into the cavity of the intake manifold. When the gaskets break, an increased volume of antifreeze enters the oil, worsening the lubricating characteristics of the substance. Scores form on the surface of the cylinders, the replacement crankshaft liners are damaged, and parts of the gas distribution mechanism suffer because of this.
Supplying a large volume of antifreeze into the cylinder of a running engine leads to water hammer. As a result, the connecting rod is deformed, piston fragments damage the cylinder bore and the upper part of the combustion chamber.
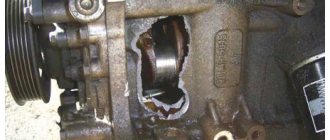
Piston fragments that have fallen into the crankcase can damage the crankshaft or break off the connecting rod, which pierces the side wall of the crankcase. The damaged power unit requires major repairs with replacement of the main components.
What to do if there is emulsion in the engine
When emulsion appears on the engine cover or on the dipstick, the first thing to do is perform a series of simple checks that will allow you to determine the severity of the cause. It's easy to do. After starting, you need to warm up the engine to an operating temperature of about +80°C...+90°C and drive the car in normal mode (you can let it burn a little) for at least 10...15 kilometers, and preferably a little more. And then look at the oil filler cap and dipstick again.
Please note that the cap itself and the oil in the engine will be very hot, so you need to unscrew the cap carefully! It's better to wait a few minutes for the temperature to drop a little.
Foam emulsion inside the engine that needs to be removed
If, as a result of the check, it turns out that the emulsion has disappeared, then there is no need to worry, and you can continue to drive the car. To ensure that an emulsion does not form in winter or in the off-season, special anti-emulsion additives (demulsifiers) are sometimes used. They work on the principle of forming a chemical reaction, the result of which is getting rid of foam. Another good preventative option is to use engine insulation.
When the emulsion on the engine cover has not disappeared, and maybe even increased, this means that you need to check the engine oil and cooling systems for depressurization. At the same time, it is recommended to check the antifreeze level in the expansion tank of the cooling system. If it regularly decreases, then this directly indicates that it “goes” into the oil. In this case, it is not recommended to use the machine until all diagnostic and repair measures have been completed!
Flushing agents
Car owners resort to the following methods as cleaning agents.
Water
You need to prepare distilled or at least boiled water. This option can only be used if the cooling system is slightly contaminated. Water is poured into the radiator, after which the engine is heated to operating temperature and everything is drained. To get rid of the emulsion, you will have to repeat the procedure 5-6 times. This is an ineffective way to flush the system of oil, but it is the most affordable.
Flush the cooling system with water until clear liquid drains out.
Milk serum
You can use whey. Before use, the whey must be strained through cheesecloth to remove any clots and sediment present in it. Craftsmen recommend different periods of time for keeping the whey in the cooling system. Some drive with it for 200–300 km, others fill it up, warm up the engine and drain it.
If after draining the whey there are a lot of clots and oily formations, then it is recommended to repeat the cleaning procedure.
The serum is not very effective in the fight against oily deposits.
Fairy
Use Fairy or similar dishwashing detergent. Pour 200–250 grams of this product into a large amount of water, depending on the degree of contamination of the system, and stir. The engine is warmed up and left for 15–20 minutes.
If after draining there are a lot of impurities in the liquid, then the procedure is repeated. During washing, the detergent begins to foam strongly, so you need to monitor the condition of the expansion tank. This option helps to effectively remove oil from the system, but its disadvantage is the formation of a large amount of foam. It is necessary to rinse the system several times with water until the remaining detergent is removed.
During heating, detergents begin to foam strongly, so you need to monitor the expansion tank
Powder machine
This option is similar to using dishwashing detergent, so it also works well at clearing oil from the system. The advantage is that using an automatic powder produces less foam. When creating a solution, add 1 tablespoon of powder per liter of water.
Diesel fuel
This is the most effective folk method. Fill the system with diesel fuel, warm up the engine and drain the diesel fuel. The procedure is repeated at least twice, and before adding antifreeze, rinse with water.
Some people are afraid that diesel fuel may ignite or damage the pipes. Folk craftsmen claim that nothing like this happens and the method works very effectively. To warm up the engine faster, it is recommended to remove the thermostat while flushing it with diesel fuel.
Special fluids
You can purchase special liquids for flushing the cooling system in the store. This is the best option for cleaning the cooling system from oil, but it is more expensive than using traditional methods.
Special liquids for flushing the cooling system can be purchased at any auto store.
Each such remedy has instructions according to which you must act. A certain amount of special liquid is poured into the system. Let the engine run for 30–40 minutes and drain, then flush the system with water.
Sources
- https://zen.yandex.ru/media/id/5affac9a1aa80c5715437e35/kak-i-pochemu-poiavliaetsia-emulsiia-v-motore-5b195c1bc3321bdbfd798a6e
- https://mashinapro.ru/1826-emulsiya-na-schupe-urovnya-masla.html
- https://DriverTip.ru/repair/pochemu-poyavlyaetsya-emulsiya-v-masle-dvigatelya.html
- https://KrutiMotor.ru/emulsiya-na-maslyanom-shhupe-i-kryshke-maslozalivnoj-gorloviny/
- https://avtocity365.ru/ustrojstvo-i-ekspluatatsiya-avtomobilya/emulsiya-v-masle-dvigatelya/
- https://KrutiMotor.ru/promyvka-dvigatelya-ot-emulsii-v-masle/
- https://autochainik.ru/emulsiya-v-masle-dvigatelya.html
- https://bumper.guru/klassicheskie-modeli-vaz/sistema-ohdazhdeniya/chem-promyt-sistemu-ohlazhdeniya-dvigatelya-ot-masla.html
How to flush the emulsion in the engine
Flushing the engine to remove emulsion is only necessary if it is formed as a result of antifreeze getting into the oil. If it appears as a result of heating, then there is no need to wash the emulsion, just warm up the engine thoroughly.
In order to flush the internal combustion engine from emulsion and other debris (especially if the oil is already old), you need to use special flushing oils. Or you can use the “old-fashioned” method. It consists of mixing diesel fuel and mineral oil (you can even use waste oil) in volumetric proportions of one to three. And then perform two or three engine flushing cycles at idle speed. If special flushing oil is used, then one flushing cycle lasting 15...20 minutes is usually sufficient. Then fill with fresh engine oil and change the oil filter.
Conclusion
Typically, an emulsion on the oil filler cap forms in winter or in the off-season. Emulsion in the engine in warm summer weather should be a concern. The first thing you need to do is check the level of antifreeze in the expansion tank, the presence of white smoke from the exhaust pipe, and also remember in what modes the car is usually used. After this, warm it up thoroughly and drive 10...15 kilometers, then check the cover. Most often, the cause of the appearance of an emulsion is precisely the accumulation of condensation on a hot engine, but it can also occur due to an engine malfunction, in which case the oil and cooling systems will have to be checked.
Where can engine oil leak from?
If during the next daily inspection it turns out that the oil level is significantly below the maximum mark, you should seriously look into troubleshooting
First of all, it is important to determine where the leak is located.
First of all, it is advisable to pay attention to the accessible engine components. One of them is the valve cover.
From under the valve cover
A leak in the valve mechanism may result in oil leakage from the engine lubrication system. Often, this problem is signaled by a characteristic burning smell from under the engine exhaust manifold.
In this case, it cannot be said with a high degree of probability that replacing the gasket will solve the problem. The occurrence of the presented malfunction may be associated with excessive pressure in the engine lubrication system.
This situation can be caused, for example, by a malfunction of the so-called pressure reducing valve.
Crankshaft oil seal
If a leak in the valve cover gasket can be corrected with little effort, as they say, the situation with the crankshaft oil seal is much more complicated. Replacing it due to the design features of the engine will require a lot of time and labor.
What could have caused the breach of its tightness?
Let us arrange the most probable causes of this malfunction in a certain sequence, starting with the most frequent:
- the operational resource has been developed;
- failure in the crankcase ventilation system;
- defective components;
- unscrupulous repairs.
Oil leak between engine and gearbox
Do not forget that the clutch flywheel housing also contains an oil seal, which sometimes makes itself felt, although extremely rarely. To verify the presence of such a malfunction, you will have to look under the bottom of the car.
In this case, it is best to drive the car into an inspection hole or so-called overpass. The presence of a leak will be indicated by an oily surface of the clutch housing and gearbox housing. To replace the oil seal, you will need to dismantle the gearbox.
Let us focus our attention on the reasons for this unfavorable phenomenon. Among them are:
- mismatch of lubricant viscosity;
- failures in the crankcase ventilation system;
- loss of elasticity of rubber goods;
- poor quality components.
Oil filter gasket
The oil filter seal can also be the culprit for an oil leak. So, during the next scheduled filter replacement, it could simply be tightened, and this is unacceptable. With such repairs, unfortunate oil leaks may appear over time.
It is also worth mentioning the fact that after each filter replacement, all associated rubber goods must be replaced. If this is not done, there is a high probability that oil formations will soon appear at the filter connection site.
In a particular case, oil from the engine lubrication system may be squeezed out due to malfunctions in the operation of the VKG system.
Engine crankcase problems
A frequent cause of engine oil leaks can be violations of the crankcase ventilation system. For the most part, owners of fairly used cars face a similar problem.
The fact is that as the CPG wears out, exhaust gases begin to accumulate in the engine crankcase. With a working crankcase ventilation system, excess pressure would be vented into the engine intake manifold. But it also happens that after prolonged use, and in the absence of proper care, the elements of the system become clogged.
This state of affairs leads to the fact that the gases have nowhere to go, and they begin to look for the most vulnerable places, which are played by various sealing elements.
