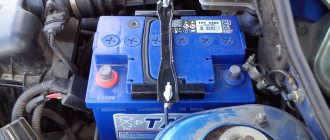
The fuel tank is the main part of the vehicle's power system, responsible for storing fuel and transferring it through a system of pumps and filters to the device that prepares the combustible mixture (carburetor or injector).
Obviously, the main malfunction of gas tanks is leaks, which can appear for three reasons:
- due to the effect of corrosion on metal tanks;
- as a result of mechanical damage (strong vibrations, friction on asphalt, gravel impacts, etc.);
- as a result of natural aging of the material , for example, the gradual appearance of porosity in plastic tanks.
In practice, all factors act simultaneously, not only increasing the risk of being left without an energy source on the road, but also reducing the fire safety of the vehicle. The fuel level arrow can indicate a problem - if you notice that it moves too quickly or periodically “falls” down, it is better to stop and inspect all elements of the power system. The smell of gasoline in the cabin and the characteristic “rainbow” puddles in the rear axle area are sure signs of a leak.
Why does a gas tank leak: reasons
In Lanos and Lada Priora, the fuel tank is located under the rear seat. The main causes of damage to a gas tank include mechanical stress and metal corrosion. Holes occur when a car is driving on uneven roads, potholes, potholes and hills. An old tank often becomes rusty and rots. Cracks increase and leaks appear.
You can detect a leak in the gas tank using the panel instrument. In addition, the smell of gasoline is clearly audible in the cabin. You should stop the car, turn off the engine, check the tank and try to seal it yourself if there are no car services nearby.
Advice!
Before work, analyze the size and nature of the damage and only then choose the type of repair.
Repair methods and preliminary preparation
As you can clearly see, there are several options for repairing a crack in a gas tank.
If you want to make a full repair that will allow you to continue to operate the car without necessarily replacing the fuel tank, you need to start from the specific material used in the manufacture of the tank.
Therefore, all repair methods are divided depending on the material of the tank. The following varieties are distinguished:
- steel;
- plastic;
- aluminum.
Each of them has its own recommendations on what to do if the gas tank is leaking and you need to get rid of the damage.
But regardless of the material used, any repair work cannot be carried out when the tank is full of fuel. This is only relevant for express repairs and then in limited cases, when it is impossible to do otherwise, and there is no real opportunity to remove the tank. In this case, there is a risk of losing all the fuel and getting stuck for a long time.
If you want to make high-quality repairs, but do not want to completely change the fuel tank by buying a new tank, you need to perform several mandatory steps before carrying out work.
- Take the repair manual for your car. It should clearly indicate how specifically to remove the fuel tank on this machine.
- Based on the instruction manual, the tank must be dismantled. It is strongly not recommended to repair cracks directly on the car. Even if there is no fuel inside.
- The fuel pump must be removed from the tank. This is not difficult to do, you just need to unscrew a few fasteners. The operation and repair manual will also help here.
- From the fuel container you need to remove the plastic float of the sensor, which monitors the fuel level in the gas tank. Be very careful not to damage the float and its holder.
- Now you can drain the remaining fuel. For this, use capacious and clean containers, which can then be hermetically sealed.
- The tank must be rinsed using hot water. Cleaning is carried out with water heated to at least 50 degrees Celsius. It is not necessary to use pure boiling water.
- After draining the first water, add washing powder to a new portion of rinsing water. Repeat the procedure several times. This ensures that there is no fuel or gasoline vapor left inside, which could ignite when exposed to high temperatures. Do the last rinse with plain water, without using powder.
- Dry the tank. This is a mandatory preparation stage. Drying is completed within 24 hours.
What tools are needed for the job?
You can eliminate a leak in a car's gas tank using rubber pads, a bolt and an adhesive-based patch. Sealants, cold welding and fiberglass are also useful.
Tools for metal tank:
- spanners;
- pliers;
- sandpaper;
- screwdrivers;
- soldering iron;
- funnel, hose and container for draining fuel;
- welding machine;
- file;
- degreaser;
- cold welding.
Before work, you need to change into work clothes and put on gloves. For convenience, the tank is dismantled - it is safer to carry out repairs. But if a hole occurs on the way, then the patch will help you get to the nearest service station without removing the tank.
Material and characteristics of the metal tank
We will be considering a container made of metal, because as mentioned above, such a gas tank can be repaired. As for the material from which this container is made, in 95% of cases it is a soft steel sheet. This sheet has additional treatment, usually a secondary lead coating, which slows down irreversible corrosion processes.
The advantage of this material and the reason why it can be repaired is that when deformed, it is possible to level the metal sheet. If for any reason a gap appears in such a gas tank (for example, a breakthrough due to an accident or thinning of the material due to rust), then it can be soldered or welded.
How to fix a leak in a car's gas tank without removing it
If a fuel leak occurs on a road where there are no repair services or residential buildings, then the car should be stopped, find the hole and try to seal it. Before you start doing anything, you need to carefully inspect the tank. The hole is patched without removing the tank if it is located in an accessible place.
First, drain the remaining gasoline and dry the tank. If necessary, expand the hole to the required size with a screwdriver. The bolt is installed in the hole inside the tank, a rubber gasket is put on it from the outside and tightened with a nut. If the work is done well, the tightness is guaranteed for 3-4 years. However, it is better to replace the leaky container with a new one.
A small crack can be repaired with regular superglue. The fabric is impregnated with it and 3 layers of patches are applied, each of them well lubricated with glue. For strength, nitro paint is applied on top. You can’t drive for a long time with such a patch - it won’t last long.
Cold welding is also used. Protective gloves are put on your hands. Take out part of the welding compound, knead it in your hands like plasticine, apply it to the damaged area in 2 layers and level it.
For a plastic container, epoxy resin is used. The crack is rubbed with sandpaper, degreased, the hardener is mixed with resin, the fiberglass is smeared with resin and glued to the hole. Press firmly onto the surface, waiting until it hardens. You will need 3 such patches. During the final coating, add aluminum powder.
If the damage is below and cannot be reached, then in extreme situations a plastic bottle is used. The method is suitable for carburetor cars. Fill up with gasoline and immerse the hose from the pump into it. The bottle is fixed so that it does not move or turn over.
Advice!
Each layer of cold welding should be 2 cm wider than the previous one.
How to check the tightness of a repaired tank
Before installing the repaired container in place, it is imperative to check its tightness. First, the part is subjected to an external inspection to identify damage and places where it may appear due to corrosion and wear. Then the tank is plugged and its integrity is checked.
This is done in the following ways:
- Filling with water. If there are holes, then these places become damp, trickles and drops appear there. For more reliable testing, the tank is subjected to vibration.
- Injecting compressed air. After pumping is completed, the container is covered with soap foam. Bubbles indicate the presence of holes.
When there are no problems, all that remains is to install the tank in place, secure it, and connect instruments and devices, taking precautions.
Plastic gas tank repair
Modern cars are equipped with plastic containers. But plastic cracks easily with any impact. Cracks form around the neck.
The tank is removed, the gasoline is drained, washed and the location of the damage is determined. Prepare for repairs:
- soldering iron;
- a piece of plastic;
- cold welding.
A piece of plastic is placed on the punched area and sealed on all sides with a soldering iron. You can take a piece of metal mesh, which is soldered into the hole.
For a small hole, use a self-tapping screw. It is inserted into the hole, a piece of rubber is placed under it and screwed.
What to do if your tank leaks
It is important to recognize the depressurization of a gas tank as early as possible, because otherwise there is a threat to the safety of the life of the driver, passengers and others. This malfunction is indicated by a strong smell of gasoline inside the car, fuel consumption higher than usual and the formation of puddles under the car. Having discovered any of the signs or a crack itself, the driver must know how to fix a gas tank leak in order to avoid a fire.
- Stop the vehicle and turn off the ignition to avoid exposure to high temperatures and sparks.
- Empty the gas tank by pouring the fuel into an empty container.
- Identify the location of the breakdown.
- Most often, the bottom of the tank is damaged; such damage can be repaired yourself. If a hole has formed on the side and is difficult to reach, the tank will have to be removed.
- Clean the crack and the spaces around it with a brush and rag.
- If possible, level the surface and remove traces of corrosion if present on the metal.
- Begin temporary or permanent repairs to the gas tank or transport the vehicle to an auto repair shop.
Repairing gas tanks in auto repair shops is an expensive service, but fixing the defect yourself will cost much less. However, in case of severe damage, it is more rational to purchase a part.
Metal gas tank repair
Before repairs, the gas tank is removed. The process is simple. You will need wire cutters, a screwdriver, an adjustable wrench and a device for connecting rubber hoses. Drain the fuel, remove the connector with the fuel sensor and fuel pump power wires. Remove the hoses and unscrew the clamps. When the gas tank is removed, it is cleaned, washed and dried. For repairs, a soldering iron, acid and tin are used.
Fuel tank soldering:
- The deformed leak area is leveled and degreased.
- Clean the area down to bare metal; it may have been covered with rust.
- The damaged area is heated, and tin is applied with a soldering iron in 2-3 layers.
- Apply primer and paint.
Before sealing the hole with a welding machine, the tank is cleaned. If the damaged area is large, then install a metal patch and weld it on all sides. After cooling, the container is primed and painted.
Repair using electric welding
Welding a fuel tank using a argon arc welding machine and tungsten electrodes is considered the most reliable method. It reliably connects non-ferrous metal with alloy steel. Most gas tanks are made of aluminum, so inverter welding is not suitable for repairs. The repair area is cleaned of oils and dirt. The patch is welded around the entire perimeter, trying to maintain a homogeneous gas environment. The seam is smooth and durable. After cooling, the repaired area is painted or covered with bitumen mastic.
Methods to protect against gasoline drainage on classics
Those car owners who, for various reasons, often due to the lack of a garage or saving money on paid parking, leave their car to spend the night in the courtyard of the house, have probably suffered with the design of the gas tank neck, through which gasoline is easily filled and drained from the car.
What possible ways can there be to protect against such theft or hooliganism? The methods can be different: both mechanical and associated with electronic signaling:
- Replacing standard gas tank caps with special ones, with keys and eccentric,
- Installing a limit switch or reed switch on the gas tank hatch,
- Changing the direction of the tank neck towards the trunk,
- Installation of a metal grate or mesh into the neck of the tank.
Each of these methods has its pros and cons, and some are not suitable at all.
According to the second point, it is suitable only for those whose car is equipped with an alarm system, even without feedback.
As for the third and fourth points, they are more labor-intensive and costly, as they are associated with technical issues, including dismantling the tank and associated with welding work. In addition, they are not suitable for those whose car is under warranty.
Attention! It is necessary to carry out any work, including welding, on a car’s gas tank only after steaming the tank, that is, removing vapors and fuel residues with hot steam.
There is another, simpler way to protect your car from draining gasoline - this is to leave the car with a minimum amount of gasoline in the tank. Not entirely practical for the owner, but thieves will have nothing to drain.
Removing and installing a new valve on Kalina
The only tool you need for this procedure is a Phillips screwdriver. The work will not take much time and effort and can be done independently in a garage. First, you should disconnect the negative terminal of the battery and remove the power plug of the piston compressor (KPA).
In a Lada Kalina car, access to the valve is slightly difficult, so you will need to slightly loosen the clamp from the inlet pipe and remove it from the mass air flow sensor. Move everything unnecessary to the side so that it does not interfere with work, and secure it during repairs.
Replacing a valve on a car
If the mass air flow sensor interferes greatly, it can be dismantled, but it is better to simply move the valve mount to the side a little and remove it without any problems. The fastener must be bent a maximum of 1 cm and, with some effort, pull the valve up in the direction of the grooves. If everything is done correctly, the part will be removed quite easily and quickly.
Advice from experienced motorists, gas tank leaking
Advice from experienced motorists when the gas tank leaks...
Hello dear readers of the blog RtiIvaz.ru. Today we will talk about a leaking car gas tank, by the way, not such a rarity these days. Advice from experienced motorists will help everyone who finds themselves in such an unpleasant situation. You don’t even have to remember the contents of this article; it will pop up in your memory when you are faced with a dilemma - what to do when your gas tank leaks on the road. https://www.youtube.com/watch?v=68dXbX0keaQ A car gas tank can leak in many different circumstances; we will only talk about those that occurred in real life and how we managed to get out of these unpredictable situations during repairs. The owner of a foreign car Audi -100, while trying to drive through the green zone through a high curb, “scratched” the gas tank of his car. With gasoline pouring, he, quite at risk of burning, drove to the workshop.
Advice from motorists warns that driving, even short distances, with a leaking gas tank is fraught with a fiery fire with unpredictable consequences along the way. A way out of this situation was found, again based on auto experience. The Audi -100 tank is made of plastic, which was taken into account when repairing the car.
Remembering, at the same time, the peculiarity of how rigidly the screw goes on the first turns in plastic bumpers or when installing plastic fender liners, even before contact with the metal. We looked at the size of the tank hole that appeared and selected the appropriate screw for it. We cut out an improvised washer from oil-resistant rubber, slightly larger in diameter than the screw head.
You can cut it from an old car inner tube or other suitable car rubber. We picked up a steel washer accordingly, screwed the self-tapping screw into the body of the gas tank, thereby closing the hole. The rubber washer went first, then the steel self-tapping screw went through them, pressing on the car rubber. The leak stopped completely after the screw was fully tightened.
The owner drove this “patch” for exactly a year without any problems, until he again “scratched” the gas tank on the same high curb while reversing (the office where the owner of this car worked is located), right on the screw that was standing there from the last time. A self-tapping screw was installed again, but with a larger diameter, but this time it was not possible to completely block the leak - it became wet under the washer, although gasoline did not drip. But this is the owner’s fault and his inattentive carelessness when reversing the car.
The method itself justified itself, since the owner of the Audi -100 drove away for a year after the first repair, the tank was completely dry without gasoline leaking through the hole in the tank on the high curb of the office parking lot. A leak in a metal tank is much more difficult to eliminate, but you can use this method; it still needs to be changed or welded in the future by removing it from the car. The old-fashioned method - covering the leak area with laundry soap - does not last long.
Experienced motorists suggest doing the following here...
When these methods described above fail to stop the tank leak, use an empty plastic bottle. If you don’t have it at hand, then walk along the side of the road - as a rule, there are always a lot of them thrown out there. Make a hole in the bottle cap and insert a piece of gas hose into it.
Remove the hose coming from the gas tank from the gas pump and place the second end of the gas hose inserted through the cap into the bottle onto the free fitting of the gas pump. The gasoline in the bottle will only last for short periods, but you can continue on your way using some gas and get to your home or the nearest auto repair shop.
Instead of a bottle, you can use any container, securing it securely under the hood. If there is no section of a spare gas hose, then useful advice from experienced motorists suggests temporarily removing the hose going to the return line, temporarily plugging its fitting after removal.
You can plug it with a short piece of hose with a bolt or screw screwed into it. Take note of the advice of experienced motorists: the diameter of the removed hose from the return line is smaller than the fuel pump fitting, but you can put it on with a certain amount of effort since car tires stretch.
You may also be interested to know:
Repair, maintenance and operation of experienced
Photo of rubber hoses and pipes
Purpose of radiator pipes