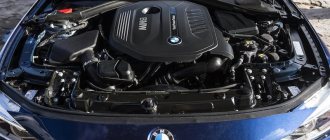
Quite a lot of drivers are interested in how difficult it is to install a 16-valve engine on a VAZ 2109. After all, such engines are more efficient than the standard ones installed on the VAZ.
This power unit makes you feel much more comfortable on the road. After all, engines with 16 valves are more modern. Such a rework is the most justified and logically sound. At the same time, it practically does not require complex equipment; there is no need to bore the block and do other things. At the same time, all work is carried out quite quickly and without any interference.
Engine
Installation of a 16 valve engine on a VAZ 2109 can be done in 2 ways. Each has its own pros and cons. Therefore, you can choose one of these methods:
- Installation of the whole unit;
- Replacing the cylinder head.
The final choice depends on your goals and capabilities.
If you have a complete and serviceable engine, you can install it. Otherwise, when buying parts from scratch, it is better to install a new head. Article on the topic “Which engine is better, 8 or 16 valves.” To remake your "nine" it is best to use a motor from a VAZ 2112
. They are almost identical. The differences are only in small details. But these nuances are precisely what make this engine more modern. What is important for you is that this engine fits perfectly into the mounts. In this case, you can even use the original box and clutch basket. Next, we will analyze these methods in more detail.
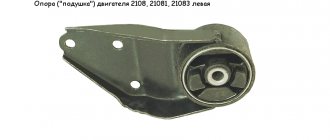
Features of the pillows used
There are several nuances that you should know about the supports in general, as well as about the engine mounts used on the VAZ 2109 model.
When developing the design of supports that serve to reduce engine vibrations, manufacturers take into account the loads absorbed by the supports; These elements are under constant influence of loads, the magnitude of which varies; One constant load is the weight of the engine. But when the car starts, another load arises; When the car moves in reverse, the supports take on negative forces; When sharply accelerating or braking, when a wheel hits a pothole, or when hitting an obstacle, these same negative forces arise
The front, rear and side engine mounts are responsible for extinguishing them; To make cushions for the VAZ 2109, special natural rubber, high-grade SKI-3 rubber is used. In addition to rubber components, the supports include steel elements and heavy-duty adhesive; The VAZ 2109 engine mounts are capable of withstanding temperature loads in the range from -40 to +70 degrees Celsius.
Engine support cushions
In order for the pillows to meet all the requirements for them, experts recommend choosing products from the manufacturer or companies that were recommended by the VAZ 2109 manufacturer.
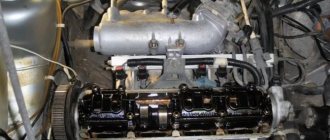
Engine Installation
Let's start with the simplest option - installing a whole motor in the "nine". To do this, in addition to the unit itself, you will need a steel or copper fuel pipe and a gas tank. It is advisable to take the engine with a body kit. So it will cost much less. The installation work is carried out in the following way:
- First, the old motor is dismantled, here everything happens according to the usual scheme;
- We are preparing the new engine for installation. To do this, you need to replace all consumables. Usually they change seals, gaskets, belts;
- The power unit is put in place and attached to the pillows;
- They installed a tank from 2112. It fits perfectly. The difference is in the design of the fuel pump and the presence of sensors. If you don’t have such a tank at hand, you can leave your original one. But you will have to install an external fuel pump from the Volga
; - The next step is to install the fuel line. It is best to use copper tubing. It's more flexible. If you decide to install steel, then heat it on fire before fitting. This will allow you to bend it as needed without any problems;
- Wiring is being installed. On cars younger than 2002, no modifications will have to be made. There is already a hole for the wires coming from the injector, as well as other elements necessary for fastening. If the car is older, you will have to cut the hole yourself. Studs are placed under the bottom for attaching the absorber and gasoline filter;
- The wiring will have to be redone. Some sensors have short wires. In this case, we lengthen them;
- To install the generator you will have to buy new mountings, otherwise you will not be able to install it;
- The box won't fit a little. You need to try it on and grind off the extra corners with a grinder. It's a matter of a couple of minutes;
- The starter installed on 2109 has 11 teeth, it will not converge with the flywheel. Therefore, replace the bendix, take one with 9 teeth;
- The exhaust system will also have to be overhauled and adjusted.
In general, the work of installing such an engine is not too difficult. In practice, it is not too different from replacing a conventional power unit.
Preparation
- first of all, you need to put a reliable support under the car, preferably wooden stumps;
- unscrew the left crab, move the stretcher to the side;
- remove the generator from the engine;
- remove the tensioner pin, pump, distributor and receiving pipe;
- do not forget to remove the head if you are planning a major overhaul;
- the motor must be removed from the box and lowered to the floor;
- in order to get the engine, you need to raise the front part higher (this is done using a jack);
- you can also just pull everything through the top.
- The first thing you need to do is turn off the power to the car. To do this, disconnect the battery. It’s easy to check the lack of current, try turning on the wipers;
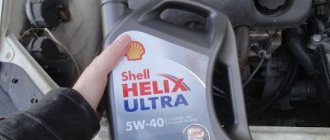
- Drain the oil from the engine crankcase. A warm engine will speed up the process;
- drain the coolant from the cooling system, here you need a cold engine;
- get rid of the engine crankcase and exhaust pipe protection;
- carefully disconnect all hoses;
- Next, you need to unscrew the ground wire fastening nut. Next, you can safely turn off the thermostat;
- disconnect the central high voltage from the ignition distributor. To do this, you need to release the pad lock and remove it;
- remove the drive cable from the clutch lever;
- next, you should disconnect the starter supply wires;
- turn off the generator;
- disconnect the wires from the coolant temperature and oil pressure sensors;
- further work will take place under the car. To make it as comfortable and safe as possible, it is worth acquiring an overpass;
- At this stage, unscrew the drive rod mounting nuts. Disconnect the speedometer drive rod, disconnect the power wires;
- disconnect the two braces, tie rods and ball joint from the lever;
- Move the upper tail of the drive a little and push it out with a pry bar. Insert the technological plug into the vacant space;
- Next comes the stage of dismantling the engine. We fix it with a strong rope using the eyelets (rings). It doesn't hurt if you take the time to check their strength first;
- It is best to remove it through the top, but you can also get it through the bottom. Then lower the engine to the floor and lift the front of the car using a jack;
- After you have secured the engine with ropes, you can reach it through the top.
Remember that you need to act extremely carefully so as not to lose the motor, scratch the body, or damage parts. As you can see, the process is very complicated.
Successful dismantling is possible only if all points of the instructions are followed, you have deep knowledge, extreme caution and no haste.
VAZ 2109. How to REMOVE THE ENGINE without unnecessary movements from above.
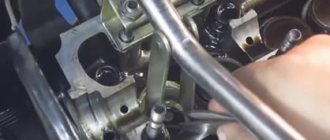
Replacing the cylinder head
Compared to replacing an engine, this work is more complex. However, both options have common actions. This applies to installing the tank and connecting the wiring. But there are also enough differences; the work is done as follows:
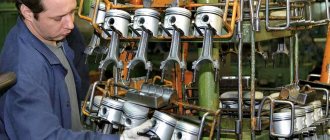
- First, the engine is removed from the car and disassembled. To do this, remove the cylinder head, pan, dismantle the pistons;
- New pistons from 2112 are installed. They have more reinforced connecting rods, and they also have recesses for the valves;
- Replace the fuel pump;
- Shorten the cylinder head mounting bolts. 12 holes are drilled in the new cylinder head;
- A hole of 8 is drilled in the block and a thread is cut for the knock sensor;
- They install a pump from 2112, at the same time install a thermostat from “Samara”;
- Change the breather;
- All that remains is to assemble the entire body kit for the engine, install the wiring and configure the unit.
In general, there is nothing extremely difficult in this work. Of course, you will have to tinker a little, but in the end you will have an almost rebuilt engine with new characteristics and in perfect condition.
Conclusion
. Many people like the first front-wheel drive VAZs for their good reliability. But their engines are far from perfect. This is why many people install a 16-valve engine on the VAZ 2109. This makes the car more economical and responsive. Also, the unit from 2112 allows you to feel more confident on the road.
Why install a new power unit?
Installing a new engine can be useful for those motorists who want to improve their outdated car. Many domestic car enthusiasts know that the “nine” has pretty good driving characteristics, requires little gasoline and is generally not as demanding to maintain as foreign cars, which is why it is often tuned. Replacing an engine from an 8 cl to a more advanced model has its advantages:
- Increased power.
- Improved driving characteristics at high speeds.
- Efficient use of fuel due to the injection system.
- More stable operation of the power unit.
- No constant valve adjustment required.
But there are also disadvantages:
- You need a lot of parts and tools to replace them in your garage.
- At low speeds the 16 cl engine is slightly worse than its 8 valve counterpart.
There are two replacement options here:
- Installation of the entire engine from the 2112 model. In this case, not many parts will need to be replaced, but the cost of the entire engine may discourage this idea.
- Modification of the cylinder head for new components. This is a more economical, but very labor-intensive process.
Return to contents
CONNECTION FEATURES
The order of connecting high-voltage wires must be strictly sequential, since each cylinder of the engine corresponds to a specific socket on the ignition module. Considering that there is a numbering of the sockets on the ignition module body, the risk of confusing anything is minimal.
The procedure for connecting high-voltage wires of the VAZ 2114 injection type depends on the year of manufacture of your car. Fourteeners before 2004 had 4-pin ignition modules installed, and cars after 2004 had 3-pin coils.
The connection diagram for VAZ 2114 high-voltage wires to the ignition module (until 2004) is as follows:
Connection diagram for VAZ-2114 with ignition coils (after 2004):
In the pictures you can see the numbers of the landing slots. Each number must have a corresponding cylinder connected to it (cylinder numbering is counted from left to right).
To correctly install high-voltage wires on the VAZ 2114, follow the following algorithm of actions:
- Turn off the ignition. Open the hood and remove the power terminals from the battery;
- We remove the old GDPs from the mounting sockets on the module and cylinders;
- We remember the location of the high-voltage wires of the VAZ 2114 and connect new GDPs according to the diagram. Before replacing, it would not be amiss to draw this very diagram by hand on paper so as not to confuse anything;
- We connect power to the battery and, to check whether we did everything correctly, start the engine.
When installing the wiring, do not try to connect individual air intakes to each other with plastic clamps; to do this, you must use the comb holder that comes with them. A thin clamp can easily wear through the insulating coating. Also make sure that the GDP does not bend.
Connecting armored wires on VAZ 2115 and 2113 is carried out in a similar way.