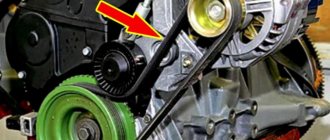
Lada Granta cars, like other vehicles, are equipped with a generator designed to power electrical equipment components while driving. If there are malfunctions in the operation of this device, first of all the driver pays attention to the condition of the belt. Below we will talk about how to replace the alternator belt on a Lada Granta car with air conditioning.
Technical regulations Lada Granta
If you decide to change the belt or belt tensioner of the alternator (RG) on a Grant with an 8-valve engine, you must follow the technical regulations of the manufacturer. According to these data, the Lada Granda alternator belt should be checked every fifteen thousand kilometers. And every 30 thousand kilometers a replacement procedure must be carried out.
White Lada Granta
In other words, the owner of an 8- or 16-valve Grant must carry out a diagnostic or replacement cycle every 15 thousand km. And if we take into account that a tensioning device, as such, is not used, then the RG is completely intended for one-time stretching during its installation. Of course, you can tighten the replaced RG on an 8-valve engine, but the manufacturer does not recommend this.
Forced tuning
Unfortunately, since 2011, designers have abolished the tensioner on Kalina. They were guided primarily by considerations of economy, but they did this without any modification to the generator. In practice, cases of its premature failure immediately became more frequent. Therefore, owners began to install the tensioner on their cars themselves.
It's not very difficult to do this. True, you will have to purchase not only the tensioner itself, but also the generator bracket. The only problem is removing the standard belt. It is very difficult to remove because it is very tight at the factory. You can simply cut it, as you will have to buy a new one. The fact is that the Kalina generator belt without a tensioner has a size of 820 mm, but 880 will be needed.
Source
We check the condition of the alternator belt ourselves
Before replacing the Lada Granta alternator belt, car enthusiasts usually check its condition to make sure whether this is really necessary. To diagnose, you need to follow simple steps. First, you need to engage fifth gear and get out of the car, and then try to push your Grant back, working on the front bumper or side pillar, if an assistant does this. In this case, the hood must be open and while pushing it is necessary to see how the RG behaves.
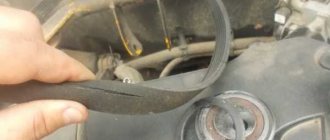
Worn and damaged RG, unsuitable for use
There should be no signs of damage on the strap when pushing the car. We are talking about cracks, delamination or breaks, even the most minimal ones, although this is quite possible, especially if the vehicle is used frequently. If during the diagnostics you notice traces of damage on the RG, this indicates that it will not be possible to tighten the belt - it needs to be replaced. The timing belt is diagnosed in a similar way.
If you don’t need to tighten the RG and adjust the tension on an 8-valve engine, you can also check the condition of the generator itself. After all, if you have any suspicions about the quality of the work of the DG, it makes sense to check the device itself. In addition, during diagnostics, you can also check the generator belt tensioner pulley, with which the belt can be tensioned. If there are chips on the roller or other signs of deformation and damage, including changes in geometry, the element must also be replaced. The video below provides detailed instructions for replacing the bracket, as well as the alternator strap on a Lada Granta car (the author of the video is Igor Semenishin).
Diagnostics of the drive belt tensioner
The drive belt tensioner must be checked for serviceability when at least one of the above symptoms appears. Other structural elements also need diagnostics. Diagnostics is performed in several stages:
- It is necessary to visually familiarize yourself with the belt and the equipment driven by it. To do this, start the power plant and check whether there are vibrations of the belt, pulley or roller.
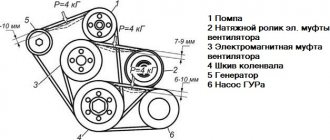
- Check the tension of the alternator belt. To do this, stop the engine. Next, on the largest span between the pulleys, take the belt and try to turn it clockwise. If you can turn it 90 degrees, then its tension is fine. Otherwise, the rotation angle will be smaller or larger, and then adjustment will be required.
- The next step is to remove the belt and check its condition. It is also necessary to check the pulleys and rollers for play. Removing the belt is quite simple. To do this, you must loosen the tension pulley nut. After this, it must be removed from the pulleys. Before doing this, remember the position of the belt between the pulleys, because you will then have to put it back on. It is recommended to take a photo of the position with a mobile phone camera. After removal, check that there are no cracks or peeling on the belt. Belt wear should be even. If any of these defects are detected, feel free to change the belt. Note wear on one side. When such wear occurs, the roller mounting stud or bracket becomes bent, causing misalignment. If this misalignment is not corrected, the belt will not last long.
- The play on the pulleys is checked. Rotate the roller and make sure that there are no jams or jams. If they are present, there will be severe wear of the bearing, and the generator belt tension roller will need to be replaced. Also carefully inspect the working surface of the plastic pad: there should be no grooves on it. If the surface is uneven, the drive belt tension roller must be replaced.
- If after replacing the belt the hum and squeaking does not disappear, then the problem must be looked for in other elements. The drive of these elements occurs due to belt tension.
Replacement instructions
The procedure for replacing the RG is quite complicated and responsible. If you make a mistake during the steps, this may lead to the strap breaking while the car is moving. Of course, it will be possible to continue driving to the nearest service station or garage, but you will lose not only the money spent on the purchase of the RG, but also your own time. Therefore, think several times before whether you can do everything yourself and whether it is advisable - perhaps it makes sense to simply pay specialists at the service station. But at the same time, you will be sure that everything was done correctly, and if problems arise, you will have someone to file a claim with.
Tools and materials
So, if you decide to replace the cylinder head on an 8-valve engine yourself, below you will find instructions on how to complete this process. In order to do everything yourself, prepare the strap itself. There is one more point here - the purchase of all parts and consumables for repairing an 8- or 16-valve engine must be carried out from representatives of an official dealer. Today the cost of such a RG is around 12-15 dollars or 700-1000 rubles.
conclusions
The generator belt tension roller is an important part, without which the correct functioning of the generator is impossible. At the slightest sign of severe wear, it is necessary to replace the generator belt tension roller. The roller can be found at a parts store. It is also necessary to monitor the remaining elements of the generator design. Replacing the tension roller of the alternator belt should not cause difficulties and can easily be carried out by the car owner himself without contacting a service station. Good luck and easy travels!
Source: auto-gl.ru
We will add only one thing on our own - do not neglect the advice of this article, and seek the service of replacing a spare part or repairing a car only at certified service stations or official dealers, because a malfunction of this part of the car can cause quite a lot of trouble on the road, and consequences afterwards, i.e. To. It's not just the alternator that turns the belt.
Video “Detailed instructions for replacing the RG on a Lada Granta car”
You can learn how to properly replace the strap on the domestic Lada Grant from the video below (the author of the video is MR. BORODA).
On cars of the Lada Granta family with 8-valve engines, an automatic alternator belt tensioner is not pre-installed. Engine modifications are as follows: VAZ-11183, VAZ-21116, VAZ-11186.
You can compensate for the lack of a tensioner in different ways:
- monthly check of the tension level of the converter drive, which is impractical and costly;
- replacing the standard KATEK generator with a Bosch: not every car owner will afford to purchase an imported converter;
- systematic “updating” of the generator bearings: excessive tension of the drive belt, the absence of an automatic tensioner in the design creates the preconditions for premature wear of the bearings;
- set the fastening bolt with a diameter of “6.0” instead of “10.0”, which will increase the free play of the converter by a few millimeters to adjust the tension;
- “makeshift” modification of the standard bracket for the Lada Granta generator;
- replacing the Lada Granta generator bracket with the Kalina bracket.
Each of the above methods has its own advantages and disadvantages. Let's consider the last two options for “modernization” as the most common.
Tensioner device
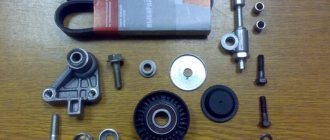
The tensioner design includes the following elements:
- belt;
- video clip;
- bracket;
- connecting bolts and nuts.
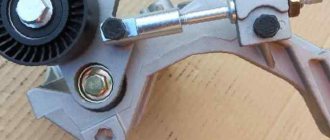
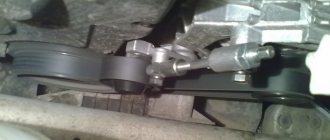
The roller is a bearing with a seating sleeve inside and a plastic coating on the outside. The belt moves along the roller. The roller is mounted on a bracket, which, in turn, is attached to the car engine using bolts and nuts.
There are two modifications of the tensioner:
- Eccentric. Includes bearing, plastic cover and bushing. The bushing has a through hole that is offset from the center. This hole is used to secure the roller to the car engine. To obtain the required belt tension, the eccentric is rotated and then the result is secured with a bolt.
- Bracket. In this modification, the roller is fixedly mounted on a bracket. The structure is attached to the power plant using bolts. To adjust the belt tension, the bracket is moved relative to the engine. This modification is more complicated than the eccentric one, but this does not make it any less reliable.
Some car factories install rollers with a spring bracket in their cars. In this design, the spring independently regulates the belt tension, that is, the unit is self-regulating.
Whatever device the belt tensioner has, the list of its main elements remains unchanged.
ATTENTION: The weak point of any tensioner is the bearing, which is constantly under load and wears out quickly. It is recommended to change this element every time the belt is replaced.
Preparatory stage before modifying the Lada Granta generator belt bracket
Necessary tools, materials:
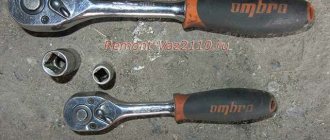
- a set of car keys, sockets, ratchet, screwdriver with a flat, cross-shaped bit;
- rags;
- liquid for removing deposits and rust WD-40;
- hammer, drill, metal drill bit for “6”, “8”, “10”;
- graphite-based lubricant;
- additional lighting, since visibility in the engine compartment is limited;
- metal mounting;
- torque wrench;
- bolt with a diameter of "8", length 100 - 110 mm.
Inspection and assessment of probable faults
Before changing the necessary part, for preventive purposes or making a full repair, it is worth first inspecting and also finding out the probable cause that caused the malfunction:
- assess the conditions under which the entire generator charging chain operated;
- find out the original source of the malfunction: bearing, belt or other components whose malfunction affected the repair;
- check the probable degree of wear of all working parts;
- pay attention to the marks from the belt on the guide and tension rollers; if there are any, it means that the belt displacement was caused by a broken bearing;
- identify probable causes that led to contamination of work surfaces that need to be replaced.
Since even replacing the alternator belt or tensioner pulley will not always bring the desired result, the reason for the failure may lie in something else. For example, if a removed belt has traces of antifreeze or oil, it is necessary to find the source from which these fluids get onto the belt and carry out the required repairs accordingly.
Step-by-step instructions for removing the generator from a Lada Granta car
Before altering the mount, we remove the converter from its standard place in the engine compartment. To do this, perform the following steps:
- We place the car within the perimeter of the repair area, provide safety measures, and secure the rear row of wheels with wheel chocks. Additionally, squeeze the parking brake lever.
- Open the hood and disconnect the terminals from the battery to prevent a short circuit in the circuit.
Accumulator battery
- We unscrew 6 bolts under the bottom of the car and temporarily remove the oil pan protection.
- Remove the protective cap and terminals from the contact board on the converter.
Removes clamps
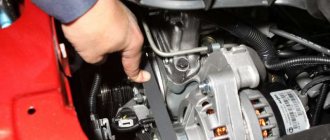
- We unscrew the nut of the upper fastening (key set to “13”), and use the mounting tool to move the converter to the side. Unscrew the lower mounting bolt.
Unscrew the nut and bolt
- We remove the generator belt from the pulleys.
- We remove the converter assembly and fix it on the surface of the workbench.
Removing the converter
Parts diagram
Rotor and stator repair
First of all, you will need to examine the stator and rotor windings for breaks. To do this, you do not need to remove the generator from the car. It will be necessary to dismantle only its diode bridge. This will require a two- or three-jaw puller, as well as an artificial frame borrowed from a cup puller.
Carefully straighten the wires in the winding and remove the diode bridge. To avoid getting confused during reassembly, you need to mark with a marker the placement points of the front and rear casing of the generator. Using a size 8 socket wrench, unscrew the 4 bolts that hold both trims in place. Carefully remove the front trim using a flathead screwdriver. After this, slide the rear casing and remove the connecting bolt along with the insulating washer, as well as the plastic plug from the bearing.
To check you will need an ohmmeter tester. Having connected its plugs to the rotor rings, check the winding for breaks. In this case, the winding resistance should be 5-10 Ohms. After this, connect the tester plugs to any of the slip rings and to the rotor. Now you need to check the winding for short breaks to ground. If the winding has no breaks and is working correctly, the tester will show the highest resistance value.
In the same way, it is necessary to connect the plugs to the stator and check the winding for breaks. If they are absent and the part is working properly, the tester will show extremely low electrical resistance. When checking for short-term ground breaks, the tester should also show the highest electrical resistance value.
To ensure proper operation of the rectifier unit, its diodes must transmit electric current in only one direction. If they conduct electricity in 2 directions or do not conduct it at all, then the diodes have become unusable and need to be replaced.
Attach the tester plug with a negative value to the diode itself, and the plug with a positive value to the part body or plate in which it is located. A functioning diode will not conduct electric current, and the tester will show the highest resistance value. After this, you will need to swap the plugs and perform the test again. If the diode is working correctly, the tester will show electrical resistance. In the same way, it is necessary to test the remaining diodes in the diode bridge circuit.
Sequence of actions when modifying the generator bracket with your own hands on the Lada Grant
- We grind 2 - 3 cm on each side of the generator mount. It is better to do this in a stationary vice using drilling equipment. Due to the lack of equipment, we use a grinding machine, which is known as a “grinder”.
Sew 2-3cm on each side
- Using a drill with a metal drill (at “8”), we drill out the standard hole on the mount, making the stroke length for the bolt 1.5 - 2.0 cm.
Drill out the standard ring
- Using a grinder, we partially grind down the stiffening rib on the mount so that it does not interfere with the free movement of the converter.
- We cut out a corner of metal 40 mm long and 30 - 40 mm thick, and bend the edge. It turned out to be something like the letter “G”. One end is attached to the bracket, on the other we weld a nut to “10”.
Corner letter G
- We assemble the structural elements, screw in the bolt to tension the generator drive belt.
- We install the converter and the bracket without tensioner in its original place.
- We move the rocker to the third gear position, put on the drive belt, and turn the crankshaft pulley by hand.
- Check the degree of belt tension.
Belt tension level
At home, we check the tension level of the generator drive belt as follows. Using your finger, press on the section of the belt between the crankshaft pulley and the tensioner. The belt bends by 10 - 12 mm, no more. Tighten the fastening (tension) as necessary.
Finally, we start the engine and check the functionality of the system.
—>Auto parts and service stations —>
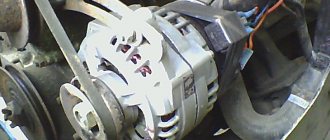
The generator is the most important element of the vehicle's electrical supply system. It is driven by the crankshaft of the power plant. This ensures uninterrupted operation during operation of the installation. A belt is used as a drive. For this purpose, the design provides a tension roller for the generator belt. In this type of design the generator is not movable. Adjustment is carried out by moving the roller.
Replacing the generator bracket with tensioner on the Lada Grant from Lada Kalina
Despite the fact that the previous method is the most economical, it is time-consuming.
Many drivers prefer to pay an additional 350-450 rubles and purchase a ready-made kit for installing a bracket from the Lada Kalina to the Lada Granta.
The sequence of actions is as follows:
- After dismantling the converter from its standard place in the engine compartment, we proceed to install the bracket from the Lada Kalina.
Original equipment of the modernized mount:
- belt;
- tensioner roller;
- bracket;
- axis to “10”;
- tensioner
- We unscrew the three mounting screws from the old converter, remove the old bracket, install and screw the new one.
- We fix the structure in its regular place, screw the three nuts to “13”.
- We activate the rocker to the third gear position.
- We put on the generator belt, turn the generator pulley by hand until the belt fits into the groove grooves.
We start the engine, check the charging and the LED indication on the dashboard.
Where is the standard generator located on a Lada Granta car?
Regardless of the modification of the Lada Grant, the converter is installed in the engine compartment on the left side, closer to the radiator of the cooling system.
The design of the Lada Granta’s engine compartment is not “entirely successful”; craftsmen have difficulty dismantling the equipment.
Engine compartment
The difference between replacing the generator bracket in 16 and 8 valve engines
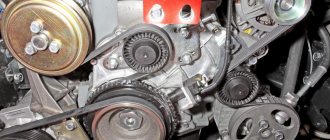
The brackets are identical in shape and number of fasteners. The difference is the absence of an automatic tensioner in the 8-valve engine modification.
The Lada Granta generator bracket with air conditioning is identical to the 16-valve modification of the engine.
Difference between belts of 16 and 8 valve engines
For Lada Granta models, an alternator belt with the following markings is used:
- 8 valves: 1118-1041020-07: 6РК 823, length 823 mm, thickness 3.0 mm;
- 16 valves: 6PK1123 with air conditioning, 6PK1113 with power steering, without air conditioning.
Signs of generator malfunction, methods for eliminating them
| Sign | Cause/remedies |
| The control diode on the console does not light up when the engine starts | The power circuit is broken in the section from the battery to the generator. Checking the continuity of the circuit circuit. |
| The control diode does not go out after starting the power unit | The belt tension is weak, insufficient to generate current. Check the voltage in the circuit. |
| The brushes are badly worn, the diode bridge has become unusable. We measure the output voltage with a tester. We replace worn elements as necessary. | |
| Shorts to ground | The cable insulation is damaged. Check the insulating coating. |
| The output voltage from the converter is below 14 - 16V | The contact terminals have oxidized. Clean with a metal brush, sandpaper, or file. Replace with new ones as needed. |
| Replace the battery. | |
| Insufficient drive belt tension. Adjust the tension. | |
| The diode bridge has become unusable. Install a new one. | |
| The battery is not receiving charge from the converter | Replacing the rectifier bridge. |
| Damage to the power cable. Replacing wiring. | |
| The voltage in the circuit drops randomly | The terminal connections are weak, the clamps are oxidized. Tighten the terminals, replace with new ones. |
Generator disassembly and repair
Bracket for mounting the unit
Repair is carried out by dismantling the generator and voltage controller. Using a flat screwdriver, you need to hook the tips of the stator wires and slightly pull them out of the spring connections of the diode bridge of the generator. Using a 8mm spanner you need to unscrew the 3 bolts that secure the diode bridge. In this case, be sure to write down or remember the layout of the insulating and support washers. After this, you need to unscrew the screw of the connecting bolt using a 12mm wrench.
To determine the technical suitability of the rear bearing, you need to lightly shake it and twist the outer ring. If the bearing rotates easily, without stopping, and there is no noise or large play, then everything is fine with it. If at least one of the above deficiencies is detected, you will need to replace the bearing with a new one.
Proceed to dismantle the Kalina generator bracket. Having marked the required placement points with a marker, pick up the stator with a screwdriver and carefully remove it from the rear casing of the generator. The generator bracket includes a bearing, the technical suitability of which must be checked using the same method as described above. If any faults are found, it must be replaced.
The automobile plant does not recommend changing the front rotor bearing, since it is rolled into the generator casing. Nevertheless, replacing it would be the most expedient solution, since the price of a new generator significantly exceeds the cost of the bearing. If you need to change the front bearing, you need to unscrew the nut fastener using a 24mm socket wrench. In this case, you will need to support the pulley with a service wrench (pliers). Next, you need to dismantle the pulley with the spring and washers, and then remove the spacer plug. Carefully press the rotor out of the front bearing using a rubber hammer. To do this, you will need to put the pulley fastener on the rotor shaft of the Kalina generator bracket at the same level as the end.
The front casing of the generator must be tightly clamped in a vice. Select the most suitable frame from the cup puller set and carefully displace the bearing, which is located in the landing opening of the front trim. Clamp the rotor and soft spacers in a vice and force the rear bearing off the shaft using a multi-function puller of the correct size.
2302-6-01-03_cr
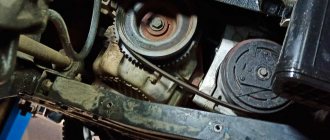
So far, we have shown operations that will allow, if necessary, to change the tension of the accessory drive belt. But to replace the belt, we have to dismantle the right support of the power unit, since it passes through the belt.
From the bottom of the car, remove the middle and right mudguards of the engine compartment. You can see how to do this in the article “Replacing Lada Granta coolant”. Next, we should remove the fender liner of the right front wheel or, having freed all the fastenings of the fender liner in the front and middle parts, bend the fender liner by the brake disc of the wheel.
We hang and remove the right front wheel and release the fender liner fastenings according to the diagram.
Snapshot53252323
In order to improve visual control, remove the plastic engine casing. To check the condition of the belt, engage fifth gear in a manual transmission, push the car (or rotate the suspended wheel) and inspect the belt along its entire length. On a car with an automatic transmission, remove the right mudguard of the engine compartment and, by rotating the crankshaft by the bolt of the auxiliary drive pulley, check the condition of the belt.
With any of the gearboxes, the following method is also possible: apply chalk marks to sections of the belt and, turning on the starter for short periods of time, turn the crankshaft at small angles. We inspect the belt along its entire length, checking the areas covered by the marks.
Most common faults
During operation, the surface of the roller is constantly in contact with the generator belt. In addition, it is in continuous rotation, which places additional demands on the reliability of its bearings. The tensioner bracket is also subject to heavy load. Hence the main problems:
- Bearing wear. It simply runs out of service life or becomes unusable due to dust and dirt getting on it.
- Damage to the work surface. As already mentioned, the roller itself is made of plastic. Despite its high wear resistance, it often cannot withstand loads. This manifests itself in the form of scratches and chips, which quickly render the alternator belt unusable.
- Misalignment. This means that the belt and tensioner are at a certain angle to each other. Alignment can be disrupted in both the horizontal and vertical planes (due to the curvature of the bracket). This always causes rapid wear of the belt and the roller itself.
Often the cause of the malfunction is the driver himself. When trying to make adjustments, he forgets or does not loosen the locknut enough. As a result, the hexagon of the stud breaks off, and the Kalina generator belt tensioner fails.
