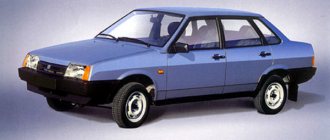
If the car is not able to stop in time, there can be no talk of any safe driving. This rule applies to both trucks and cars. VAZ 2107 is no exception in this sense. The brakes of this car have never been famous for their reliability and have always caused drivers a lot of problems. And the most vulnerable point of the brakes on the “seven” have always been the brake discs, the service life of which was very short. Can a car owner change these discs himself? Yes maybe. Let's try to figure out how this is done.
- Types of brake discs
About materials for discs - Design features of brake discs
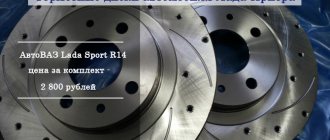
- Allied Nippon wheels
- Sequence of work
- Sequencing
PURPOSE AND PRINCIPLE OF OPERATION OF BRAKE DISCS ON THE VAZ 2107
The VAZ 2107 has two brake systems: main and additional. The main one allows the driver to reduce the speed of the car while driving. An additional system allows you to lock the rear wheels of the car after it has stopped.
The brake disc is the most important part of the VAZ 2107 braking system; without it, normal operation of the car is impossible
Brake discs are part of the main braking system. They are located on the front axle of the VAZ 2107 and rotate with it. A caliper with brake pads and hydraulic cylinders is attached to the brake discs. As soon as the driver decides to brake and presses the pedal, brake fluid begins to flow into the hydraulic cylinders through special hoses. Under its influence, pistons move out of the cylinders, pressing on the brake pads. And the pads, in turn, compress the brake disc on both sides. The disk, and with it the front wheels of the VAZ 2107, begin to rotate more slowly and the car brakes smoothly.
BRAKE DISC MANUFACTURERS
As a rule, car owners, having discovered the wear of one or two brake discs, are in no hurry to replace them with standard VAZ ones, remembering their mediocre quality. But since the spare parts market is now literally flooded with discs from various manufacturers, a novice driver becomes completely confused by such abundance. Which companies should you prefer? Let's list the most popular ones.
ALLIED NIPPON WHEELS
Allied Nippon is a manufacturer very well known in the domestic auto parts market. This company specializes mainly in brake pads and clutch discs, but also produces brake discs that are suitable for “sevens”.
Allied Nippon wheels have always been distinguished by the optimal combination of price and quality
Allied Nippon wheels are made from high quality cast iron and undergo mandatory three-time sizing and balancing testing. The company produces both ventilated and non-ventilated discs, which are almost always supplied complete with brake pads. The manufacturer guarantees that the brake systems it supplies will cover at least 50 thousand km before the first failure. And finally, the price for Allied Nippon wheels is more than affordable, starting at 2,200 rubles per set.
ASP DISCS
The ASP company is widely known not only in Europe, but also among domestic owners of VAZ “classics”. The Russian market offers mainly non-ventilated brake discs, which are also suitable for the VAZ 2107.
ASP discs have the highest wear resistance and reasonable price
ASP discs are processed on high-precision machines and are triple checked for balancing and dimensions. They have the highest wear resistance: the manufacturer guarantees that they are able to travel at least 100 thousand km before the first breakdown. In fact, the only drawback of ASP disks is their considerable weight, but this drawback is more than compensated for by the attractive price, which starts at 1,500 rubles per set.
ALNAS WHEELS
Another large manufacturer of high-quality brake discs is Alnas. It produces mainly ventilated discs with a wide variety of perforations. Recently, the range has been expanded with radial discs with different notches. Alnas products are in demand primarily among drivers who tune their cars and among drivers who prefer an aggressive driving style. New discs can travel at least 80 thousand km before the first failure. They are lightweight, and the price, given their sporting purpose, is steep: the cheapest set will cost the driver 2,900 rubles.
Alnas wheels are designed for drivers with an aggressive driving style
These are, perhaps, all the major manufacturers of brake discs, whose products the owner of the “Seven” should take a closer look at. Of course, there are a lot of smaller companies that are very aggressively promoting their wheels on the auto parts market. But the quality of their products often leaves much to be desired, so there is no point in mentioning them in this article.
So which wheels should a novice driver choose?
When choosing wheels, you should consider two things: your driving style and your wallet size. If the driver prefers aggressive driving, reliable brakes and is not short on money, then the optimal choice would be Alnas products. If a person is used to driving carefully, and the main criterion for him is durability and reliability, it is worth purchasing ASP wheels. And finally, if money is short, but high-quality ventilated discs are still needed, the last option remains - Allied Nippon.
How to replace brake discs on a VAZ-2107 with your own hands
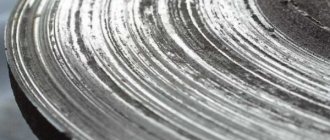
Brake discs are replaced when the disc thickness is less than 9 mm, or if there are deep scratches or cracks on its working surface, as well as if increased lateral runout and vibration occur during braking.
The latter indicates warping and deformation of the disc, an indirect sign of which is arcuate wear of the pads with working mechanisms. Brake discs, like pads, are replaced in pairs on both sides. It is also advisable to combine the replacement of pads with the replacement of discs.
For work we will need: - New brake discs - A spare set of guide pins, caliper mounting bolts, locking plates - A 7 (8, 12) and 17 socket - A mounting blade or a large screwdriver, a hammer, a wooden block - A wire brush, emery paper - Copper or graphite grease - WD-shka or other analogue - Gas burner
So, we hang and remove the front wheel, securely fixing the car, press the pads off the brake disc or remove them, having previously marked the location.
We bend the locking plates of the two bolts securing the caliper to the steering knuckle. We turn out the bolts and remove the plates.
We remove the caliper and move it to the side, hang it or place it on a block so that it does not hang on the brake hose.
At the same time, you should avoid accidentally pressing the brake pedal in order to prevent the pistons from being squeezed out of the brake cylinders.
We clean the pin heads and treat them with “liquid key”. Screw one of the wheel mounting bolts into the hub. While holding it from turning with a spatula, unscrew the two guide pins and turn out the bolt.
If the pins do not give in, they can be heated with a gas burner or other method.
Using a spatula and a hammer, carefully remove the spacer ring. And then carefully knock the brake disc out of its seat.
Before installing new parts, we carefully clean the mating surfaces from rust and scale, since the slightest particle caught between the parts can cause disk beating and vibration.
During assembly, to prevent corrosion, you can lubricate the adjacent surfaces of the parts and the threads of the pins with copper or graphite grease, just so that it does not get on the working surfaces.
We put the new disk in place, if there is protective lubricant, first wash it off from the working surfaces.
Then we install the spacer ring and screw in the guide pins, tapping the disc through the block.
We install the caliper in place, replace the bolts with “licked” edges and used locking plates, if necessary, with new ones. The tightening torque of the bolts is 3.0-3.7 kgf*m. Don't forget to bend the locking plates.
It should be taken into account that at first, while grinding the pads to the disc, the effectiveness of the brakes will be reduced.
A short video of the process:
Good luck on the roads!
What you need to switch to disc brakes
The standard kit for converting from drum brakes to disc brakes includes:
- 2 brake discs;
- 2 brake calipers (when purchasing used spare parts, it is advisable to immediately inspect the working area of the piston for scoring (there should not be any); before installation, the caliper must be serviced by replacing the boot and lubricating the areas under the guides);
- 2 brake hoses, as well as brackets and fasteners for their fixation;
- fittings, sealing copper washers, bypass bolts;
- 2 brake shields, which may have places for mounting calipers. If these are not provided, a plan washer is needed. Installing the anchor plate may require longer caliper bolts. If it is not possible to purchase an element, the plan washer will have to be sharpened according to an individual drawing;
- parking brake mechanism (the design of the components depends on the type of brake system you choose);
- The handbrake cable is overwhelmingly not suitable, so it also needs to be replaced.
Of course, the list may not be complete. If you want to change from drum brakes to disc brakes, carefully study the parameters of your system.
DIY installation example
To give a clearer idea of the transition to ZDT, let's look at some of the nuances that the owner of a Daewoo Lanos will encounter. On this car, the drums can be replaced with rear brakes from OVA or Opel Astra G. If the choice falls on Astra, then the question immediately arises about the hubs. Lanos in the 1.5SE configuration needs to replace the unit with a non-separable version from Astra G, Opel Meriva, Nexia or Lanos 1.6SX. As you can guess, 1.6SX models, which have ABS installed from the factory, are standardly equipped with such hub assemblies, so the item about replacing the hubs can be crossed out.
Parts from the Hyundai Sonata FN can be used as new cables coming from the main adjustment mechanism. To properly lay the brake line, you need to machine 2 small bushings that will secure the cable in the standard holes. Otherwise, replacing drum brakes with disc brakes is carried out according to the above-described list of elements. After completing the work, the system must be bled. As a result, after all the manipulations, we get a car that brakes much better than its counterparts with drum mechanisms.
Brake discs on the VAZ 2107: selection and replacement
The VAZ 2107 uses front disc brakes and drum brakes at the rear. During operation, consumables are erased. Therefore, during maintenance there is a need to replace discs and pads. At the same time, it is important not only to correctly install new auto parts, but also to follow the recommendations of experienced drivers when choosing products.
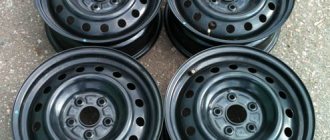
The original front brake discs have article number 2101-3501070. Their price ranges from 800 to 1500 rubles. Among drivers, these original wheels are considered obsolete, since they were designed for the VAZ 2101 car.
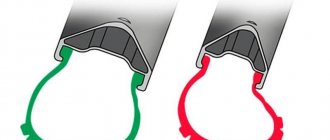
Brake discs 2101-3501070 are non-ventilated. Consumables tend to heat up quickly and take a long time to cool down. They were created taking into account the movement of a car in thin city traffic, so they perform mediocrely on roads where sharp, frequent braking is required.
Overheating of the disk due to lack of ventilation leads to a deterioration in the intensity of stopping the car. Under unfavorable conditions, the consumable may become deformed or experience mechanical damage. An overheated disk requires replacement before its allotted service life, that is, when its thickness has not yet reached 9 mm.
The heating of the original non-ventilated disc does not leave its mark on the remaining elements of the braking system. Soot and melting appear on the pads, which cause a deterioration in the stopping power of the car and reduce the service life of the friction lining. The brake fluid also overheats. It may boil, accompanied by the appearance of air pockets in the circuit. Because of this, the brake pedal becomes weak and there is a risk of getting into an emergency situation.
Original brake discs 2101-3501070 can be installed if the car owner prefers a calm driving style and the car is not expected to drive on long descents. Otherwise, it is better to install ventilated discs from third-party manufacturers.
Lada 2106 › Logbook › Installation of an HTD on a classic 2101-2107
Well, I don’t think it makes sense to talk about the advantages of disc brakes and why they are needed) Personally, I was not happy with the “classic” brakes from the beginning! When studying the issue (what and how to install), the choice fell on the front brakes of the VAZ 2108, for my purposes they are enough for the eyes!
I will provide a list of spare parts and modifications that will be required for installation at the end of the logbook!
Our initial task is to remove the axle shafts (there won’t be any problems with this; we know how to break them))
Remove the drum, unscrew it and remove the axle shaft!
As you can see in the photo, one drum turned out to have character, but an angle grinder and a sledgehammer have never broken anything like that!
Now we have removed everything (rear brakes, brake pipes along the tee, axle shafts, handbrake (dismantled the whole one, including the sales handle)) from the entire list we only need axle shafts!
Well, now the most difficult thing for most users)) is turning the axle shaft) The problem is that the brake. The disc just won't fit on the axle shaft!
My groove is a whole story that lasted 2 weeks) The first turner broke 2 cutters and, to put it mildly, sent me away) the second turner just sharpened for 2 weeks and did not sharpen them to the end, and the third turned out to be a Soviet-trained old man and did everything for 200 rubles right in front of me!
If you have a good turner (I only got one later))) then there are no problems at all!
I immediately changed the bearings, seals and made studs (the right thing). I made the studs as follows: I bought old-style 2108 head bolts and nuts from the Niva, all 8 pieces each!
Blank for hairpins! Leave everything as it should be, scald it, saw it off!
This is what the finished axle shaft looks like
We've done everything with the axle shafts, now we need a faceplate! There are a lot of drawings on the Internet for different calipers, I just went to the southern port and bought
Well, all the spare parts are ready, and you can start assembling!
We wash everything and change the oil seal!
We put on the faceplate and screw the axle shaft to its rightful place! I used standard bolts (some are missing them)
We install the brake disc, caliper and make sure that the disc does not rest against the caliper. My disc rested against the caliper and I had to make a 5mm spacer (I made them from standard spacers for the front wheels)
They machined it in the same way as the axle shaft
Simple assembly follows
Install the bracket and caliper
We use the following pipes - on the left side we put the pipe from the front brakes of the classic (which is short, between the cylinders) and on the right we put the pipe that goes to the left side (you can see them in the photo) and standard hoses from 2108
Here are the tubes and hoses. I bent the tubes where they needed to be and attached them to the bridge with plastic ties! Let's bleed the brakes and we're ready to have an HDT on the classic!
List of required spare parts: -Pipes (seen in the photo) -Hoses (stock before 2108) -Calipers 2108 -Disks (stock 2108) -Padders (Ferodo 2108) -Wheel studs -Plant washer (ABTechnic) -Mound axle shafts -5mm spacers (turned -Well, a bunch of small things (brake fluid, gearbox oil, repair kits for axle shafts, bolts and other crap) Budget is about 5 thousand rubles, you can do it much cheaper!
The problems I encountered: 1) It took a long time to sharpen the axle shafts 2) The disk rested against the bracket (I was making a spacer)
Ideally, buy a second set of axle shafts and swap everything in 1 day! This system is without a handbrake (I use the car every day, there are no problems) Question about the balance of the brakes - yes, the rear brakes really do over-braking (set the adjuster or swap of the front brakes to 2112)
Article number and cost of good front brake discs for VAZ 2107 from third-party manufacturers
The best alternative options for original discs that do not require alteration of the brake mechanism are shown in the table below.
Table - Good analogues of the original front discs
| Manufacturer | vendor code | Approximate cost, ruble |
| Ferodo | DDF035 | 900-1300 |
| Remsa | 615600 | 1150-1500 |
| Brembo | 08255924 | 1200-1500 |
| ABS | 15025 | 720-950 |
| Road House | 615600 | 800-1100 |
Required tools and materials for replacing front discs
To successfully replace brake discs on a VAZ 2107, you will need a list of tools, which are presented in the table below.
Table - Tools and materials required to replace front discs
| Tools and materials | Note |
| open-end wrench | "at 7", "at 17" |
| Socket or socket wrench | "at 17" |
| Mounting blade | Can be replaced with a piece of durable reinforcement or other metal rod |
| Jack | Not required with a lift |
| Screwdriver | Durable, straight, flat blade |
| Ratchet | With a 17" head |
| Balloon wrench | To remove the wheel |
| Copper grease | It is applied to the seat of the brake disc to prevent it from sticking. Also, applying copper grease helps prevent corrosion. |
| Wire brush | For cleaning fasteners and working surfaces from dirt |
| Penetrating lubricant | To reduce the risk of damage to the brake mechanism when unscrewing the fasteners, as well as to facilitate the process of dismantling the disc. |
| Hammer | To remove stuck consumables from their seat |
| Spacer | Made of wood, thick plastic or soft metal |
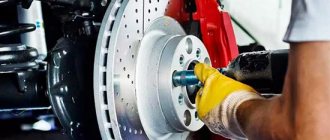
Replacing front discs on a VAZ 2107
Replacing the front brake discs on a VAZ 2107 car is carried out according to the step-by-step instructions below.
- Put the car on the handbrake.
- Secure the rear axle with wheel chocks.
- Jack up the front of the car.
- Unscrew the wheel mounts and dismantle them.
- Unscrew the brake hose mounting bracket.
The process of unscrewing the bolt that holds the brake hose bracket
- Remove the brake hose from the bracket. Some car owners recommend removing the tube and plugging it, for example, using a bolt of a suitable diameter. This action will allow you to completely remove the caliper, without the need to hang it. It should be taken into account that there is a risk of airing the circuit and therefore the process of bleeding the brakes becomes inevitable.
Brake line hose
- Press in the pistons.
Piston indentation
- Using a flathead screwdriver, unbend the locking plates that secure the caliper mounting bolts.
Bending the locking plates
- Unscrew the caliper mount.
Unscrewing fasteners
- Remove the caliper.
Removing the caliper
- Unscrew the two pins that secure the brake disc. If it turns, you need to place a mounting bracket or a metal rod, as shown in the photo below.
Unscrewing the pins
- Remove the spacer ring.
Removing the spacer ring
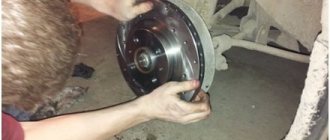
- Using a hammer, remove the disc from its seat.
Using a hammer to remove a disc
- Remove the disc.
Disk removal process
- Install a new consumable and assemble everything in the reverse order of removal.
- Check the operation of the brakes.
Instructions for installing the HCD on VAZ 2101 - 2107
The package includes:
- Left caliper VAZ 2108 – 1 pc.
- Right caliper VAZ 2108 – 1 pc.
- Shoe guide VAZ 2108 – 2 pcs.
- Front brake flexible hose – 2 pcs.
- Faceplate – 2 pcs.
- Distance washer – 2 pcs.
- Brake disc boot – 2 pcs.
- Half ring – 2 pcs.
- Brake pads Ladasport VAZ 2108 – 1 set.
- Brake disc VAZ 2108 – 2 pcs.
- VAZ 2101 axle shaft, modified – 2 pcs.
Work order.
- Place the car on a level surface.
- We install wheel chocks.
- Loosen the rear wheel mounting bolts.
- We jack up the car, completely unscrew the wheel mounting bolts and remove the wheel from the car.
- Remove the brake drum.
- We turn the axle shaft until the large holes coincide with the two nuts securing the brake shield.
- Using a 17 mm socket wrench with an extension, unscrew the nuts securing the brake shield.
- Turn the axle shaft and unscrew the remaining 2 nuts in the same way.
- We remove the semi-axle from the car. This can be done with a special puller or by securing the wheel with 2 bolts to the axle shaft. With a sharp movement towards ourselves, we pull out the axle bearing from the flange of the rear axle beam.
- After unscrewing the bolts, remove the wheel.
- We take out the axle shaft.
- Remove the brake pads.
- Using a 10mm wrench, unscrew the brake pipe from the back of the brake shield.
- Remove the brake shield completely.
- We inspect the axle shaft seal and replace it if necessary.
- Take the modified axle shaft from the delivery kit.
- Install a half ring between the bearing and the oil reflective shield.
- Put the faceplate on and orient it so that the holes on the faceplate and the oil deflector plate line up.
- Place the brake disc boot on the rear axle beam.
- Install the axle shaft with the faceplate into the rear axle beam. Attention! The holes for attaching the brake mechanisms should be oriented so that the brake mechanism is located in front (in front of the bridge), the holes should be directed downward, as in the photo below.
- Tighten the 4 axle nuts.
- Attach the brake disc boot to the faceplate.
- Place the spacer on the axle shaft. Orient the washer so that the holes in the washer and the axle shaft line up.
- Install the brake disc and secure it to the axle flange.
- Install the caliper assembly onto the faceplate and tighten it with two M10 bolts. Attention. The fitting on the brake cylinder should point upward.
- Connect the brake hose to the brake pipe.
- Secure the brake hose with plastic ties. Secure in such a way that the hose does not have constant contact with other parts.
- Install the wheel. To secure the wheel, you must use extended bolts. Or replace the bolts with studs.
- Lower the car.
- Tighten the wheel bolts.
- Repeat steps 4-27 on the second side.
- Check the oil level in the rear axle gearbox. Add oil if necessary.
- Bleed the brake system.
Review of rear brakes on the VAZ 2107
On the rear axle of the VAZ 2107, drum brakes are used exclusively. Therefore, there are no original disks or their analogues for the “seven”. Some car owners change the design of the rear brakes, but this action is extremely rarely justified.
Making design changes to the brake system is illegal, and also, as a result of inept installation, leads to loss of control over the control of the machine while it is stopping.
Tuning rear disc brakes VAZ 2107
What should you prepare for?
Using the example of installing rear disc brakes on a UAZ, you can see that such a design change requires a large number of strictly individual solutions.
In the worst case scenario, you yourself need to take measurements of some components of the rear brake system; some of the information can be found by the vehicle’s VIN code and original spare parts catalogues. Having the necessary measurements, all that remains is to select standard disc brakes from another car. Some elements will have to be selected empirically in an auto parts store, at a car dismantling station, or even ordered from a turner. There are easier ways to replace drums. Judging by the reviews, not a single driver who has replaced drum mechanisms with disc brakes regrets the time and money spent.