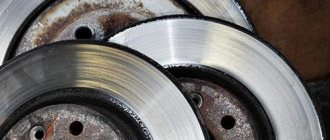
Rear brakes on cars of the Lada Vesta family are of two types - disc and drum, respectively, and their replacement will differ from each other. Disc brakes are installed from the factory on models with a 1.8-liter engine, while other trims are equipped with drum brakes. AvtoVAZ explains this by saying that for a Lada Vesta with a 1.6-liter engine (106 horsepower), a drum brake system will be sufficient, and such a move, in turn, will reduce the final price of the product. It is worth noting that, if desired, the brake system can be replaced and discs installed instead of drums, however, such tuning will be a waste of money and will only bring moral satisfaction to the owner.
Front brake discs
Despite the fact that on the SV Cross version the wheels are installed with a larger diameter than on the sedan or SV, according to the catalogues, the wheels have the same number.
First, let's get acquainted with the parameters of the front brake discs; they are especially relevant when selecting analogues, since the specified compatibility is not always accurate; some discs may either not be suitable or need some modification. Therefore, it would be a good idea to compare the parameters in the catalog when ordering, or on the packaging when purchasing.
| Disk option | Meaning |
| Type | Ventilated |
| Thickness | 22 |
| Minimum thickness | 19.8 |
| External diameter | 258 |
| D location of mounting holes | 100 |
| Number of mounting holes | 4 |
| Bolt pattern | 100*4 |
| D centering | 61 |
| Height | 44 |
| D mounting holes | 13.5 |
Original
The original spare part has article number 8450031577 . Users are accustomed to the fact that brake discs are usually sold in pairs, however, in this case, most often you can find them on sale individually. One original brake disc on the front axle will cost approximately 4 thousand rubles.
Analogs
Analogues are installed for three reasons: when it is not possible to purchase the original, when you want to save money, or if you want to purchase discs with greater efficiency and an increased resource. Among analogues, users note the following options; they are shown in the table.
| Name | vendor code | Estimated cost per pair (rubles) |
| Renault | 7701207795 | 7000 |
| Swag | 60924165 | 4000 |
| NF | NF1699131 | 3000 |
Discs are a good alternative
On the Lada Vesta sedan, rear disc brakes will be installed in three cases:
- If it is a Vesta Sport sedan;
- If we are talking about a concept;
- If the car was prepared for WTCC racing, and the preparation was carried out by LADA Sport.
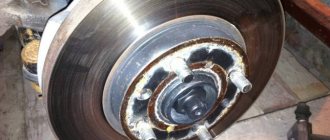
Photos for each case are presented below.
It turns out that you can install disks
WTCC sports cars do not have ABS systems, and in general we are not talking about road cars. The first two cases are closer to reality. Conclusion: you can install disks, the question is why.
Rear brake discs
The table below shows the parameters of the rear disk.
| Disk option | Meaning |
| Type | Hollow |
| Thickness | 11 |
| Minimum thickness | 9 |
| External diameter | 260 |
| D location of mounting holes | 100 |
| Number of mounting holes | 4 |
| Bolt pattern | 100*4 |
| D centering | 66 |
| Height | 45.7 |
| D mounting holes | 13 |
Original
The original rear brake discs have part number 8450031131 . Discs are also sold individually rather than in pairs. They cost less than the front one and will cost about 3-3.5 thousand rubles per disc.
Analogs
The table shows analogs of disks that users most often respond positively to, and they also cost much less than the original.
| Name | vendor code | Estimated cost per pair (rubles) |
| Valeo | 297764 | 2000 |
| Jurid | 561997 jc | 2000 |
| N.K. | 202264 | 1500 |
Most owners of these cars note that it is best to use original discs, as they cause fewer problems and work efficiently.
Safety
The new Lada Vesta is equipped with an adaptive system that can facilitate the braking process. The built-in electronics are configured to detect the speed and force of the driver pressing the pedal, due to which it instantly reacts and speeds up the stopping of the car.
Also, the 2015 Lada Vesta has a built-in electronic force distribution system. Its work begins at a time when the braking forces of the rear and front wheels exceed the norm. At such moments, the system begins to redistribute the load, due to which driving continues without skidding and other problems that may arise while driving.
According to the presented characteristics, the new Lada also has a stability control system. It performs the following actions:
- braking certain wheels depending on the situation,
- change in torque
- redirection of the front wheels.
Thanks to this, when turning, the new Lada Vesta does not begin to move away from the trajectory due to the braking of the rear inner wheel. All this ensures a high level of driving safety, which distinguishes the car from previous versions. Also, the built-in electronics allow you to maintain good vehicle controllability.
More details about Lada “Vesta” cars
Replacement procedure
Briefly described, the procedure for replacing the front disc is as follows:
- the wheel is removed;
- the brake caliper is loosened and moved to the side;
- the bolts holding the disk are unscrewed;
- the disc is removed from the landing site (often this is difficult, in which case a hammer and WD40 come to the rescue);
- installation and assembly are carried out in reverse order.
The rear brake disc can be changed in almost the same way, however, you will need a special device to remove the disc from the hub. Its operating principle is simple - the center of the device rests on the axis, and the remaining one exerts pressure on the disk.
You should pay very close attention to the procedure for unscrewing the disk mounting bolt to the hub; it is better to use WD40 to ensure that nothing is damaged. After removal, a new disc is put on and assembly is carried out in the opposite sequence.
Vesta and Grant drums and differences in design
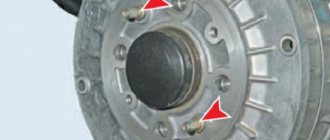
It’s impossible to look at what rear brakes are installed on the Lada Vesta now without being surprised. We remove the wheel and see: there are no fastening elements on the body.
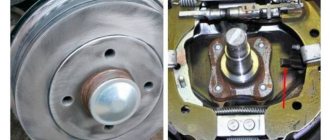
Rear drum, serial Lada Vesta
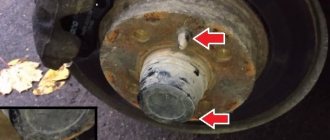
In fact, one element will be hidden under the hood. Break off the cap and everything will become clear.
Protective cap
Nut "30"
You will need a 30mm spanner, but don’t rush! First of all, to remove the drum, you need to do the following:
- Release the handbrake;
- Use a thin screwdriver to rotate the ratchet upward to bring the pads together.
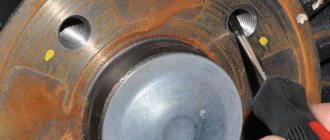
The required hole is one of four
The ratchet in the brake drum regulates the adjustment of the unit as a whole. But there is no need to remember how many revolutions were made. On the contrary, before installation, the adjustment is set to a minimum.
If even rear disc brakes were installed on the Lada Vesta, everything would be simpler than with a “new drum design”. The drums on the Lada Grant are different.
Granta and its rear brakes
Previously, two studs were unscrewed, and that was enough. The ABS sensor was also easy to remove: disconnect the connector and unscrew the screw. On Vesta this option is not provided.
It was decided before the design stage whether to install drum or disc rear brakes on the Lada Vesta. Too many changes have appeared in the design of drums - and they can only be made through painstaking work. This means that the engineers received the “order” in advance.
What can you see inside the drum?
We will not argue with which rear brakes were chosen for installation on the Lada Vesta. The reliability of the drums can be considered good, and with the transition to the new generation it has increased. You can see this for yourself.
New generation, Vesta
Previous generation, Granta
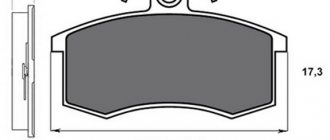
One view of the brake cylinder now inspires respect: the body is covered with ribs and made using casting technology. The design uses a spacer bar, however, only original pads are compatible with it. Therefore, pads from Grants (for example, 2108-3502090) are absolutely not suitable.
A spacer bar is connected to the pads
The bar is compressed if you turn the ratchet upward. And vice versa.
The spacer bar assembly itself is a complex mechanical system. It automatically adjusts the gap between the drum and the pads. But the main thing is that this system also keeps the handbrake mechanism in working order! You can now forget about setting the parking brake.
A few words about the sensor
The ABS sensor appeared on Grants, as well as on the second Kalinas. But it is simply attached there.
Sensor connector and mounting screw
Knowing what rear brakes are currently installed on Lada Vesta, we warn you: do not look for a similar connector on the back of the drum. It is located very inconveniently. It is easier to dismantle without removing or unscrewing anything. The main thing is not to damage the sensor housing (see photo).
ABS sensor plastic housing
The tachometer disk disappeared from the Vesta drum design. And this is great luck! The disc itself was easily damaged when replacing pads.
Above we talked about the speed sensor. Its number in the VAZ catalog is: 8450006893 (right side), 8450006894 (left).
Replacing brake pads yourself
Experience shows that there are practically no things in the world that cannot be done with your own hands. This applies equally to replacing brake pads on a Vesta car. There are several ways to acquire the necessary skills for car repair and maintenance:
- carefully read news, articles or tests.
- Observe the work of a technician performing general maintenance of heating, suspension, brake and transmission systems.
- use the tips posted in this article.
It is recommended to start work after familiarizing yourself with the general design, suspension components, and braking system of your car. This applies equally to the transmission or electrics. The experience of replacing brake pads on your own Lada, acquired today or yesterday, will definitely come in handy tomorrow.
First you need to prepare the required tools - wrenches, sockets, pullers. Next, the car is driven onto an overpass or inspection hole and secured on racks.
From these reviews it is known that standard Vestas are equipped with rear drum brakes; this is not a Lada Xray SUV with increased requirements for stopping the car and disc drives on all 4 wheels.
At the same time, the engineers managed to improve the design: instead of a complicated system for fixing the drum on Vesta, a fastening using a large central nut appeared. So, let's start replacing the pads on a Lada car. The immediate answer to the question is whether it is possible to drive with worn out, cracked, deep-cut linings - no, you cannot. They need to be replaced as quickly as possible.
“Native” VAZ pads are marked as TRW, it is claimed that they are of fairly high quality. After removing the wheel, you will need to remove a special protective cap that hides the drum mounting nut. This can be done with careful movements of a flat, wide screwdriver or a chisel.
Causes and signs of worn pads
The need for replacement or preventative inspection of the pads can be determined by a number of characteristic signs. Malfunctions consist either in low-quality components, causing destruction of the friction material, or in natural wear.
Increased parking brake travel
Since the Lada Vesta is equipped with rear drum brakes, this feature is relevant for it. Normally, the handbrake is raised 3 or 4 clicks. A sign of wear is a rise of 5-7 clicks. When stopping on a hill, the car rolls with the handbrake raised - the handbrake does not hold. The problem may be a stretched cable, but it wouldn't hurt to check the pads.
The wear sensor gives a signal
Vesta is equipped with a brake pad wear sensor in the maximum configuration. When the friction material lining thins to a critical level, the sensor will begin to make a characteristic sound with each braking. On some cars, an electronic type sensor is installed; it signals wear and tear with a warning light on the instrument panel.
Brake fluid level decreases
If the main element of the brake system is in a worn condition, then in order to effectively press it against the disc or caliper drum, the cylinders must exert more force, using more fluid. Accordingly, a decrease in its level can be observed. The volume of brake fluid may decrease if the cylinders are faulty, hoses or lines are damaged.
Long travel brake pedal
As in the previous case, if the pads are worn out enough, then greater effort is required to press them, and accordingly, the pedal stroke increases.
Damage to pads
On disc brakes, mechanical damage (flaking, chips, cracks) can be seen with the naked eye. They can also be found on the disks themselves.
Unevenly worn pads
If increased wear of the friction material is observed on one side relative to the other, this may indicate a failure (jamming) of one of the calipers. If you do not change it, then replacing a set of pads will do nothing - the wear will be just as uneven, and braking will be ineffective and even dangerous, since the car will pull to the side.
Increased braking distance
It is urgent to replace spare parts of the brake system if the car’s braking distance has become unnaturally long. Low braking efficiency may indicate severe wear of the front pads - they wear out much faster than the rear ones, as they take a greater load. Another reason could be a faulty caliper, a leaking system, or low brake fluid levels.
You can determine the degree of wear yourself; it takes no more than an hour. All you need to do is remove the wheels and inspect the friction material. In the case of drums, you need to remove them first. At the same time, you can assess the condition of the drums and discs for wear, cracks and other mechanical damage.
In the most advanced cases, the indicator of critical pad wear will be a grinding noise when braking. This occurs when the lining wears down to the base and the metal plates of the pads begin to rub against the discs or drums. Operating a vehicle with such wear is prohibited, as it can lead to jamming of the drums and serious damage to the discs, which ultimately will require them to be completely replaced.
AvtoVAZ explains which rear brakes are better: disc or drum
02 June 2022 Lada.Online 51 096
AVTOVAZ has opened a new section “Lada Mechanics”, in which it answers questions from fans of Lada cars. The first story is about rear brakes, where a specialist explains why AVTOVAZ still uses brake drums and not discs at the rear.
Reasons to choose rear drum brakes over disc brakes:
1. When braking under the influence of inertia, the front axle is loaded (more pressure on the wheel), and the rear axle is unloaded. For effective braking, disc brakes at the front require less force, and for effective braking at the rear drums, more force is needed. But because The rear axle is unloaded when braking; the front and rear brakes require one single force, which is developed in the hydraulic braking system.
2. Disc brakes are less protected from dirt and dust that fly out from under the front wheels. As a result, the wear of the brake pads increases (the replacement of pads on drum brakes is performed much less frequently). On the first VAZ-2105, disc brakes were initially installed on the rear axle; the pads had to be changed every 500-2000 km.
3. Due to dirt and moisture, the rear disc brakes (RDB) may become “lubricated”. To restore effectiveness they need to be dried.
4. Previously, a “sorcerer” was used in the braking system (distributes forces between the braking mechanisms). He required constant attention, because... if it is not adjusted correctly or is faulty, the car does not brake correctly. Modern Lada cars do not have this problem, because... All of them are equipped with an ABS system, this allowed AVTOVAZ to switch from “mechanics” to “electronics”.
Components
In such a situation, there are 2 scenarios:
- Carry out modifications in accordance with the factory diagram;
- Purchase components from another manufacturer.
IMPORTANT! Unauthorized modifications to the design of the car's braking system, which includes the independent installation of rear disc brakes on the Lada Vesta, can be regarded as a violation of traffic rules. And so, one of the owners of the Lada Vesta in the Exclusive configuration said that he was able to find out from an AvtoVAZ employee exactly what components were needed to replace drum brakes with disc brakes
And so, one of the owners of the Lada Vesta in the Exclusive configuration said that he was able to find out from an AvtoVAZ employee exactly what components were needed to replace drum brakes with disc brakes.
According to an employee of the plant, there is no need to replace the beam or reflash the ABS block, and this significantly speeds up and reduces the cost of the work.
In addition, the picture clearly shows that there is a standard spacer between the axle and the beam and it is to this spacer that the boot is fixed. From the factory, the hub and disc come separately, so after installing the rear disc brakes on the Lada Vesta yourself, there is no need to replace the bearings if you need to replace the disc.
All the components necessary to replace the brakes with your own hands are presented in the table along with the article numbers.
| Position | vendor code |
| Right brake hose mounting bracket | 8450031136 |
| Left brake hose mounting bracket | 8450031137 |
| Rear brake flexible hose assembly – 2 pcs. | 8450031129 |
| Rear brake pads (full set) | 11196-3502089-00 |
| Washer 10 | 00001-000516870 |
| Ball joint fixing bolt | 21080-2904194-00 |
| Washer 10 | 00001-000516870 |
| Ball joint fixing bolt | 21080-2904194-00 |
| Rear left brake (assembly) | 8450031163 |
| Rear right brake (assembly) | 8450031162 |
| Retainer fixing screw | 21080610526810 |
| Rear brake disc | 8450031131 |
| Rear wheel hub (assembly) | 8450031130 |
| Hex Head Screw | 00001-003836021 |
| Right rear brake guard | 8450031686 |
| Left rear brake guard | 8450031687 |
| Bolt M10-1.25-40 | 8450031161 |
| Left rear brake mount | 8450031132 |
| Right rear brake mount | 8450031133 |
The estimated cost of the entire kit for self-installation of rear disc brakes on a Lada Vesta is about 30,000 rubles.
↑ replacing brake pads with your own hands
Experience shows that there are practically no things in the world that cannot be done with your own hands. This applies equally to replacing brake pads on a Vesta car. There are several ways to acquire the necessary skills for car repair and maintenance:
- carefully read news, articles or tests.
- Observe the work of a technician performing general maintenance of heating, suspension, brake and transmission systems.
- use the tips posted in this article.
It is recommended to start work after familiarizing yourself with the general design, suspension components, and braking system of your car. This applies equally to the transmission or electrics. The experience of replacing brake pads on your own Lada, acquired today or yesterday, will definitely come in handy tomorrow.
First you need to prepare the required tools - keys, sockets, pullers. Next, the car is driven onto an overpass or inspection hole and secured on racks. From these reviews it is known that standard Vestas are equipped with rear drum brakes; this is not a Lada Xray SUV with increased requirements for stopping the car and disc drives on all 4 wheels.
At the same time, the engineers managed to improve the design: instead of a complicated system for fixing the drum on Vesta, a fastening using a large central nut appeared. So, let's start replacing the pads on a Lada car. The immediate answer to the question is whether it is possible to drive with worn out, cracked, deep-cut linings - no, you cannot. They need to be replaced as quickly as possible.
“Native” VAZ pads are marked as TRW, it is claimed that they are of fairly high quality. After removing the wheel, you will need to remove a special protective cap that hides the drum mounting nut. This can be done with careful movements of a flat, wide screwdriver or a chisel.
The basis of the brake system of Vesta’s rear wheels is hidden directly under the drum. Before you start replacing the pads and removing the drum, you will need to release the brakes (lower the handbrake) and, inserting a ton screwdriver into one of the mounting holes, turn the ratchet gear to move the linings away from the inner walls. It is not at all necessary to remember the position of the ratchet; after replacing the pads, the system will set it itself.
The pads are replaced regardless of the condition of the transmission or electrical system; all that is required is careful adherence to the step-by-step instructions and a complete set (4 pads). It is strongly recommended not to carry out any actions with the brake pedal during the procedure, in order to avoid the piston coming out of the brake cylinder. Carefully, trying not to damage, remove the ABS sensor, and then the springs.
Nothing should be broken or lost, otherwise simple maintenance will turn into a lengthy repair. The uniqueness of Vesta’s braking system is that it is self-regulating, that is, a special setting of the parking brake is not required at all.
New pads are installed in the same way as the dismantled ones; at the same time, it’s a good idea to clean the surface of the cylinder from dirt and rust. To tighten the fastening nut, you will need a special wrench to apply the required force not 05, but 175 Nm. Today, almost all instruments are equipped with a ratchet that prevents overtightening.
All that remains is to adjust the working position of the pads: to do this, press the brake pedal several times in a row (bleed the line), then, holding it in the lower position, raise and lower the handbrake. To avoid triggering the ratchet inside the drum, the parking brake button is not released while handling it.
This brief overview will help you perform maintenance of the Vesta brake system, regardless of its model year. Whatever brakes are considered better: disc or drum, the safety of the car and passengers directly depends on the general condition of all its parts and components, including the engine, suspension and braking system.
Not every car owner is able to fully replace an electrician or mechanic; moreover, sometimes this type of maintenance is extremely necessary to perform in a specialized workshop. But everyone can replace the brake pads of their 4-wheeled friend, replace the hydraulic fluid and adjust the brakes, if desired.
Self-installation of rear disc brakes on Lada Vesta - parts and work
Lada Vesta is equipped with rear disc brakes from the factory, but they are not available for all trim levels. Therefore, some owners of the domestic model, who bought it in an inexpensive version, want to independently replace the rear drum brakes with disc ones.
Components
In such a situation, there are 2 scenarios:
- Carry out modifications in accordance with the factory diagram;
- Purchase components from another manufacturer.
IMPORTANT! Unauthorized modifications to the design of the car's braking system, which includes the independent installation of rear disc brakes on the Lada Vesta, can be regarded as a violation of traffic rules. And so, one of the owners of the Lada Vesta in the Exclusive configuration said that he was able to find out from an AvtoVAZ employee exactly what components were needed to replace drum brakes with disc brakes
And so, one of the owners of the Lada Vesta in the Exclusive configuration said that he was able to find out from an AvtoVAZ employee exactly what components were needed to replace drum brakes with disc brakes.
According to an employee of the plant, there is no need to replace the beam or reflash the ABS block, and this significantly speeds up and reduces the cost of the work.
In addition, the picture clearly shows that there is a standard spacer between the axle and the beam and it is to this spacer that the boot is fixed. From the factory, the hub and disc come separately, so after installing the rear disc brakes on the Lada Vesta yourself, there is no need to replace the bearings if you need to replace the disc.
All the components necessary to replace the brakes with your own hands are presented in the table along with the article numbers.
| Position | vendor code |
| Right brake hose mounting bracket | 8450031136 |
| Left brake hose mounting bracket | 8450031137 |
| Rear brake flexible hose assembly – 2 pcs. | 8450031129 |
| Rear brake pads (full set) | 11196-3502089-00 |
| Washer 10 | 00001-000516870 |
| Ball joint fixing bolt | 21080-2904194-00 |
| Washer 10 | 00001-000516870 |
| Ball joint fixing bolt | 21080-2904194-00 |
| Rear left brake (assembly) | 8450031163 |
| Rear right brake (assembly) | 8450031162 |
| Retainer fixing screw | 21080610526810 |
| Rear brake disc | 8450031131 |
| Rear wheel hub (assembly) | 8450031130 |
| Hex Head Screw | 00001-003836021 |
| Right rear brake guard | 8450031686 |
| Left rear brake guard | 8450031687 |
| Bolt M10-1.25-40 | 8450031161 |
| Left rear brake mount | 8450031132 |
| Right rear brake mount | 8450031133 |
The estimated cost of the entire kit for self-installation of rear disc brakes on a Lada Vesta is about 30,000 rubles.
Signs of pad wear
Before each vehicle departure, check the amount of fluid in the brake system reservoir. The level must be above the min mark. If it is lower, this is one of the signs of abrasion.
Another sign is that the pedal softens at first and then drops. The distance from pressing the pedal to stopping the car increases noticeably.
When the linings of one of the wheels wear below a critical value, the car can be felt skidding in the opposite direction.
If such signs, knocks and squeaks are detected, the pads are inspected. Check whether their wear has reached the limit values. For overlays the thickness limit is 2 mm. The maximum size of the drum rubbing surface is 204.45 mm.
