The VAZ 2104 has not been produced for many years in a row, but is seen relatively often on the roads. The engine is started using a starter.
This part fails relatively rarely, but due to how long the machines have been produced, it has to be replaced relatively often. It is important to study possible breakdowns of this equipment in advance.
Checking status
Before changing the relay, make sure that the problem with starting the engine is related to this component.
To do this, consider two situations that indicate its malfunction.
| Situation | Your actions |
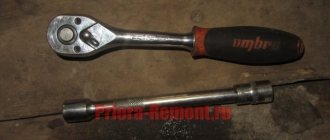
| The relay makes clicks, but the armature does not spin | If there are clicks from the relay, check the condition of the armature. To do this, the terminals of the retractor relay are bridged with a large screwdriver or a piece of welding cable to the terminals at the ends. Taking a thin wire or a screwdriver can easily burn the terminals. When the armature is working, after closing the terminals, the armature will spin, which can be determined by the sound. Consequently, the solenoid relay itself has failed and requires repair. |
| The relay is completely silent | Even if there is silence after closing the terminals, the problem should be looked for in the starter. The relay no longer plays any role here. |
Having discovered that the relay has served its purpose, it must be replaced or repaired, if possible.
Differences between starter and relay failure
In order not to confuse what exactly has failed - the starter or the solenoid relay, there is an excellent method for recognizing the “culprit”.
- Remove the starter, connect the negative terminal of the battery to ground;
- The design of the device has copper bolts and a tongue-shaped element;
- The positive wire from the battery is connected to this “tongue”;
- If there is contact, the solenoid relay clicks and starts working;
- If not, then you will have to go to the store for a new relay.
But there is one more very important point. Even if all the facts indicate that the starter or retractor relay is not working, another unit - the ignition switch - may still be the cause of ignition problems. Take the time to check its serviceability before buying new parts.
What original or analogue can I supply?
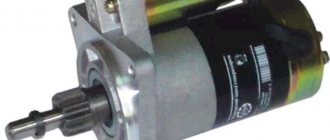
If the starter does not turn, you can simply replace it. Typically, in a store, the buyer has a choice between two options:
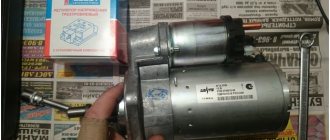
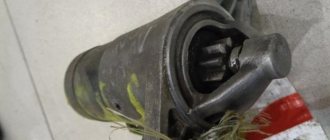
They differ not only in their quality, but also in their durability. The easiest way to study visual differences is in the photo. Original starter:
| Model | Manufacturer | Catalog number | vendor code | Price, rubles |
| 21213 | KATEK | 21213-3708010-00 | 5722.3708 | From 3 300 |
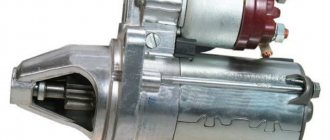
But the cost of the original starter is usually at least 3.5 thousand rubles. That’s why many people opt for analogues. There are many other manufacturers on the Russian market that are not certified by AvtoVAZ. If possible, you should choose well-established brands. The optimal solution would be:
| Model | Manufacturer | Catalog number | Price, rubles |
| 21213 | TRACKMAN | 21013708 | 2900 |
| GANZ | GRP14005 65 (Similar to 5722.3708) | From 2,000 | |
| FENOX | AN 5722.3708 NM 1.55 KW | From 4 3000 |
It is important to remember: all starters have different resources and may differ in size. It is advisable to arm yourself with a ruler and tape measure before going to the store.
This will allow you to avoid purchasing a device that is not suitable in size. Some manufacturers produce equipment that can be installed on various vehicle models. The price depends significantly on the manufacturer.
Before purchasing an analogue, you need to familiarize yourself with the brand. For example, Bosch has proven itself to be good. The equipment he produces is durable and does not cause difficulties in repair. There is a list of manufacturing companies recommended by AvtoVAZ itself. It is advisable to familiarize yourself with all the nuances and subtleties of installation in advance. This will allow you to select it at the start and install it later yourself.
Causes of starter failure and main types of malfunctions
All causes of malfunctions can be divided into two groups:
- Mechanical. These include breakdowns caused by wear and tear of parts. They wear out over prolonged use or when operating rules are violated. Mechanical damage is also possible due to electrical problems.
- Electrical. Such breakdowns include problems with power supply. To detect electrical problems, you need to check all the wiring, diagnose contacts and turn-to-turn short circuits. You should also check for burning of the closing plates and working surfaces, which are possible due to the passage of excess current through the contacts.
Diagnostics using the battery
Generally speaking, the following breakdowns of the engine starting device are possible:
- When you try to start the starter, the armature does not rotate and the traction relay does not operate. The main reason is insufficient power supply. This can be caused by a discharged battery, oxidation on the positive terminal or poor contact, loose terminals on the battery, electrical breakage, turn-to-turn short circuit and armature sticking.
- When the retractor relay is working properly, the armature rotates heavily when the starter is started. A possible reason is a short circuit between the commutator plates or its burning, freezing, brush wear, poor battery charging, wear of the armature bushings, displacement of the armature plates, winding breakage, interturn short circuit of the starter and armature.
- When the starter is running, the armature rotates, but the crankshaft does not rotate. The reason may be a breakdown of the buffer spring or clutch drive ring, slipping of the clutch's free play, poor movement of the armature, or a malfunction of the lever that disengages the clutch.
- The starter does not turn off after the engine starts - the solenoid relay or lever drive is stuck, the ignition switch return spring is faulty, the relay return springs are broken, the clutch is broken. In any of these cases, you need to turn off the ignition and disconnect the wire going to the relay.
- The appearance of extraneous noise indicates loosening of the device, wear of the bearing bushings, weakening of the starter buffer spring, damage to the flywheel ring or nicks in the drive teeth, and improper adjustment of the gear travel of the device.
Before starting repairs, you need to check the starter. You can do it yourself or using a stand for testing generators.
Generator diagnostic stand
Disassembly Features
Disassembling the starter is done in stages.
The first stage is to inspect the condition of the brushes. To do this, you need to remove the protective cover, release the springs and remove the brushes. Using a caliper or ruler, measure the height of the brushes. If it is less than 12 cm, then they should be replaced. The working surface must not have cracks or chips.
Brush height measurement
The second stage is dismantling and checking the anchor. To do this, the housing is removed along with the stator. At the anchor, it is necessary to perform a visual inspection of the commutator and check the winding for integrity.
Removing the device's anchor
The third stage is removing the freewheel from the gear. To dismantle the coupling, you need to remove the armature from the front cover, then remove the intermediate support from the shaft. Next, you should inspect the gear teeth. If it is discovered that the clutch is faulty, it must be replaced.
Overrunning clutch and gear
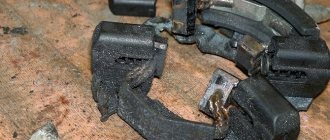
The fourth stage is replacing the solenoid relay. Replacement should be done if the freewheel does not extend when voltage is applied to the terminals. It is better to change the entire assembly.
Traction relay VAZ 2109
The fifth stage is replacing the starter bushing. If the starting device begins to jam during rotation, the cause is most often worn starter bushings on a VAZ 2109. If you are replacing the VAZ 2109 starter bushings, then you need to change the bushing located in the rear cover and the second one installed in the clutch box. Naturally, you need to know how to replace the starter bushing.
Front and rear hubs
Defects in bushings are detected by inspecting them. The working surface should not be chipped, cracked, scored, or severely worn. You can conclude that the VAZ 2109 starter bushing needs to be replaced by the presence of play.
Kopek starter disassembly diagram
Disassembly of the mechanism described in the article is required in many cases, otherwise it is simply impossible to determine why it does not turn. The diagram for removing the starter is given below: the air filter is removed from the VAZ 2101 carburetor; unscrew (using a wrench) the nuts that connect the engine block to the starter. After this, you can remove the wires from the starter, moving it forward a little (don’t forget how the wires were connected, otherwise you will absolutely have problems when assembling the unit).
As a result of such fairly simple actions, the starter can be easily removed and checked for the presence of certain malfunctions (does not turn, sticks, does not turn off, and so on). It is clear that to carry out this check you will need to disassemble the starter. The disassembly diagram is as follows:
- the retracting cylinder is dismantled (the bolt and three mounting screws are unscrewed, the spring is removed);
- the anchor is lifted up and disengaged;
- using a screwdriver, remove the casing that protects the starter, and then remove the cover from its body;
- disconnect the winding brush holder plates from the plates and dismantle the insulating tube;
- remove the brushes from the holder (for this you need to remove a special jumper);
- using the adapter, press out the bushing, and use a screwdriver to remove the axle and cotter pin of the drive lever.
Then the rubber plug is removed, the drive is disengaged from the clutch and dismantled, which makes it possible to remove the drive lever, retaining ring and washer. Next, the disassembly scheme is simple: the drive coupling is removed from the anchor shaft; Another bushing is pressed out of the starter cover.
Home →
Practical advice → Malfunctions →
How to replace the starter on a VAZ 2101-VAZ 2107?
Note! Before you start replacing this unit, be sure to make sure that its performance is not due to other reasons, for example, the battery is discharged, or its terminals are oxidized, or the wiring that goes to the starter is not working properly!
And also take into account the fact that the starter must be replaced in an inspection ditch, otherwise it will be inconvenient and very problematic to remove from the car!
Removal: 1) First, loosen the clamp that secures the warm air supply hose to the air filter housing.
2) Then loosen the clamp that secures the hose to the air intake itself.
3) And then remove this hose from the car engine.
4) Next, loosen the lower nut that secures the air intake.
5) Next, unscrew the top nut that secures the same air intake.
6) And then remove this air intake from the car engine.
7) Now remove both nuts that secure the heat shield to the engine.
And then, using an extension joint with the socket head, unscrew the remaining bolt that secures the heat-insulating shield to the right engine mount bracket. (For information on how to unscrew the remaining bolt that secures the heat-insulating shield to the bracket, see the very bottom of the article in the “For Beginners!” section)
9) After unscrewing the bolt, remove the heat insulation shield from the engine.
10) Next, unscrew the bottom bolt that secures the starter.
11) Then unscrew the remaining two upper bolts, which also secure the starter.
12) Moving the starter a little forward... (Continued in point 13)
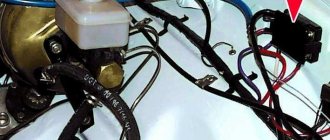
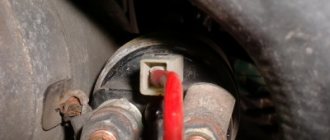
13) Disconnect the wire block from the starter traction relay terminal on the starter.
14) Then unscrew the nut that secures the wire to the upper contact of the traction relay.
15) And then disconnect the wire from the upper contact, and also remove the bolt and nut that held this contact.
16) Next, remove the starter from the car engine.
Installation: 1) Installation of a new starter is carried out in the reverse order of removal.
Important! 1) Before starting work, disconnect the negative terminal from the battery! (For information on how to disconnect this terminal, see the article: “About the battery”)
For newbies! Question: How to unscrew the bolt securing the heat-insulating shield to the bracket of the right engine mount. Answer: Using an extension joint with the socket head “2”, unscrew the bolt “1” securing the heat-insulating shield to the bracket of the right engine mount.
For newbies! Question: How to unscrew the bolt securing the heat-insulating shield to the bracket of the right engine mount. Answer: Using an extension joint with the socket head “2”, unscrew the bolt “1” securing the heat-insulating shield to the bracket of the right engine mount.
Additional video: To understand in more detail how to replace the starter, watch an interesting video in which the replacement process will be described in detail:
Sources
- https://vaz-remzona.ru/starter-vaz-2101/
- https://carnovato.ru/starter-vaz-2101-vtjagivajushhee-rele-remont/
- https://vaz-russia.ru/remont/zamena-startera.html
Starter repair
It is quite clear that not every repair of a car’s electrical equipment, and in particular the starter, can be done by yourself. To do this, you will need to ring the winding, this will be necessary in order to correctly determine the fault. If you still decide to repair the starter yourself, you should find out how to properly remove and disassemble the VAZ 2107 starter. Having installed your car on an overpass or inspection hole, you need to disconnect the wire from the negative terminal of the battery. Further actions will depend on what type of engine your car has - carburetor or injection.
Carburetor engine
- In this case, you need to remove the air filter housing by first disconnecting and removing the MAF sensor (mass air flow sensor).
- Then, using a flat-head screwdriver, you need to remove the rubber holders securing the filter from the brackets.
- It is also necessary to remove the water intake from the holder, disconnecting it from the filter pipe.
Repairing a starter in a carburetor engine
Injection engine
- First of all, you need to remove the mudguards - main and additional. Using a socket wrench size 8, unscrew the 4 screws of the front and 4 screws of the side fastening of the main panel, and 2 more bolts at the back of the additional one. The bottom screw is a different size and will require a 10 mm socket wrench to remove it.
- Next, using a 13 mm socket wrench with an extension, you need to unscrew the bolts securing the starter and clutch housing. Then those bolts that secure the starter to the intake manifold extension and the bracket that holds the lambda sensor wiring harness - the probe.
- Then, carefully removing the stretch marks of the intake pipeline and unscrewing the exhaust manifold nut with a 13 key, remove the shield.
Attention: Further actions are the same for both types of VAZ 2107 engine
- The wire is disconnected from the positive terminal of the battery and the tip is removed from the contact rod.
- We release the traction relay terminal from wire 50 and carefully remove the starter.
- Before disassembling the starter, you should thoroughly clean it of dust and greasy deposits.
- First of all, you should check the solenoid relay. It's pretty simple. After connecting the 50th output of the relay to the positive terminal of the battery, and the housing of the removed starter to its negative output, it will immediately become clear whether there is a problem with the relay. If it is working, you will hear the click of the gear being extended by the armature.
- To check the integrity of the windings, you will have to remove the cover from the starter and disconnect the brush assembly. Next you will need to use a device called an ohmmeter. It will help you check if there is a short circuit in the windings to the starter housing. To do this, you need to connect one probe of the device to the body, and the second one - alternately connect it to each winding.
- If no problems are found on the windings, you need to remove the armature. To do this, you need to unscrew the bolts securing the starter housing, remove the lock washer and gaskets. Then unscrew the two nuts and remove the back cover. We free the stator winding housing from the studs. The starter is now disassembled into parts.
- By unscrewing the nut of the eccentric rotation axis and removing it from the housing, disconnect the armature. Then you need to remove the armature body from the studs, removing its engagement with the Bendix lever fork.
- Now the starter has been disassembled into parts, now it is easy to replace the failed parts or repair them.
After fixing all problems and replacing worn-out elements, installing a VAZ 2107 starter, the repair of the electrical part of the car can be considered successfully completed.
Dismantling and replacement
To make it more convenient to replace the relay, it is recommended not to be lazy and still remove the starter itself. This will allow you to simultaneously check the condition of the starter while replacing the relay.
The removal procedure described below concerns an assembled relay, which has the ability to replace individual structural elements.
- Disconnect the negative terminal from the battery.
- Disconnect the red terminal from the relay. This is a red wire.
- Using an 8 mm wrench, unscrew the nut securing the brush assembly. You will find it behind the relay.
- Remove the contact that this nut held in place.
- Unscrew the fastening of the solenoid relay to ground. We are talking about coupling bolts.
- Next, you need to dismantle the power wire, after which the relay itself is pulled out.
- The fastening nuts are unscrewed from the end part, which allows you to remove the upper part of the relay.
- It is advisable to immediately replace the relay core with a new one.
- Install a new relay.
- Proceeding strictly in reverse order, reassemble the assembly, which will allow you to complete the replacement of the unit.
- When separating the relay into its two component parts, be sure to ensure that the core does not slip out and the spring does not jump out.
We can say that replacing the gearbox on a VAZ 2114 is not so difficult. It is much easier to replace a non-separable relay, since to replace it it is enough to unscrew all the fasteners in the same way and disconnect the contacts.
Element Role
All VAZ cars, including model 2109, have a standard engine starting system, which is based on an electric starter. Here's what you need to know about him.
- A starter is a small electric motor that is connected to the flywheel of the motor via a coupling (Bendix) for a short period of time to start the rotation of the flywheel.
- Despite its small dimensions, the starter passes through itself enormous currents.
- If the starter circuit were closed directly in the ignition switch, then not a single component of the system would be able to withstand such current loads. As a result, they would burn out.
- Therefore, for these purposes, the starter is connected remotely to the battery via a relay. Its contacts are designed for high currents.
- The starter operates briefly and must be turned off after the engine starts. Otherwise, its active destruction will begin due to the influence of motor power.
- Relyushka performs these tasks perfectly. Actually, it is precisely to ensure the functioning of the system and protection against current, timely shutdown of the starter, a retractor relay is included in the design.
Element diagram
REMOVAL AND REPLACEMENT
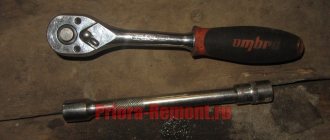
Let's figure out how to remove the starter on a VAZ 2114. To work, we will need a key for 13 and 10, a hammer, a flat-head screwdriver and VD-40 (if the bolts have not been unscrewed for a long time).
The algorithm of actions is as follows:
- Remove the “-” terminal from the battery;
- The starter is secured to the clutch housing with three screws - two upper and one lower. The lower one, as a rule, is removed during the first car repair, since, in fact, it is not needed, but it adds significant inconvenience. If there is no lower bolt, then you can remove the starter on a VAZ 2114 without a pit, but if there is a lower lock, then to get to it you need to drive the car into a pit or crawl under the car. Unscrew the screws with a 13 key;
- We remove all wiring from the device (when installing a new unit, it is most convenient to install the wiring in advance, before attaching the starter to the engine);
- We move the starter to the right so that it comes off the guides on the engine, and remove it.
To determine the malfunction, unscrew all the screws connecting the housing and disassemble the device (you may need to tap the housing with a hammer). Check the wear of the brushes, field winding and flywheel teeth.
The most typical failure of the unit is wear or mechanical damage to the bendix.
Replacing the Bendix on a VAZ 2114 is carried out as follows:
- Using a flat-head screwdriver, bend the Bendix fork at its connection to the body;
- We remove the ring, under which another one is hidden - the locking ring. It can be removed with a 13 key; you may need to knock down the fastening with a hammer;
- We remove the retaining ring using a screwdriver; it’s easy enough to pry it off;
- Pull the bendix out of the body.
Do not think that if there is no visible damage on the bendix, then it is working, since it usually breaks from the inside. If typical signs of a Bendix malfunction are detected, it needs to be replaced.
If you are interested in how to remove the starter on a VAZ 2115, then you can do everything according to the algorithm given in the article - the technology for removing the starter for the fourteenth and fifteenth VAZs is identical.
Starter replacement and installation procedure
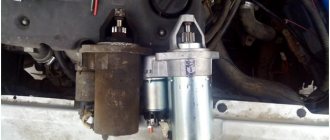
Before removing the starter, you need to figure out where this device is located. The easiest way to do this is using the photo from the manual. Dismantling this equipment usually does not cause difficulties. Removal requires only a set of wrenches, WD-40 and a little patience. The procedure usually takes no more than 1 hour. Removing the starter from a VAZ 2104 car includes the following main steps:
- it is necessary to disconnect the battery terminals - in some cases it is enough to disconnect the negative terminal;
- Next you will need to unscrew the bolt securing the starter shield - use a 10mm wrench;
the starter itself is attached to the clutch housing using 3 bolts - you can unscrew them using a 13mm socket;
using the same 13mm socket with an extension, you will need to unscrew a couple more bolts securing the crankcase shield;
the terminals securing the starter wires are disconnected - the block itself is then removed.
Next, the starter is simply pulled out through the engine compartment - as in the picture below.
Installing a new starter or the old one after repair is performed in the reverse order. You need to familiarize yourself with all the subtleties and nuances in advance
It is important to note that WD-40 is a dielectric.
After unscrewing various threaded connections, it is necessary to remove it from the contact points. Otherwise, startup problems may occur. Also, threaded connections should be lubricated with graphite lubricant. This will avoid problems later when removing the starter.
Electrical
Problems in the electrical power system are one of the most common breakdowns. We are talking about the section of the line from the battery to the starting device directly.
- Slow rotation of the rotor;
- Lack of response when current is supplied to the starting device (hereinafter referred to as PU);
- The control unit clicks, but does not turn: interturn short circuit, broken wiring, short circuit of the solenoid relay;
- Washing brushes;
- Anchor wear.
To exclude a number of other related breakdowns, you need to check:
- presence of charge in the battery;
- fixing the terminals on the battery contacts;
- integrity of electrical wiring in the area from the battery to the control unit;
- proper operation of the ignition switch core.
Causes of starter problems and their elimination
The Kalina engine is started through the interaction of the starter with the gearbox. Sometimes the starter turns, but the car does not start. You need to start looking for reasons without removing the trigger from your worker. Possible.
places where the machine malfunctions when the starter breaks down.
- When the starter is connected, all devices are turned off. It is necessary to check the charging of the battery and its terminals. If there is oxidation, you just need to clean them and charge the battery.
- The engine starts running at low speed.
- The starter does not turn. Inspect the electric motor. On the starter solenoid relay, bridge the outer and inner bolts of Kalina. The electric motor starts to work at idle speed without any intervention. When checking the crankshaft, there should be no noise or counteracting rotation. The electric drive is in perfect order, you need to release the wire from the retractor relay block and bridge it with the outer bolt from the terminal. The car is secured by kickbacks, the transmission is turned off. The starter functions simultaneously with the crank starter.
- the shaft turns, but the car does not start, that is, the crankshaft does not turn the engine. The reason for this circuit is a violation of the activation of the solenoid relay. The removed wire should occupy the corresponding point on the relay again. starter, try turning on the starter.
It is impossible to repair it on your own; you need to remove the relay and have it diagnosed at a service station. When diagnosing, one should take into account the service life, amount of work, money and spare parts issue.
There are minor and deep starter repairs. In the first case, some self-starting parts are repaired: retractor, holders, the autobrushes themselves, restoration. ball bearings will be inexpensive.
The start is carried out by an autostarter with a battery. Auto parts need to be checked, washed and repaired. The most common damage is the breakdown of the solenoid relay. Burnt windings, spots, corrosion - the armature jams. Rust stains are removed, broken parts are replaced, new parts are installed.
Brush life is limited. Before changing them, you need to sharpen the commutator and press the leads of the armature winding into its grooves. The Collector itself cannot be replaced. Minor damage to the surface of the commutator is turned on a lathe. Significant wear on the commutator forces the armature and brushes to be replaced with new ones.
Troubleshooting a faulty starter armature is very difficult. Rewinding and balancing required. parts work is hard and expensive, so they only rewind those anchors for which there is no new one. replacement, the starter winding is not rewound, but selected according to the magnets.
Self-starting catalogs are repaired in different ways. If the magnets are non-removable, they are changed along with the housing glass. removable If, then you can replace them individually. The workpieces must be magnetized on special equipment. The magnet changes when the polarity and new location of the part are found.
Bushings and bearings must be replaced in pairs. This is a mandatory condition; in case of one replacement of a part, the starter may jam, which will lead to its breakdown.
Welding of parts is used during installation. It is not recommended to solder parts; they will fall off due to heat. When carrying out repairs with your own hands, you will need a welding tester, a device, a special puller, and a press.
starter causes of malfunction part 1
You can extend the service life of the starter if you follow the following rules when operating the car.
- Driving through a rain stream, after washing a strong engine part of the car, is contraindicated.
- The self-starter should not be turned on if there is no fuel in the gas tank. In the fall, in preparation for winter, it is necessary to diagnose the starter: remove it, make sure there is no corrosion of the armature, inspect small starter parts for wear, clean the collector, lubricate everything.
- Compliance with protected starter inlet - 2 seconds 4 or. This is 3 times less than Bendix. rest should not be subjected to heavy loads, as this will lead to breakage of the part.
What is the design of the gear-six starter?
The VAZ 2106, produced after the 1980s, has a starter with an end manifold model 35.3708. Earlier cars from the Volzhsky plant had a different gear mechanism installed - ST-221, which was equipped with a cylindrical manifold. Their structure is approximately the same, so they are completely interchangeable.
Let's take a closer look at the design of the mechanisms that interest us, using model 35.3708 as an example. The “six” gear starter consists of the following main parts:
- field winding (i.e. stator) and housing;
- electric drive with anchor;
- three special covers;
- electromagnetic traction relay with two windings (one of them is retracting, the other is holding).
Using bolts, the starter housing is secured into one block with three covers. The armature of the mechanism we are interested in has a core, a commutator and a shaft. The last of these elements rotates in metal-ceramic bushings (there are two of them structurally provided). These bushings are pressed into the covers and must be impregnated with a lubricant. The starter drive is located at the end of the shaft. It includes a gear and a roller clutch, which is necessary to transmit torque to the flywheel.
On the front cover there is a relay consisting of a yoke, several flanges and a core. When the gear mechanism is turned on, two processes occur simultaneously: the armature is retracted, and the drive and gear mesh with the flywheel; a special contact plate closes the bolts. The result of these processes is the start of power supply to the windings of the device we are considering. As you can see, the circuit for switching on and operating the “six” starter is quite simple.
Starter operating principle
When the ignition key is turned to the “start” position, power is supplied to the traction relay, after which the core is pulled inward. When retracted by the fork, it moves the gear drive to the teeth of the engine flywheel, resulting in the starter engaging with the power plant. In parallel with this core, the contacts of the traction relay are closed, which in turn transmit power voltage to the stator windings.
A car starter is an electric motor designed for short-term operation. When starting the power unit, it is not recommended to hold the key in the ignition switch in the “start” position for more than 15 seconds. Between attempts to start the engine, the starter operation should be interrupted for 30–40 seconds (in winter, at least a minute). Operating the device for a long time will lead to overheating of the rotor and stator, as a result of which the varnish of the windings will begin to melt and, as a result, an interturn short circuit will occur or the windings will burn out.
If the engine does not start after three or more attempts, then there may be a malfunction in the systems (ignition, power, etc.) involved in starting the engine. You should not repeat attempts to start and operate the starter over and over again, as this will shorten its service life. After the engine starts, the ignition key must be immediately released to return it from the “start” position.
It is unacceptable to drive a car using torque from the starter; the device will quickly become unusable.
Starter 2108, device and purpose
Protective cap fixing screw (1), protective cap (2), retaining D-ring (3), rear cover fixing nut (4), rear cover (5), brush springs (6), brush guides (outer part) (7), brushes (8), stator (9), armature (10), drive lever (11), drive (12), restrictor ring (13), retaining ring (14), drive lever axis (15), traction relay mounting screws ( 16), front cover (17), cover O-ring (plastic) (18), tie rods (19), rubber plug (20), traction relay core (21), return spring (22), traction relay seal ring (23 ), traction relay (24), sealing washer (25), adjusting washers (26).
A starter is a device that is designed to convert electrical energy into mechanical energy in order to start the engine. Essentially, the starter is a DC electric motor.
Types of starters that are equipped with VAZ 2106
There are 2 types of such electric machines:
A car starter with a gearbox is more efficient and functional even with a low battery charging current. As a disadvantage, it should be noted that the rotation gear may be defective. Electric machines that are not equipped with a gearbox are simpler and provide almost instantaneous engagement with the flywheel ring. This significantly speeds up the ignition timing. The advantage is its high degree of reliability. As a disadvantage, the starter turns poorly in the low temperature range.
In the latest configurations of the “sixes”, the electrical system is equipped with starters of the ST-221 brand under the item number 35.3708 with an end receiver-collector. In some batches of vehicles, the installation of German or Belarusian electric vehicles is allowed. This starter is adapted to the performance characteristics of a standard product.
Basic tactical and technical data of the VAZ 2106 starter:
In the final modifications, some design changes were made to the VAZ 2106 starter device. In the last quarter of the twentieth century, when assembling the “six”, the ST-221 was mounted with a collector-receiver in the form of a cylinder, which had a different aft segment and a stator winding with a different set of shunt and serial coils. The basic design of the VAZ 2106 starter can be seen below:
1 – drive gear; 2 – overrunning clutch; 3 – leash ring; 4 – rubber rubber plug; 5 – drive lever; 6 – drive casing; 7 – relay anchor; 8 – relay winding; 9 – contact type plate; 10 – relay cover; 11 – bolts for contact; 12 – collector device; 13 – starter brush holder; 14 – anchor bushing; 15 – collector cover; 16 – protective cover; 17 – body part; 18 – pole element; 19 – anchor device; 20 – ring of intermediate fastening; 21 – limiter ring.
The electrical diagram for connecting the VAZ 2106 starter is located below:
1 – battery; 2 – winding of the starter relay; 3 – ignition key; 4 – winding of the relay retracting to the starter of the holding type; 5 – starter-starter; 6 – generator device.
When electricity is supplied to the VAZ 2106 starter, the price of which is quite high, the relay armature works to “retract” and, using a lever, moves the gear drive, engaging the gear with the flywheel. At the same time, the contact plate enters the circuit with the relay bolts, thereby contributing to the appearance of current in the starter windings.
When the starter electrical circuit is activated, current from the battery is supplied to the windings of the traction type starter relay. In this case, the winding that works to retract the bendix is de-energized, and the arrival of an energy pulse to the starter armature through the gearbox increases the electrical pulse several times.