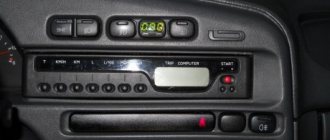
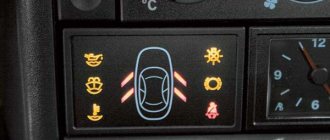
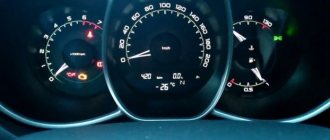
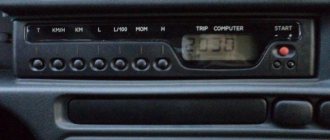
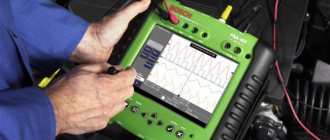
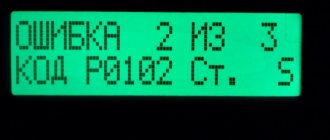
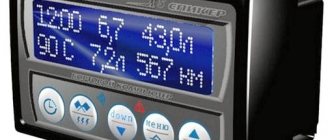
The instructions for the on-board computer STATE on the VAZ 2114 and 2115 will help to reveal and understand the purpose of the BC. The prevailing function of the device is to inform the driver about the technical condition of the vehicle. Using codes, you can find out the condition of the fuel system, power unit and other important components.
Some luxury versions of the VAZ 2114 are equipped with a standard BC; other models provide space for installing a computer and all the necessary connectors. Installing a high-quality device will allow you to detect vehicle problems at an early stage and eliminate them in a timely manner.
Purpose and main functions of the on-board computer
The main purpose of the device is to promptly inform the driver about the status of various systems.
Modern systems are capable of solving dozens of different problems. The operation of the automotive device is possible by connecting it to the standard VAZ-2114 control unit via a diagnostic line. Due to the encoded pulses, the following information appears on the computer display:
- volume of fuel in the tank.
- fuel and air consumption;
- vehicle speed;
All functions are displayed right in front of the driver. At first glance, it may seem that the VAZ-2114 on-board computer shows everything that was previously available on the dashboard. But in reality this is not entirely true.
Most on-board computers installed at the factory in cars have a fairly narrow range of functions and do not have the ability to read errors. It is for this reason that many car owners eventually resort to replacing the standard BC.
The software on any computer is many times greater than the capabilities of the control panel. These features particularly affect the accuracy of the display of various functions. This is far from the only difference between the BC and the dashboard. Next we will look at all the fundamental differences.
The on-board computer of the VAZ 2114 is the “brain” of the car. Thanks to this device, the operation of the main systems and components of the car is controlled, and in the event of a breakdown, the driver may encounter some difficulties.
Why is it needed?
After installing the on-board computer, you can receive a device that informs you about the operation of all systems and with enviable accuracy. The computer reads the parameters, reports potential problems and prevents damage before it leads to major repairs.
New device
The advantages of an on-board vehicle are incredibly difficult to overestimate, so many decide to install it on their VAZ 2114. Then car owners, without the help of expensive equipment at a service station, will be able to independently monitor the condition of the car, respond in a timely manner to messages from a computer on which regular diagnostics are performed.
How to use the VAZ 2114 on-board computer
- On the dashboard, you need to master the procedure for working with the buttons that control the main BC modes.
- The greatest attention should be paid to studying the icons and commands given in critical situations that threaten the operation of the machine.
- The on-board computer of a car is a complex computer device that performs more than 500 functions, and therefore, in order to competently and fully use all its capabilities, you must carefully study the operating instructions. The instructions are best read in the vehicle with the display turned on to ensure maximum clarity.
There may be a different number of buttons for each model, but functionally they are divided into the following groups:
- “Trip computer”: displays parameters such as remaining fuel; current and total fuel consumption; Average speed; black box;
- “Diagnostic computer” - in this mode you can monitor the operating parameters of all sensors, devices and systems with which the BC has feedback; Typically this group may contain commands such as "preheat the spark plugs when they are turned on in the cold season", this function is also briefly called "Plasmer" and "Winter start", in which after pressing the key to start, the Plasmer mode is activated automatically. » And the fan in the cooling system turns on for a short time to heat the electrolyte in the battery, making it easier to start in cold weather;
- “Maintenance” - commands are programmed in this group, starting from the next stage of maintenance, until changing the oil or filter;
- “Diagnostics, system errors” is a separate group that displays error codes when the engine is running. When such codes are highlighted, you need to check according to the instructions of the BC installed on the machine what this code means. The instructions provide decoding of all codes programmed into a particular computer. After decryption, take steps to reset the error or reprogram the BC.
- If you have an external control panel, familiarize yourself with the operation and, if necessary, set the necessary parameters. If you do not have your own knowledge and skills, then you need to contact the service center that installed this option when purchasing a car at an auto center or providing support for this on-board computer model.
Video text
Adapter for diagnostics ELM327 V1.5 ► https://ali.pub/2e82kw (this version is the most complete, unlike V2.1 and is suitable for a much larger number of cars with different ECUs)ELM327 - adapter for do-it-yourself diagnostics ►https: //ali.pub/3v6rfh
BI BSK VAZ (VAZ on-board control system display unit) The VAZ 2114 2113 2115 display panel and the VAZ 2110 on-board control system display unit often fail due to a breakdown of the Microswitch. Replacing the VAZ ignition switch just because of one switch is impractical.
►Restoring a 12 year old battery. RESUSCITATION. Polarity reversal and the second life of the battery https://www.youtube.com/watch?v=20e8PIrJkeA
In this video I will show my solution to the problem with the VAZ BSK, Refinement of the VAZ BSK (real-time mode) and Pinout of the BI BSK. Reworking the BSK is very simple and elementary!
The standard BSK polls all sensors ONLY when the ignition is turned on. This means that if the coolant level has dropped (the Coolant reservoir has burst or the pipe from under the clamp has leaked), the driver will not know about it until the next time he turns on the ignition, or sees the rapidly rising temperature of the Antifreeze (Antifreeze/water) Well and the “brake pad wear” indicator, also known as the VAZ 2114 pad wear sensor, monitors in real time, that is, constantly, with the ignition on.
Of course, it remains a big mystery why AvtoVAZ employees didn’t think of implementing the On-Line mode for the coolant level. After all, a brake pad sensor is present on a small number of Lada Samara cars, but a water level sensor (Coolant) is present on ALL cars.
The most common problem why the BSK VAZ 2114 does not work is the microswitch in the ignition switch. But before applying Plus forcibly (for example, from the side lights key/button), you need to make sure that fuse F16 is working properly.
The display unit of the on-board control system BI BSK 2114 is designed for installation in cars of the SAMARA and SAMARA-2 family (2108-21099 and 2113-2115) to indicate malfunctions of vehicle systems. The unit is installed in a standard location on the instrument panel and connected with the appropriate connector to the vehicle's On-Board Electrical Network (c) https://schetmash.com
BI BSK is located under the Standard BC (On-Board Computer), and in its absence - under the BC 2114 plug
BIBSK VAZ has outputs to signals from sensors:
-Relay for monitoring the health of lamps (needs modification if Diodes are used in Dimensions) -Door limit sensor -Oil level sensor -Coolant level sensor -Washer fluid level sensor -Seat belt sensor (unfastened belt sensor) -Brake sensor (pad wear sensor) - Driver door opening sensor (limit switch)
BSK VAZ 2113 2114 2115. BI BSK does not work. Revision + online___________________________
What parameters does the BC screen display?
By connecting the on-board vehicle, you can access a large amount of information and data about the operation of your car.
Display options
Most computers suitable for the VAZ 2114 display the following data:
- Average speed;
- Average car fuel consumption;
- Motor heating level;
- Error codes and their designation in simple language;
- The distance that the car can travel with remaining fuel;
- On-board voltage;
- The amount of fuel remaining in the tank;
- Distance traveled by car;
- The amount of heating of the coolant;
- Vehicle speed;
- Internal temperature;
- Travel time;
- Motor speed;
- Fuel consumption indicators;
- The amount of fuel consumed for the current trip;
- Throttle position;
- Distance traveled during the trip in kilometers;
- Total air flow;
Which on-board computer to install on a VAZ 2114
The main point from which you need to be guided when choosing an on-board computer for a VAZ 2114 is support for the VAZ2114 ECU program. In addition, there is no need to save money; more expensive electronics will be able to check the condition of the machine and promptly report a malfunction.
Errors on-board computer VAZ 2114
To check the ECU, you need to reset the daily mileage on the dashboard and turn on the ignition at the same time. Then, by pressing the button on the windshield wiper arm, you will see the computer firmware version on the display with error codes, if any.
Main error codes:
- 9 - battery is low.
- 8 - defects in the brake system.
- 7 - critically low oil pressure.
- 3 - fuel level sensor malfunction.
- 6 - the motor is overheating.
- 4 — liquid cooling temperature sensor.
- 5 - malfunction of the outside temperature sensor.
- 2- The mains voltage of the machine is too high.
The most common on-board system errors:
- Code 4 is mainly displayed when the engine is not warm enough or when the sensor indicating the amount of fuel is triggered.
- Code 6 indicates an overheated engine.
- Code 8, if there is a lack of brake fluid in the system.
Once existing errors have been identified, they can be restored by simply holding down the car’s daily mileage button for a while.
Before you make a deal to buy a car, be sure to check the on-board system. Make sure there are no system errors.
How to connect an on-board computer to a VAZ 2114
Before you begin installation, you need to decide for what functions you need the VAZ 2114 on-board computer. Before choosing an electronic system, you need to pay attention to the characteristics of the car.
Of course, it is not recommended to buy a very complex system for a regular car or one that is too expensive for an economy car.
It is enough to purchase a system that includes a monitor, the necessary set of cables and, as a result, a processor.
Determine where to install the electronic system monitor. The best solution would be to install it in the center of the console, if space allows. If there is no free space, the monitor can be installed on a dashboard, which requires an external housing.
The next step is to place the processor itself. Remember that all vents on the processor must be freely accessible and that the case must be secured in a specific location. You also need to pass the wires through a special tube that protects them from external negative influences.
Preliminary preparation
Preparing for installation
There are several activities that you should think about and implement before you begin installing the BC.
- Determine the set of functions that you want from your bookmaker. For this purpose, standard instructions are attached to each device. Plus a lot of information can be found on the Internet.
- It makes no sense to buy a highly sophisticated system for the VAZ 2114. But budget bookmaker models are not the best solution.
- The optimal package includes a monitor, a set of wires and a processor.
- Decide where the BC will be installed. The center console is best suited for this. But there must be adequate free space for it.
- If the center console doesn't fit, try the dash. Although in this case you will need an external housing.
How to install an on-board computer on a VAZ 2114?
Diagnostic unit VAZ 2114
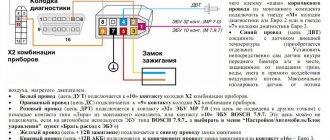
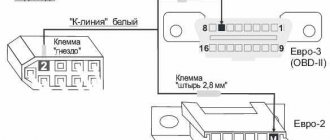
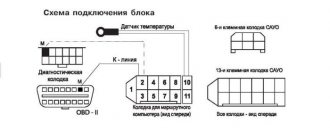
First you need to remove the cover from the panel. After removing it, you need to find a bunch of wires with a 9-pin connector; all VAZ cars have it. Insert the plug into the on-board computer, be sure to draw line K, for this:
- Connect a 1 m cable to the second pin of the terminal block.
- Bring the other end of the cable to the diagnostic unit under the instrument panel, so that the process does not cause inconvenience, you can disconnect the panel on the right.
- Connect the cable to the diagnostic unit, through socket M if there is a EURO 2 unit, or to socket 7 if there is a EURO 3 unit (there are cases where the EURO 3 unit is mounted upside down, be sure to pay attention to this!).
- We connect the on-board computer, install it in the designated place and check it.
The presented connection diagram for the on-board computer on the VAZ 2114 shows in detail the procedure.
Connection diagram for on-board computer on VAZ 2114
How to remove the on-board computer on a VAZ 2114
Unfortunately, many drivers are not satisfied with the operation of the car's electronic system installed during the assembly of the VAZ. This gadget can be removed without any problems.
The first thing you need to do is study the instructions for the car; it involves the process of dismantling the on-board system.
Be sure to check with the car dealership where the car was purchased about the warranty period. Most dealerships can void the warranty if you tamper with the vehicle yourself.
Let's start removing the on-board computer:
- First you need to get the radio, but first disconnect the negative terminal from the battery.
- Remove the outer cover of the radio.
- Then remove the entire body of the radio, making sure to loosen the wires attached to it.
- Reach through the open hole and carefully open the clasps on the computer unit.
- We remove the on-board computer, having first untied all the wires connected to it. If you are not planning to install a new electronic system, you will need to connect the wiring.
- Carefully disconnect all devices connected to the computer.
- We connect the radio and install it in place.
Polite lighting and door switches
Any alarm or security system is always equipped with an input connected to the door limit switches. In VAZ cars, the control wire can be connected to one point (A). Diodes are not used in this case:
Be sure to carry out the setup: the delay in polling the limit switches should be 20-30 seconds. If this is not done, false alarms will occur when the security system is turned on. The reason is the operation of the APS unit, which does not turn off the light after the driver's door is closed. The option in question is called “polite backlighting.”
In theory, pins 7 and 13 of the BSK are the connection points that need to be decoupled by two diodes. But as practice shows, it is better to implement a circuit with three additional diodes (see figure). The alarm is connected to point B, and setting the polling delay in this case is not required. Good luck.
What settings are important during operation?
The standard on-board computer of the VAZ 2114 has quite decent functionality, but the lack of error notification in the sensor system makes it not very suitable for use. Since you need to know where and what has stopped working, it is better to install a more informative device. How to use my new purchase?
In all cases, a small instruction manual is included, which indicates the basic conditions for installing the computer, as well as its initial settings. The device interface is quite simple, and the VAZ 2114 on-board computer is controlled and configured using buttons. There's nothing complicated.
Now it’s worth talking about the functions that need to be enabled to conveniently monitor the operating conditions of the car. These are the following options:
- read error codes and decipher them.
- air consumption for the fuel mixture;
- information about the operation of the cooling system - usually shows the temperature of the coolant;
- the amount of fuel in the tank, its consumption, how the nozzle works;
- voltage value in the electronic network;
- automatic speed;
- data on engine operation: the option shows the speed, gasoline consumption, temperature in the engine block;
All other functions of the on-board computer are considered secondary and are turned on at will. The VAZ 2114 on-board computer, whose instructions contain a description of all settings, can work in conjunction with sound and light alarms. The selected signal will indicate a malfunction so that the driver does not miss a breakdown or error.
Brief instructions for use
The on-board computer in question is a structurally complex electronic design capable of performing about 500 options. The STATE variation is interfaced with the VAZ 2114 ECU, which ensures normal operation of the device. To use the computer correctly, you should study the purpose and functionality of the BC control buttons located on the dashboard.
It is not necessary to keep in mind the decoding of all the codes; you just need to print them out and take them with you. Important notices:
– excessive voltage in the on-board network;
– problems with the fuel indicator;
– signals a violation of the temperature regime of the power unit;
– indicates engine overheating;
– critical decrease in pressure in the lubrication system;
– violations in the brake unit;
– battery discharge.
It happens that the BC issues codes incorrectly due to the failure of a sensor. However, you should not ignore checking the car, since, most often, the activation of errors indicates a malfunction. After fixing the problem, you should reset the processor. This procedure is performed by turning on and holding the daily mileage button.
How to choose a quality bookmaker
The main rule when choosing a computer for a car is that the device must support collaboration with the computer. And secondly, you need to be guided by personal preferences. You must clearly understand for yourself what functionality the device should have.
The on-board computer from Multitronics fits perfectly into the VAZ 2114 car. Among the devices of this company, you can choose the best option for your car.
If BC is required to represent a limited number of parameters, economic models should be preferred.
Today there are a huge number of automotive gadgets for various purposes. The on-board computer can be universal - for monitoring car systems and accessing the Internet. It can also be highly specialized. Particularly popular today are route BCs, which allow you to build a route using an interactive LCD display, download various maps of the area from the Internet and perform a number of other useful actions.
The price range is quite wide - you can buy a device for 1000 rubles, or you can buy it for 5000 rubles. Of course, more expensive models have enormous capabilities. They can start the engine to warm up at a specific time, alert you to low tire pressure, and turn on the GPS navigation system.
If these functions are not critical for you, then you should choose an on-board computer from the budget segment and not overpay for functions that will never be useful.
Device installation
The domestic model VAZ 2114 is equipped with a place for mounting the BC. It is closed with a control plug, which must be carefully removed. The installation work is facilitated by the presence of a special set of wires with a nine-pin connector. It must be connected to the corresponding input of the device. The main interaction between the device and the machine is activated by connecting the brown wire to the “M” (Euro 2) or “7” (Euro 3) socket. The opposite end of the wire is inserted into the input socket of the device. The operation of the computer is tested, if everything is normal, the installation can be considered complete.
If it is necessary to dismantle the BC, the following manipulations are performed:
- The system is de-energized by removing the terminal from the battery;
- The radio control panel is dismantled, along with it;
- Through the resulting window, the BC fastenings are disconnected;
- The device is removed after first disconnecting all connected devices;
- The radio and panel are mounted in place.
The principle of operation of the BC on the VAZ-2114
Non-standard on-board computer
The operating principle of the on-board computer may seem primitive at first glance, but in fact it is a technically complex device that receives, processes and, if necessary, simultaneously notifies about the presence of faults. The notification function is carried out by displaying a special icon on the screen and giving a certain sound signal.
Brief user instructions
All on-board computers supplied to the VAZ-2114 have their own user manual, and if it is not in paper form, it can be easily found on the Internet, just know the make and model of the device. Although there are many options and models, their basic functionality is largely the same.
On-board computer readings.
- Pay attention to the location of the buttons and the rules for working with them in order to quickly respond to changes in parameters on the go (on some BC models, the keys can be blocked at a certain vehicle speed - approx.).
- It is best to spend time familiarizing yourself with the on-board computer with the emergency control symbols and visual icons displayed on the display.
- If you are going to buy a BC, you should know whether a particular model will fit your car's ECU. As a rule, the seller already has all the information and there should be no difficulties in this.
BC cost
The price range varies quite widely - from one thousand to five thousand rubles. Expensive models, accordingly, are distinguished by greater functionality compared to budget devices.
If the BC does not require a wide range of functions, including automatic engine start, tire pressure level monitoring and other options, it is best to choose budget models and not overpay.
Sources
- https://AccBook.ru/to-avto/bk-vaz-2114-instrukciya-shtat.html
- https://moto13.ru/avtoremont-drugoe/kak-nastroit-bortovoj.html
- https://delis-avto.ru/avto-ts/bortovoj-kompyuter-na-vaz-2114-shtat-instrukciya.html
- https://akb-bu.ru/kuzov/kak-polzovatsya-bortovym-kompyuterom-vaz-2114.html
- https://FokSevmash.ru/elektronika/bortovoj-kompyuter-vaz-2114-instrukciya.html
- https://autovaz-2114.ru/electrical-equipment-in-the-car/shtatnyj-bk-na-vaz-2114-zachem-on-nuzhen-i-kak-im-polzovatsya/
- https://logan-50.ru/otechestvennyj-avtoprom/bortovoy-komp-yuter-na-vaz-2114-shtat-instrukciya.html
- https://AvtoSotka.ru/to/bortovoj-kompyuter-shtat-vaz-2114.html
- https://ladafakt.ru/nastrojka-bortovogo-kompyutera-vaz-2114.html
- https://ProAutoMarki.ru/bortovoi-komputer-vaz-2114-fynkcional-ystanovka-i-obzor-2-modelei-ystroistva/
- https://avtonomnaya-gazifikaciya.ru/obsluzhivanie/bk-na-vaz-2114.html
- https://bolt-taxi.com/instruktsiya-po-ekspluatatsii-bortovogo-kompyutera-vaz-2114/
- https://moto163.ru/tyuning-i-servis/funkcii-bortovogo-kompyutera-vaz-2114.html
- https://carfrance.ru/instrukciya-dlya-bortovogo-kompyutera-vaz-2114/
Reworking the low beam button
As already mentioned, the button for turning on the low beam and the button for the dimensions of the VAZ 2114 are combined and located in pairs. Their main drawback, which most car enthusiasts point out, is the absence of a power-on LED on the low-beam headlight button.
This problem is quite serious, since very often it becomes unclear whether the headlights are working or not (especially during daylight hours). You can solve this by upgrading the button yourself.
For this you will need:
- a button that will be redesigned;
- the second button is the same - donor;
- soldering iron or (better) soldering station.
The button modification should be carried out according to the diagram shown here. Resoldering the LED itself from one board to another is highly not recommended, since this requires a soldering station equipped with a hair dryer, a special flux and high skill in working with them.
First, we need to remove the main button from the car panel (how to do this has already been discussed above).
After it is removed and disconnected from the wires, perform the following operations:
- remove the keys by prying them off with a flat screwdriver;
- we disassemble the body of the buttons by pressing the latches with a screwdriver (the buttons themselves at this moment must be in the “on” position);
- we see that the sidebar button has two diodes (backlight and indication), and the low headlight button has only a backlight button;
- remove a pair of legs and a pair of contacts from the donor button;
- we rearrange them into the free spaces on the working button;
- remove the board from the donor button with two diodes and insert it into the working button instead of the board with one diode;
- solder the board to the legs that were added;
- make a hole in the button cover (this can be done with a sharp knife or simply punched with a flat screwdriver).
The junction of the newly installed legs and the new board must be well soldered. Otherwise, the button may quickly fail or not work correctly.
After all these operations have been completed, all that remains is to assemble everything in the reverse order and install the upgraded button in its place (during installation, it is important that all the mini-latches on the case fall into place)
