Injectors - what are they?
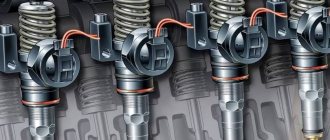
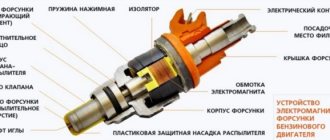
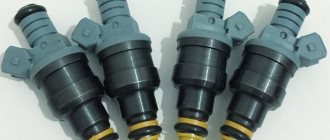
Let's figure out what injectors are and what they are needed for. Injectors are an electromagnetic mechanism designed to spray fuel into the cylinder. Their number depends on the number of cylinders in the car. The VAZ car has 4 cylinders, therefore there are also 4 injectors.
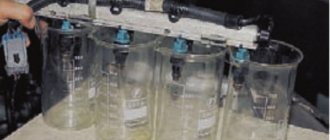
A serviceable and clean injector sprays fuel evenly without any delays or jerks.
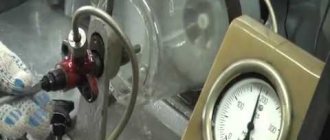
Operation of a serviceable and clean injector
A clogged injector may not spray fuel at all or, on the contrary, pour it in drops. As a result, the engine cannot operate normally and correctly.
Dirty nozzle
How to clean injector nozzles?
If we are talking about the chemical method of washing the injector, you need to buy a special product, a fine filter and new sealing rings.
This method is not suitable for ceramic, old and heavily soiled injectors - there is a serious risk of damage.
They sell cleaning liquid for flushing, that's what it's called. You can purchase it at any auto store or gas station. If for some reason such liquid is not on sale, then it can be replaced with “carb cleaner” - a liquid for cleaning carburetors. Its chemical composition is exactly the same. The best way to rinse is up to you. You can read reviews about this or that composition on the Internet in specialized forums. Flushing fluids for diesel and gasoline injectors differ.
Be careful! These liquids are very aggressive and flammable. Protect your eyes and wear rubber gloves.
There is also liquid to add to the fuel. But more on that below.
Symptoms of clogged injectors
Loss of dynamics is one of the main signs of clogged injectors. If they are contaminated, the car simply will not accelerate properly.
- Unstable idling, the engine at idle will operate unstably and intermittently.
- Starting difficulties can occur when there is contamination or when the injectors stop holding pressure. Fuel begins to drip into the cylinder, which can cause popping sounds in the exhaust pipe.
- Ringing fingers are inevitable when the spray nozzle is clogged; this is due to the fact that the fuel entering the cylinder is mixed with air and the concentration of fuel in this mixture is quite small, so the engine experiences detonation.
Driving with dirty injectors will not provide any driving pleasure. And driving with such a problem is highly not recommended.
Results
Thus, choosing a method for cleaning injectors is a search for the balance of benefits required for each specific vehicle. It is important to consider the type of injection system and injectors themselves, the mileage of the car, the expected degree of contamination, as well as financial and time possibilities, and seasonality. The result of using a particular method and preparation for cleaning the injection system depends not only on its composition, but also on the condition of the engine, fuel system, quality of gasoline used and other factors.
We recommend cleaning every 20-30 thousand kilometers, without waiting for symptoms of clogging to appear, in order to save on repairs in the future.
When to clean injectors
Cleaning of injectors on Lada cars is carried out according to the condition of the car. If there are no problems with your car, then there is no need to clean them. Also, to find out for sure whether the injectors need to be cleaned, you first need to diagnose the fuel system. You can learn more about how to diagnose the fuel system in our article.
The manufacturer recommends cleaning the injectors every 50,000 km. Since the fuel at our gas stations leaves much to be desired, just before this mileage they begin to become clogged and flushing them will be useful. You can wash it at a service station, or you can do it yourself. Next, we will look in detail at how to wash the injectors on a VAZ car at home.
Is it worth using injector cleaner?
Surely many car owners have seen on the shelves of hypermarkets in the auto departments beautiful bottles, cans and bottles intended for cleaning the car injector. But most of us usually pass by such auto chemical goods. Also, many car enthusiasts have heard more than once from car mechanics about the need to flush the injector in their car. But unfortunately, not many drivers listen to these recommendations and almost never regularly clean the fuel system in their car. Why is this happening? But the fact is that many people believe that flushing the injector is another “scam” by the auto mechanics themselves. Is this true, and is it really necessary to flush the injector? Let's find out.
Methods for cleaning injectors
Injector flushing additives
Additives that are poured into the tank
There are a huge number of different additives for flushing the injector. Such additives are poured into the car tank and mixed with fuel. The mixture of fuel and additives enters the main elements of the fuel system and flushes them, including the injectors. But, as a rule, such washings do not bring much results, since all the dirt that was washed away to the injectors gets and settles on them, which can only aggravate the situation. Using this method is not recommended.
Ultrasonic cleaning
Ultrasonic cleaning of injectors
This washing is considered as effective as washing the injectors during dismantling. We will not dwell on this method, since this method of washing can only be carried out at a service station. And the price of this method is not small, from 2000 rubles to 5000 rubles.
Clean in place without removal
This flushing method is carried out using special additives, but differs from the first method in that this flushing is used only on the injectors without going all the way along the fuel line. We will dwell on this method in more detail.
Washing with dismantling
This method is very reliable and probably the most popular among garage car enthusiasts who like to repair their car themselves. After reading this article, you can easily wash the injectors on a Lada car with your own hands without any special knowledge.
Injectors: do they need to be washed and why are they needed at all?
Every car owner has at least once heard the phrases “cleaning injectors”, “injectors after cleaning”, and other similar expressions. In today’s article, I propose to understand what a nozzle is in general, why they are needed and how to clean them.
First, a little theory.
What is the nozzle for?
When carburetor power systems became a thing of the past (approximately in the mid-80s of the last century), the nozzle firmly took its place under the hood. Presumably the Russian “nozzle” was formed from the English forcepump - literally, “pressure pump”. After all, the essence of any nozzle is to finely disperse liquid, almost in the state of dust, pumped by a pump under pressure. In the case of a car, the injector injects a strictly dosed portion of fuel necessary to ignite the air-fuel mixture in the cylinder. This fuel supply scheme is called: injection, or injector - from the English injection (injection, infusion).
Timing of fuel injection by injector. As you can see, it is not a jet that is supplied, but finely dispersed fuel “dust”
What types of fuel injection are there?
Globally, fuel injection systems are divided into two categories: port injection and direct injection. In the first case, the injectors are located in the intake manifold and supply fuel to the intake valve when it opens. Partially evaporating on the valve plate, the fuel, together with the incoming air, is sucked into the cylinder by the piston and there it is finally mixed and ignited by a spark plug.
With direct injection, the injector is installed directly in the combustion chamber (hence the name). Thus, during the intake stage, fuel is supplied directly to the cylinder. This ensures more uniform mixing of gasoline (or diesel) with air, which means more efficient combustion. In addition, direct injection allows the engine to operate on ultra-lean mixtures in certain modes (for example, idling). Which leads to significant fuel savings compared to classic distributed injection.
A visual explanation of the differences between the two fuel injection systems
Note that the pioneers of injection systems did not have one injector per cylinder, as now, but one common for the entire intake manifold. This system was called “mono-injection” and was a cross between a carburetor and a full-fledged injector. Due to the complexity, whimsical operation and low efficiency, single injection did not last long, giving way to distributed injection.
Today, direct fuel injection systems have significantly replaced the classic distributed scheme. Despite the higher cost and demands on fuel quality, direct injection has proven its effectiveness and is now used in almost all classes and price segments of cars. With the exception of the very budget sector, such as the domestic automobile industry or cheap “people's” B-class foreign cars.
Why do you need to clean injectors?
It is obvious that over several years of operation, each of the injectors performs hundreds of millions of injection cycles. And, despite the presence of coarse and fine filters in the power system, the fuel cannot always be perfectly clean. Plus, the conditions in which the injector operates are beyond envy - the temperature in the combustion chamber can be thousands of degrees. All this contributes to contamination of the injector. The nozzles from which fuel is sprayed, as well as the nozzle body around it, become clogged and overgrown with carbon deposits. Of course, this significantly affects the efficiency of atomization: the nozzle begins not to spray, but simply pours fuel in streams, or even becomes partially clogged. Accordingly, fuel consumption jumps, dynamics drop, and in the most advanced cases, the engine begins to start poorly and run unevenly.
What to do? Clean the injectors! No, of course, you can simply replace them with new ones. But on modern engines, the price of one injector is often determined by a price tag with four zeros... So, cleaning the injectors of a gasoline engine (and diesel engines too) is today the most popular solution to the problem.
Fine (normal) and jet (not normal) nozzle spray
Cleaning injectors - what types are there?
Here we can also distinguish two global ways to solve the problem: cleaning the injectors without removing them and cleaning the injectors on a stand.
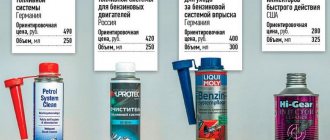
In the first case, a special liquid is used. That’s what it’s called: an injector cleaner, or an injector cleaning additive. We will not go into specific brands and brands, there are a great many of them now. Cleaning fuel injectors on a car involves adding this liquid to the gas tank. Powerful chemistry washes away old deposits and cleans the injectors.
The disadvantage of this method is that the composition washes away carbon deposits and deposits not only from the nozzle itself, but also from the tank and fuel lines. Of course, the fuel filter will retain most of the dirt, but after such a procedure (usually you need to drive 150-300 km), it is necessary to change the oil, fuel filter and, very preferably, spark plugs. In addition, everything that is washed off the injector partially settles on the cylinder walls, piston and valves. In general, the injectors themselves may have started to work better after cleaning, but there are also a lot of side effects. In addition, the chemicals dissolved in the fuel will not remove old deposits.
Nozzle before and after cleaning
The second option is much more effective: cleaning the injectors with ultrasound. In this case, the nozzles are removed and immersed in the cleaning agent on a special stand. Ultrasonic waves supplied through this bath, using the cavitation effect, effectively “beat off” even stubborn carbon deposits and dirt. In general, a complete analogy with that same ultrasonic micro-washing machine “Retona” from the 90s. It just really works.
This method removes dirt much more effectively than additives, but can be destructive for certain models of injectors, especially direct injection. True, there are still fierce debates on this matter. Sometimes with very ambiguous arguments on both sides.
Stand for ultrasonic cleaning of garage-sized nozzles
The third method is a kind of compromise between the two above. It’s called an “injector washing stand.” In simple words, instead of a fuel line from the tank, a special external tank with an injector cleaning agent is connected and suspended from the hood. This product is supplied under pressure (usually using an air compressor), simulating the operation of a gasoline pump. In common parlance, such a system is also called a “dropper”.
On the plus side: the efficiency of direct supply of cleaning agent is much higher than pouring additives into the tank. In addition, there is no need to worry about the safety of delicate direct injection nozzles, as is the case with ultrasonic cleaning.
The disadvantages are the same as in the first option: chemicals will not dissolve old stubborn deposits; they can only be repelled by “micro-explosions” of ultrasonic cleaning.
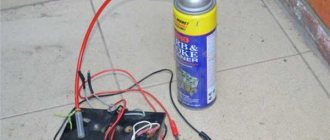
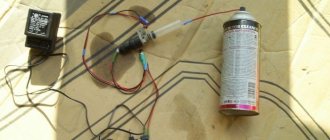
There is also a fourth method - “at home”. The injector is removed, a hose is connected to it, and an ordinary can of carb cleaner (carburetor cleaner) or the same injector cleaning agent is connected to the hose. 12 volts are supplied to the injector contacts from a conventional battery, and liquid under pressure from a can is supplied to the hose. This option requires an absolute minimum of costs, and in terms of efficiency it is not inferior (and often superior) to the method with a “dropper”.
A visual illustration of the use of a simple home stand for cleaning injectors
So, you can not change the injectors at all?
Alas, it will still not be possible to ensure that the injectors operate forever with the efficiency intended by the engineers. Even the most reliable injectors, which are periodically cleaned, after 200-300 thousand kilometers no longer provide the intended characteristics. No matter how clean they are.
As for the options that we discussed today, bench cleaning of gasoline and diesel injectors with removal is today the most effective (albeit the most expensive) measure to bring fuel injectors into working condition.
Washing without removal
What you will need:
- Set of wrenches;
- Screwdrivers “+” and “-“;
- Flushing fluid;
- Fuel hose;
- Fitting for tubeless wheel – 2 pcs;
- Bottle;
- Clamps;
- Drill 10 mm;
- Compressor with pressure gauge (can be used for a car);
Making a device for washing injectors without removing them from the car
- In a 1.5 liter bottle, drill a hole in the bottom with a diameter of 10 mm.
- Insert the wheel fitting into the drilled hole.
- Similarly, drill a 10 mm hole in the bottle cap.
- Insert the wheel fitting into the bottle cap and screw it on.
- Unscrew the spool valve from the fitting in the bottle cap.
- We attach a fuel hose to the fitting installed on the cover and secure it with a clamp.
This is what should happen
Nozzle cleaning device
Relieving pressure in the fuel rail
- In order to relieve pressure in the fuel rail, you need to remove fuse F3 (15A) it is located under the central panel where the foot air ducts are.
- After that, you need to start the car at the residual pressure and let it run until the car engine stops.
- After which you can start working
Connecting the device to the fuel line
- Under the hood we find a fuel line pipe (if the engine has a return line, there will be two pipes, one of them goes to the fuel rail, so you need to connect to it).
Connect to the “straight” hose
- We take two Keys on “17” and unscrew the fitting connection, carefully without damaging the tube.
- You need to unscrew it like this: position the keys like scissors and squeeze them; you must follow the correct direction so that the fitting and nut are unscrewed and not tightened.
- After the fitting connection is unscrewed on the tube, you will see a rubber ring; it must be removed; if it is in poor condition, it is better to replace it.
- Next, we connect the hose from our device to the tube and tighten it with a clamp.
- Pour washing liquid into the bottle and tighten the cap.
- We pump a pressure of 3 atm into the bottle with a compressor.
- We hang the bottle with the cork down and start the car.
Washing process
- We start the car on the flushing fluid and let it use up half of the flushing fluid.
- Next, we stop the car engine and let it sit for 20 minutes. This is necessary so that all the dirt in the injectors becomes sour and dissolves.
- We start the engine again and press the accelerator pedal and keep the speed around 3000 rpm. This must be done until the flushing liquid runs out.
- Next, remove the flushing device and screw the fuel line hose into place.
Attention
Don't forget to install the rubber O-ring when connecting the tube and the fuel line fitting.
Should I change the oil after flushing?
After flushing the fuel injectors, car owners have questions about the need to change the oil. “Is it necessary to change the oil after adjusting the valve clearances?” - they ask a car service specialist. Drivers have similar questions after replacing the timing belt, camshaft oil seal or replacing spark plugs.
Engine oil is replaced in cases where engine repairs (maintenance) have directly or indirectly affected its composition and changed the characteristics of the lubricant.
The injector cleaning procedure, both chemical and ultrasonic, does not change the composition of the engine oil. As a result, there is no need to change the oil after flushing the fuel system.
In engine maintenance, there is a technique for “decarbonizing” the piston rings, piston crowns, combustion chamber and valve guides with a special liquid. The technique is based on the slow dissolution of solid resinous deposits in a “steam bath” environment. To create such an environment, by rotating the crankshaft, the pistons are installed in one row on the middle line of the cylinders in height, and by turning out the spark plugs, liquid is poured into the cylinders in equal parts. The engine must be at maximum operating temperature. After filling the liquid, the spark plugs are wrapped and the “steam bath” process begins, which continues until the engine temperature drops to 15-20 degrees. The engine starts again and warms up to operating temperature at idle speed. Do I need to change the oil in this case?
Using the “steam bath” engine decoking technique changes the composition of the engine oil, since the waste liquid with dissolved resin fractions flows into the engine crankcase and, accordingly, requires its replacement.
The question arises: is it necessary to use the above method of steam treatment of resins when chemically washing injectors? Chemical cleaning of injectors with a solvent allows you to clean not only the injectors. Since the procedure is performed with the engine running and at different speeds, there is no urgent need for additional decarbonization and oil changes.
Washing with removal of injectors
What you need:
- Set of wrenches;
- O-rings for injectors 16 pcs;
- Carburetor cleaner;
- Syringe;
- Injector plug 1 pc. or mother chips 2 pcs;
- Two-core wire up to 1 m long;
- Intake receiver O-rings;
Injector removal process
- First, we relieve the pressure in the fuel rail; how to do this is written above.
- In order to dismantle the fuel rail, it is necessary to remove the intake manifold.
- We remove the intake manifold corrugation by unscrewing the clamp from the DZ and unscrewing the clamp from the low crankcase ventilation, and remove the chip from the mass air flow sensor.
- Unscrew the dipstick with a screwdriver and pull it up.
- Unscrew the breather clamp, remove the hose and bend it down.
- We remove individual ignition coils except for the 4th cylinder (it does not interfere).
- Unscrew the two nuts securing the intake manifold from above.
- Unscrew the 2 bolts and 3 nuts securing the intake manifold.
- We move the intake manifold towards the radiator and lift it to the top.
- Under the hood we find a fuel line pipe (if the engine has a return line, there will be two pipes, one of them goes to the fuel rail, so you need to connect to it).
- We take two Keys on “17” and unscrew the fitting connection, carefully without damaging the tube.
- You need to unscrew it like this: position the keys like scissors and squeeze them; you must follow the correct direction so that the fitting and nut are unscrewed and not tightened.
- After the fitting connection is unscrewed on the tube, you will see a rubber ring; it must be removed; if it is in poor condition, it is better to replace it.
- Disconnect the injector wiring harness.
- Using a screwdriver, unscrew the bolt securing the fuel rail tube to the cylinder head.
- Unscrew the two hex bolts to “6”.
- Pull the fuel rail towards you; with a little force, the ramp should come off.
Removing injectors from the fuel rail
- We remove the chip from each injector and dismantle the wiring harness.
- Remove the retaining rings from the injectors
- Pull out the nozzles in a circular motion
Preparing to wash the injectors
In order to wash the removed injectors, it is necessary to prepare a washing device. The injectors are flushed under pressure. To do this, we assemble the injector power supply circuit. The injector receives power from 9 to 12 V. The power source for opening the injector can be a crown battery or a car battery. We will use a rechargeable battery.
So, let's start assembling a device for washing injectors on a Lada car
For convenience, it is better to carry out the procedure together.
- You need to prepare a syringe. Pull the piston out of it; the syringe cylinder should fit tightly onto the nozzle with the ring. You can also use a hose of a suitable diameter instead of a syringe and tighten it with a clamp. We will use a hose.
flushing with a syringe
flushing through a hose
- Next, we twist the wires with the injector plug or with the “mother” terminals.
- We connect the nozzle to the power source, observing the polarity. "+" and "-"
- The injector should click, which means the injector is opening.
- We hold the nozzle and spray carburetor cleaner into the hose and hold it, creating pressure in the hose between the nozzle and the cleaner bottle.
- Then you need to open the injector by connecting the wires to the battery
- The injector will spray carburetor cleaner and clear itself.
- You can complete the procedure as soon as a uniform spray of fuel begins to emerge from the injector.
- Next, you should do the same procedure with all the injectors.
- Assembly should be carried out in the reverse order of disassembly.
Advice
For easier installation of the fuel rail with injectors into the cylinder head, it is recommended to lubricate the O-rings with engine oil.
Now you know in what ways and how you can wash the injectors. We hope our article helped you and you chose a method of washing injectors that is convenient for you.
How to prepare injectors for cleaning
Before flushing, the fuel injectors must be removed. They are not attached to the power unit, but are pressed against the intake manifold using a fuel rail.
Nuts are used to secure the rail to the manifold. They need to be unscrewed and the fuel rail with injectors removed, carefully removing them from the mounting holes in the manifold. After this, the injectors are removed one by one from their mounting sockets.
Before removing the fuel rail, it is necessary to remove the attachments that interfere with its removal. The fuel line is disconnected from the injector connectors.
In most cases, the fuel pressure regulator is mounted on the fuel rail. It is necessary to either remove it from the rack, or dismantle the vacuum hose and “return”.
Areas where fuel leakage is likely (for example, the junction of the fuel rail and line) should be covered with a rag. It is better to start cleaning fuel injectors when the car has been standing for several hours, in this case the pressure in the system will decrease, minimizing the risk of fuel leakage.
