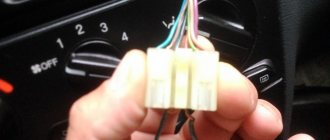
How should a driver behave in a situation where the signal on a VAZ 2110 does not work? Obviously, the situation is not pleasant, especially in a city where there is always a huge number of cars and sometimes an accident can only be avoided by using the horn. This point is very important, because sometimes even pedestrians do not follow the traffic lights and markings, but only pay attention to the sound emanating from the vehicle.
The signal on the VAZ 2110 does not work - what's the matter? In fact, there are only a couple of main reasons:
- A specific fuse has blown.
- The horn itself is broken.
In option number one, everything is quite easy and simple. All that is necessary is to replace the failed fuse.
It is worth noting that replacing the fuse is the main thing to do if there is no response when exposed to a signal. If the problem really is a blown fuse, then by replacing it, the repair is considered complete. A person can close the block, lower the hood and continue driving.
There are drivers who still try to do everything in order to find out why the fuse failed. As a rule, a short circuit is to blame. In this case, the failure of the fuse becomes not a cause, but a consequence of some other problem. Here you will have to study everything as carefully as possible. In this case, there is no point in describing this kind of procedure, since you should immediately go to experienced craftsmen who will do everything without difficulty. For beginners, there is no point in doing the wiring on their own, because this will require special knowledge. By the way, it’s worth going to a car service center even if the fuse was changed, but after a certain time it failed again. There are probably some voltage issues.
As for the second reason, it can cause much more problems even for an experienced motorist. In order to properly diagnose the sound signal, you should connect it to the battery. If there is no result, we can safely say that the horn is broken for a specific reason. The simplest option in this case would be to buy a new one and install it in place of the broken one. But here, too, you need to take into account that a good repairman, if he has the necessary equipment, has the ability to repair the signal with maximum effort.
It also happens that when a signal is connected to a battery, it turns out to be fully operational. It can be logical to conclude that the problem lies in the malfunction of another node. Alternatively, the cause could be:
- Wiring problems. Over time, it dries out and can simply break.
- There is no proper contact between the terminals. This may also be due to prolonged use and constant voltage changes.
In the first case, the wiring will have to be wired absolutely along its entire length. When it is not possible to do this, you should limit yourself to at least the most careful visual inspection. In the second, you will need to remove the switch cover located directly under the steering wheel and look at the existing wires. Be sure to find a “plus”. Its end is located directly in the mounting block. Both wires should be connected to each other.
When a signal appears, the person is once again convinced that the preliminary “diagnosis” was made correctly: poor contact between the terminals. You can fix this kind of problem quickly and without much effort: the nut used for fixing is loosened, and then the switch block moves up a little. In this case, a better touch and, therefore, contact will be ensured.
Speed sensor
There is another sensor that is not related to the power plant - this is the speed sensor.
It is located on the gearbox. He is responsible for the speedometer and odometer readings. The reliability of this sensor is low, and the malfunction is manifested by incorrect speedometer readings.
As for the electrical part of the car, the weakest parts of the VAZ 2110 - 2112 are the generator and window lifting mechanisms.
The generator in these cars rarely lasts more than 60 thousand km. Generator malfunctions manifest themselves in the cessation of power supply to the vehicle’s on-board network.
They are often eliminated only by replacing it, although some elements of the latter can still be repaired.
The feasibility of self-repair
Self-repair - in accordance with the above tips - is advisable only if the car owner shows maximum caution and accuracy when performing it. There is a real danger that a beginner will damage the wires in the steering column unit or connect the contacts incorrectly.
Therefore, the best advice for beginners
If you are faced with the problem of a non-working signal on a VAZ 2110, you will be advised to contact a specialist - with the exception of the very first case described (when replacing the fuse is enough to restore the unit's functionality).
What else to pay attention to
Very often, the appearance of such malfunctions occurs due to the fault of the rear lights, or more precisely, in the places where the connectors with wires and lamp sockets are connected. Using a measuring device or a test lamp, check the presence of power at the rear light connectors with the brake pedal pressed or the wires on the switch connected to each other. If it is missing, you should carefully check the condition of the wiring harness.
Oxidation of contacts in connectors or sockets of electric lamps can be removed using available means. It is not advisable to use sandpaper for this, even very fine sandpaper. Alcohol-containing liquids are best suited for this, as they remove the resulting oxidation.
Replacing the horn
The work is carried out in this way:
- remove the protective cover of the button;
- unscrew the three bolts securing the movable plate;
- inspect the contacts, clean them and test them;
- if it doesn’t help, then use a 24 mm wrench to slightly loosen the nut and pull the steering wheel towards you;
- when it gives in, finally unscrew the fasteners and remove the steering wheel;
- inspect the slip ring.
Next, look deep into it - there are two round bronze plaques. Close them - a sound is heard, which means the buzzer is ok and the problem is in the button. If nothing happens, then the signal is broken.
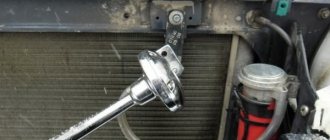
The horn itself, as previously noted, is hidden behind the radiator grille. A single 13mm nut holds it in place. It is more convenient to unscrew it with an open-end wrench. Next, disconnect the signal connector and remove the device.
It is advisable to check the functionality of the new horn. If everything is in order, then put the part back in place.
Afterwards, assemble the steering wheel and make sure that the unit works.
Wiring diagram for an audio signal via a relay on a VAZ 2110
Installation of sound signals from Volga
Many owners of VAZ 2109, 2108 are not satisfied with the sound of the standard horn of their car. An excellent replacement for the standard nine signal can be the option discussed here for installing a sound signal from the Volga. Many, including the author, have already completed this not at all complicated installation, and do not regret the time and money spent, especially since this modernization is more than compensated by the awareness of the fact that his car has become a little closer to ideal, and is ready for it immediately show it to everyone!
So, for this installation we will need the following materials:
- signals from the Volga with a “mass” on the body
- relay type 90.3747 with mounting flange
- relay socket
- female terminals wide
- heat-shrinkable tube (HERE)
- stranded wire with a cross section of 2.5 mm. sq.
- blade fuse block
- 20 A fuse
- metal corner
First of all, remove the ground terminal from the battery.
To access the standard signal of the VAZ 2109, remove the radiator grille, unscrew the standard signal along with its fastening bar. The signal ground wire is attached nearby, we dismantle it too.
At home, we will first prepare the mounting of signals from the Volga based on a steel angle purchased at any building materials store. We will attach the signals to the standard place where the original signal is attached. We mark the corner at the installation location, saw it off, and drill holes for attaching signals from the Volga. It is also advisable to paint the corner to protect it from corrosion. Next, we attach the signals to the corner. The signal fastening bolt is also a “ground”, so it is necessary to ensure its electrical contact with the angle, for example, by securing the Volgov signals through a castle washer.
We fasten the corner with the signals to the bolt securing the standard Samara signal through a castle washer to ensure contact of the corner with the ground. It is possible that the bolts securing the Volgov signals on the corner will touch the radiator; in this case, we put washers, thereby moving the corner with the signals away from the radiator. Do not forget about the need to preserve the corner with the car body (“ground”). That's it, the mechanical part is over, let's move on to the electrical part.
Signals from the Volga to the VAZ 2109 are connected according to the following scheme:
We crimp the ends of the wires with appropriate terminals. We hide all connections in a heat-shrinkable tube.
The relay can be mounted on the back of the radiator frame, next to the headlight.
We fix the ground wire of the relay (pin 86) under the flange of the relay mounting to the car body through a castle washer to ensure electrical contact, having previously installed a tip with a fastening eye on the wire.
We connect the wire from the fuse (30th contact of the relay) to the positive terminal of the battery.
The final result is how signals from the Volga look on the “nine”:
Reinstall the radiator grille:
That's it, the Volga signals are installed, let's buzz and enjoy the noble sound!
You can adjust the sound of signals from the Volga by rotating a special bolt on their body. Also, don’t forget about anti-corrosion protection; you can simply coat all bolted joints with Litol.
Volga signals on the VAZ 2109 and its modifications can be installed without using a relay, by directly connecting to the power wires of the standard signal; the standard signal is already connected through a relay in the fuse block. But this method has disadvantages. The positive power wire of the standard signal is very thin; the signals will not operate at full power due to the voltage drop in this wire, because The Volgov signal is more powerful than the standard one. The power supply circuit for the standard signal is protected by fuse No. 8 in the fuse block, and the cooling fan power supply circuit is also protected by the same fuse. Due to the fact that Volgov signals consume more current (14 A) than the standard one (5 A), this fuse will burn if the fan and Volgov signal operate simultaneously, and the corresponding tracks on the printed circuit board in the fuse block may also be damaged.
If you find an error, please select a piece of text and press Ctrl+Enter.
Horn from Volga - is it really possible to install it on a VAZ?
For those who want to increase the volume of the VAZ-2110 signal, it makes sense to replace the standard one with a product intended for the Volga.
You can take either an old type element or a new one - there is no difference between them. However, it is worth considering one nuance - the device for Lada has two wires: minus and plus, while the GAZ horn is equipped with only one cable (positive). Simply put, in the Volga the circuit is closed to the total mass of the car, that is, its body.
There is one more circumstance. The “tens” horn consumes only 5 amperes, and the gas analog – 8. Since they are installed as a set (2 pieces), the output will be 16 A. That is, a stronger fuse will be needed in the electrical circuit.
Additionally, the native circuit of the VAZ-2110 will have to be complicated by installing a relay designed for four contact groups. It is permissible to install the relay where it is convenient. Choose:
- interior mounting block;
- engine compartment (here it is isolated from moisture).
- remove the radiator grille;
- disconnect the connector from the signal;
- cut off the block remaining on the car;
- a relay is connected to the wire (contacts 85 minus and 86 plus, a jumper is placed on the latter leading to 87);
- two beeps are attached in series to pin 30;
- then they are fixed with bolts on the frame in pre-drilled holes;
- the radiator grille is put in place.
It remains to check the functionality of the signal.
Source
Repair of sound signals on VAZ cars of various modifications
Sound signals, as such, are not among the most complex elements of a car, however, traffic safety and the ability to avoid emergency situations largely depend on their good condition. Be that as it may, even with all its simplicity of design, the sound signal (including on various modifications of the VAZ) may stop working and if such an unpleasant situation arises, you can most often cope with the problem on your own, it is enough to have the appropriate diagram at hand and follow a few simple recommendations. In general, the connection diagrams for the sound signal on the VAZ “classic” series and on subsequent front-wheel drive models are quite similar and the main differences relate to the relay markings, as well as the location of the fuse. Among other things, on the earliest versions of the VAZ (2101, 2102, 2103 and a number of modifications 2106), the electrical circuit of the sound signal or the presence of a unloading relay is not provided at all.
VAZ sound signal circuit without relay
- Accumulator battery;
- Fuse (one for two signals), located in the fuse block;
- Horn switch in the form of a button on the steering wheel;
- Generator.
VAZ sound signal circuit (2104 – 2107, and also 2121) with relay
- Accumulator battery;
- DC generator;
- A fuse common to the two signals (located in the fuse block);
- Control relay (usually RS-528).
Sound signal diagram for VAZ Samara (2108, 2109, 21099), as well as for VAZ 2113 - VAZ 2115
Sound signal circuit for VAZ 2110 - VAZ 2112, as well as all existing modifications
1.Universal sound horn;
2. Signal control key located on the steering wheel;
3. Fuse in the mounting block (again, there is no relay).
Wiring diagram for the sound signal on the VAZ Kalina and VAZ Priora
- Mounting block with fuse and relay (in the documentation it is sometimes called a control and comfort unit);
- Sound signal control key;
- Universal sound signal.
Possible causes of audio signal failure and methods of elimination
The most common reason for the loss of a sound signal lies in the imperfection of its design and poor protection from moisture and dirt. In other words, during operation, oxidation of the contacts occurs, as well as blocking of the sound membrane (as a result of which there are no vibrations and the necessary sound effect). Such failures can often be eliminated by adding a small amount of WD-40 or its equivalent to the signal, but in order to achieve a guaranteed and long-lasting result, it is still recommended to disassemble the signal and the control key in order to perform more thorough cleaning.
Among other things, on cars equipped with two signals (as a rule, they are of different tones), when one of the elements fails, a significant weakening of the output sound power occurs, and here you will have to determine the failed signal and change it. By the way, many signals are equipped with special adjustment controls, and if wheezing, grinding and other extraneous sounds occur, you can improve the sound quality by rotating the adjusting screw. You can also try to rip off the “soured” membrane by rotating it.
Troubleshooting Electrical Circuits
when there is no signal at all:
– We check the presence and condition of the “ground”, as well as the supply voltage directly on the signal (it is necessary to take into account that on early VAZ models the “plus” “hangs” constantly, and control is carried out by closing the “minus”). If there is a stable plus and a minus appears when the key is closed, the signal itself is faulty and should be changed.
– We check the supply voltage in the sections of the circuit with the fuse, the power relay and the mounting block as a whole;
– We evaluate the condition of the contacts and the overall “ground” of the control button and eliminate all traces of oxidation.
The signal periodically disappears, and extraneous sounds can be heard when sounding:
– We carry out debugging using the adjusting screw.
When turning the steering wheel, the signal begins to sound spontaneously:
– Most likely, the steering column switch is installed incorrectly (too close to the steering wheel);
– Alternatively, the ground on the steering column is shorted (via the signal control circuit).
Malfunctions of the electrical signal circuit:
— no signal:
1) check the presence of incoming mass or voltage on the signal itself (on old systems, “plus” is constant, but the signal was controlled by “minus”). If there is a plus and a minus that appears, when you press the horn, replace the signals themselves (the signals are non-separable and must be replaced if they fail);
2) Check the supply voltage (fuse, relay, mounting block);
3) Power button on the steering wheel (contacts, adjustment of switches and three-lever), presence of mass on the steering column;
— the signal wheezes or disappears:
Adjustment required;
— the sound signal appears spontaneously when turning the steering wheel:
1) Incorrect adjustment of the steering column switch (too much “pressed” towards the steering wheel);
2) Ground circuit on the steering column (signal control wire);
It should be noted that on some KALINA and PRIORA models the signals are connected to the anti-theft system (signals the opening or closing of doors, acts as a security system and alarm), and some reasons for the malfunction of the signals may be associated with it.
Didn't find the information you are looking for? on our forum.
We recommend reading:
Installing rings on a VAZ 2108 piston
How to change the fuel pump on a VAZ 2114
Rear brake lights for VAZ 2114, replacement, connection diagram
The window regulators on the VAZ 2115 do not work reasons
The reverse gear on the VAZ 2114 falls out, the speed does not engage, causes of the malfunction
Dashboard VAZ 21214 Niva injector
Replacing the thermostat on a VAZ 2110
Replacing a chain on a VAZ 2106
Mounting block fuse block VAZ tenth family
| Mounting block (fuse block), also called a black box. If your car's electrical system suddenly stops working, then the first thing to do is check the fuses and relays. |
Fuse box diagram
- headlight high beam relay (K5);
- low beam headlight relay (K4);
- relay for monitoring and checking the serviceability of lamps (K1);
- tweezers for removing fuses;
- door power window relay;
- relay for turning on direction indicators and hazard warning lights (K3);
- starter relay;
- spare fuses;
- installation location of the fog lamp relay;
- relay for switching on windshield wipers and windshield washers (K2);
- rear window heating relay (K7);
- additional relay (K6);
- top row of fuses (F1-F10 are installed in numerical order from left to right);
- bottom row of fuses (F11-F20 are installed in numerical order from left to right)
- F1 5A License plate lighting lamps Instrument lighting lamps Side light warning lamp Trunk lighting lamp Left side side light lamps
- F2 7.5A Left headlight (low beam)
- F3 10A Left headlight (high beam)
- F4 10A Right fog lamp
- F5 30A Electric door window drive
- F6 15A Portable lamp socket Cigarette lighter
- F7 20A Electric cooling fan Sound signal
- F8 20A Rear window heating element. Relay (contacts) for turning on the heated rear window
- F9 20A Cleaners and washers for windshield, rear glass and headlights. Relay (coil) for turning on the heated rear window.
- F10 20A Reserve
- F11 5A Left side marker lamps
- F12 7.5A Right headlight (low beam)
- F13 10A Right headlight (high beam)
- F14 10A Left fog lamp
- F15 20A Electric seat heating Trunk lock lock
- F16 10A Relay-breaker for direction indicators and hazard warning lights (in hazard warning mode) Hazard warning lamp
- F17 7.5A Interior lighting lamp. Individual backlight lamp. Ignition switch illumination lamp.
- Brake light bulbs. Clock (or trip computer).
- F18 25A Glove box lighting lamp. Heating and ventilation control unit.
- F19 10A Door locking (central locking) Relay for monitoring the health of brake signal lamps and side lights Turn indicators with warning lamps Reversing lamps Generator excitation winding On-board control system display unit Instrument panel
- F20 7.5A Rear fog lamps
xn--2111-43da1a8c.xn--p1ai
Fuse box in the passenger compartment of VAZ-2170, -2171, -2172
How to fix the sound signal on a VAZ-2110 yourself.
The fuse box in the Priora is located at the bottom of the dashboard, on the left side of the steering wheel. To get to it, you need to open the cover, which is held on by three latches. Rotate each locking knob 90 degrees and pull the lid down and it will snap open.
Fuses in the interior mounting block
F1 (25 A) - radiator cooling fan. If your fan does not work, check its motor by applying 12 V directly to it from the battery. If the engine is working properly, then most likely the problem is in the wiring or connectors. Check the serviceability of relay K1.
The fan in the Priora usually turns on at a temperature of 105-110 degrees. Do not allow the engine to overheat, watch the arrow of the temperature sensor.
If the fan runs constantly and does not turn off, check the coolant temperature sensor located on the thermostat. If you remove the connector from the working sensor, the fan should turn on. Check the wiring to this temperature sensor, as well as the contacts of relay K1, move this relay, clean the contacts. If this is the case, replace it with a new relay.
F3 (10 A) - high beam, right headlight. F4 (10 A) - high beam, left headlight. If the headlights do not shine on high beam, check the K7 relay and the headlight bulbs. The steering column switch, wiring or connectors may also be faulty.
F5 (10 A) - sound signal.
If the signal does not work when you press the steering wheel button, check relay K8. The signal itself is located under the radiator grille; you can get to it by removing the plastic casing from above. Check it by connecting the voltage to 12 V. If it doesn’t work, try turning the adjusting screw, or replace it with a new one.
F6 (7.5 A) - low beam, left headlight. F7 (7.5 A) - low beam, right headlight. When replacing lamps, be careful; there are separate lamps for the low and high beams, so they can be easily confused. It is better not to install lamps in high-power headlights; the reflectors may melt and the desired effect will not be achieved. Most low beam headlight problems that cannot be corrected by conventional means can be related to the light control module (LCM). The low beam relay is only available in cars equipped with a light sensor, it is located in the place of relay K1; on most cars this relay is not in the mounting block; the low beam circuit goes through the MUS block. It happens that the tracks in the block burn out; if there are problems, it is better to replace it with a new one. If the windshield wipers turn on spontaneously when the low beam is not working correctly, the problem is most likely in the windshield wiper control unit, located in the center of the dashboard, the topmost block, next to the radio, is best reached from the glove compartment, or by hand through the removed console covers at the feet.
VAZ sound signal does not work
A non-functioning horn on a car is a very dangerous malfunction. The most unpleasant thing is that they find out about this breakdown just when the signal is needed most - in a dangerous situation on the road. What could cause the signal to fail? There are several reasons why the horn may stop working. Almost all of them are electrical and simply involve no contact where it should be. Let's go through them all:
Horn fuse blown
The very first and easiest check that can be performed when the sound signal is not working is the integrity of the fuse. If it turns out to be burnt out, then there may be a short circuit in the car. Try inserting a whole fuse that matches the rating (How to choose a fuse. Colors and ratings). If it burns out in the same way, it means there is actually a short circuit.
If not, then perhaps the fuse has simply exhausted its resource and you should pay attention to other reasons
The horn button does not work
The signal in most cars is turned on by a button in the center of the steering wheel. There are variations with a button in the steering column switch or a certain position of this switch itself, but this is rare.
There are actually a whole bunch of places inside the steering wheel where contact can be lost, leading to the failure of the horn. To understand exactly where they can be located, you need to understand how the sound signal in the car turns on. Let's look at the diagram.
Diagram for connecting an audio signal via a relay
This circuit assumes the presence of a signal activation relay. This relay is found on all modern cars. On a certain category of cars (for example, VAZ classics), there is no relay. In this case, the signal is connected directly through the button on the steering wheel.
The diagram shows that there are two electrical circuits: control and power. The power circuit feeds the signal and does not come into the car interior; the control circuit, on the contrary, comes to the steering wheel. When you press the signal button, the control contacts of the relay close, connect the power circuit and the signal turns on. What are relays, control and power contacts, read the article: how a relay works in a car .
The control current from the relay is transmitted from the steering column to the steering wheel through a floating contact. There may be one, or maybe two. These contacts rub against a special conductive ring built into the steering wheel at the point where it is attached to the steering shaft. Due to the fact that the contacts are spring-loaded, they are constantly pressed against the ring, ensuring the transmission of current to the steering wheel in any position.
Then the voltage is transmitted through a short wire to the button and when it is pressed, the electrical circuit closes to ground - the signal turns on. Now about malfunctions that can occur in the steering wheel.
ATTENTION!
It is better to entrust all work related to disassembling the steering wheel on cars with airbags to a car service center. Unskilled actions can cause the airbag to deploy, which can lead to life-threatening injuries!
– Worn contacts
The pressure contacts on the steering column rub against the slip ring whenever you move the steering wheel and wear out over time. Sooner or later, a moment may come when they can no longer reach the contact ring on the steering wheel and then pressing the horn button will lead to nothing. To avoid this, when removing the steering wheel for any repairs, it is necessary to lubricate the contacts and the ring on the steering wheel with a conductive lubricant, for example, graphite. Such treatment will reduce the friction of the contacts on the ring and extend their service life.
– Worn slip ring
Exactly the same malfunction can befall the conductive ring in the steering wheel. It can also wear out and lead to signal failure. The method of struggle is the same - lubricant.
The wear of the clamping contacts or slip ring has an insidious property: due to uneven wear, the contact may disappear only at certain steering wheel positions. For example, when driving straight, the signal works, but when turning, it does not. Such symptoms almost always clearly indicate problems in the contact pair “steering column - steering wheel”.
Worn contacts and a ring in the steering wheel, as a rule, cannot be repaired. Therefore, the best solution is to replace these elements with new ones.
– Oxidized contacts inside the steering wheel
Another “steering” problem is the oxidation of internal contacts. Due to the large amount of oxides, a sufficient amount of current cannot pass through the contacts inside the steering wheel and the sound signal is silent. You need to disassemble the steering wheel and clean the contacts.
The horn of the VAZ 2110 does not work
How should a driver behave in a situation where the signal on a VAZ 2110 does not work?
Obviously, the situation is not pleasant, especially in a city where there is always a huge number of cars and sometimes an accident can only be avoided by using the horn. This point is very important, because sometimes even pedestrians do not follow the traffic lights and markings, but only pay attention to the sound emanating from the vehicle. The signal on the VAZ 2110 does not work - what's the matter? In fact, there are only a couple of main reasons:
- A specific fuse has blown.
- The horn itself is broken.
In option number one, everything is quite easy and simple. All that is necessary is to replace the failed fuse.
It is worth noting that replacing the fuse is the main thing to do if there is no response when exposed to a signal. If the problem really is a blown fuse, then by replacing it, the repair is considered complete. A person can close the block, lower the hood and continue driving.
There are drivers who still try to do everything in order to find out why the fuse failed. As a rule, a short circuit is to blame. In this case, the failure of the fuse becomes not a cause, but a consequence of some other problem. Here you will have to study everything as carefully as possible. In this case, there is no point in describing this kind of procedure, since you should immediately go to experienced craftsmen who will do everything without difficulty. For beginners, there is no point in doing the wiring on their own, because this will require special knowledge. By the way, it’s worth going to a car service center even if the fuse was changed, but after a certain time it failed again. There are probably some voltage issues.
As for the second reason, it can cause much more problems even for an experienced motorist. In order to properly diagnose the sound signal, you should connect it to the battery. If there is no result, we can safely say that the horn is broken for a specific reason. The simplest option in this case would be to buy a new one and install it in place of the broken one. But here, too, you need to take into account that a good repairman, if he has the necessary equipment, has the ability to repair the signal with maximum effort.
It also happens that when a signal is connected to a battery, it turns out to be fully operational. It can be logical to conclude that the problem lies in the malfunction of another node. Alternatively, the cause could be:
- Wiring problems. Over time, it dries out and can simply break.
- There is no proper contact between the terminals. This may also be due to prolonged use and constant voltage changes.
In the first case, the wiring will have to be wired absolutely along its entire length. When it is not possible to do this, you should limit yourself to at least the most careful visual inspection. In the second, you will need to remove the switch cover located directly under the steering wheel and look at the existing wires. Be sure to find a “plus”. Its end is located directly in the mounting block. Both wires should be connected to each other.
When a signal appears, the person is once again convinced that the preliminary “diagnosis” was made correctly: poor contact between the terminals. You can fix this kind of problem quickly and without much effort: the nut used for fixing is loosened, and then the switch block moves up a little. In this case, a better touch and, therefore, contact will be ensured.
When the wires are bridged, but the signal still does not appear, once again carefully check the condition of the wires throughout the entire circuit.
It is possible to do what is written in this article only if a person shows maximum caution and attentiveness during the work. Otherwise, it's not worth trying. There is a high risk of damage to the wires located directly in the unit itself. It may also be that the contacts are not connected quite correctly.
Be that as it may, for beginners who are faced with a problem such as the signal on a VAZ 2110 not working, it is best to ask experienced professionals for help. They will definitely cope with the task. Of course, in the case of a fuse, you really need to limit yourself to your own skills, because replacing it does not require supernatural skills or any tools.
The sound signal of the VAZ 2110 does not work
Moderator: Kolya Taran
The sound signal of the VAZ 2110 does not work
Shrus000 » April 10, 2022, 6:21 pm
Failed horn
If the relay still clicks, check for voltage on the signal itself. Here you will have to work with an assistant: one holds the signal button, and the other checks the voltage. The test can be done with a regular test light or a multimeter, which is more reliable. The multimeter is able to show a weak voltage, which will be a sign of heavily oxidized contacts in the signal power circuit or a short circuit.
If voltage arrives, the “mass” signal wire has no oxides and is securely connected to the body, and the signal is silent, it means it has burned out. In this case, as a rule, the “beep” has to be replaced.
ratings, average:
from 5).
Loading…
| Has the sound signal stopped working? There may be several reasons for the malfunction. In the article we will look at how you can diagnose and repair the VAZ 2110 sound signal yourself. |
The circuit diagram of the sound signal is implemented according to a two-pole circuit where:
- (+) is constantly applied to the signal.
- (-) sends a minus signal when the contact in the steering wheel closes, thereby ensuring its functionality.
1 - sound signal 2 - sound signal switch.
3 - mounting block A - wiring block to the electric motor of the engine cooling system fan B - to power supplies The first place to start looking for the problem is checking the signal fuse, on the VAZ 2110 it is F7. He is also responsible for the operation of the electric fan of the cooling system. If necessary, replace the horn fuse with a new one (20A). Next, we check the horn under the hood; to do this, just connect it directly to the battery. If it does not work, then we replace it with a new one, otherwise we move into the car interior to check the contacts on the steering wheel.
We disassemble the steering wheel and find two horn wires. If you bridge these two wires with a wire:
1. You will hear a beep, which means the problem is in the tips (they are oxidized or poorly connected to the signal body). Sometimes the moving contacts no longer touch the slip ring; to solve the problem, loosen the nuts securing the steering column switches and move them closer to the steering wheel so that the moving contacts begin to touch the slip ring.
2. You won’t hear the signal, which means we’re looking for damage to the wiring. By the way, do you know that the standard horn can be replaced with a Volgov signal
Have you encountered a non-functional sound signal? Keywords:
- xn--2111-43da1a8c.xn--p1ai
- www.vazzz.ru
- russia-avto.ru
- xn--2111-43da1a8c.xn--p1ai
Why did the horn stop working?
If the warning signal on the VAZ-2110 does not work, including the fan, you should not immediately contact a service station.
You can identify the cause of the malfunction and eliminate it yourself, taking into account the advice of professional technicians.
Most often, the signal may stop working due to the following reasons:
- A fuse that has become unusable. To fix the problem, you will need to replace the burnt element, which must match the color and value of the previous one. This procedure does not take much time; it can be completed in just a couple of minutes. But if after a short time the new fuse blows again, this problem needs to be solved at a service station.
- If after replacement the sound signal does not appear, this will indicate a short circuit in the electrical network. To eliminate the cause of the problem, the owner’s experience is rarely enough, so the right decision would be to seek help from experienced professionals.
- The sound signal stopped working due to a breakdown of the horn itself. If replacing the fuse did not produce any result, and the audible brake light still does not work, then most likely the horn itself is broken. It will be difficult even for an experienced car enthusiast to cope with the problem on his own, since in order to identify the cause of the breakdown, you need to connect the part to the battery. If you decide to check the signal yourself and the element does not start functioning after connecting to the battery, the easiest way is to buy a new horn and install it.
Why the sound signal does not work on the VAZ-2112 photo and video
Lada 2110 Logbook Replacing the thermoelement of the VAZ 2110 thermostat
Operating a car with a faulty sound signal is prohibited. At the same time, on cars of the “tenth” family, the horn may stop working for no apparent reason. Potential “+12” is connected to one of the horn wires. And the second terminal should close to ground when the key is pressed. Let's look at why the signal on the VAZ-2112 does not work, and for this we will check the control points.
Sometimes it is possible to restore contact with ground without removing the steering wheel. An example is shown in the video.
Features of the VAZ-2112 electrical circuit
The owners of cars of the “tenth” family are to some extent lucky: there is no relay in the horn circuit, but only a switch. The proof is given below.
Standard wiring diagram
The first step is to check fuse F7. In the mounting block it is in the top row (seventh from the left).
Voltage “+12” is applied to one of the fuse terminals. Check it out!
If the fuse is good, potential “+12” should be at one of the horn terminals. Let's take a look under the hood...
Audio module connector
Disconnect the connector and check both terminals with a tester. We connect the second probe of the voltmeter to the negative of the battery.
The standard reason why the signal does not work on the VAZ-2112 is this: the “positive” voltage is connected, but the contact with the “ground” is broken. Most often the problem lies in the switch.
We diagnose the sound signal
It all starts with the connector pins:
- Let's say the voltage “+12” is not caused on both contacts. Then look for a short circuit or break point, starting from terminal 6-Ш5 (diagram above).
- If positive voltage is received, check the second terminal. It will contact ground when you press the horn button. During this check, the battery must be disconnected.
- If the previous two steps are completed successfully, then voltage is supplied to the horn. It may need to be replaced or the contacts cleaned.
By the way, in “step 2” it is recommended to rotate the steering wheel - contact may be broken at certain angles of rotation.
Removing the steering wheel
If “step 2” is not successful, you need to remove the steering wheel. The two copper strips should “close” when pressed - everything is clear here. The test is carried out with an ohmmeter, and if necessary, the switch is replaced.
Steering wheel after dismantling
When the steering wheel is removed, you can clean the contact tracks. The wire contacts in the column must also be clean.
Dismantling from start to finish
First you need to unscrew the two screws under the trim. Having removed the plastic, you can see the contact plate - perhaps that was the problem.
First step in dismantling
Try cleaning the contacts and performing “step 2” again. If there is no result, take a 24mm wrench and unscrew one nut (not all the way).
The steering wheel needs to be knocked off its splines
The steering wheel is pushed towards itself. And then the nut can be unscrewed completely.
When installing, follow one rule. The protrusion on the bracket should fit into the slot made in the plastic ring (see photo).
Steering wheel installation (first step)
How to remove a faulty signal (horn)
There is a single module mounted under the radiator grille. To remove it, unscrew one nut (key “13”). First disconnect the connector.
Dismantling, adjustment before installation
It will be necessary to remove the grille. This action is difficult to perform on both the “Ten” and even on the VAZ-2112, and the signal may not work due to faulty wiring. First achieve what was discussed in “step 3”. And only then, if necessary, proceed with replacement.
One adjusting screw is fixed to the horn body. Set it to the middle position and check.
Removing the radiator grille
- Taking the “10” key, unscrew the two screws on top (as in the photo). You can't remove the grill right away. Self-tapping screw for radiator grille fastening
- Using both hands, applying equal force on both sides, pull the grill upward. In this case, the two lower clamps should not break. An important fastening element is the clamp.
- Installation will be easier - there is no risk of breaking the clamps.
The article number of the new radiator grille is 2110-8401014 (or 8401614, or 8401714).
Methods for troubleshooting
If the horn circuit is broken and the horn stops working, then there are several options for solving the problem:
- First you need to diagnose the safety device. If this part is burnt out, then you just need to replace it with a new one; the device is located in the mounting block. The replacement process will not take much time; any car enthusiast can cope with this task. If replacing the fuse gave results, but after some time the horn stopped working again, then most likely the reason lies in voltage surges in the on-board network. Overload contributes to accelerated burnout of the fuse element, so you will have to look for the source of the load and solve the problem. To do this, use a multimeter or seek help from an electrician.
- If the horn itself malfunctions, the device must be replaced. If diagnostics by direct connection to the battery do not produce results, then most likely the reason lies in the device itself, which needs to be changed.
- Short circuit. To diagnose, you will need a multimeter and a little experience. Using a tester, you can find a short circuit, but if you have never encountered such a problem before, it is better to seek help from specialists.
- If the clamping contacts or slip ring are worn out, then the failed elements must be replaced. It is not a fact that you will be able to buy new contacts or a ring, so most likely you will have to change the horn assembly.
- Another reason why the horn does not work is oxidation of the internal contacts. Over time, as mentioned above, dirt and deposits accumulate on them, which leads to the obstruction of sound. You can try to disassemble the steering wheel of the car, then clean the internal contacts and assemble the steering wheel (the author of the video is the channel Alexander Amochkin Kolomna AAK).
If you are faced with the problem of a non-working horn, then you will probably be wondering how to replace it:
- First of all, you need to remove the steering wheel. To do this, remove the trim and unscrew the bolts that secure the steering wheel.
- After the steering wheel is removed, you can clean the contact tracks, perhaps this will help solve the problem. Make sure that the wire contacts in the column are as clean as possible .
- Unscrew the two screws located under the plastic cover. After dismantling the cover, you will be able to see the contact plate; there is a possibility that the problem lies there. Clean the contacts and check the signal functionality. If the horn does not work, then using a 24mm wrench you will need to unscrew the nut, but you do not need to unscrew it all the way.
- Next, the steering wheel itself must be pulled towards you; this will require some effort. You can try to move the wheel by tapping it from different sides. When you feel that the steering wheel has given way, the nut is unscrewed completely.
- After dismantling the steering wheel, we proceed to removing the horn. There is a module located under the grille of the radiator unit; it must be removed; to do this, unscrew the nut to 13 and disconnect the connector.
- Install a new one, replace the steering wheel and check the operation of the horn.

