The car has many devices and units that provide a comfortable ride. They are so familiar that when they work properly, they are simply not noticed . However, their failure often leads to serious problems. All this fully applies to the windshield washer or, as it is often called, “washer”. When the washer does not work, visibility and, as a result, traffic safety are sharply reduced. It’s especially unpleasant when this happens after rain or in slush - dirt quickly sticks to the windshield, which the wipers cannot cope with...
Features of windshield washer failures
Frequent use of the device invariably leads to wear of parts, which means problems with operation are inevitable. You can prevent such “surprises” by spending time on your car and monitoring the slightest changes in the device.
The washer often breaks down during the season when there is mud and slush, as well as in hot heat and when driving on dirt and other roads that stir up dust.
At such times, the driver has to frequently spray the windows, clearing them of contaminants that appear every now and then. Thus, the device’s motor is subjected to a higher load.
What is a windshield wiper relay and its purpose?
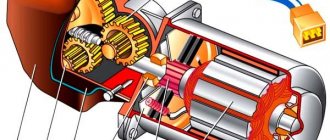
Let's start with the fact that the wipers on the VAZ-2107 are driven by a 12V DC electric motor. But the engine alone would not be able to provide such pendulum operation of the wipers. In addition, such an electric motor has high power, and therefore a considerable amount of direct current. To reduce the current in the windshield wiper switching circuit, a relay of type RS-514 is installed, which also performs the function of periodic operation of the wipers. The VAZ-2107 car has two modes of movement of the wipers - without interruption, and at intervals of four seconds.
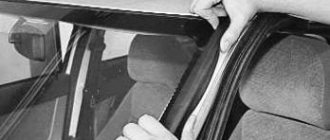
The device is located in the driver's seat area under the dashboard on the left. It is attached directly to the body of the VAZ-2107 car using two screws and is located under the upholstery. A wire with a plug for connection comes out of the relay. The connector where the plug is connected is located on the dashboard near the headlight hydrocorrector control. You can only get to it from below, and you can find the correct plug by disconnecting the supposed one and checking the operation of the wipers; if, when you turn the lever to position 1, the windshield wiper is not activated, then the device is turned off.
Design features of the washer
Before repairing any device on your own, you should understand in more detail how it works and which parts most often fail. This is exactly the case when the problem can really be solved qualitatively on your own due to the simplicity of the design.
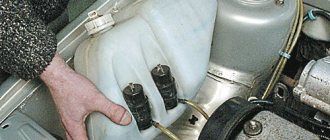
The first important link is a plastic tank. More often than not, it’s enough just to open the hood, or sometimes you have to climb under the wing to gain access. The volume of the container can be from 2 to 5 liters and this liquid, as a rule, lasts for a long time.
The liquid is sprayed using nozzles installed opposite, which are connected to the tank with branched thin tubes. They supply dosed water, which is then distributed with brushes over the entire surface of the windshield.
A small electric pump is responsible for the flow of liquid. A rechargeable battery is used to power it, and the impeller pumps water from the water tank. Perhaps the motor is the most important element of the glass washing system, and its breakdown makes this process impossible.
Operating principle of the device
So, an electric pump is currently being installed; previously it was a mechanical one. We also have a tank in which the glass spray liquid is stored. Naturally, there are two tubes through which it flows to two sprayers. The volume of the tank can be 2.5-5 liters, which is quite enough for a long period of operation, due to the efficiency of the injectors. The electric pump located in the reservoir is activated by the steering column switch. This way, cleaning liquid is supplied to the windshield and the wipers turn on for a while.
Ordinary water is used as a working fluid - this applies to the summer period, but in winter, when it is cold, a special “anti-freeze” is added there. Two types of nozzles are used: jet and fan. It’s difficult to say which is better, both of them give excellent results. That’s probably all that concerns the device and operating principle of the washer.
Common causes of windshield washer failure
The failure of any of the parts in a separate section of the structure leads to a malfunction of the washer system.
Among the most common windshield washer failures are:
- Clogging. It may block the flow of water to the nozzles. If debris accumulates in thin tubes, it easily creates an obstruction. Flushing will help correct this situation and eliminate the defect and, perhaps, purging will be necessary.
- Damage to tubes. If the hoses are torn or have lost their tightness, the water also cannot reach the nozzles.
- Lack of power. You should check the reliability of fastening the shafts of the electric pump and battery. In addition, the terminals could have oxidized or fallen off the motor. The device is also equipped with a fuse with a capacity of up to 10 Amps. Sometimes you need to change it if the motor malfunctions.
- Icing. Problems in the cold season often occur due to water solidifying in the tank. You can warm it up with a regular hairdryer, but it’s better to take care of this in advance and use antifreeze in winter.
Ways to solve problems with washer fluid freezing
Drivers regularly face the problem of liquid freezing during the winter season. Even the most resistant substances may not retain their properties in severe frosts. As a result, some drivers turn off the system until the weather warms up, while others use alternative solutions to the problem. What to do if the windshield washer freezes:
- Move the car to a warm, heated garage or parking lot until the fluid restores its previous properties. This option is suitable only for those who have free time and access to insulated premises.
- Temporarily remove the water tank, if possible, and warm it indoors. After defrosting, the tank must be installed back.
- Fill the reservoir with anti-icing washer fluid, which is designed to work in extreme conditions, including the range from -70 to -50 degrees.
In winter, it is not recommended to completely fill the washer reservoir. Due to the expansion of frozen liquid, the reservoir may crack or burst.
What is better - install a new one or repair an old washer?
Repairing this part does not justify the time spent on it. The old part of the washer has most likely already served its purpose and it is often pointless to tinker with it. Usually, replacing an electric pump is even more affordable than repairing it.
If the washer motor breaks down, experienced motorists and experts recommend ordering a new part and not having to worry about repairs.
- First, remove any remaining liquid from the plastic tank. Then the contact is released at the pump connection point.
- The next stage can be performed in different ways - by disconnecting the tank, removing the bolts securing it, or without dismantling, if you are confident in your abilities and are ready to manipulate the fixed container.
- Then you need to remove the pump from the tank and unscrew the hoses. It is important to remember which tube was screwed to where, then you will need to place them all clearly in their places.
If the tank was dismantled, it is put back in place. Then the contacts from the battery are connected to power the motor and water is poured back. After all manipulations, you should check the operation of the device by pressing the lever. Did you hear a buzzing sound? Congratulations, the washer motor is working again.
Part malfunctions: signs and causes
If the system stops working, the car owner is faced with the need to search and determine the malfunction. You can tell that the pump has failed by the lack of water when you try to activate the washer system. This problem requires maximum prompt intervention from the motorist, since its performance largely affects the safety of the driver and passengers. But it must be taken into account that the failure of a unit is not always associated with the failure of the pumping device.
We recommend: What is a car stabilizer strut: features, design, functions and what it is needed for
The reasons may be as follows:
- Lack of fluid in the expansion tank. If water stops flowing to the glass, every driver must first make sure that there is liquid in the tank. It may be that liquid leaves the tank because the tank has burst, damage and cracks have appeared on it, which contribute to leakage. You can try to patch the tank, for example, by cold welding, but this usually does not help for long and over time the tank will still have to be replaced.
- The nozzles or filter element, if any, are clogged. If the clogging of the injectors is minor, then you can always try to wash them, but it is best to completely disassemble all the elements. It is possible that the hoses themselves through which water is supplied are clogged. After flushing, it would be a good idea to blow out the system; to perform this task, you will need a compressor.
- Another reason why the system stopped functioning was that the tightness of the lines through which the liquid flows was damaged. The reasons can vary, but are usually associated with mechanical damage, for example, as a result of vibration or interaction with moving parts, or natural wear and tear. One way or another, worn elements must be replaced. It happens that the hose falls off from the connection point to the pump or nozzle. If it is silicone, then the problem can be solved by treating the joint with sealant, but before doing this, the end of the hose should be held for several seconds over a fire, for example, a lighter. This will allow the stretched part to shrink.
- Some system elements were incorrectly connected. As a rule, such a problem arises as a result of incorrect actions taken during repairs.
- The pump shaft and the electric motor shaft are poorly connected. With such a problem, all elements of the system simply need to be fixed more securely.
- Failure of the electric motor. Its breakdown may be due to natural wear and tear, but if the motor comes out earlier than necessary, then you need to pay attention to its contacts. They may need cleaning, and the brushes and other components should also be cleaned. If there are traces of corrosion on parts of the motor, you need to get rid of them; for this you can use a simple office eraser (the author of the video is the channel Made in the Garage).
We recommend: Flushing the car air conditioner: when is it necessary and where to do it
How to clean windshield washer nozzles
The first method is washing with a special aggressive solution. This is necessary to clean the parts from accumulated blockages. So, mix 1:1 water and vinegar. Pour the resulting solution into the tank, start the process, press the lever. Due to the blockage, water may still not immediately flow to the surface. It's not scary.
Our task is to deliver the prepared liquid to the site of the blockage. If you couldn’t clean the system right away, let it sit for up to two hours. We check again, press the lever. If operation is restored, the solution is drained and the tubes are washed with purified water.
If the cleansing does not happen, but you are still confident that there is a problem, we start everything again and leave it for a while. Then we check again.
It would be useful to study the procedure for removing the washer. This is relevant for separate cleaning of injectors or the process of replacing them.
- To remove the nozzles, you need to check for the presence of plastic plugs. If they are present, they must be carefully removed.
- The latches should be removed carefully by pushing back the spring fasteners using a flathead screwdriver. Now dismantling the injectors is easy and after processing they are also installed in place without any problems.
- Most drivers don't pay enough attention to their windshield washer until it breaks down. Then you have to think about the importance, because driving a car with dirty glass and virtually no visibility is impossible.
The use of high-quality liquids without chlorine will help prevent such troubles. And in case of malfunction, no need to worry. Restoring the system is not that difficult, and not particularly expensive. It is important not to let the problem get worse, and if something starts to go wrong, take action immediately.
Replacement
If the old motor has failed, there is no point in trying to repair it somehow. To buy a new part, you will have to spend very little money. And the replacement procedure on most cars is extremely simple.
I will describe the main stages of work associated with replacing this element of the windshield cleaning system of any car.
- Turning off the vehicle's power. A safety measure without which further work makes no sense. Be sure to remove the negative terminal from the car. It's simple but important. Otherwise, you not only risk burning the wiring, but also getting an unpleasant electric shock yourself.
- Search for a motor. It all starts with identifying where your windshield wiper motor is located. It depends on your car. On some cars, just lift the hood and you will immediately see the washer reservoir. The motor itself is located on the reservoir (partially inside) of the windshield wiper, into which the liquid is poured. Do you see the tank? If yes, then you are in luck. If not, then you will have to look for it by removing elements of the engine compartment. On some car models, the tank is hidden so that the fender protection has to be removed.
- Disconnect the connectors with wires from the motor. Then remove the tank itself.
- The hose and fitting are separated from each other. Don't forget to drain the liquid. Filling a new one will not be difficult. Yes, and for prevention it won’t hurt to do it.
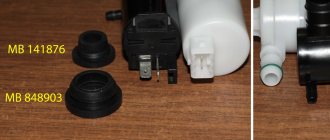
- Using a screwdriver, push the intake seal out of the bushing. This will allow you to completely remove the windshield washer motor.
- Don't forget to install a new bushing when reassembling. This often leads to the washer pump itself breaking down. So the old bushing goes to the landfill.
- Reassemble the assembly in reverse order. Here many craftsmen relax, because they consider the work done. In fact, reassembly causes more problems than disassembly. Advice from someone who made similar mistakes. That is, from me. Do not try to remember the location of parts unless you are confident in your memory capabilities. We got distracted by something, forgot, got confused. This happens to everyone, and there is nothing wrong with it. To ensure proper reassembly sequence, you can record, mark, or label the parts in the order in which they are removed. This will make it easier to put everything back together the way it was before.
The instructions are for informational purposes only, as the procedure may differ depending on the car model. Consult your machine's owner's manual for assistance. This is the best visual aid for self-repair.
There is nothing complicated in this work. Even the car owner who prefers to solve most problems with the help of a car service can easily cope with it. Repairs cost several hundred rubles and take a maximum of a few hours.
Photo instructions for repairing windshield washer
About the importance of the node
A windshield washer pump can be purchased without any problems; to replace it, you do not need to disassemble the motor or use a lift. So why does such a critical and easily replaceable unit often remain vulnerable? It's all about its maintenance, which is not performed in a timely manner. Sometimes the product is of such poor quality that the driver cannot fix anything.
In order to avoid getting into a stalemate on the road, you need to pay attention to the quality of the pump. Usually no one does this. Nevertheless, experts carry out working experiments and find out what is worth buying and what is not. We’ll talk about this at the very end, but now we’ll look at the key points that everyone, without exception, should pay attention to.
How to repair a windshield washer pump
The first step is to remove it from the tank. To do this, disconnect the plug with the wires and carefully pull out the motor. It sits there tightly and is fixed with special “jaws” of the tank, so you need to be careful not to break anything. Next we disassemble the pump itself. On Peugeot cars it is dismountable, so it’s easier here; on many other brands it’s one-piece. In the second case, you will have to saw the pump, and only then will you be able to get to its brushes and windings.
This can be done with a metal blade. Please note that the brushes may fly out during disassembly. By the way, if the latter are worn out, then you just need to replace them with new ones, and it is quite possible that this will help solve the problem. Pay attention to the condition of the parts - dirt and corrosion are unacceptable. Everything needs to be thoroughly cleaned and checked. The sore spot is usually the relay built into the pump. The contacts between the case and the board are bent. You can try to solder them, but this is extremely difficult and unreliable. It’s better to go to the nearest auto store and buy such a relay. Moreover, it costs about 100 rubles.
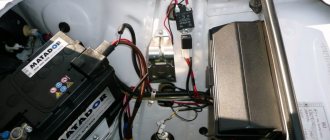
Block under the hood
It is located next to the washer fluid reservoir, under the protective cover.
Description
Option 1
| F1 | 10A Emission control system |
| F2 | 15A Emission control system |
| F3 | 15A Emission control system |
| F4 | 10A Emission control system |
| F5 | 30A Diesel combustion products filter evaporator, Glow plug control system |
| F6 | 3A Anti-lock braking system. Maintaining sustainability. Ignition |
| F7 | 7.5A Powertrain control module |
| F8 | 20A Cooling Fan |
| F9 | 30A Left windshield wiper |
| F10 | 30A Right windshield wiper |
| F11 | 10A Air conditioning compressor clutch |
| F12 | 20A Glow plug for the evaporator of the diesel combustion product filter |
| F13 | Reserve |
| F14 | 30A Emission control system - ignition |
| F15 | Not used |
| F16 | Not used |
| F17 | Not used |
| F18 | 40A Anti-lock brakes, stability control pump |
| F19 | 30A Starter Solenoid |
| F20 | 60A Glow plugs |
| F21 | 60A Ignition relay 3 |
| F22 | Reserve |
| F22 | Reserve |
| F23 | Reserve |
| F24 | 7.5A High Pressure Fuel Pump |
| F25 | Reserve |
| F26 | Reserve |
| F27 | Reserve |
| F28 | Reserve |
| F29 | Reserve |
| F30 | 40A Cooling fan 1 |
| F31 | 40A Fan 2 cooling systems |
| F32 | 60A Electric motors (two) windshield wipers |
| F33 | 20A Start-stop auxiliary water pump |
| F34 | Reserve |
| F35 | 15A Power supply for powertrain control system |
| F36 | 15A NOXI 2 sensor |
| F37 | 7.5A Volume control valve |
| F38 | 7.5A Mass air flow sensor |
| F39 | 15A Diesel Pump Fuel Evaporator |
| Relay | |
| R1 | Ignition |
| R2 | Starter |
| R3 | Rear window wiper |
| R4 | Not used |
| R5 | cooling Fan |
| R6 | Windshield wiper - on and off |
| R7 | Windshield wiper - low and high speed |
| R8 | Not used |
| R9 | Not used |
| R10 | Air conditioning compressor clutch |
| R11 | Evaporator system fuel glow plug |
| R12 | High pressure fuel pump |
| R13 | All Wheel Drive Pump |
| R14 | Econetic system |
| R15 | Cooling fans: high speed and low speed |
| R16 | Emission control system |
| R17 | Powertrain Control Module |
| R18 | Cooling fan - high speed |
Option 2
| F1 | 5A Switching off the radio sound |
| F2 | Reserve |
| F3 | Reserve |
| F4 | Reserve |
| F5 | Reserve |
| F6 | 15A Nitrogen oxide sensor |
| F7 | 15A Particulate Sensor |
| F8 | 20A High Speed Cooling Fan |
| F9 | Reserve |
| F10 | Reserve |
| F11 | Reserve |
| F12 | Reserve |
| F13 | Reserve |
| F14 | Reserve |
| F15 | Reserve |
| F16 | Reserve |
| F17 | Reserve |
| F18 | 40A Cooling Fan 2 |
| F19 | 40/60A cooling fan |
| F20 | 40A Emission control system |
| F21 | 40A Glow plug 2 |
| F22 | 40A Glow plug 1 |
| F23 | 10A Air conditioning compressor clutch |
| F24 | Reserve |
| F25 | 15A Right headlights with high intensity discharge lamps |
| F26 | 15A Left headlights with high intensity discharge lamps |
| F27 | Reserve |
| F28 | 5A Heating element for positive crankcase ventilation valve |
| F29 | 7.5/15A Coolant pump |
| F30 | 40/60A Powertrain Control Module Relay |
| F31 | 20A Run-start relay 2 |
| F32 | 20A Fuel fired auxiliary heater |
| F33 | Reserve |
| F34 | Reserve |
| F35 | 20A Powertrain Control Module |
| F36 | 20A Power wire 5 car |
| F37 | 15A Tank with reagent. Exhaust gas recirculation valve |
| F38 | 10A High speed cooling fan. Air conditioning compressor clutch. Low speed cooling fan. High and low speed cooling fan relay. Relay coils R1, R5, R10, and R15 of the engine electrical junction box |
| F39 | Glow plug control system |
| Relay | |
| R1 | High speed cooling fan |
| R2 | Not used |
| R3 | Rear window wiper |
| R4 | Air suspension module |
| R5 | Cooling Fan |
| R6 | Not used |
| R7 | Left headlights with high intensity discharge lamps |
| R8 | Right headlights with high intensity discharge lamps |
| R9 | Starter |
| R10 | Air conditioning compressor clutch |
| R11 | Not used |
| R12 | Not used |
| R13 | Emission control system catalyst |
| R14 | Not used |
| R15 | Low speed cooling fan |
| R16 | Not used |
| R17 | Not used |
| R18 | Powertrain Control Module |
System diagnostics
A working washer blows a jet of water onto the windshield glass, while at the same time the blade moves. You can determine which element needs replacement as follows:
- We start the engine and open the hood.
- We ask an assistant to pull the steering column switch lever towards you.
- If the pump is running, it will be clearly audible.
- There is no water jet blowing - this means that the nozzles are clogged.
If the liquid in the tank is frozen and needs to be replaced, then such a malfunction is difficult to miss.
