Why does the radio tape recorder not read the flash drive?
A common reason why the radio does not read a flash drive is the file system of the storage device. Most older models are designed to work in the FAT 16 and FAT 32 systems. For modern standard devices, the flash drive format for the car radio is most often NTFS. For the USB media to be in a supported format, it must be formatted. To do this you will need a computer or laptop.
Which radio do you recommend buying?
The reason for the radio freezing or completely refusing to read information from digital media may be the volume of the latter. To solve this problem, it is recommended to study the technical specifications of the device. Another option is the selection method. A USB drive, for example, with a capacity of 8 GB, is installed in the car radio connector. If the connected device is not supported, the radio will not play sound. In this situation, take a flash drive whose memory size is smaller, for example, 4 GB, and try connecting again.
Some radios are designed to read only small volumes. For this reason, a flash drive with a size of 1 GB may be suitable.
Any device has a limited service life. Therefore, the cause of the malfunction may be a failure of the flash drive. To test this, you will need another device to play the recorded music. This can be done, for example, on a speaker (with a USB port).
If the device is working properly, has the appropriate file system, a suitable volume, works on other music installations, but you cannot listen to music in the car, the reason may be an incorrect recording.
Problems can also arise due to a malfunction of the reproducing equipment. This often happens when the radio has an Internet connection function. A car gadget may be infected with a virus, which will cause the device to malfunction.
Incorrect connection of the digital media is also one of the reasons that can become an obstacle to listening to songs in the car. In most cases, this problem occurs among car enthusiasts who have old equipment that does not have an appropriate input, i.e. The flash drive is connected via an adapter or other means.
The flash drive connector is faulty. This technical problem often occurs if the drive is removed incorrectly (torn out).
Troubleshooting a hardware problem
A dusty lens and a broken laser are the most common causes of such breakdowns. But often there is another reason.
These are incorrectly or poorly connected cables for power supply and data transfer SATA or IDE.
This parameter needs to be checked first.
To do this, open the system unit and find the wires that go from the drive to the motherboard and the computer's power supply.
Make sure they are connected securely (tightly in the ports, free of dust and debris, etc.).
If the cables are connected normally, then the problem is in the drive. Fixing it is more difficult than buying a new device.
It is much easier to purchase a disk drive - the price of such a component is about 1000 rubles.
In the case of laptops, you shouldn’t try to fix anything yourself. Since the drive connection system there is connected to many components.
You can accidentally damage the entire device.
The solution in the case of laptops is to use a drive connected via USB.
With installed drivers and correct software, such a device works properly and stably.
In principle, to repair it, it is often enough to disassemble the drive. And then wipe the lens with a cotton swab.
It’s just very difficult to do this, since these devices are selected without taking into account the fact that they will be disassembled (although in principle this can be done, there are no general algorithms).
What format of flash drive is needed for the radio?
Format—drive file system. There are 3 main ones: FAT32, NTFS, EXT. The last 2 are not used for radios.
The FAT32 (File Allocation Table) format is understood as the standard version, which was created from the previous FAT16. Almost not supported due to being outdated.
FAT32 is a special table where files and information are located in a given sequence. This uses 32-bit cluster addressing. Now this system has been maximally improved.
FAT32 is a flash drive format for car radios, although it is the simplest. But complex data will not be stored on such a medium either.
Choice
Not only a special flash drive format is needed for the radio. This type of storage has become one of the most common. In addition to the file system on the flash drive, attention is paid to other criteria for choosing a device for a radio in a vehicle.
It is necessary to take into account the specifics of turning on the radio in the car. Since the USB connector may be located in the front, a large flash drive will break. The nest may also be damaged. Therefore, you need to choose a small option that will not stick out too much and interfere.
A small device should be well protected. The flash drive will work in any weather with temperature changes, vibration and other unfavorable factors.
Because of this, malfunctions in its operation may appear over time, so it is better to choose the most reliable option.
It is necessary to pay attention to the volume of the media. It is best not to choose a flash drive with too high an indicator, since the radio may not see the files. A good option is 4 GB. You can upload a large number of musical compositions there. Suitable for both old and new car radios. You can additionally check drives with larger capacities. If everything functions stably, then you can take this option.
Several options for good flash drives for car radios:
- Apacer Handy AH134. Looks like a car key. It is small in size, convenient in shape and waterproof. The body is solid. Models with a capacity of 4 and 8 GB are sold.
- HP V165W. The device can operate at air temperatures of +0…+60°C. There are volumes up to 32 GB.
- Kingstone Micro. The device has a special hole where you can thread a rope or keychain. The body is stamped from the inside. This option is less durable. It is suitable for those who do not plan to often remove the flash drive from the connector.
- PQI U280L Button Disk. The case has special hooking elements to make it easy to remove the device from the connector. But it is not necessary to remove the flash drive, since it can be left in the car overnight. This model can operate at temperatures ranging from -20...75°C.
- Pretec iDisk BulletProof. Manufacturers claim that the device can withstand even being shot with a bullet. The downside is its large dimensions, so it should be used carefully. The case itself is durable, but the socket can be damaged. Options with memory from 2 to 32 GB are sold.
How to format correctly
To correctly format a flash drive for a car radio, you need to insert it into a USB connector on a computer or laptop. Afterwards, you need to right-click on the icon of the device itself and select “properties” from the drop-down context menu. Next, a window appears where the format - the type of file system - is displayed under the name of the media.
If this format is not readable in the car, you need to format the flash drive for the radio:
- Right-click on the media.
- Select the “format” tab.
- Select FAT32 format.
- Click the “start” button.
After some time, the format will be converted to the required one. Then you can transfer all the data back to the media.
It must be remembered that after formatting the flash drive, all files on it will be deleted.
It is best to simply save the data on a computer or other storage device.
Sometimes the radio cannot work with the selected drive and displays an error. In this case, you need to format the flash drive so that the radio can read it.
How to record music
Before you record music onto a flash drive for your car radio, you need to take some preparatory steps.
The algorithm of actions is as follows:
- Determine the file system and select the correct one. Please note that the radio will support FAT32. If necessary, format the media.
- Select the correct file format for the recorded song from your computer. Almost all car radios have an MP3 option. If the files have a different extension, then you can either convert them or find a replacement composition, but with the required format. For the first option, the Format Factory program is suitable. You will need to drag the file into the work area, select the appropriate format in the window, and then click “OK”.
- Copy and record music to a flash drive for the radio. To do this, you need to insert the media into the appropriate slot. Then open the folder where the music is stored and copy it (right-click to select the “copy” function). Then open the drive itself and insert the files (right-click to select “insert” from the drop-down menu).
After this, all selected files will be located on the flash drive. It can be pulled out of the connector on the computer and connected to the radio.
How to make music scatter
If music tracks in a car are constantly played only in the same order, then you want variety.
There are several methods on how to arrange them so that they are included in the spread:
- Total Commander program. This is a file manager. Additionally, you need to install the special Random WDX plugin. It is intended specifically for mixing files. You need to run the program and select the folder on the flash drive where you want to mix the songs. Then you need to select the “Group Rename” function. In the window that opens, you need to create a “Renaming mask”.
- ReNamer program. It is designed to rename files. After installing it, you need to open “Add files” and select those that are needed. You can select the entire folder. Then, through the “Filters” function, a mask is selected for further renaming. Additionally, you need to select the “Randomization” item. All that remains is to click the “Rename” button.
- AutoRen. After installing such a program, you need to open the necessary folder with music. Then, in the “Symbols” section, perform a rename with the “Random” function.
- SufflEx1. This program rearranges files in a folder. You need to install it and click the “Shuffle” button.
All these programs rename files, so that later the songs will sound random when played on the radio.
Checking technical inspection using the EAISTO database
Good afternoon, dear reader.
For several years now, the State Traffic Safety Inspectorate has not carried out state technical inspections of vehicles. Currently, technical inspection is carried out by so-called operators (commercial organizations).
Based on the results of passing the technical inspection, a diagnostic card is issued, printed on a printer and not having any protection. In this regard, drivers often have the question of verifying the authenticity of this document.
In this article I will tell you how to check the technical inspection using the EAISTO database. Let's get started.
First, a few words about the diagnostic card, which is issued based on the results of the technical inspection. It does not have any protection, is printed on an A4 sheet and certified by the signature and seal of a maintenance point employee.
Unlike inspection tickets that were issued several years ago, a fake diagnostic card can theoretically be made by anyone with a computer with a printer.
However, protection from fraudsters is provided. After the technical inspection is carried out and a diagnostic card is issued to you, information about it is entered into the EAISTO.
EAISTO is a unified automated information system for technical inspection of vehicles. It is a database with information about all diagnostic cards and technical inspections.
Both technical inspection operators and insurance companies have access to this database. So you won’t be able to purchase insurance with a fake diagnostic card.
Checking the diagnostic inspection card using the PCA database
The form above allows you to check the legality of the diagnostic technical inspection card online.
To do this, you need to fill in any of the four fields and click on the “Check” button.
Checking the technical inspection by car number is quite simple. Enter the license plate number of any vehicle in the field and receive information about its technical inspection.
No confirmation is required, so you can enter the number of your car, or your neighbor’s.
Number input format:X777XX77X777XX177
The number must be entered in the Russian keyboard layout, without spaces.
The following results of checking a car using the EAISTO database are possible:
- The car has passed technical inspection. In this case, information about the make and model of the car, as well as the validity period of the diagnostic card, will appear on the screen.
- The car requires a technical inspection. The same information is displayed on the screen as in the previous paragraph, but the validity period of the diagnostic card has already passed.
- The car is not in the database. The information “CARD NOT FOUND” is displayed on the screen. This is possible if the car has never undergone a technical inspection (new car less than 3 years old).
Please note that the EAISTO database is not always updated instantly, and there may be some delays in the event of a technical failure. Now you know how you can check the diagnostic inspection card using the EAISTO database and, if necessary, you can always use this page
Now you know how you can check the diagnostic inspection card using the EAISTO database and, if necessary, you can always use this page.
Good luck on the roads!
pddmaster.ru
Formatting procedure
In order for the radio to be guaranteed to recognize a flash drive, its file system format must comply with the FAT32 standard. Of course, some modern equipment of this type can also work with the NTFS file system, but not all radios can do this. Therefore, if you want to be 100% sure that the USB drive will fit the device, you need to format it to FAT32 before recording audio files. Moreover, it is important to perform the process in exactly this order: first formatting, and only then copying musical compositions.
Attention! Formatting involves deleting all data on the flash drive. Therefore, if files that are important to you are stored on it, be sure to transfer them to another storage medium before starting the procedure.
But first you need to check what file system the flash drive currently has. It may not need to be formatted.
- To do this, connect the flash drive to the computer, and then through the main menu, a shortcut on the “Desktop” or the “Start” button, go to the “Computer” section.
- The specified window displays all drives connected to the PC, including hard drives, USB and optical media. Find the flash drive you are going to connect to the radio and right-click on its name. In the list that appears, click on “Properties”.
- If the “File system” option is “FAT32”, this means that the media is already prepared for interaction with the radio and you can safely record music on it without additional steps.
If the name of any other type of file system is displayed opposite the specified item, you should format the flash drive.
Formatting a USB drive into the FAT32 file format can be done either using third-party utilities or using the functionality of the Windows operating system. Next we will look at both of these methods in more detail.
Method 1: Third Party Programs
First of all, let's look at the procedure for formatting a flash drive in FAT32 format using third-party programs. The algorithm itself will be described using the Format Tool as an example.
- Connect the USB flash drive to your computer and activate the Format Tool utility as an administrator. From the drop-down list in the “Device” field, select the name of the USB device that you want to format. From the "File System" drop-down list, select the "FAT32" option. In the “Volume Label” field, be sure to enter the name that will be assigned to the drive after formatting. It can be arbitrary, but it is highly desirable to use only letters of the Latin alphabet and numbers. If you do not enter a new name, you simply will not be able to start the formatting procedure. After completing these steps, click on the “Format Disk” button.
- Next, a dialog box will open in which a warning will be displayed in English that if the formatting procedure is launched, all data on the media will be destroyed. If you are sure of your desire to format the flash drive and have transferred all valuable data from it to another drive, click “Yes”.
- After this, the formatting procedure starts, the dynamics of which can be observed using the green indicator.
- After the process is completed, the media will be formatted in the FAT32 file system format, that is, prepared for recording audio files and then listening to them through the radio.
Method 2: Standard Windows tools
The file system of a USB drive can also be formatted in FAT32 using exclusively the built-in Windows tools. We will look at the algorithm of actions using the Windows 7 system as an example, but in general it is suitable for other operating systems in this line.
- Go to the Computer window, where your connected drives are displayed. This can be done in the same way as was described when we looked at the procedure for checking the current file system. Right-click on the name of the flash drive that you plan to connect to the radio. In the list that opens, select “Format...”.
- The formatting settings window will open. Here you need to perform only two steps: in the “File system” drop-down list, select the “FAT32” option and click on the “Start” button.
- A window will open warning you that running the procedure will destroy all information stored on the media. If you are confident in your actions, click “OK”.
- The formatting process will start, after which a window with the relevant information will open. Now you can use the flash drive to connect to the radio.
If the flash drive does not want to play music when connected to the radio, do not despair, since it is quite likely that it will be enough to format it using a PC into the FAT32 file system. This can be done using third-party programs or using the functionality that is already built into the operating system.
Signs of a hardware problem
The device can fail for various reasons. Sometimes this is due to operational wear of heads or other hardware components, dust and other reasons.
However, in these situations, it is typical to stop reading media of any type, but if only one type has stopped being read, then the problem is probably something else (with rare exceptions).
Playback side
How to diagnose a problem and roughly determine what actually happened? There are several characteristic signs:
- If the VD opens, but the CD does not start, or vice versa, then the problem is most likely a broken laser or one that has just begun to change its functionality;
- When inserting the media into the drive, the user hears how it makes noise, the spinning speed either increases or decreases, in some cases a grinding noise is also heard - the lens is damaged (worn out, dusty, etc.);
- If the problem described above only occurs with one specific drive, then the drive itself is faulty and the drive is probably fine;
- Licensed discs are detected fairly well, but unlicensed ones are not detected at all.
These are signs that may appear on the disk reading side. They are not the only ones. But these are the ones that occur most often.
From the recording side
A separate option is signs of a drive malfunction, detected when recording to a storage medium. From the recording side, problems manifest themselves as follows:
- The disc is not written at all;
- Data is written at the beginning, but then the process is interrupted;
- The data seems to have been recorded, the system shows that the process is completed (sometimes too quickly), but such media then does not open on any other device;
- The recording occurred or was interrupted, but the resulting disk can no longer be formatted, cleaned, or used again.
Those who often use the recording function note that if the hardware malfunctions, problems with recording appear earlier than with playback.
That is, the discs stop being written to, but are still readable. This allows for timely repairs.
What should be the volume
Most audio systems in cars are capable of working with flash drives, the memory capacity of which ranges from 2 to 8 GB. However, there are removable drives on the market today with a capacity of 16 GB or more. Therefore, before purchasing high-capacity flash drives, you simply need to find out how much memory the car radio can “withstand”.
When choosing a flash drive, drivers should pay special attention to the format, capacity, standard and size of the removable media. The ideal option, provided that other technical parameters are met, is a removable drive in the form of a keychain. Such a flash drive will not get lost on the road or at home, and will always be “at hand” for recording the next audio file.
Reason 4: There are Russian letters in the track title or tags
Many car players do not support the Cyrillic alphabet, which is why, at best, song names are displayed in the form of unreadable hieroglyphs, and at worst, the music is not recognized at all. The situation is similar with tracks whose tags contain Cyrillic. The way out of this situation is simple - rename the files using only English letters, as well as look at the tags and correct them if necessary, which the article at the link below will help you with.
Read more: How to edit MP3 file tags
Rules for downloading music from the Internet
Many resources that have huge collections of popular music from around the world operate on a paid basis, leaving only some tracks free. Many inexperienced users fall for this and pay money monthly to receive the latest news. Often, this playlist is not updated or is updated irregularly. Therefore, when downloading music to your computer, you need to follow the main rule - use only free offers.
To check the ability to play, you can try to play the tracks using the player on your computer
In addition to this, our editors offer a number of recommendations that should be followed when using music from various sites.
- It is better to search for resources with collections in well-known Russian-language search engines such as Yandex or Google.
- When you try to download a track you like, several links appear that require you to click to get to the “Download” button. This is not worth doing. There is a high risk of “catching the virus.”
- Before directly downloading audio files from the network, it is better to install an application such as USB-Security on your computer. This will block the passage of an infected file to the flash drive.
- If there is no similar program, it is better to leave your antivirus program always on, especially when working with various pages on the Internet, including music portals.
- To download songs to the browser, it is better to attach a separate folder and set up automatic saving of information in it. It can even be stored on the local drive “D”.
According to experts and IT specialists, the best sites for downloading are those on which the download occurs immediately after clicking on the “Download” button.
Possible solutions:
- Check the card for “foreign” files with an extension different from *.mp3. It is recommended to use the Total Commander file manager with a mode for displaying hidden/system files.
- If step 1 doesn’t help, check your drive (preferably your computer too - it’s never a bad idea) for viruses. Viruses themselves cannot harm the radio, but they can copy executable and other files to your drive, thereby preventing the device from reading the contents of the memory card. You can use such anti-virus scanners and utilities as: AVZ, CureIt!, Antimalware Bytes, Kaspersky Virus Removal Tool.
- If steps 1 and 2 did not help, then do the following: format the memory card using the FAT32 file system. In the root of the disk, create one folder and name it using the Latin alphabet. For example Music . Copy the required MP3 files to this folder. Then do step 1 again
NOTE. It is recommended to use a file manager for this, for example Total Commander. Make sure that you copied only MP3 files.
The information on error ERROR-19 of the Pioneer radio is most likely not complete. If you have more accurate or complete information about this error, we would be grateful if you share it.
See also:
And also ERROR-19 in PIONEER radios can be a hardware failure, for example due to a broken data bus contact, this is pin 2 or 3 of the USB connector, tested from personal experience
Agree. A similar error appeared after another flash drive was inserted, the plug of which turned out to be tight, as a result of which the 2nd pin of the USB connector was bent when inserted. So, guys, if after inserting another flash drive you get error 19, you should inspect the connector.
You can try formatting the flash drive and setting the cluster size to 4096 bytes. It helped me.
This happened to me, I couldn’t figure out what was wrong for a long time, but I finally figured it out. The radio has something in the settings like 'USB Auto on' or something like that - when you connect a flash drive, the radio automatically starts reading it. By default this option was enabled, I turned it off and after that this error appeared. I reset the radio to factory settings (press on for a long time - there will be such an option, but you can stupidly disconnect the power supply) - everything worked fine again. The result is that the “USB Auto on” option on my radio is buggy and cannot be changed.
I connected either a flash drive or an iPhone, and the next time I connected the phone via USB, I got error 19! Rebooted the phone and everything is fine!
I had the same situation, formatting the flash drive did not help. The problem was a burnt-out signal track 2 from the USB to the socket connector. I soldered the jumper and everything works.
Error 19 the flash drive failed, tried to insert another flash drive, everything works, formatted the old one, it didn’t help, bought a new one, too, error 19, formatted the new one, set it to 4000b, also didn’t help, the 3rd flash drive still works.. the funny thing is that the first flash drive worked for several days before the error, can you tell me what?
Resetting to factory settings helped. Or you can simply remove the terminal from the battery. The flash drive started working.
the same garbage happens, removing the terminal basically helps, but sometimes I switch from the flash drive to the radio, I return to the flash drive again error 19, although it worked before, sometimes I just took out the flash drive - put it in and it worked
I rummaged through the settings - the system has AUTO PI, turned it on and the flash drive started working
Pioneer 580, error 19, it doesn’t matter whether the flash drive is installed or not, they reset the radio to the initial settings, checked the tracks, everything works, nothing is short-circuited, has anyone encountered such a problem? Help.
I'm trying to solve the same problem using this method.
Thanks guys!) I turned on auto pi and everything worked)
Has anyone fixed this error on Android?
At 190 you need to set the memory in the settings and there it is initially android and then it’s ok! Moreover, this error only occurred on SanDisk flash drives.
Pioneer MVH-S100UB. The flash drive is also SanDisk. This was the only thing that helped. What have I not tried? Good luck.
Beautiful to the point brother
yes, I went too, now I reset everything to factory settings and the flash drive started working) I didn’t even believe it at first)
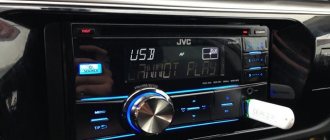
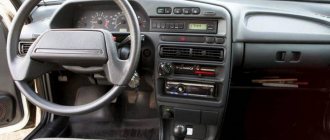
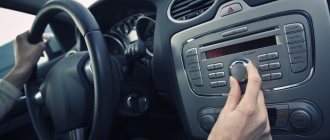
How to connect to a car radio
To connect a music storage device, it must be inserted into the appropriate connector. It is not recommended to do this procedure with the radio turned on, because The device software may crash. But even if you ignore this advice and insert it into the connector, in most cases the equipment automatically switches to playing music from a USB drive.
You can connect a flash drive to a car radio, not only when the equipment has the necessary connector.
USB adapter from mp3 player
To connect a USB drive to the standard radio, you will need a player that can read information from the corresponding media. An mp3 player must have a headphone jack. You will also need a soldering iron.
The modification work begins by removing the CD drive from the radio. Power for the player will be taken from the standard device. Additionally, a voltage converter is required. It is necessary to ensure that the player does not burn out. A signal is taken from the player’s output and will be fed to the input of the AUX radio. The connecting cable must be shielded. On the car radio board you should find the audio input contacts. The wires from the mp3 player are soldered to them.
The space freed up from the CD player in the radio is used to install the player.
DIY adapter
To make an adapter, you will need a wire from old headphones, a tulip connector and a 4-core copper braided wire. The standard device must have an AUX connector. The headphone wire is stripped. After removing the insulation, solder the right and left channels to the tulip (to the middle connectors). The main wire is connected to the steel rod of the tulip. On the radio, you should find the external audio signal output and connect an adapter with storage media to it.
To play music in the car, you will need to activate the AUX mode.
Connecting to AUX
Even when the car radio does not have an AUX output, you can connect a flash drive to it. For remodeling you will need the following materials and tools:
- soldering iron;
- connection cable;
- 3-pin stereo jack;
- screwdriver;
- multimeter
After dismantling the car radio, they begin to remove its protective casing. You need to find the RCH and LCH connection points on the board. A signal will be sent through them. Using a soldering iron, you need to connect one wire to ground. 2 more wires are soldered to the channels (right and left). The wires are brought out and the audio connector is soldered to them. The media will be connected to it.
If you are not sure that you will be able to connect a USB flash drive yourself when there is no corresponding connector, it is better to contact a specialist. Otherwise, incorrect performance of the work may cause a short circuit and damage to the old but working radio. In such a situation, you will have to purchase new equipment for your car.
An alternative option could be an FM modulator. The device is inserted into the cigarette lighter. Some modulator models are equipped with Bluetooth, a microphone and a connector for USB devices. Thanks to the audio output, it can be connected to a radio.
Error AMP
An error in the Pioneer radio amplifier is indicated by just such an inscription. This message appears when the sound disappears while music is playing. It has nothing to do with the carrier. The fault should be looked for in the wiring from the head unit to the speakers installed inside the car. As a rule, this may be a short circuit or a wire break due to vibration.
If the files are not MP3
If it happens that your music is not in MP3 format (which is very rare), we can always convert it the way we need it. To do this, you can use any converter installed on your computer. This option is suitable if there is a lot of music. But the easiest way is to use an online service. For example, this could be online-audio-converter.com.
- Open the site and drag the music you want to convert into the window.
- We are waiting for the process to complete.
- Download files in the required format.
Now all we have to do is move the finished MP3 songs to our flash drive.
How to decipher the error code and fix it
Some “smart” car radios report information on the display that they specifically do not like about the USB storage device.
For example, these error codes:
- ERROR 23 – FAT32 or NTFS file system mismatch;
- ERROR-PROTECT – absence of Windows Media codec in the radio;
- CHECK USB – USB port power supply error;
- ERROR 19 – Cyrillic in file names, complex hierarchy, lack of an appropriate codec, etc.
For other types and error codes, please refer to the owner's manual for your specific brand of car stereo.
Error 23
On the radio display, error 23 is marked as ERROR-23. Most often this problem occurs on Pioneer radios. The reason for its appearance is that the installed drive is formatted in one of the FAT systems, while the radio “understands” only the NTFS system. Solution: reformat the drive from FAT to NTFS as described above;
Pioneer DEH-1500UBA
when connecting a smartphone via USB, it says error 19, there were no problems on another smartphone before, I read the tracks right away
Answers 1
Hello, check if the USB cable is working, try connecting the device to the radio via another USB cable, if the error pops up again, try using a Bluetooth connection and using this connection to listen to your tracks from your phone on the radio.
Pioneer car multimedia centers are equipped with a built-in diagnostic system that displays detected error codes on the display. The appearance of error 19 on the Pioneer radio with a flash drive occurs when information is incorrectly read from the drive. Moreover, the error code does not depend on the switching method and design features of the external device for storing information.
Reasons for lack of work functions
First of all, you need to identify the root cause why the radio tape recorder stopped seeing the flash drive. If equipment for listening to music purchased in a store cannot be listened to from the media, then you should send it in for repair under warranty.
Before this, you need to check it by inserting a new flash card into the computer and making sure that it is in working order, insert it back into the music device. If the work is not restored, then the essence of the problem should be attributed to warranty repairs. The main reasons why any radio model, including the Pioneer, does not see the flash drive include the following:
- Damage to the connector at the junction of the storage medium with the music equipment. This moment occurs when the movements during connection and removal are performed inaccurately;
- Poorly performed work regarding the internal wiring of the system leads to damage or breaks. Result - the Pioneer radio does not see the information card;
- If the radio sees music on the flash drive, then the chip or board that is responsible for playing music from the flash card may be damaged;
- A mandatory procedure is to check the equipment for the operation of the radio and disks. Perhaps it doesn't work at all;
- Faulty state of the memory source. Outgoing contacts or a burnt-out microcircuit responsible for control prevents this device from functioning normally;
- The control buttons located on the equipment and responsible for playing melody from a portable device have stopped working correctly;
- Software error. This is another problem why the radio tape recorder stopped seeing the flash drive. If detected, you must immediately contact the service center to eliminate it;
- Inconsistency with model specifications. The Pioneer radio does not see the flash drive, since it should be remembered that it does not see flash cards larger than 8 GB, much less 16 GB. Because maintaining them requires more power than it can provide;
- The priority of the folders on the memory card is incorrectly set. In this case, it is recommended to check if the checkbox located in the folder settings is checked, because this permission reads them only on a specific computer;
- The content needs to be formatted or completely cleared. This may be necessary if a virus has penetrated and deleted all data, and the radio is not able to open the information because it has ceased to exist;
- Recorded file formats do not match. Instead of mp3, the FLAC or AAC formats are installed, which are supported by quite a few devices.
After identifying a breakdown and establishing the specific cause of its occurrence, everyone wants to know what to do to fix it.
Common fixes for this problem
To eliminate an unpleasant situation and get an answer to the question: “What should I do?” Perhaps you can learn from these steps:
- Format. First, the files are checked to see what extension they are recorded with. If they meet the stated requirements, then the entire drive is formatted. The entered data is copied to it again. This process is done in this way: a portable device is connected to a laptop or computer, the “removable storage” section is located and the right mouse button is clicked on it. Next, it is recommended to select the “format” button and select FAT32 in the menu that appears. If, at the end of this procedure, the memory card is detected on the PC, but not on the car radio, then the fault is in the music player.
- Synchronization. The file system of the portable storage device is being checked. Most often, the FAT32 system is present in the radio settings. It is worth checking before operation because it may be locked to the NTFS system function by default. After synchronization is completed on your computer, you need to open the properties of the flash card by changing the type of file system.
- Connector compatibility. This is a particularly important point. Because you need to select a removable device in accordance with the connectors presented to it, USB 1.0, 2.0, 3.0. Thus, if the most advanced version is connected to an outdated version, then a program conflict occurs and the radio does not read the card.
To solve this problem, when buying a memory card, be sure to read the characteristics with what capacity of the removable card, namely less than 8 GB or more than 16 GB, a car radio, for example Pioneer, is compatible. And also know the main points that will allow you to correct the problems that arise.
Radio firmware
All modern digital devices, including car radios, have software responsible for the correct operation of the equipment. If various problems occur, problems with the firmware are suspected. An example is the occurrence of difficulties when trying to open a file on a car tape recorder, while other equipment of this type immediately plays songs. First look at the USB drive, it should be working properly.
When deciding what to do if the radio does not see some MP3 files, you must first check their parameters. If the basic characteristics are the same as the rest of the songs, it suggests software errors. In this case, you need to update it or reflash the radio.
About notOshibka.Ru
Consent to the processing of personal data
I hereby confirm and give my voluntary consent to the website neoshibka.ru (Internet address https://neoshibka.ru/) in accordance with Article 9 of the Federal Law of July 27, 2006 N 152-FZ “On Personal Data” for processing and the use of my personal data specified during the registration process, commenting, or when filling out any other contact form on this site, with or without the use of automation tools, including collection, recording, systematization, accumulation, storage, clarification (updating, changing ), extraction, use, transfer (distribution, provision, access), depersonalization, blocking, deletion, destruction of personal data in order to collect statistics and improve the services provided by the site. The processing of personal data is also carried out for the purposes of my information notification (distribution of information, if desired, there is an unsubscribe function) and for conducting analytics and statistics.
I am aware that:
- This consent to the processing of my personal data specified during registration on the Site, sent (filled out) using the Site, is valid for 20 (twenty) years from the date of registration on the Site;
- Consent can be withdrawn by me based on a written statement in any form;
- Providing personal data of third parties without their consent entails liability in accordance with the current legislation of the Russian Federation.
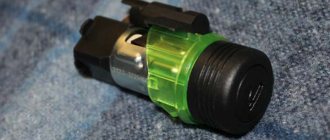
What are the advantages of modern USB drives?
In the last few years, flash drives have been the most popular among car owners, as they allow you to quickly record your favorite audio tracks. This cannot be said about recording audio onto CDs, for which a laptop or computer must at least have a CD drive, as well as a special utility (for example, Nero or DAEMON Tools).
Another advantage of USB drives is their compact dimensions and large amount of built-in memory (flash drives with a memory capacity of 256 GB or more are available on the market).
The main advantages of flash drives: compact dimensions and large memory capacity
Other useful tips
Remember a few more basic tips:
- Do not use flash drives larger than 4 GB for the radio;
- Check if the files are in a valid format;
- It is rare, but it happens that the radio does not read files that have Russian names or Russian letters in it;
- Insert and remove the flash drive carefully;
- Do not repair a broken radio yourself - today this is a complex electronic equipment that only professionals with special knowledge and equipment can understand.
As you can see, a car radio may not read a flash drive for a variety of reasons.
What's the result?
As you can see, the actions discussed above in some cases allow you to achieve the desired result. If the drive is completely out of order for one reason or another, you can always buy a flash drive for music in the car at an affordable price.
In this case, it is more difficult with a radio (especially the standard one). You need to check the radio connections, reboot the device, update the firmware, etc. If such simple methods of restoring functionality do not help, then repairs are needed.
Finally, we note that at first glance the problem may seem large-scale, but in reality everything is not so critical. If the repair is too expensive, and the problems are related only to the USB connector, you can try an AUX instead of a flash drive or an FM transmitter as a replacement. These solutions also have their advantages even compared to traditional drives, although for a number of reasons they are used less actively.
Sources
- https://omagnitolah.ru/podklyuchenie/fleshka-v-mashinu.html
- https://AutoTuning.expert/magnitola/fleshka-v-mashinu.html
- https://lumpics.ru/what-format-to-format-flash-drive-for-radio/
- https://TehnoPanorama.ru/avto/kakoy-dolzhna-byt-fleshka-dlya-magnitoly-avtomobilistam-na-zametku.html
- https://tehno.guru/ru/kak-skachat-muzyku-na-fleshku-s-kompyutera/
- https://os-helper.ru/pc/kak-skachat-muzyku-na-fleshku-chtoby-potom-ona-chitalas-v-mashine.html
- https://voditeliauto.ru/poleznaya-informaciya/aksessuary-i-gadzhety-dlya-avto/pochemu-magnitola-ne-chitaet-fleshku.html
- https://carnovato.ru/samostoyatelno-zapisyvaem-muzyku-na-fleshku-dlya-avtomagnitoly/
- https://1avtozvuk.ru/neispravnosti/magnitola-ne-vidit-fleshku
- https://AutoTuning.expert/magnitola/ne-chitaet-fleshku-s-muzyikoy.html
- https://scart-avto.ru/remont/v-kakom-formate-formatirovat-i-kak-zapisat-muzyku-na/
- https://AutoTopik.ru/sovet/788-magnitola-ne-chitaet-fleshku.html
- https://KrutiMotor.ru/magnitola-ne-chitaet-ili-ne-vidit-fleshku-prichiny-remont/