A novice driver needs to understand the operation of the injector, which consists of a fuel injection system. If you know the principle of operation of an injection engine, then in case of minor breakdowns you can not turn to a car service center for help, but fix them yourself.
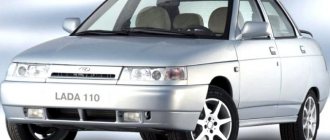
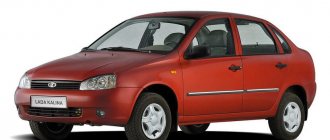
The VAZ 2115 is based on the “ninety-ninth” VAZ model. Therefore, the VAZ 2115 fuse box is similar to the 99 modification, but the injector has significant differences - the distributor injection of gasoline is controlled by the vehicle electronics.
Location of fuses on Priora
The fuses on the VAZ 2170 and its modifications are concentrated in different places as follows:
- In the interior mounting block, which is hidden behind the dashboard cover opposite the driver’s left foot;
- In the additional relay and safety block on the right under the lining of the floor tunnel near the navigator's left leg;
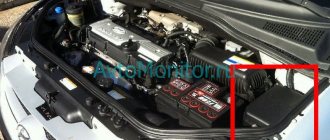
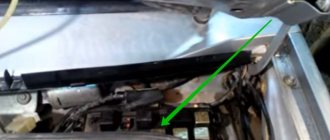
- In the main fuse block under the hood near the expansion tank. It is there that the most powerful safety system is located, designed to ensure the operation of power electrical circuits;
- In the relay and safety block of the air conditioner next to the front left shock absorber strut cup.
Of course, each block contains fuses and/or relays responsible for the operation of a particular electrical system, so you need to take a closer look at where and which of them are located.
Relays and fuses of the mounting block in the passenger compartment under the dashboard
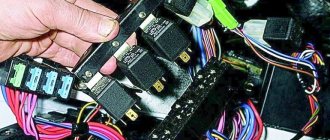
So, under the dashboard cover we will find the interior relay and safety unit, also called the “black box”. There are no such number of relays and fuses anywhere else, so most of the problems are associated with this relay-fuse group. It is also the subject of greatest interest. Relays are marked with the letter K and a digital designation, which for this block has the following interpretation. (Indicated in Fig. 1)
In addition, the interior mounting block contains fuses, marked with the letter F, which protect the following circuits (Indicated in Fig. 2):
The wiring diagram for the interior mounting block can be seen on the back surface of the cover that covers it.
Safety relay group of an additional block in the floor tunnel
This block is called additional and contains relays (marked with the letter K) and fuses (F) of such technical systems (See Fig. 3):
WHY DO FUSES FAIL?
There may be several reasons for this. You need to start with trivial cases when a device with a lower current is placed in the circuit. When you turn on, for example, the lighting, the starting current of the cold filaments exceeds the working current, so if the circuits are working properly, a fuse of a lower rating will simply blow out.
A short circuit in the protected circuit is one of the most dangerous electrical equipment faults. If in the circuit where the short circuit occurred there is a fuse of a higher rating, then the track of the printed circuit board of the mounting block may burn out instead. If the culprit for the blown fuse is a short circuit in the circuit, then before installing a new protective element, you need to try to eliminate it.
To increase reliability, a new type of fuse block was developed and installed in the electrical equipment system of VAZ 2105, VAZ 21051 and VAZ 21053 vehicles.
Removal and Replacement Guide
Changing fuses yourself
Before you begin replacing the safety devices located in the main unit, you must turn off the ignition and battery terminals under the hood.
The replacement procedure is carried out as follows:
- Find the installation location of the device. There are latches on the plastic cover of the block; press them. After removing the cover, you will be able to see a diagram printed on the reverse side, which indicates the location and purpose of all used elements.
- Then you need to identify which device has failed and needs to be replaced. Sometimes a breakdown can be determined visually - the component itself may be burnt out, sometimes a broken thread is clearly visible in it.
- Under the cover of the device you will see tweezers, which can be used to remove the device. If you don't have tweezers, you can use pliers.
- Remove the burnt out element and replace it with a new one, then replace the cover and connect the battery terminals (video filmed and published by the AVTOCLUB_22 channel).
Replacing fog lamp fuses
If the fog optics break down, you should first diagnose the operation of the device. The component is located inside the car.
To check and replace, follow these steps:
- First you will need a Phillips screwdriver, use it to remove the two switches located in the middle of the console, near the audio system.
- Using a screwdriver, you will need to press out two fasteners.
- Then remove the plastic insert.
- You can now remove the fuse housing. Remove the protective cover of the device and replace the part with a new one.
Changing the fuse box
Removing and replacing the block with components is done as follows:
- First, open the engine compartment of your car and remove the air filter housing. Unscrew the nuts that secure the housing using a Phillips screwdriver.
- Then under the device you will be able to see a plug with cables connected to the device, you need to unplug it. The product body itself is marked in colors; it corresponds to the color of the connected connectors. By taking these plugs into account, the need to label cables can be avoided.
- After this, you should climb into the vehicle interior and remove the shelf, which is located under the control panel. After this, unscrew the bolts that hold the glove box housing.
- Next, disconnect the plug with cables connected to the connectors directly on the device. Once you do this, you will be able to see the color coding.
- Using a wrench, remove the bolts that secure the block itself. Please note that the outermost screw on the case is hidden, so you will not be able to see it immediately.
- At the end, remove the block with the devices, now the device can be replaced. Installation of a new device, as well as assembly of components, is carried out in the reverse order.
Replacement
Before replacing fuses, you must turn off the ignition and disconnect the battery. This will avoid electric shock.
How to remove a burnt one? The block itself must have special pliers for removing non-working protective equipment (they are supplied by the manufacturer along with the machine). It is better to insert a new one with their help as well. At the same time, it is important to ensure that it matches the previous value.
In a situation where there is no suitable fuse on the farm, a temporary jumper will help. Any copper or aluminum wire of sufficient cross-section will do for it. If necessary, it can be twisted several times.
If the fuse sparks when you turn on the power, then most likely there is a short circuit somewhere. You need to check all the contacts and wires coming from it. Sometimes it is necessary to remove the fuse box. To do this, you must first disconnect the negative terminal from the battery. Next, connectors with wires are disconnected in the cabin - first remove the top one. The block itself is held in place by nuts, which will need to be unscrewed with a 10 mm socket wrench. Then all that remains is to remove the bottom four pads and pull out the entire assembly. There is no need to be afraid of mixing them up during assembly, as they simply will not fit into the “non-native” socket.
Fuse diagram under the hood
This block contains elements responsible for the electrical equipment of the engine and external lighting.
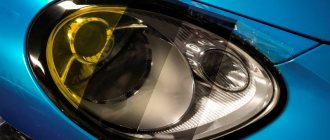
For example, if there are interruptions in the lighting of the low-beam headlights, then using the circuit it is possible to easily find the failed fuse.
Power supply table under the hood of Renault Megane 2
LPG has a brown color, which is responsible for the climate control in the car interior, the cigarette lighter, the hazard warning switch button, and the central locking. The red RRG and RPD markings are responsible for the high beam lamp of the left and right headlights, respectively. The fuses that are located under the hood are responsible for all lights, the windshield wiper, and the liquefied gas supply.
How to remove the fuse box on Renault Megane 2 and Scenic 2:
Removing the fuse box of Renault Megane 2 and Scenic 2 cars is quite simple:
1) First, remove the side panel near the steering wheel.
2) Remove the side panel.
3) Remove the panel with the buttons and use a thin screwdriver or an awl to disconnect the power connector.
4) Unscrew the bolts and remove the panel under the steering column.
5) Now we can look at the interior block.
6) You need to press the latch and pull out this block.
7) In front of us is a fallen block with relays and fuses. We proceed to remove it from under the hood.
 You need to open the hood and remove the plastic plate, then unscrew the 2 bolts of the protective cover, because that is where the fuse box is located.
9) We take out the battery, ECU, battery pad, fuse cover, and pull out the board.
10) Next, disconnect the connectors.
11) Remove the battery terminals.
12) We take out the battery.
13) It is necessary to unscrew the bolts securing the machine ECU. The top bolt is unscrewed first, and then the bottom.
14) Carefully disconnect the connectors - 3 pieces going to the control unit.
15) We remove the ECU.
16) Unscrew the bolt and remove the fuse box.
17) The block fits tightly, so you need to pull it slowly.
18) Disconnect the terminals to completely remove the block.
19) This is what the fuse box looks like from above.
20) And here it is from below.
If one fine day the Renault Megane's electrical system starts to malfunction, then it is worth remembering that the fuses responsible for the light, climate control, and windshield wipers are located in the fuse box near the battery. Problems inside the car can be solved by removing the side panel, the panel with buttons and the panel under the steering column.
Location and electrical diagram
If this occurs, remove any traces of corrosion using a wire brush or sandpaper, then spray the fuse terminals with electrical contact cleaner.
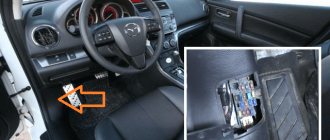
Fuses, their numbers and assignments located in the passenger compartment Most fuses are installed in the mounting fuse block in the passenger compartment, the block cover in the instrument panel is removed, located at the left end of the instrument panel under the plastic cover.
The circuits protected by fuses are shown in the photo and are shown in the table Table: The second unit is installed by the manufacturer in the engine compartment, in the area of the battery.
PSU in the cabin First, let's look at the diagram and assignment of fuses in the cabin. As mentioned above, this block is located on the left side of the dashboard, in the area of the hood opening lever.
To get to it, you will need to remove the plastic decorative trim - under it are all the elements of the device. Diagram of the device that is located inside the car Depending on the configuration, not all parts of the device may be installed on your car. However, we will consider the purpose of each of the elements. Table of the purpose of the parts of the power supply located in the passenger compartment of the Renault Logan vehicle. Here we should also tell you about the cigarette lighter fuse.
How to remove the relay and fuse box
The current consumer can be not only the cigarette lighter itself, but also any other device connected directly to it: If you notice problems with operation, then first of all you should check the cigarette lighter fuse. It is marked in red and has a number. Remember that the device directly responsible for the cigarette lighter is not in the car, since it consumes voltage from the media system or radio, depending on what is installed in the car.
Therefore, when checking a part for operability, you need to check the functioning of the number. As practice shows, the most common cause of combustion of fusible parts is the connection to the network of devices that consume a lot of voltage. Poll Can you replace the fuse box yourself?
Fuse box
The VAZ 2114 car has a total of two mounting blocks.
The first and main one is installed in the engine compartment above the windshield on the left. Relays and fuses are located there. Actually, largely because of this, it is often called a fuse block rather than a mounting block.
The unit cover is held in place by special plastic clips, which makes it easy to snap and remove. On the inside of the cover there is a fuse diagram, the rated current of each individual charger.
Under no circumstances should you install a charger into the mounting block whose current strength exceeds the rated values provided for in the circuit. This may lead to electrical equipment failure.
Dismantled power supply
In the image above you can see that there are tweezers in the corner of the block. It is specifically included in the design, since it is used to dismantle and install new fuses.
In total, the power supply includes 17 active fuses (F1-F16) and four more backup fuses - F17-F20.
Also for the VAZ 2114 there is a second block with fuses. It is located inside the cabin under the glove compartment and shelf. This PSU includes the following fuses:
- For fuel pump. Rated current -15A;
- For fan relay, speed sensor, mass air flow sensor and oxygen sensor. All of them have a rated current of 7.5A;
- To protect the ignition unit and electronic engine control unit. Their normal current is also 7.5A.
Purpose of the memory
In order to quickly resolve issues with failed fuses, VAZ 2114 owners should figure out which charger is intended for what. This will make it much easier for you to navigate the notations. Use a special table.
Power supply circuit
Designation
Recommendations for use
Good and failed fuse
In order to determine whether a fuse is good or not, drivers usually practice two methods.
- The simplest one is to remove the problematic element and see if its conductive part is intact.
- The second method is a little more complicated, but is more accurate than determining by eye. To do this, you need to turn on a non-working consumer, for example, a cigarette lighter. Without removing the element itself, we check the voltage at one end and at the other. If there is voltage only at one end, then the conclusion here is clear - the fuse is blown and needs to be replaced.
If you find that your VAZ 2115 protective elements often burn out, then it is quite possible that your wiring is not in order. In such a situation, it is better to contact a service station.
- When operating a vehicle, never install so-called “bugs” or jumpers instead of electrical fuses. If the voltage in the circuit increases, the consumer may simply fail completely.
- Replace the burnt out one with a whole one of similar value.
- It would be wise to always keep in stock a set of electrical fuses of different amperages. They won’t take up much space, but in certain situations they can help out.
Set of electrical fuses
Sorry, there are no surveys available at this time.
Fuse box VAZ 2107 injector and carburetor
When operating a VAZ Seven, owners sometimes encounter a situation where one or another fuse blows. In this case, every car enthusiast should know and navigate where the fuse block (FB) is installed and which electrical circuit this or that element protects.
Where is it located?
The fuse box on the VAZ 2107, regardless of the engine power system, is located under the hood on the right side opposite the passenger seat. The unit has two versions - old and new, so in order to clarify the situation, it is worthwhile to dwell on each of them in more detail.
The choice of power supply sample does not depend on the vehicle's power system.
Old version of the block
The old mounting block consists of 17 protective elements and 6 electromagnetic type relays. The number of switching elements may vary depending on the vehicle configuration. Fuse links are arranged in one row, made in the shape of a cylinder, and are held using spring-loaded contacts. With this connection method, the reliability of the contacts is quite low, since at the moment large currents pass through the protective element, not only does it heat up, but also the spring contacts themselves. The latter become deformed over time, which leads to the need to remove fuses and clean oxidized contacts.
The mounting block is made in the form of two printed circuit boards, which are installed one above the other and connected via jumpers. The design is far from perfect, since its repair is quite difficult. This is due to the fact that not everyone can disconnect the boards, and this may be necessary in case of burnout of the tracks. As a rule, a track on the board burns out due to installing a fuse of a larger value than necessary.
The fuse box is connected to the vehicle's electrical network through connectors. To prevent errors when connecting, the pads are made in different colors.
The rear of the mounting block protrudes into the glove compartment where the rear wiring harness and instrument panel connector fit. The bottom of the power supply is located under the hood and also has connectors of different colors. The block body is made of plastic. The unit cover is transparent with markings of the locations of switching devices and fuse links.
Table: which fuse is responsible for what
| Fuse number (rated current)* | Purpose of VAZ 2107 fuses |
| F1 (8A/10A) | Rear lights (reversing light). Reverse safety device. Heater electric motor. Heater fuse. Warning lamp and heated rear window relay (winding). Electric motor for rear window cleaner and washer (VAZ-21047). |
| F2 (8/10A) | Electric motors for wipers, windshield washers and headlights. Relay for wipers, windshield washers and headlights (contacts). Wiper fuse for VAZ 2107. |
| F3/4 (8A/10A) | Reserve. |
| F5 (16A/20A) | Rear window heating element and its relay (contacts). |
| F6 (8A/10A) | Cigarette lighter fuse for VAZ 2107. Socket for a portable lamp. |
| F7 (16A/20A) | Sound signal. Radiator cooling fan electric motor. Fan fuse for VAZ 2107. |
| F8 (8A/10A) | Direction indicators in hazard warning mode. Switch and relay-interrupter for direction indicators and hazard warning lights (in hazard warning mode). |
| F9 (8A/10A) | Fog lights. Generator voltage regulator G-222 (for some vehicles). |
| F10 (8A/10A) | Instrument cluster. Instrument panel fuse. Indicator lamp and battery charge relay. Direction indicators and corresponding warning lamps. Indicator lamps for fuel reserve, oil pressure, parking brake and brake fluid level. Voltmeter. Instruments of the carburetor electro-pneumatic valve control system. Parking brake warning light relay. |
| F11 (8A/10A) | Brake light bulbs. Lamps for interior body lighting. Brake light fuse. |
| F12 (8A/10A) | High beam (right headlight). Winding for switching on the headlight cleaner relay. |
| F13 (8A/10A) | High beam (left headlight) and high beam indicator lamp. |
| F14 (8A/10A) | Side light (left headlight and right rear light). Indicator lamp for turning on the side light. License plate lights. Engine compartment lamp. |
| F15 (8A/10A) | Side light (right headlight and left rear light). Instrument lighting lamp. Cigarette lighter lamp. Glove box lighting lamp. |
| F16 (8A/10A) | Low beam (right headlight). Headlight cleaner relay activation coil. |
| F17 (8A/10A) | Low beam (left headlight). |
| * In the denominator for blade type fuses | |
VAZ 2114 fuses burn out - how to prevent
The easiest way to eliminate a breakdown is to take proactive action. High-quality and timely diagnostics help prevent breakdowns and sudden circuit failures.
The manufacturer recommends performing basic procedures in a timely manner.
- Treatment of contact groups with special oils. The products isolate metals from exposure to oxygen and water.
- Periodic control of the seating density of elements. Over time, mounting connections can become loose, leading to loss of contact and the potential for arcing, which can burn out metal parts.
- Strength of fastening of consumers in sockets. The size fuse of the VAZ 2114 may blow out if the light bulb dangles in the lampshade or water gets inside when it rains.
- Serviceability of blocks and main mechanisms. It is necessary to carry out diagnostics of vehicle devices in a timely manner. The VAZ 2114 starter fuse often fails when there is damage to the electric motor or the retractor element touching the body.
The power supply system of a domestic car has its own disadvantages and design features. To prevent unexpected breakdowns, it is recommended to carry out diagnostics of the machine in a timely manner. The VAZ 2114 fuse panel will help troubleshoot the problem.
The nuances of manipulating the power unit
To correctly replace an element in a LADA Granta, you should use specific rules and know where the so-called fuse box is located. If a burnout occurs, do not rush and replace the failed part with an analogue one. It is recommended to check the serviceability of the current collectors protected by this fuse.
We replace the element that contains the fuse box in strict accordance with the requirements of the circuit. There is no need to resort to installing fuses designed for a higher current limit, as this can cause a fire. It is also necessary to disconnect the negative voltage from the battery.
About fuses in Grant
Sometimes failures of elements in the vehicle's electrical on-board network occur. For domestic models, this malfunction is much more relevant in comparison with foreign analogues. The causes of damage to the electrical network can be very different. Among the most common factors causing blackouts is the usual overvoltage. Most likely, after this phenomenon, the owner will need to replace the corresponding fuse. A painfully familiar model, the Lada Granta, can serve as an example.
In the car we are considering, the lion's share of electrical circuits and current collectors is protected by fuses. We should not forget about the lack of protection for three nodes:
- battery charging circuits;
- generator electrical circuit;
- starter.
Scheme
It is important to replace all elements in compliance with the current standards indicated in the table. Otherwise, serious problems in the car's electrical system are possible: from a short circuit to a fire.
As you can see, the fuse box of the Lada Granta is designed quite simply and, if desired, is not difficult to understand. Using the material from the article, you can quite effectively replace one of the “defenders” and repair your car. The main thing is to comply with all rated current values and do the work carefully.
Afterword
Car owners whose cars keep melting fuses should be sure to check all installed wiring at the first opportunity.
Very often this problem is evidence of serious damage in one or more circuits. To do this you will need detailed:
- electrical circuit;
- pinout;
- tester.
If you lack the necessary knowledge, it is better not to undertake repairs yourself, but to entrust this task to professionals. The fee for their services, of course, can be quite high, but eliminating the consequences of unqualified intervention will cost much more.
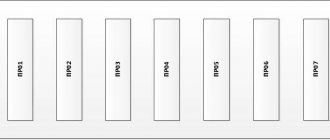
Schematic location in the engine compartment
| Name | Block pinout |
| RP 1 | Lighting, seat heating |
| RP 2 | Responsible for the cigarette lighter |
| RP 3 | Heated rear window |
| RP 4 | Front windows |
| RP 5 | Interior heater (stove) |
| RP 6 | Window lifter for rear doors |
| RP 7 | Gasoline pump |
| RP 8 | Car socket (powered by 12 Volts) |
| RP 9 | Heated windshield |
| RP10 | Heating relay |
| RP11 | Starter |
| RP12 | Cruise control |